|
Imperial TIE Fighter
by Bernd Korte

HyperScale is proudly supported by Squadron.com
The original - or what George Lucas'
writers think it is...
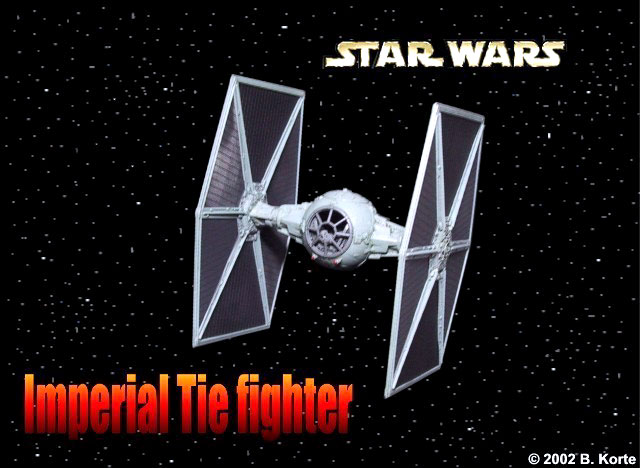
During the prominence of the Imperium, the Tie fighter
represented the standard hunter of the "dark side". It was designed
in such a way by the Sienar fleet systems that it combined a maximum
of expediency with an efficient manufacturing process that was as
resource prudent as possible. Therefore the Tie fighter had no
hyper-drive or shields and featured a standard armament of only two
laser cannons. This weight reduction gave the Tie fighter high
agility and speed.
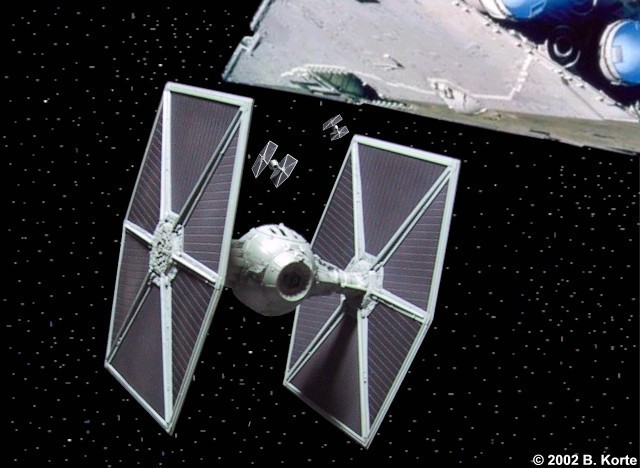
Did Lucas' designers let themselves be inspired by the
"Japanese-imperial" agile but badly armed and shielded hunters? The
engine of the Tie fighter gets along without any moving parts and
the pilots must always wear a space suit because of the lack of life
support systems. Due to its extensive production the Tie fighter
could be found in the proximity of most Imperium activities. A Star
Destroyer for example usually carried 72 Tie fighters in 6 squadrons
to 12 ships each.
The kit consists of gray plastic parts for two identical models
and a nice display showing part of a Death Star's surface. All parts
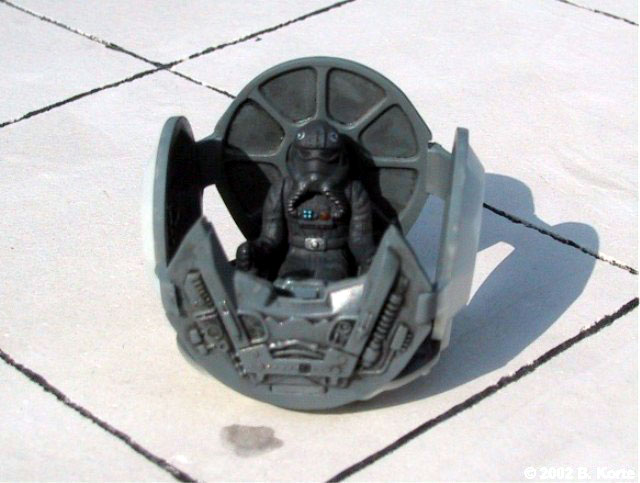
are accurately molded and feature good detail. Pilot figures are
included. The clear parts are a little bit too thick, so I didn't
install them to give a better view in the assembled cockpits.
Construction
When building any vehicle from a science fiction movie, the color
selection is always the most difficult task. In most cases you won't
find any reliable color codes à la RAL or FS but only vague hints
like this must be painted gray and that black. So, first you have to
view enough "reference material" in order to make up your mind about
the right colors. For Star Wars especially, the merchandising
industry offers enough material like data sheets, plan books and so
on. But different photograph with different shadings - of perhaps
even different movie models - do not contribute much to the solution
of this problem. As a result, the final decision is usually the most
easily justifiable mixture of all impressions. The outside gray of
the Tie fighter for example appears very bright in some scenes and
even sometimes bluish in others, but averages "central gray". Walter
Müller solved this problem for me in KIT issue # 5/99 (German
model-magazine). I simply followed his choice, Humbrol 87. Assembly
progresses from inside to outside, so the interior color was started
first. The few existing interior photographs/designs show that the
gray of the cockpit is always darker than the gray of the exterior.
Therefore I painted all cockpit parts in a darker gray than Humbrol
87. After drying, everything got a coat "Erdal Glänzer" ("Future")
and a wash with diluted black oil paint. The control elements at the
pilot's seats got some color, following my imagination. For painting
the pilot figures I found excellent pictures of the original
costumes on the CD "Behind The Magic" from Lucasarts. Accordingly
the figures were first brushed with a lightened black, the
transparencies of the helmets, the gloves and boots where then
emphasized with gloss clear lacquer and details of the life support
system of the space suit with red and blue. The belt-buckles and the
imperial badges to both sides of the helmet appear in silver. Some
silver drybrushing of the hoses finished the painting of the pilots.
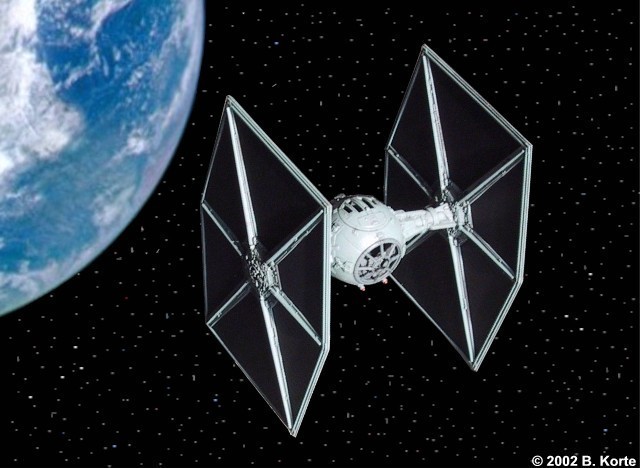
The most complicated part of painting was the hexagonal solar
wings that are so characteristic of the Tie fighter. While the solar
elements appear in a lightened black, the structure continues the
gray color of the cockpit section. So the wings were installed after
the whole paint-job was done. After several attempts at cutting
masks on the wings had failed, I made some paper shapes that fit
perfectly into the different solar segments. Since there are only
two different segments, I only needed two different templates. I put
these on a strip of masking foil and cut the needed pieces out.
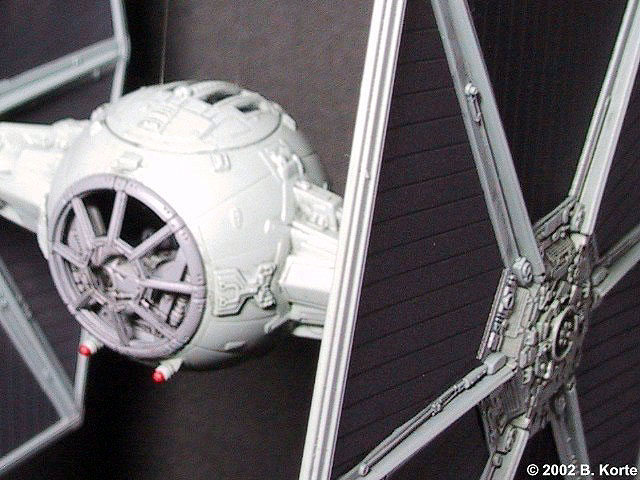
As the spherical body had to be painted in gray too, it was now
time to assemble it. I didn't install the clear parts to provide a
better view in the assembled cockpit. The hatch was glued in place
as the hinge to open it is placed on the wrong side. Seen from the
pilot's view, the hatch should open to the rear and not to the
forward.
After the gray had been painted, the masking on the wings was
removed. Some spots where the gray had gone under the masking on the
black solar panels were fixed. Now it was time for the mandatory
layer of "Erdal Glänzer" in order to prepare the model for a wash
with black oil paint. To finish the whole paint-job everything got a
coat of silk-matte clear lacquer. Finally, the wings had to be
joined with the body and the Imperium had two more space hunters.
While the glue was drying I placed the Ties with the wings on a
smooth surface, so that both wings lay in the same position to the
body.
The Display Stand
The display stand is actually too small to offer two models
equivalent place. Therefore I covered one of the two slots for the
transparent stands with some plastic sheet, which disappeared in the
surface texture after a lacquer finish. First, I painted the frame
black. Some segments of the Death Star surface that should later
appear a little bit shaded were likewise fogged in black. Then the
black frame was masked and the surface was airbrushed gray. I took
another gray than that of the Tie fighters, since otherwise the
whole thing would look too uniform. When everything was dry, I
applied a coat of "Erdal Glänzer" and washed the display stand with
oil paint. Finally, a matte finish gave the right look.
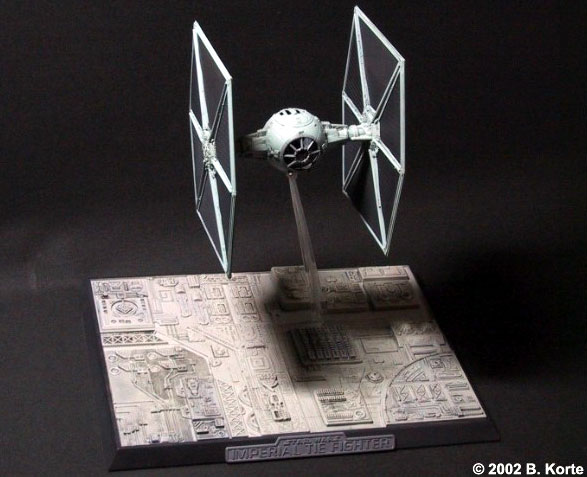
The plaque contained in the kit was sprayed with a Humbrol Metal
Cote color that was polished after drying to get that metal-like
shine.
Summing up this is a well-detailed representation of this ultimate
Imperial symbol from the Star Wars saga and is impressive by its
size. Only the painting of the one-piece solar panels is somewhat
time-consuming. Fine molds constructed this part far better at its
1:72 kit with the multipart solar wings, making painting much
easier. Well, you can't have everything...
Special thanks to Clarence Wentzel who helped me with this
translation (original German article can be seen at
www.modellversium.de in the scifi-gallery).
Text by myself, pictures by Deun Yu, picture arrangement by myself
;-)
Click the thumbnails below
to view larger images:
Model and Text Copyright © 2002 by
Bernd Korte
Images and Text by Deun Yu
Page Created 02 January, 2003
Last Updated 04 June, 2007
Back to
HyperScale Main Page
Back to
Features Index
|
 Home
| What's New |
Features |
Gallery |
Reviews |
Reference |
Forum |
Search
Home
| What's New |
Features |
Gallery |
Reviews |
Reference |
Forum |
Search