|
Curtiss SB2C-4 Helldiver
by
Patrick Chung
|
 |
|
Curtiss SB2C-4 Helldiver |

ProModeler's Helldiver is available online from
Squadron.com
The Diving Beast.
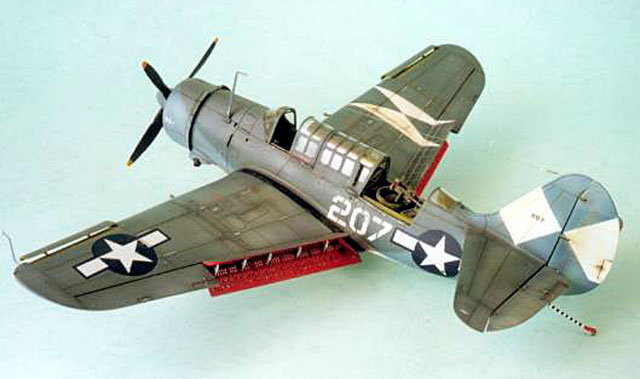
Building ProModeler's 1/48 Scale Curtiss SB2C-4 "Helldiver"
Inspired by Mister Bernhard Schrock's brilliant conversion of the
Helldiver elsewhere on HyperScale, I decided to build mine in the
same way.
My kit is the Hasegawa release of ProModeler's kit which
features Japanese instruction sheet (which far worse than the
original English version by ProModeler - many areas are somewhat
unclear); and different painting scheme (an late war all blue a/c of
VB-16 aboard USS Randolph), which I did not like very much.
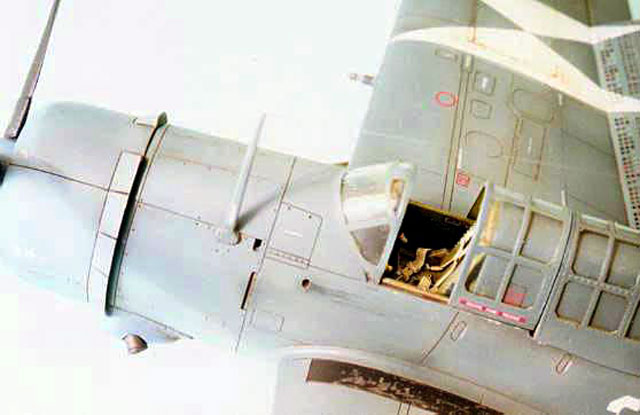
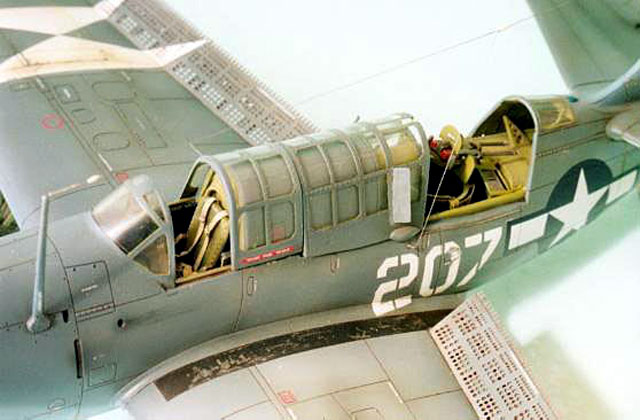
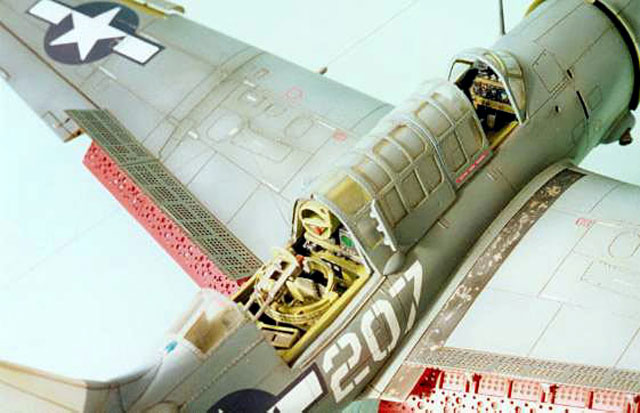
To enhance the interior detail, Eduard's PE set 48-226 was
used.(the gun-metal coloured PE fret got to be thoroughly washed in
the dish washing detergent and rinsed to get rid of the grease,
otherwise they won't stick to the kit parts properly).
Construction started with cutting plastic interior parts for PE
replacement per Eduard's instruction and then independently painted
and weathered. All interior was painted bronze green using Gunze
Sangyo's Mr.Colour lacquer paint No.27 custom tuned down to a darker
and more greenish shade to match that, followed by a second coat of
highlighting and a third coat of shading.
Tiny details then brought out using black, red, yellow and tan
colours - all GS lacquer paints. Each every sub-assembly and all
interior surfaces then oil washed and dry brushed to further give a
3D visual effect.
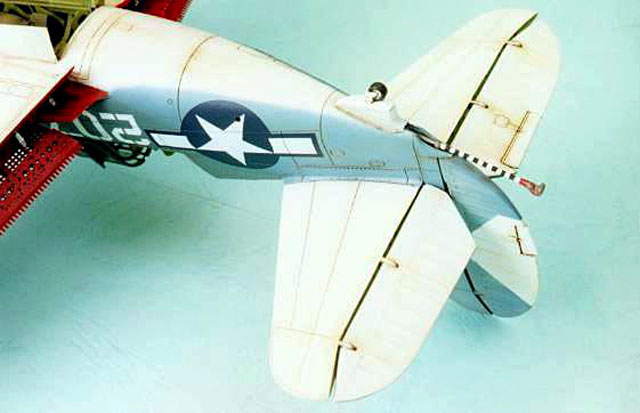
Next I started cutting all flying surfaces off with a fine razor
saw, and plasticard sheet was used to block the openings of
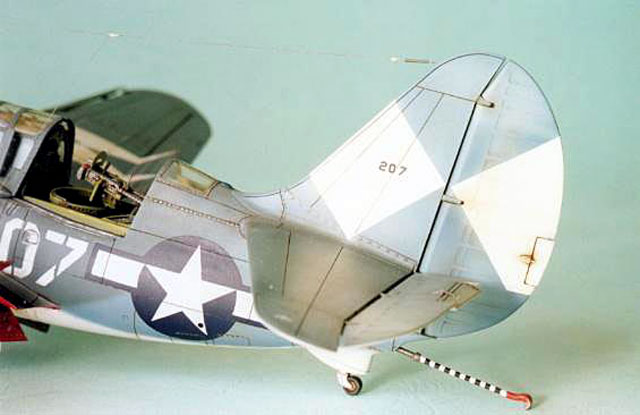
stablizers. The leading edge of the elevators and rudder were sanded
to a smooth, rounded finish.
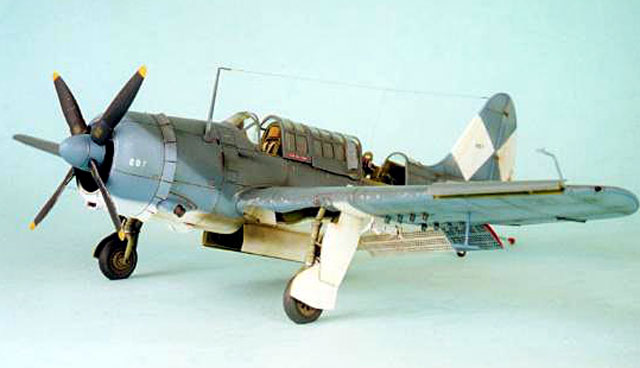
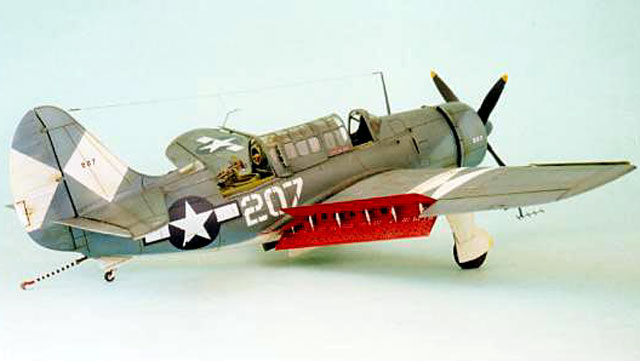
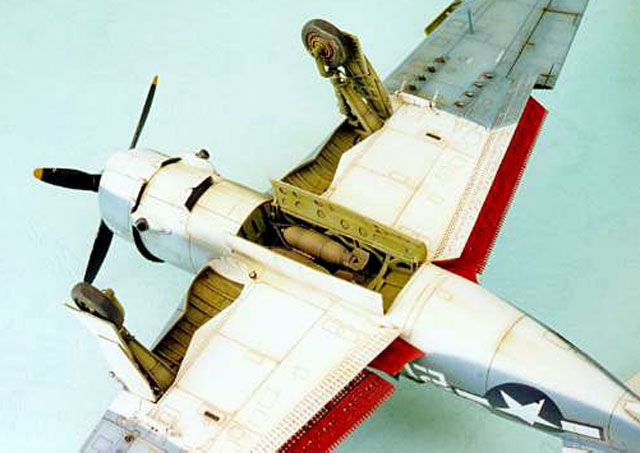
The internal portion of the dive-brake (upper and lower, both
wings) were also cut off from the wing trailing edge and all tiny
holes of the perforated area drilled through. After dry fitting with
the kit photoetched parts (which seemingly also made by Eduard, but
without the gun metal coating, and much thicker and harder, easier
to bond with) they were superglued together with only minor
modifications.
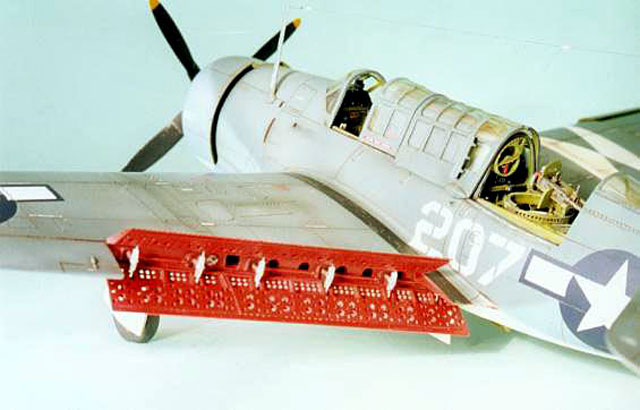
The hydraulic operated dive-brake actuators, hinges, bearings,
horns and pushrods were scratch built using copper wires, plastic
rods and cards.
A few mismatches occurred during the final assembly and after a
lot of sanding I carefully re-established all the raised rivets lost
using heat stretched runner sprues.
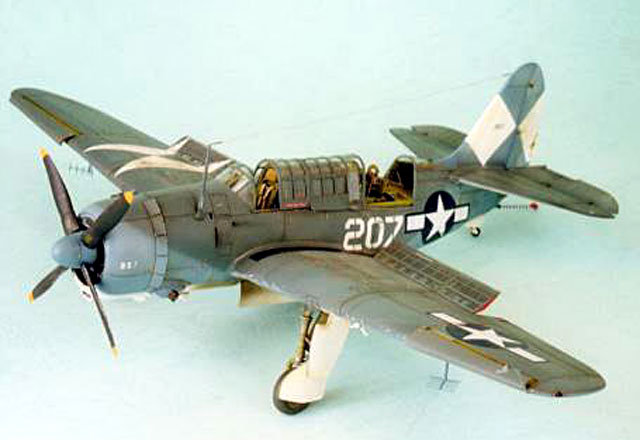
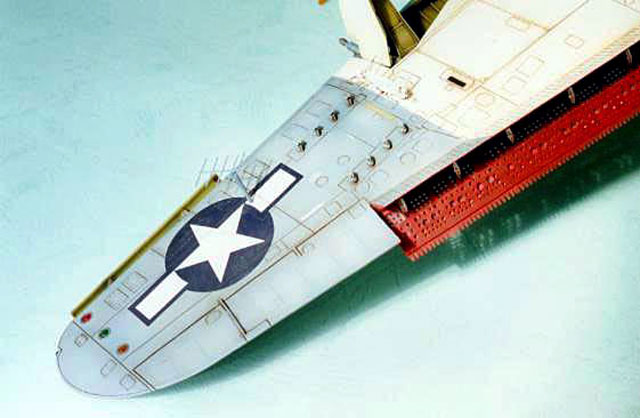
For painting scheme I opted the tri-coloured camouflage dipcting
an aircraft of VB-83 on board USS Essex, circa April,1945.
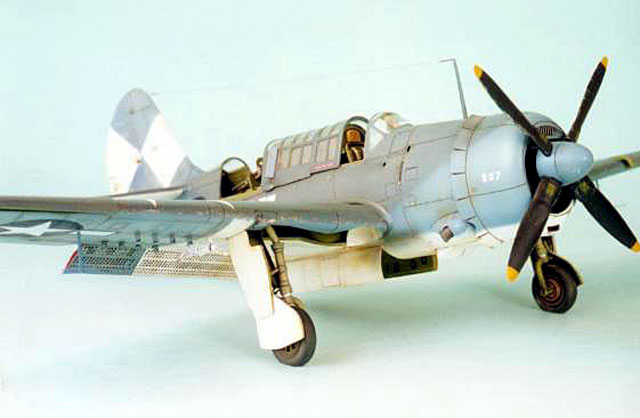
I was not able to use the AeroMaster decal set for this specific
ship so I decided to mask-and-paint all the markings: The result
turned out okay.
Click the thumbnails
below to view larger images:
Review and Images Copyright © 2002 by
Patrick Chung
Page
Created 12 April, 2002
Last updated
04 June, 2007
Back to HyperScale Main
Page
Back to Reviews
Page
|  Home
| What's New |
Features |
Gallery |
Reviews |
Reference |
Forum |
Search
Home
| What's New |
Features |
Gallery |
Reviews |
Reference |
Forum |
Search