|
Savoia-Marchetti S.79
by John C. Valo
 |
|
Savoia-Marchetti
S.79 Sparviero |

Classic
Airframes' 1/48 scale S.79 is available online from
Squadron.com
At last, the hopes of many modelers have been addressed with the
release of Classic Airframes' S.79 Sparviero.
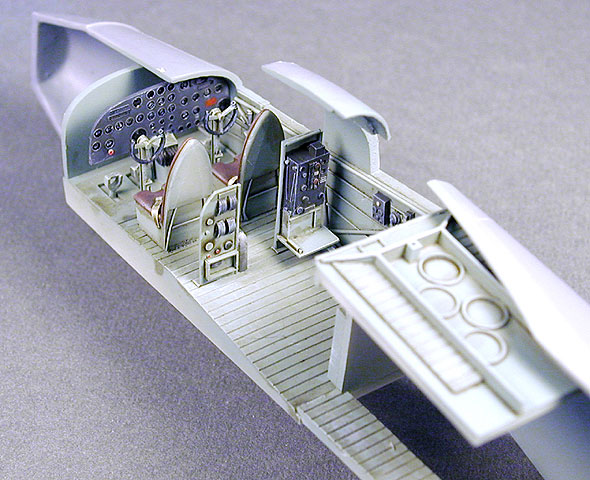
The kit features a beautiful resin interior (as well as a bunch
of other resin bits) and delicately scribed plastic parts. Clear
parts are injection-molded. Markings for three aircraft are
included.
As with most most multi-media kits I build, I spent an evening or
two cutting out and cleaning up parts. I keep track of everything by
grouping the individual parts according to instruction step numbers,
then putting the parts in Ziploc bags according to which step they
belong to. The next evening is spent painting parts such as wheels,
struts, etc.
When assembly finally commences, this allows things to proceed
much more quickly. Nothing worse than getting to the 'landing gear
step' (i.e. almost finished) and gazing at struts that have an
hour's worth of cleanup to do - I'd be willing to bet we all have a
bunch of models that have been put on extended hold because of this.
I prefer to get the hassle all out of the way at the beginning, when
my motivation to do the project carries me through the boredom.
But back to the model...
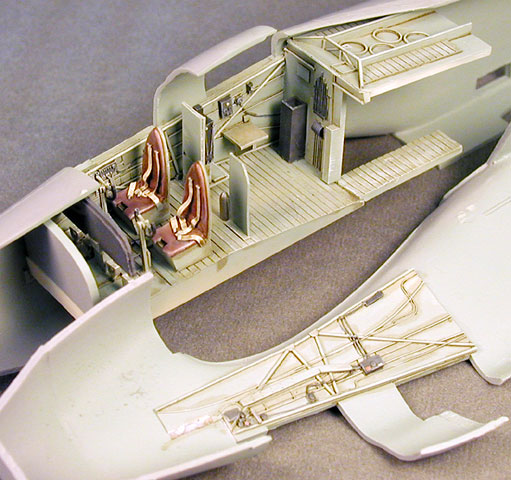
Truth be told, a major hassle with past CA kits was the fit of the
resin interior parts, which generally demanded much grinding,
sanding and gnashing of teeth. Not so on this kit - the interior
parts fit perfectly with only the usual cleanup of the pour stubs.
The interior is quite convincing when finished. An option is
provided to open the rear door, but no interior rear cabin detail is
provided.
When assembling the major parts, I deviated from the instructions
slightly.
Steps 13 through 16 suggest assembling all of the wing
components, then attaching this subassembly to the completed
fuselage. I elected to attach the bottom wing center section to the
completed fuselage, then I attached the upper wings. This allowed me
to get a nice, tight upper wing root fit. The bottom outer panels
lock in place to complete the assembly.
The balance of assembly was trouble-free for me.
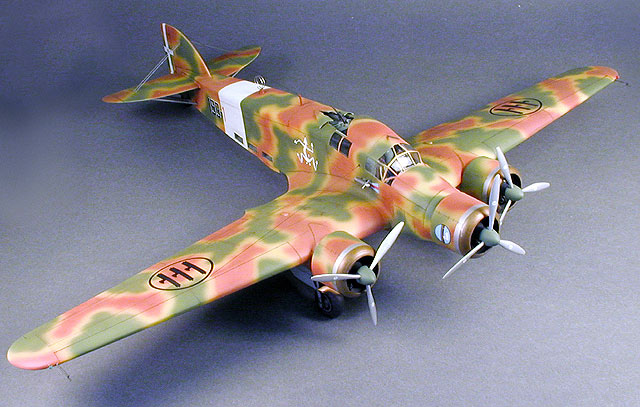
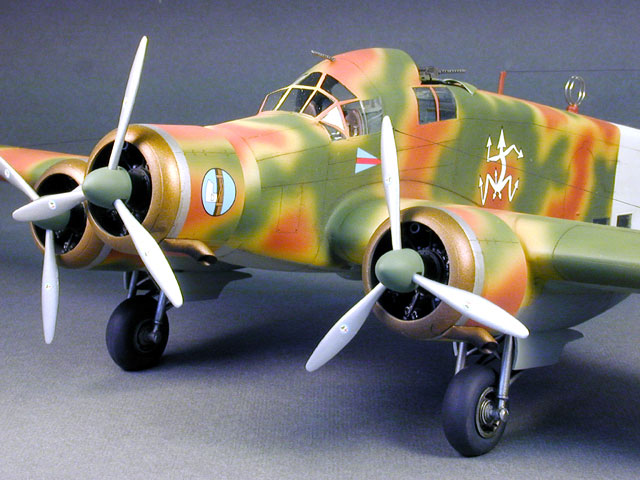
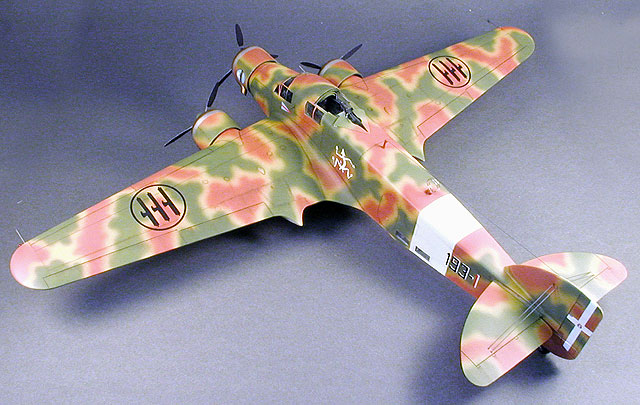
I couldn't resist finishing the model with the anatomically (if
to some not quite politically) correct 'Electric Man' markings.
This was the first time I have attempted the 'jigsaw-puzzle'
camouflage, and it took awhile to get a feel for it. Enough time to
paint the model all over again, to be exact! I used Polly-Scale
acrylics, and their covering power came in handy when my first
painting attempt failed. The decals are printed by Microscale, and
went on beautifully. As a matter of fact, this sheet had a VERY thin
clear layer which made the decals very delicate to handle, but they
really snuggled down nicely.

I would venture to say that overall this is the best CA kit yet,
and is certainly highly recommended. Just have lots of space in the
display cabinet - it's a big one!
Click the thumbnails
below to view larger images:
Model, Images and Article Copyright © 2002 by
John C. Valo
Page Created 01 June 2002
Last updated
04 June 2007
Back to
HyperScale Main Page |  Home
| What's New |
Features |
Gallery |
Reviews |
Reference |
Forum |
Search
Home
| What's New |
Features |
Gallery |
Reviews |
Reference |
Forum |
Search