|
Nakajima G8N1 Renzan
by Bobby McElroy
|
|
|
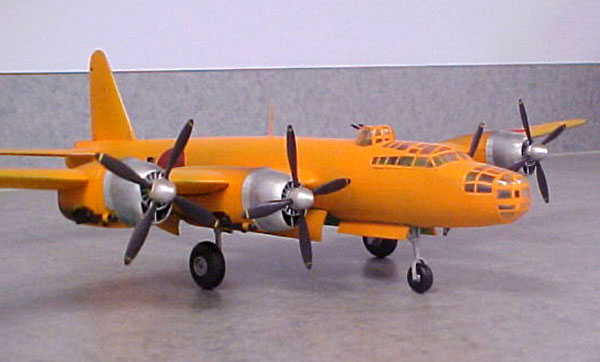
Nakajima G8N1 Renzan
"Rita" |

HyperScale is proudly supported by Squadron.com
In 1942 the Imperial Japanese Navy had the need for a long range,
land-based four engine bomber. This aircraft would be used to support
the fleet and aid in operations penetrating deeply into allied held
territory in the South Pacific. As the replacement for the G4M series,
the G8N1 was the bomber for this role of long range offensive bombing.
The first prototype was completed in October of 1944, and by the 23rd
of that month the Renzan made her first test flight. Three additional
aircraft were constructed by the end of December of the same year.
However due to constant allied air attacks and a critical shortage of
light alloys the Japanese Navy was forced to cancel the program.
Hasegawa's 1/72
Scale Rita
|
Hasegawa's 1/72 scale Rita is one of their older kits. I appropriated
this kit at a local contest back in 1997. I built it and then put it on
the shelf.
After many years and much modeling research I decided to do some
justice to this kit and try to fix several mistakes I made while
building it the first time. It was fun, and a challenge. I hope you like
the finished project.
The panel lines and rivets were raised, and the model was molded in
the hard green plastic, typical of early Hasegawa kits but it went
together well. All of the parts fitted together and I did not need to
use too much putty or filler. The instructions were precise and well
written.
The transparencies were not of a good quality and needed a bit of
polishing up before masking and painting was done, but in the end they
turned out rather well. The flight deck was lacking in detail so those
of you out there who are excellent scratch builders you guys can have a
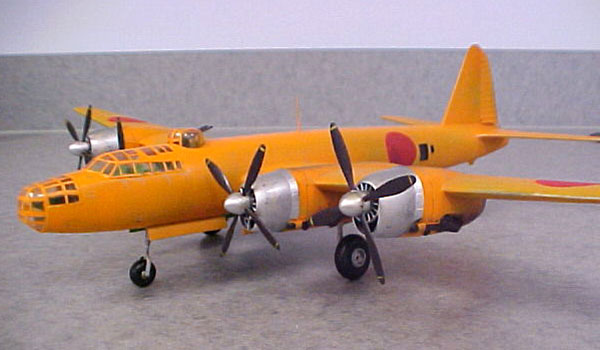
field day. Rather than using the decals that came w/ the kit, I chose to
cut stencils and paint on the hinomarus with my airbrush.
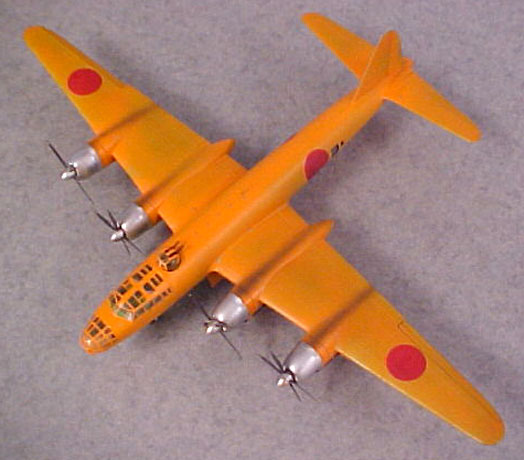
The pictures do an excellent job of letting the reader see the outcome
of the canopy. I used masking tape to mask the glass, then placed the
canopy on the model using Elmer’s glue. After the glue dried I sprayed
the canopy area w/ a clear coat to help seal the area where the tape
ended. (to keep the edges nice and crisp) Next I sprayed the aircraft
with MM metalizer, and last with the orange. I did not remove the mask
until the model was completed.
To get the canopies clear and shinny I tried a rather harsh approach.
I first tried to polish them with a polishing kit, but I think I
scratched them worse. Next I took toothpaste and my Dremel tool with the
buffing pad and went to work. That was the trick! They turned out pretty
good. After a little soap and water they were ready to mask and spray.
The fuselage was first sprayed with Testors Buffing Metalizer, left to
dry 48 hrs, and then oversprayed with Model Masters flat yellow and a
drop of international orange. I used masking tape to pull up the orange
topcoat from the metalizer for the weathered effect. It worked rather
well.
For the exhaust stains I used burnt umber Acrylic Model Masters
airbrushing in the direction of the exhaust.
This old kit has been through it so I wanted to try some techniques
that were new to me. For the most part they worked. I would like to see
Hasegawa re-release this kit, maybe adding more detailing in the flight
deck. Overall this is a good kit and I had fun doing it and then redoing
it. I guess that is the point then isn’t it? Hope you liked the Rita.
Happy Modeling
Model, Images and Text Copyright © 2002 by
Bobby McElroy
Page Created 27 December, 2002
Last Updated 04 June, 2007
Back to HyperScale
Main Page
Back to Features Index
|
 Home
| What's New |
Features |
Gallery |
Reviews |
Reference |
Forum |
Search
Home
| What's New |
Features |
Gallery |
Reviews |
Reference |
Forum |
Search