|
Mitsubishi A7M2 Reppu
by Joe Youngerman
 |
|
Mitsubishi A7M2 Reppu |

HyperScale is proudly supported by
Squadron.com
The Mitsubishi A7M Reppu “Sam” was the intended replacement for the Zero. The
program was poorly executed with constant changes in the aircraft’s
requirements. The lack of a suitable powerplant was another major hurdle for the
Reppu. After making its first flight in spring of 1944, it was clear that the
aircraft was underpowered and the Navy decided to shelve the project. Only after
Jiro Horikoshi convinced the Navy to allow the installation of the Mitsubishi
MK9A engine, did the aircraft begin to show its full potential. The Reppu was
now designated the A7M2 and plans for full scale production were finally made.
Production plans were never to be realized, however, due to continued bad
luck for Mitsubishi. In December 1944, an earthquake and B-29 bombing raids
severely damaged the engine plant in Nagoya, and three of the prototypes were
destroyed by US aircraft! By wars end, only a single production aircraft had
been produced.
|
Fine Molds 1/72 Scale
Reppu |
The Fine Mold’s kit in 1/72 scale of Mitsubishi’s impressive A7M2 Reppu has been
around for some time but has always been outrageously expensive. Thanks to the
miracle of Ebay, I was finally able to pick one up at good price. The first
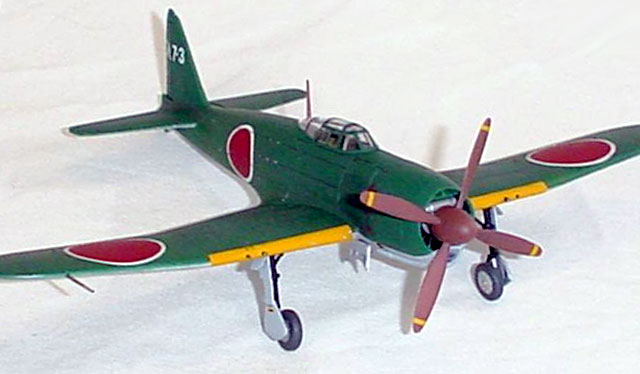
thing that struck me is how big this aircraft was. The wing area is roughly
fifty percent larger than that of the Zero it was to replace. The kit comes well
packaged in the usual Fine Molds style with excellent instructions. The decals
were the high quality one should expect from a kit so high priced.
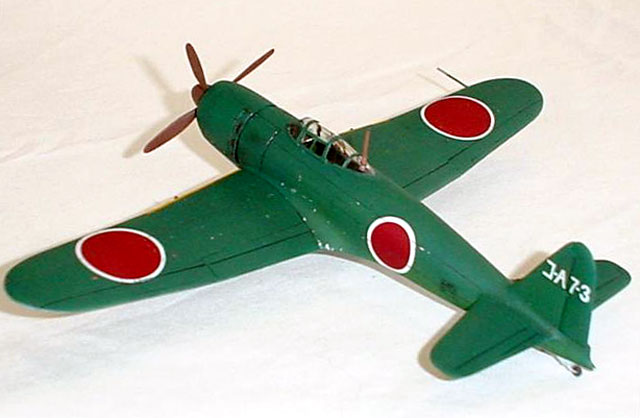
Building the kit presented no major challenges, although the fit of the wing
to the fuselage was rather poor and required some filler and sanding for a neat
appearance. I added only some Eduard photo etch seatbelts as the cockpit has
plenty of detail for this scale. The landing gear wells are also nicely detailed
and the engine looks the part also.
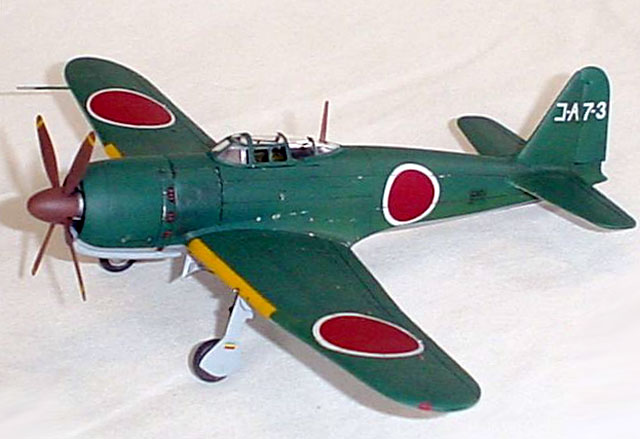
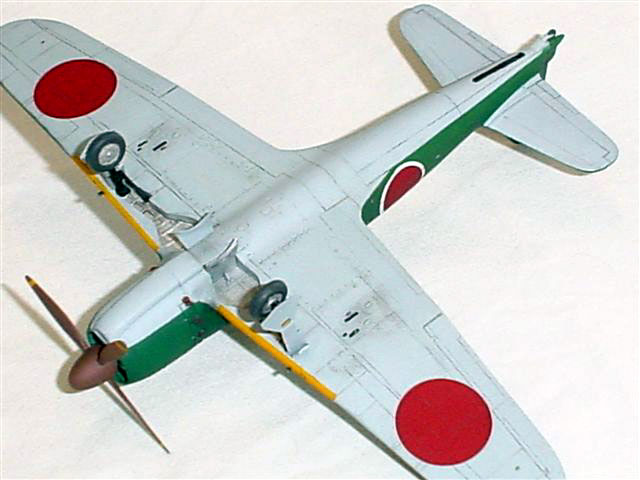
 Once assembly was accomplished, I finished the kit using Aeromaster Acrylics
Mitsubishi Navy Green and Mitsubishi Underside Grey. The prop was painted with
Polly S Brown Primer. I painted the wheel wells natural metal using Testor’s
Aluminum. Once assembly was accomplished, I finished the kit using Aeromaster Acrylics
Mitsubishi Navy Green and Mitsubishi Underside Grey. The prop was painted with
Polly S Brown Primer. I painted the wheel wells natural metal using Testor’s
Aluminum.
After coating the model with Polly S clear gloss, I applied the kit decals
which went on beautifully. The instructions show a white surround on the bottom
markings, but all the photo evidence I have shows none. The Hinomaru decals come
in two parts, so you have this option. This particular aircraft also had the
landing gear pennants, so I robbed a Zero kits decals for them.
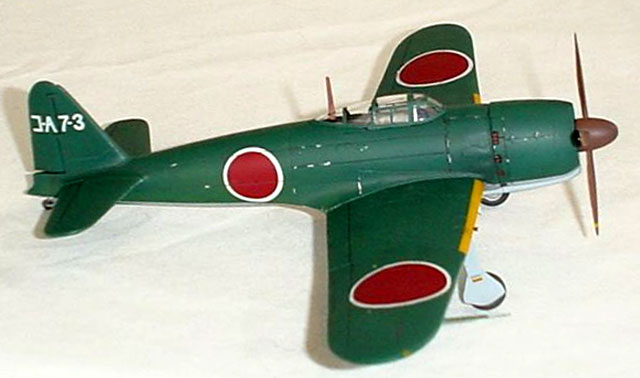
As you may know, photos of the Reppu are rather rare but most show
considerable weathering. I think most of these photos were taken after the end
of hostilities, so it is difficult to know how much of this occurred due to
neglect after the war. I chose to give mine a mildly worn look.
I love the way this aircraft looks and would highly recommend adding one to
your collection!
Click
the thumbnails below to view larger images:
Model, Images and
Article Copyright © 2002 by Joe
Youngerman
Page Created 29 August 2002
Last updated 04 June 2007
Back to HyperScale Main Page
Back to Features Page |
 Home
| What's New |
Features |
Gallery |
Reviews |
Reference |
Forum |
Search
Home
| What's New |
Features |
Gallery |
Reviews |
Reference |
Forum |
Search