|
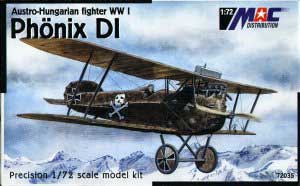
Phonix D.I
by Robert
Baumgartner
 |
|
Phonix D.I |

MAC's 1/72 scale
Phonix D.I is available online from Squadron.com
The Phonix D.I was a well-liked aircraft to the flyers of the
Austro-Hungarian Empire. It was both faster and a better climber than the
Albatros D.III (Oef) and had improved flight characteristics over the Aviatik
D.I.
This rugged and reliable fighter was the mount of many aces and could also be
found in the photoreconnaissance role. December 1917 saw the D.I being flown
with Fliks 4, 15, 17, 48, 54 and 66 as a fighter and with Fliks 14, 30, 60, 61
and 63 as an escort fighter.
|
MAC's 1/72 Phonix In
The Box |
Upon opening the box, the modeller is greeted by the now familiar package
that has made MAC very popular with 72nd scale modellers.
Two sprues of tan coloured plastic, a fret of etched metal, an acetate sheet and
a perfectly registered decal sheet, provide all the basics for a good looking
model.
One of the sprues contains parts common to both the D.I and D.II. These items
being exhausts, radiator, cabane struts and tail skid. The other has wings,
fuselage, and tailplane that were appropriate for the D.I.
 All 33 plastic parts are well moulded with no flash and good detail. The
upper wing displays subtle rib detail and even has a representation of washout
at the wingtips! All 33 plastic parts are well moulded with no flash and good detail. The
upper wing displays subtle rib detail and even has a representation of washout
at the wingtips!
Personal preference will decide whether or not you slightly reduce the
thickness of the trailing edge on the upper wing.
George Haddow’s drawings in the Albatros Productions Datafile on the Phonix were
used as a basis to check for accuracy. As expected, the outlines matched very
well. This is no surprise because MAC admits to using this source of information
themselves. If only all manufactures would tell us what references they use!
There were only very minor differences in shape noted. A quick wipe with “wet
and dry” will solve this. If the slightly short fuselage worries you, then a
slice of plastic strip at the tail should see you right.
Construction starts with the cockpit and MAC supply the basics such as floor,
seat, and p-e control column, seat belts and instrument panel. Other detailing
can be added to taste. The acetate sheet containing the printed dials is a real
bonus. When this is used in combination with a dash of gloss varnish over the
dials, a very realistic effect can be produced.
|
Phonix D.I Summary |
MAC Models
Kit No 72035
Scale: 1/72
Advantages: Accurate no nonsense kit
Disadvantages: Tricky exhaust and strut alignment |
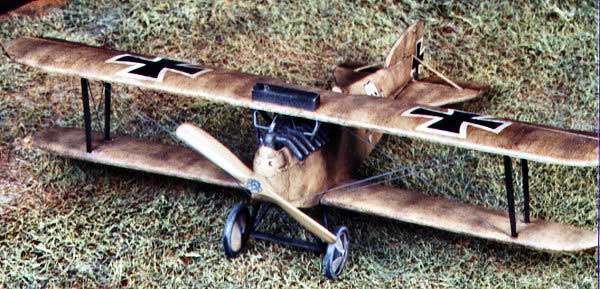
The inner fuselage halves have the internal structure moulded on and this looks
good when painted in a contrasting wood colour. The engine can be mounted on the
supplied floor and the two fuselage halves joined. I found that I needed to
scrape away some of the fuselage floor to allow this to happen. The engine is
quite basic but was jazzed up later after final assembly with the various pipes
made from stretched sprue.
The lower wings were now pinned to the fuselage for strength. The fin and
tailplane needed only a light sanding to allow a perfect fit. I decided to use
plastic strip for the tailplane bracing but MAC’s p-e would do just as well.
It was now time for the struts and here I ran into a small problem.
Two of the
outer struts were found to be too short and had to be lengthened and shaped with Milliputt. After installation, a suitable jig was used to give these items the
correct inward slope. The cabanes did not escape the adjustment process, as they
also had to be played with to give the top wing a proper sit. Note that the
exhaust pipes will have to be manipulated to allow them to fit properly between
the cabanes. Thankfully, the undercarriage presented no problems at all.
With the top wing on, the radiator can be attached and the rigging added. This
was accomplished with invisible mending thread. Extra piping to the engine and radiator
can be added and again I used stretched sprue but MAC does supply these items in
photo-etch.
|
Painting and Marking
Options |
Markings are supplied for two aircraft.
-
Phonix D.I 328.26 of Flik 14J in Feltre. Those
doing this machine should note that there is a flare rack on the starboard
side as well as a mirror on the port cabane strut. These two items were not
added to the review kit. Note also that the tailskid that MAC tells you to use
is correct as opposed to the colour depiction on the rear of the Datafile.
-
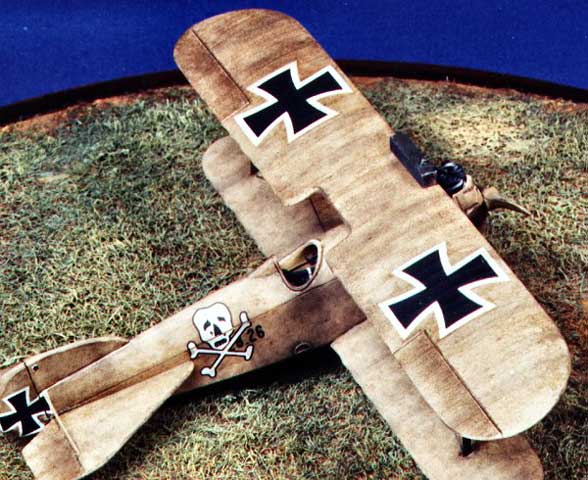
Phonix D.I 328.33 of Flik 16. A
photoreconnaissance fighter flown by Oberleutnant Schultheiss. This aircraft
carried a twin gun sight in front of the windscreen. The large white 16 on the
fuselage is actually painted on a band of colour that encircles the fuselage.
This band is not mentioned on the instructions.
The plywood fuselage was painted in a light brown colour over which a darker
brown was stippled. It is best to do the underlying brown colour using a
different medium to that of the stipple. This way, the stipple can be easily
removed and reapplied if the effect is not to you liking. Repeat the process for
the upper wing surfaces but use a much lighter background colour to represent
the fabric.
The decals settle down very well, especially with decal setting solution, and
this being needed when it came to the marking on the wheels.
Thoughtfully, MAC provides the Phonix logo for the tail.
This was a most enjoyable kit to build despite the dramas caused by the
struts. All can be easily sorted out with a little patience after some trial and error.
This is a well-produced kit of a seldom-offered subject and MAC is to be
applauded for giving it a go.
Highly recommended.
Thanks to Squadron for
the Review Sample.
Model, Images and
Article Copyright © 2002 by Robert Baumgartner
Page Created 19 February 2002
Last updated 04 June 2007
Back to HyperScale Main Page
Back to Features Page |
 Home
| What's New |
Features |
Gallery |
Reviews |
Reference |
Forum |
Search
Home
| What's New |
Features |
Gallery |
Reviews |
Reference |
Forum |
Search