|
PB4Y-1 Liberator
by Matt Swan
|
|
|
PB4Y-1 |

HyperScale is proudly supported by Squadron.com
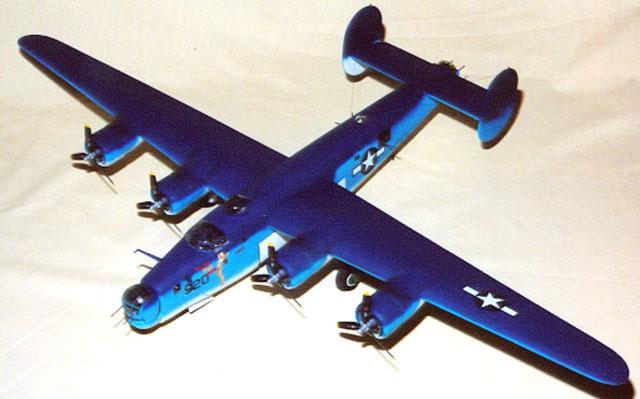
Here is my PB4Y-1 based
on Monogram's Libertator using Koster's conversion.
I began this project in February 2002 and did not reach completion until
November 2002 - 9 months! Now that is a labor of love.
 This
whole thing started with HyperScale when I can across Eli Raphael’s
beautiful PB4Y-2 in the archives. This is what motivated me to build
this beast. I needed to do a big bomber in that beautiful Navy tricolor
scheme. First, I had to acquire a Monogram B-24J and then locate a
conversion kit. I found the model kit on e-Bay and paid the collector’s
price for that. Other modelers on HyperScale were so kind as to put me
in touch with Bill Koster who made sure that I was set up with the
correct conversion kit and got me the white metal and resin detail parts
for the gun turrets. This
whole thing started with HyperScale when I can across Eli Raphael’s
beautiful PB4Y-2 in the archives. This is what motivated me to build
this beast. I needed to do a big bomber in that beautiful Navy tricolor
scheme. First, I had to acquire a Monogram B-24J and then locate a
conversion kit. I found the model kit on e-Bay and paid the collector’s
price for that. Other modelers on HyperScale were so kind as to put me
in touch with Bill Koster who made sure that I was set up with the
correct conversion kit and got me the white metal and resin detail parts
for the gun turrets.
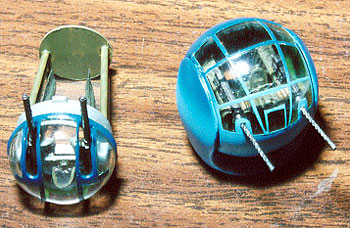
The turret details were
still a little sparse so I scratch built some more detail into them with
styrene sheet, fuse wire and some clear plastic cut from a battery
bubble pack to make gun sights. I have to thank Bill Smith, another
HyperScaler, for the excellent detailed pictures that he provided me
with of turret interiors.
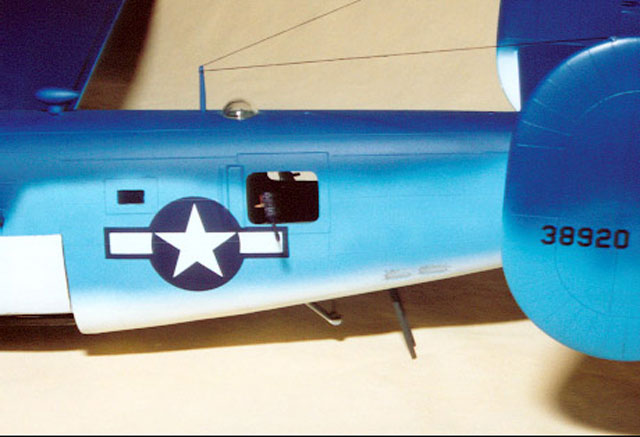
I replaced the waist guns with Aires Browning machine guns, which are
incredible little kits in their own right.
Click the thumbnails below to view larger
images:
I learned how to make
resin molds and castings so I could replicate the Oxygen bottles that
are placed throughout the plane. These were not used often on the PB4Y
because they seldom operated at altitudes that required them but I felt
that the equipment should still be present. At least I could not find
any references to the contrary.
I used a variety of lead
fishing sinkers (painted flat black to hide them) in the forward
compartments secured with silicon caulk to counterweight the craft.
Using silicon can be tricky, you can’t get any on a surface that you
wish to paint later or it will cause serious fish-eyes.
I also had to make some
serious modifications to the bombardier’s flooring. It had to be lowered
and extended to fit with the new nose and the Nordan bombsite mount had
to be modified to fit under the ERCO turret. I was sorely temped to
leave the bomb sight out – the Navy preferred to bomb at low altitude by
eyesight and experience but I could not find any information as to
whether the site was left in place or removed. Flip the coin - it stayed
in place.
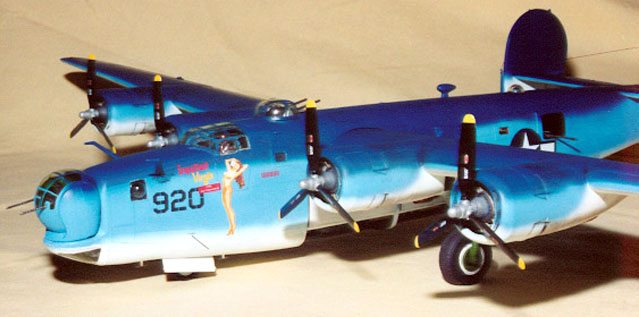
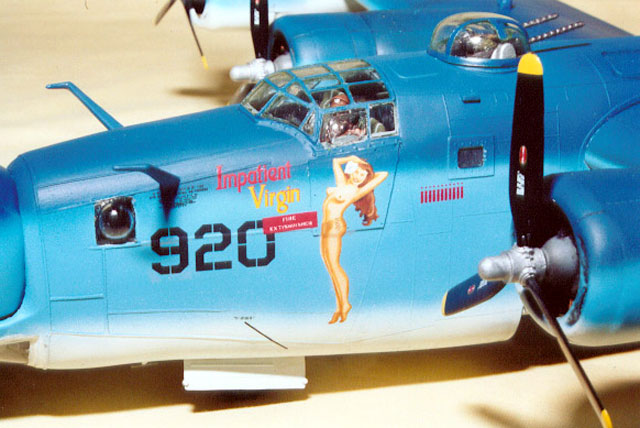
While I worked on the
interior details and nose conversion I thought about what kind of
exterior scheme to do. I wanted to do something different. I ended up at
www.navylib.com checking out nose
art when I ran into the “Impatient Virgin”. This was it! I had to do
this craft.
Eli Raphael suggested
that I get in touch with Mike Grant from Mike Grant Designs who was able
to make me a set of Alps decals to represent the “Impatient Virgin”
artwork and the BU numbers. As you can see, Mike did an exceptional job.
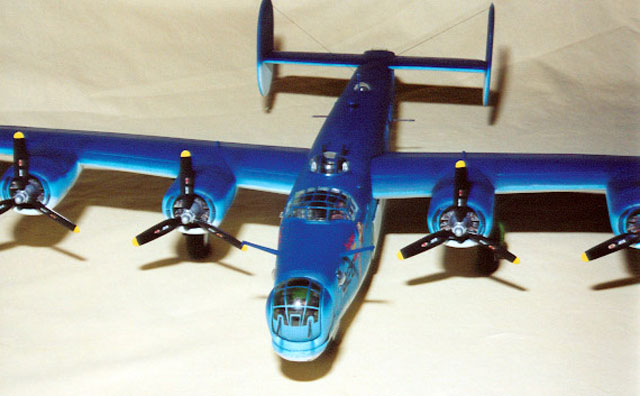
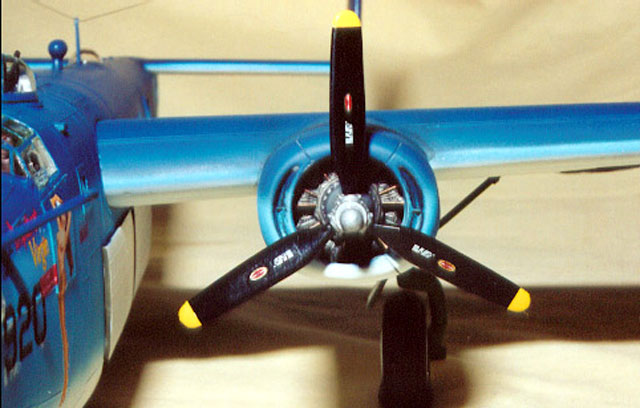
Mike also provided me
with Hamilton Standard logo decals for the propellers to replace the
blobs that came from Monogram. The mission markers and national insignia
came from the Monogram sheet.
For the exterior I mixed my own blues from various Testor and Model
Master paints to get the shades that seemed to suit it best.
I used Cutting Edge
window masks for most of the glass along with some masking tape and
masking solution. Let me tell you, those Cutting Edge window masks save
a lot of time and backache! Especially on something like this with so
many little windows. I’ve heard people complain about having to trim
them sometimes and yes, I did have to trim two of them – beat the hell
out of masking every individual window with tape. I weathered it with
Tamiya X-19 smoke and sludge wash and finished with Polly Scale clear
flat.
Overall, this was a
wonderful project. The Koster parts had very nice detail and fit nearly
perfectly into the monogram parts. The most difficult area was the tail
turret – nothing wanted to mesh for me there and that may have been more
my fault then any one else’s.
Nine months is a long time to stay focused on a single model kit and I
have many HyperScalers to thank for keeping me motivated like Howard
Bulin and Dan, the Yankee Air Pirate and so many others that I can’t
list them all here – thanks guys, I made to the end!
And special thanks to Brett Green, without this site and his dedication
to maintaining it none of this would have happened.
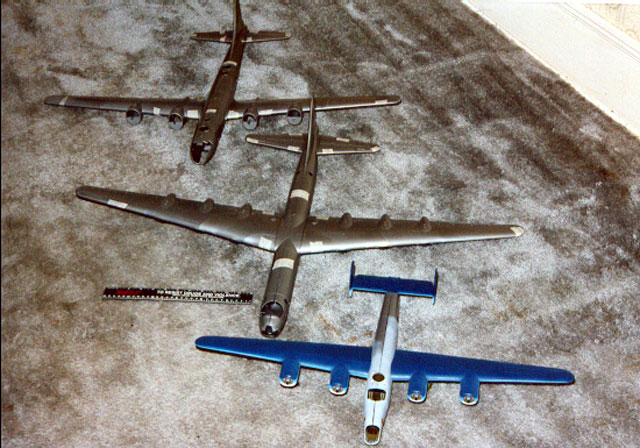
Now I just have to find
someplace to display this monster.
Click
the thumbnails below to view larger images:
Model, Images and Text Copyright © 2002 by
Matt Swan
Page Created 08 January, 2003
Last Updated 04 June, 2007
Back to
HyperScale
Main Page
Back to Features Index
|
 Home
| What's New |
Features |
Gallery |
Reviews |
Reference |
Forum |
Search
Home
| What's New |
Features |
Gallery |
Reviews |
Reference |
Forum |
Search