|
Republic P-47D Thunderbolt
by
Ian
Robertson
 |
|
Republic P-47D Thunderbolt |

Hasegawa's 1/48 scale P-47D Thunderbolt
is available online from
Squadron.com
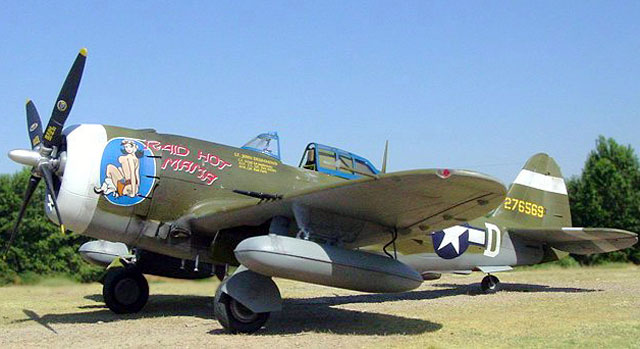
The P-47D was a large, pugnacious, and portly radial-engine fighter that
became the most-produced fighter in American history (over 15,000 built in
total).
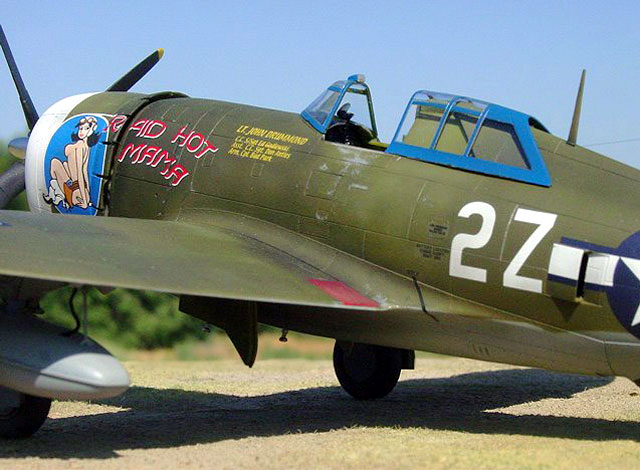
Early versions of the P-47D had a sharp upper ridge aft of the cockpit in
order to increase the pilot's field of view. These "razorbacks" stood in
contrast to later versions which sported a bubble canopy.
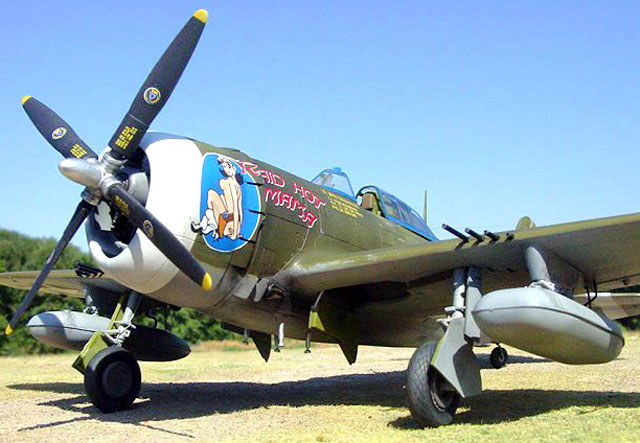
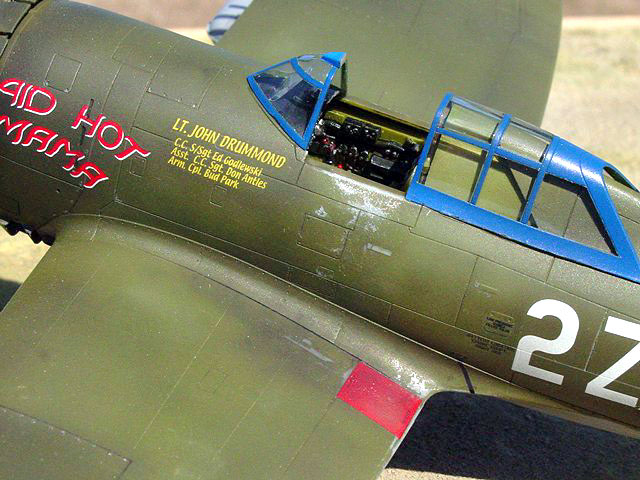
My model depicts "Raid Hot Mama", a P-47D-15 razorback from the 510 FS, 405
FG, flown by Lt. John Drummond in 1944.
|
Hasegawa's 1/48 Scale
P-47D |
Basic Construction
Overall I found the fit of Hasegawa's model to be very good. The fuselage to
wing join was a bit tricky in terms of getting a symmetric dihedral and smooth
join to the belly, a problem I've heard repeated by other modelers. It was not a
major obstacle to overcome.
The wing assembly was constructed as per the instructions. I opted to glue
the lower-center wing section to the fuselage first and then set it aside to dry
overnight. The next day I glued the upper part of the wing to the wing-root,
taking care to achieve a proper dihedral for both wings. In the end some sanding
beneath the fuselage was still required to get a smooth transition between the
wing assembly and fuselage. A minor amount of detail was lost in the process.
Detailing
I used Verlinden's P-47 detail set to display the cowl flaps open, detail the
cockpit, and reposition the control surfaces on the tail.
Overall the resin parts fit well; however, the kit's cowl is slightly larger
in diameter than the resin cowl flaps, necessitating rather heavy sanding an
rescribing on the cowl in order to mate the two pieces without a noticeable
step. Tamiya's upcoming release will undoubtedly be an improvement in this
regard. The control surfaces and cockpit details in the Verlinden set are
superb. Some minor modifications to the cockpit were needed because the
Verlinden set is designed for a bubble top. Note that the Verlinden detail set
also allows for dropped wing flaps, engine details, and an open gun bay. I opted
to save these parts for another P-47 model.
The main landing gear were modified slightly by thinning the oleo scissors and
adding brake lines made from electrical wire. The tail wheel was modified by
removing the strut from the wheel and replacing it with wire. The wire was bent
with pliers and attached to the wheel and strut using CA glue.
The intercooler exhaust vents on the side of the fuselage were thinned as much
as possible using an exacto knife. This simple procedure makes a big difference
in the model's appearance because the thickness of the plastic is very
noticeable otherwise. I thinned the vents on the underside of the fuselage in a
similar manner.
Although not a common configuration, some P-47D razorbacks carried a flat drop
tank beneath each wing pylon rather than a single tank suspended beneath the
fuselage (refer to Jeffrey Ethell's book "Air Command" for some beautiful color
images of razorbacks with this configuration). The Hasegawa kit provides only a
single 150 gallon flat tank for the belly position. However, I had a spare tank
from another Hasegawa P-47 kit and decided to use the two of them on my model.
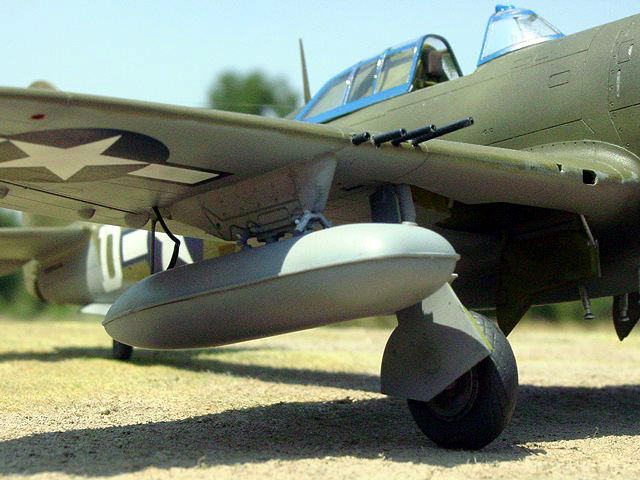
A swing brace constructed from stock styrene was attached from the back of
the wing pylon to the rear of each tank (Darrell Thompson supplied me with some
excellent photos - thanks). A fuel line made from heated styrene rod was added
to each tank.
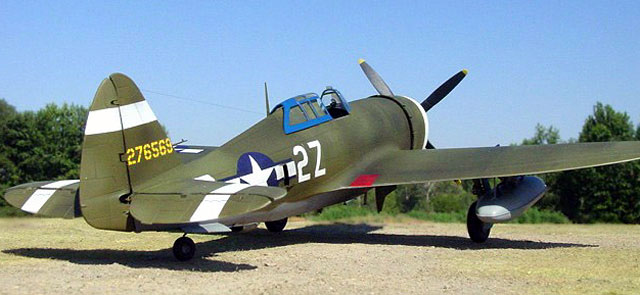
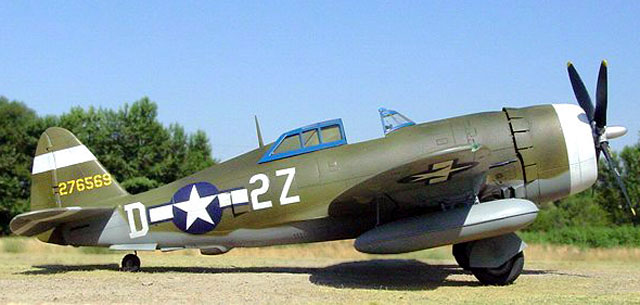
The exterior of the model was first painted with SnJ Aluminum metallizer. The
white bands on the cowl and tail were then painted with Polly Scale acrylics and
masked. The underside panel lines were pre-shaded in black and then painted
neutral gray with Polly Scale acrylic until the pre-shading had all but
disappeared.
 The
upper surfaces were painted various shades of olive drab using a combination of
Aeromaster faded olive drab, Aeromaster olive drab, and Polly Scale olive drab.
Some applications of olive drab included a touch of dark green and/or black. My
goal was to create the varied colors evident in period photographs of olive drab
camouflage. As a final step, highly thinned back paint was sprayed over certain
areas of the model, particularly the wing roots and behind the cowl flaps. Once
the camouflage scheme was complete, fine grain sandpaper was used to make minor
surface abrasions and expose the SnJ aluminum beneath, particularly around the
cockpit entrance and leading edges of the wings. The
upper surfaces were painted various shades of olive drab using a combination of
Aeromaster faded olive drab, Aeromaster olive drab, and Polly Scale olive drab.
Some applications of olive drab included a touch of dark green and/or black. My
goal was to create the varied colors evident in period photographs of olive drab
camouflage. As a final step, highly thinned back paint was sprayed over certain
areas of the model, particularly the wing roots and behind the cowl flaps. Once
the camouflage scheme was complete, fine grain sandpaper was used to make minor
surface abrasions and expose the SnJ aluminum beneath, particularly around the
cockpit entrance and leading edges of the wings.
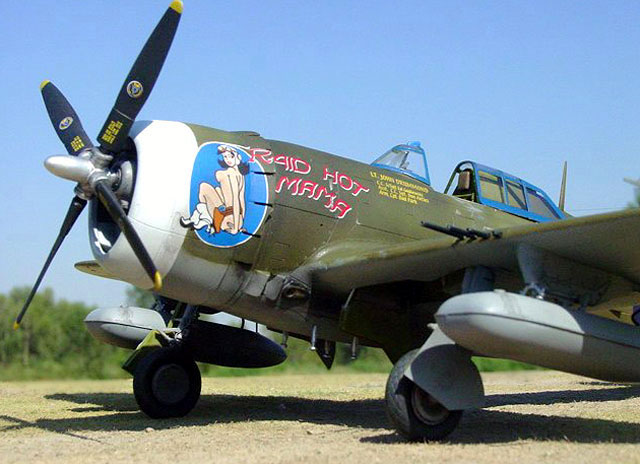
The canopy was treated to a coat of Future floor wax, masked with Tamiya tape
(once the Future had dried), and then painted. A coat of interior green was
sprayed first, followed by a mixture of Model Master Acryl "French Blue" and
Polly Scale "ATSF Blue". These two colors produced a nice match with the blue of
the nose art.
The decals for "Raid Hot Mama" were produced by Eagle Strike (American Jabos,
Part 3: #48053). They were of excellent quality and reacted well to decal
solvents.
All images were taken outdoors on a sunny day with a SONY S-75 digital camera
set at its highest picture resolution (2048 x 1536 pixels). Other camera
settings were as follows: 200 ISO film speed (yes, it is a setting on my digital
camera), 1000th/sec shutter speed, F-stop 8.0 (highest possible), and fixed
focus distance of either 20 or 30 cm.
Images were cleaned up using Adobe Photoshop 6.0 for the Macintosh.
Specifically, the interface between the base and background were merged using
the software's "blur" tool.
Click
the thumbnails below to view larger images:
Model, Images and
Article Copyright © 2002 by Ian
Robertson
Page Created 23 October 2002
Last updated 04 June 2007
Back to HyperScale Main Page
Back to Features Page |
 Home
| What's New |
Features |
Gallery |
Reviews |
Reference |
Forum |
Search
Home
| What's New |
Features |
Gallery |
Reviews |
Reference |
Forum |
Search