|
Curtiss P-40L
by
Steven Eisenman
 |
|
Curtiss P-40L |

HyperScale is proudly supported by
Squadron.com
Probably more nose jobs (rhinoplasty) are done in the New York
metropolitan area than anywhere else. However, the most important
nose job, as far as modelers are concerned, comes out of West Des
Moines, Iowa.
As announced earlier, AMtech models has created a totally new
resin nose for their forthcoming P-40F/L Warhawks that more
accurately captures the shape of this Merlin powered aircraft.
I received the preproduction run of the nose and plastic kit without
instruction, decals or other information as to what I should do. As
a result, I feel it would not be appropriate to comment on the ease
or sequence of construction. But even without instructions, you do
not need to be an American Medical Association board certified
plastic surgeon to build this kit. I simply built this one straight
from the box!
That being said, I still would like to give a few notes on the
construction and painting of my model.
As noted in my earlier announcement about the nose, cutting of
the cowling was quite easy, and should not be any problem
determining where the cuts are to be made. With clean, close cuts,
very minor amounts of filler should be needed. Test fit before
applying super glue. Slow setting gel is recommended to get
everything aligned. I put the fuselage halves together before
inserting the nose plug. There is additional cutting of the forward
section of the lower wing so the nose plug will slip into the
fuselage. I also had to make cowl flaps out of sheet stock.
After getting the new nose on, I was overcome by a strange fear.
Given the size of that resin nose, it weighs almost as much as the
rest of the kit. Would this be the first model to require lead
weight in the rear? Would it just fall over on its nose when
put on the shelf? The answer, after it was completed, was no. It did
not tip forward!
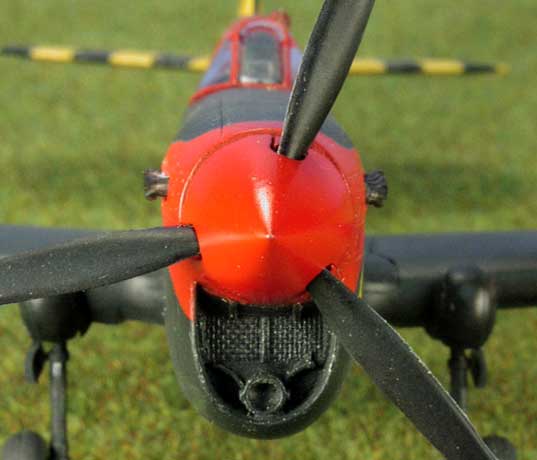
For the exhaust stack, AMtech contemplates that you will cut the
exhaust stubs off the backing plate and individually glue each stub
in the recesses in the nose. Once again slow set super glue gel is a
good way to go. I carefully cut each one off using a new #11 blade.
Be careful though - luckily I found the one that went “Ping” across
my work desk. Resin aftermarket companies listen up! Would be nice
to have some beautiful resin exhausts, cast in pairs (two per
opening).
For mounting the prop/spinner, I cut the kit’s prop mounting post
just behind the first point where the plastic cowl would have held
the post between the two fuselage halves, and glued it to the center
of the resin nose. The prop assembly just rests on this.
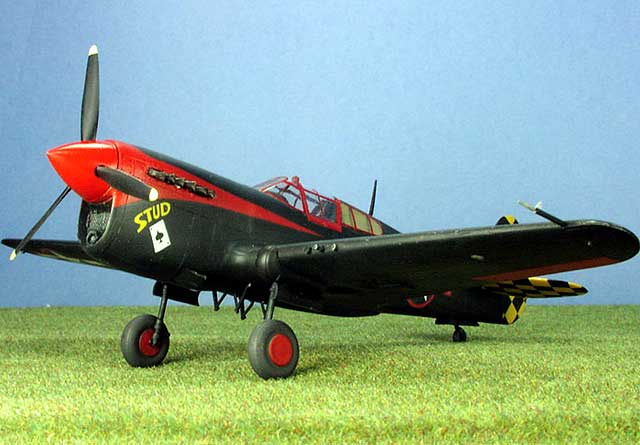
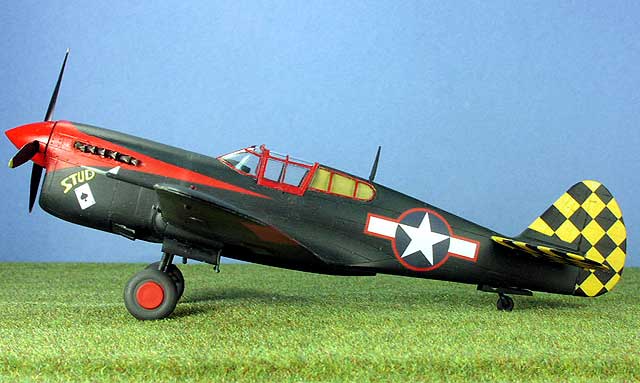
I wanted to do “Stud’ of the 325th F.G. “Checkertails”. This
aircraft was the personal mount of Lt. Col. Robert Baseler, who used
it to fly from base to base. The markings for this aircraft will be
in the kit. I used the old Aeromaster sheet SP48-15, “The 325 F.G.
in Combat – Flying Checkers from Africa to Italy”. Just a note on
these; the nose art is about twice as big as the nose art that was
on the actual aircraft. Also, this aircraft, prior to being redone
in black and red, had the “Stud” nose art as well as the name
“MORTIMER SNERD” on the right side. It is quite possible that this
was on the repainted aircraft. But I have only seen photographs of
the left side.

As for the colors, I used NATO Black and Flat Red, both from the
Tamiya Acrylic range of colors. For the tail I used Testor’s Model
Master Acryl Chrome Yellow (FS 13538). Most profiles show the area
behind the rear cockpit panel windows as being red. Looking at the
few pictures that exist, and even taking into consideration glare,
it is my opinion that the area under the windows was left in the
original Middlestone. I am sure there will be much discussion of
this point.
One final note. It is quite possible that this aircraft only
carried one gun per wing. It seems it was quite common among this
unit for the pilots to remove two guns per wing to lighten the
aircraft so that they could climb faster. Often it was the center
gun of the three that was retained.
For those who have been waiting for the long-tailed P-40 F/L, wait
no longer. This is one great kit and it has the prettiest nose I
have seen in a long time.
I’d like to thank Alan Griffith of AMtech for the sample.
-
Checkertails: The 325 Fighter Group in
the Second World War, by Ernest McDowell; Squadron Signal
Publications; 1994.
-
P-40 Warhawk Aces of the MTO, by Carl
Molesworth; Osprey Publishing; 2002
-
Curtis P-40, by Vlastimil Ehrman and
Valerij Roman; MBI, 1998.
Model,
Images and Article Copyright © 2002 by
Steven Eisenman
Page
Created 15 November 2002
Last updated
04 June 2007
Back to HyperScale Main
Page
Back to Features
Page |  Home
| What's New |
Features |
Gallery |
Reviews |
Reference |
Forum |
Search
Home
| What's New |
Features |
Gallery |
Reviews |
Reference |
Forum |
Search