|
Curtiss P-40F
by
Lee Rouse
|
|
|
Curtiss P-40F |

HyperScale is proudly supported by
Squadron.com
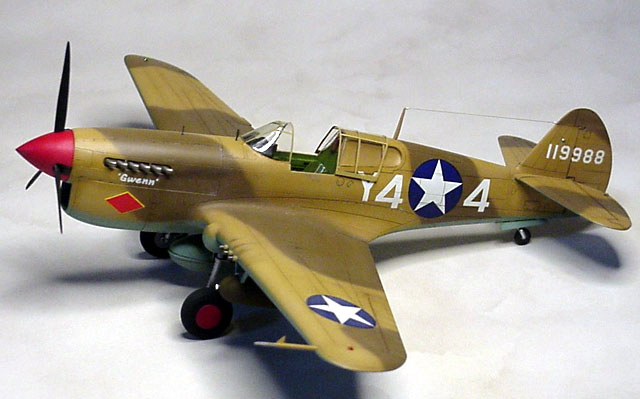
The P-40 that I modeled is -F model offered several years ago by ERTL.
The kit instructions indicate that this aircraft was flown by Lt.
Richard Lander of the 315 Squadron, 324th Fighter Group, and that it was
based in the North African desert in 1943. The presence of the radio
mast suggests that this is a late model -F.
On opening the box, I was impressed by the cleanly recessed paneling and
good detail of the model. There was, however, quite a bit of flash. The
cockpit is somewhat simplified, but can still yield a nice build up
straight out of the box.
The fuselage halves were glued together. The fit of part A4 (radiator
facing) was not that great, requiring a bit of maneuvering to get it
right. After part A4 was in place, the cockpit assembly was inserted
through the bottom of the fuselage and glued into place.
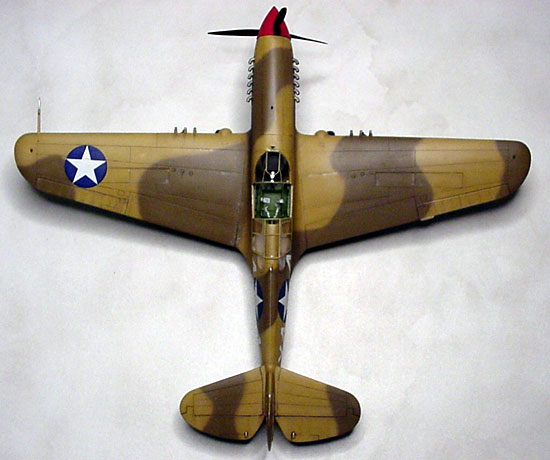
Each top wing piece was glued to its corresponding half of the bottom
wing. When I fit the wing assembly up into the fuselage, there were
large gaps along the wing root/fuselage joint. These gaps were a bit too
large for modeling putty. Since I was going to rescribe the joints, I
elected to use Magic Sculpt, an excellent 2-part epoxy putty which when
dried can be drilled or scribed with absolutely not flaking or chipping.
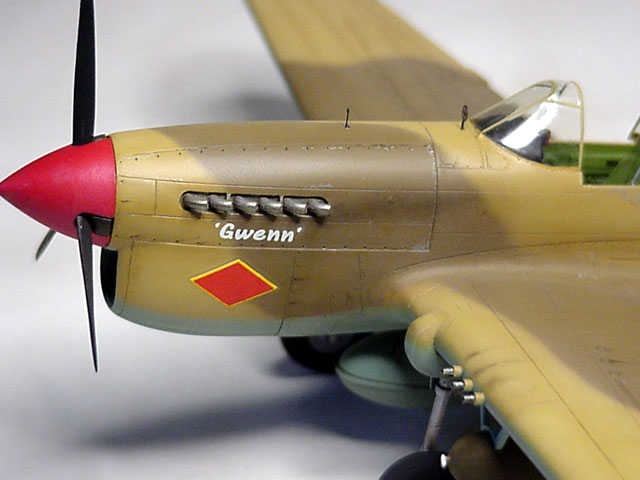
Exhaust stacks were drilled out and glued to the backside of engine
cowling panels F1 and F2. The fit of parts F1 and F2 with the fuselage
was slightly short on both sides, requiring styrene sheet to fill the
gaps at the front.
Paint
I airbrushed Tamiya Light Blue XF-23 onto the underside and along the
sides. The demarcation line between upper and lower colors was then
masked off using drafting tape. The upper surface was painted the
lighter color with a custom mix of Tamiya paints to simulate Sand. The
darker brown color (Dark Earth) was mixed in a similar (very
unscientific) manner. Once the Sand color was dried, I applied paper
masks which I had cut out from enlarged images on the instruction sheet.
The Dark Earth color was airbrushed. After the fuselage was painted to
satisfaction, a coat of Future was applied to serve as a base for the
decals. I would have to give the kit decals a rating of 8 out of 10.
They were durable, in good register, and of appropriate color.
Weathering
Weathering was next and accomplished with a combination of materials
including artist’s acrylic inks, artist’s water colors, pastels, and a
Prismacolor silver pencil.
Finishing Touches
Underside parts were painted and attached, including the landing gear,
centerline external fuel tank, and bombs. The bracing structures for the
bombs looked overscale and clunky, but I used them anyway.
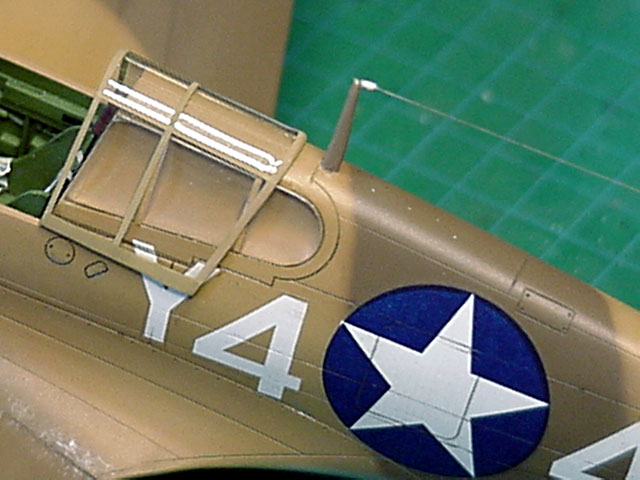
Fuselage side windows were fitted and glued onto the fuselage using
Micro Kristal Kleer white glue. I used the “heat and smash” to create a
new windscreen and canopy.

The cockpit gun sight was glued into place after I "upgraded" it with a
small piece of clear styrene to simulate the reflection glass. Eduard
photoetch ring and bead sights were installed in front of the
windscreen. Monofilament clear sewing thread was used for the antenna
wire.
In summary, this was not the easiest model to build due to excess flash,
and occasional fit problems. Still, the result is a good looking
aircraft which I will be happy to find a place for in my display case
amongst my other WWII model aircraft.
For the full build review and additional pictures of this model, please
visit the Articles page of Eastern Carolina Plastic Modelers website at
www.ecpmod.com
Model, Images and Text Copyright © 2002 by
Lee Rouse
Page Created 17 September, 2002
Last Updated 04 June, 2007
Back to HyperScale
Main Page
Back to
Features Index
|
 Home
| What's New |
Features |
Gallery |
Reviews |
Reference |
Forum |
Search
Home
| What's New |
Features |
Gallery |
Reviews |
Reference |
Forum |
Search