|
Mustang
III
by
Randy Lutz
 |
North
American Mustang III
Captain Eugeniusz Horbaczewski, 315 "Deblinski" Squadron,
August, 1944 |

Tamiya's 1/48
scale Mustang III
is available online from Squadron.com
At the close of hostilities in Europe, Polish Air Force fighter squadrons
had accounted 922 confirmed and 188 probable victories. In addition they claimed
258 damaged enemy aircraft and produced forty-one aces, six of which had shot
down ten or more aircraft. Perhaps the most legendary of all Polish aces was
Squadron Leader Eugeniusz Horbaczewski. Polish pilots were noted for their
bravery and Horbaczewski was no exception. On June 22, 1944, while No. 315
Deblinski Squadron was on a strafing mission, W.O. T. Tarnowiez was shot down by
flak and crashed in a marsh.
Horbaczewski landed on an uncompleted Normandy landing strip and rescued his
comrade and flew back to base sitting on his lap.
On August 18, twelve Mustangs from 315 Squadron engaged 60 FW-190s. During
the ensuing battle which lasted 15 minutes they claimed 16 enemy aircraft shot
down for loss of only one Mustang. This single loss was that of Squadron Leader
Eugeniusz Horbaczewski, but not before he downed 3 Focke-Wulfs. Horbaczewski's
final tally was 16 ˝ aircraft and 4 V-1 Flying bombs destroyed.
|
Tamiya's
1/48 Scale Mustang III |
The Oxford Dictionary defines a masterpiece as "the consummate piece of
workmanship, or one's best work."
This definition best describes the
quality of Tamiya's R.A.F. Mustang Mk III. In all my 30 years of model building,
this is the first model I have encountered that did not require contour putty of
any kind. Mind you I have built many models without putty, which in retrospect,
could have benefitted from the filler. But, this model is the exception.
Construction
Tamiya's Mustang is moulded in medium grey plastic with a good assortment of
canopy options: closed Malcolm hood; closed clam-shell canopy or; open
clam-shell. The canopies are a touch on the thick side, but have amazing
clarity.
Everyone has been complaining about the curved cockpit floor, and how it
should be the flat wood variety. I admit that Tamiya got it wrong, but it is
something I can live with, if it comes with a kit that assembles so well. Once
the closed Malcolm hood is installed, the floor is really not that visible. The
model has its fair share of small inaccuracies, but none of them relate to fit
or construction problems. Specifically, they are the American style control
stick and American style bombs, both of which should be replaced by British
equivalents. One major plus is the option of building the model with the flaps
down. This is the only 1/48 Mustang kit on the market that has this feature.
As this kit was to be built out-of-the-box, using the supplied decals, any
modifications were limited to what would pass at an IPMS Competition.
Construction started with the interior. This was airbrushed with Model Master
Interior Green (FS34151). The seat was finished in Model Master Chromate Green,
while the radio gear and instrument panel were painted with Black Chrome. A dark
wash was applied to all the green components, and once dry, was followed by
three applications of green dry-brushing. Each subsequent dry-brushing was
slightly lighter than the previous until I had created a nice contrast between
the dark areas and the high-lights. A multi-step, grey dry-brushing process was
also used for the black chrome areas to break up the mono-chromatic look.
Afterwards, small traces of red were applied to select areas of the instrument
panel, side consoles, and control stick. Micro Scale Kristal Kleer was applied
to the instrument faces, and the kit supplied seat belt decal was finally added
to the seat. Tamiya supplies a decal for the instrument panel, but I find these
are a little to vibrant in comparison with the rest of the interior.
Part numbers A13 and B15 are the radiator and oil cooler. These two parts
were airbrushed with Metalizer Aluminium, and then given a black wash to pick
out the details. The tail wheel opening was airbrushed with Testors Pla Zinc
Chromate Yellow, and then the fuselage halves were assembled, trapping all the
previously finished interior components.
Step three of the instruction relates to the installation of the exhaust
pipes. Tamiya suggests installing them at this stage, but this would lead to
unnecessary masking. I found it best to leave them off until after painting. You
should however, verify with photographs of the subject being modelled, as both
shrouded and unshrouded exhausts are included with the kit. Horbaczewski's
Mustang had the unshrouded style. These two parts were airbrushed with Metalizer
Burnt Iron, after the pipes were drilled out.
The upper and lower halves of the wing were assembled and the wheel wells
were finished in three different colours. The main spar at the back of the wheel
well was painted Chromate Yellow, Interior Green was applied to the main spar
that separates the two wells, and the remainder of the wells was finished in
Metalizer Aluminium. Tamiya's instructions indicate a wheel well colour of
Interior Green overall, but based on two of my references (Camouflage and
Markings, N. A. Mustang, RAF Northern Europe 1936-45, and P-51 Mustang in Color)
this is incorrect. A dark wash was next applied to the details and then the gear
doors were tacked in place, in the closed position using Kristal Kleer. This
prevents any underside colour over?spray from getting in the wells.
The main wing and both stabilizers were installed at this time. The fit of
these parts is superb. No filler of any kind is necessary. At this point, the
engine cowl breather vents, gun barrels and any other miscellaneous openings
were drilled out.
Next, the canopy was installed, the framing masked off, and then given a
light coat of Interior Green. The instruction show an external rear view mirror
on Horbaczewski's aircraft, but this is incorrect. He did have a mirror, but it
was the internal type, so leave off part A3. I was now ready to start painting
the model, and it was at this point some of the major errors in the instruction
sheet came to my attention.
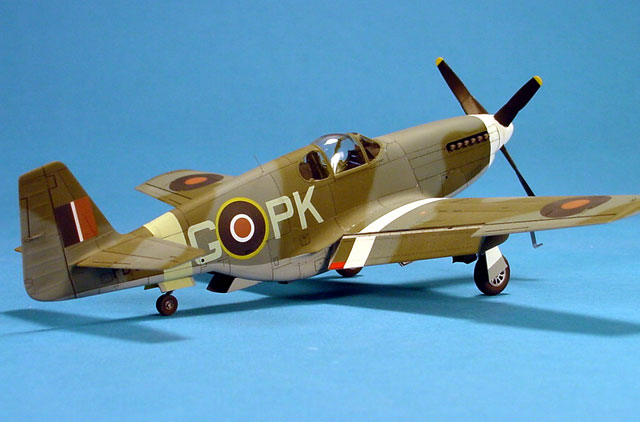
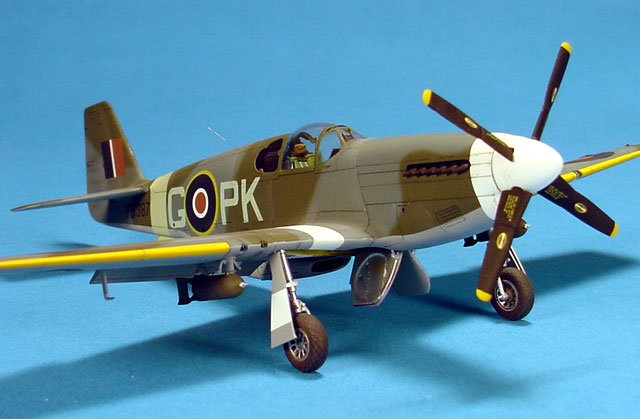
Tamiya's painting guide does not indicate the white band on the nose,
immediately behind the spinner. This was a standard identification feature on
RAF Mustangs, and is quite evident in all photos of Horbaczewski's Mustang. It
should be a scale 12" in depth, starting from the front of the cowl and
terminating at the forward edge of the exhaust opening. The second major
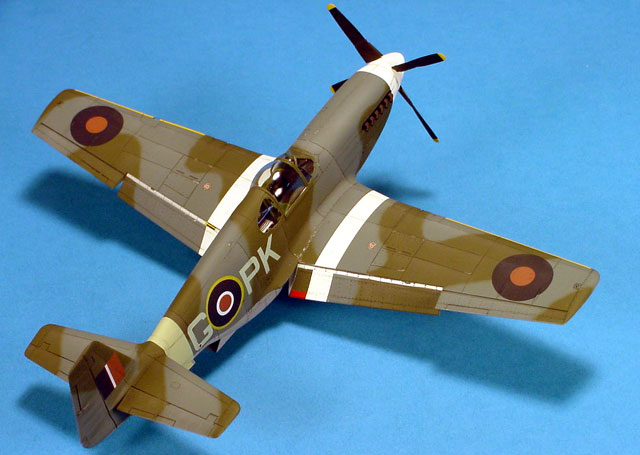
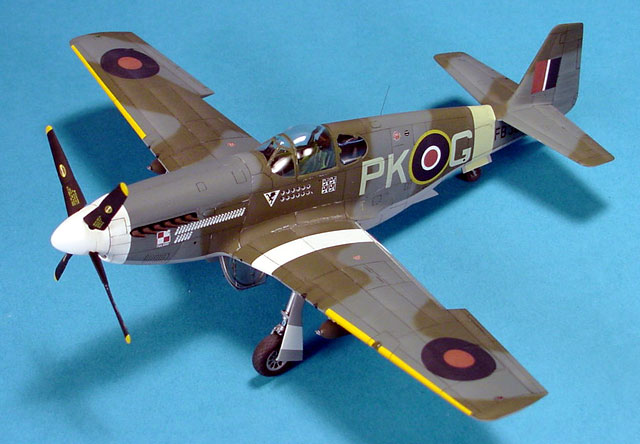
painting error relates to the white wing I.D. bands. Tamiya does not indicate
any bands on Horbaczewski's aircraft, yet page 5 of the Aircam Aviation Series
No.3, Mustang in Foreign Service has two excellent photos which clearly show the
bands.
So, with this new evidence in hand, the Tamiya painting guide was set aside.
Testors Model Master Insignia White (FS17875) was used for the spinner and wing
bands. Xtracolor X7 Sky was applied to the fuselage for the rear band, and
Xtracolor X106 Insignia Yellow (FS13538) was airbrushed along the leading edge
of the wings, instead of using the decals supplied in the kit. All of these
areas were masked off and then the remainder of the model was finished in
Xtracolor X3 Medium Sea Grey, X1 Dark Green and X6 Ocean Grey. A hard edge
demarcation line is used to separate the upper and lower camouflage colours. A
soft, but tight demarcation is used between the two upper colours which is best
accomplished freehand, as opposed to trying raised edged masks. I find the masks
tend to produce uneven results, with some areas featuring soft over-spray while
other areas are almost hard edged.
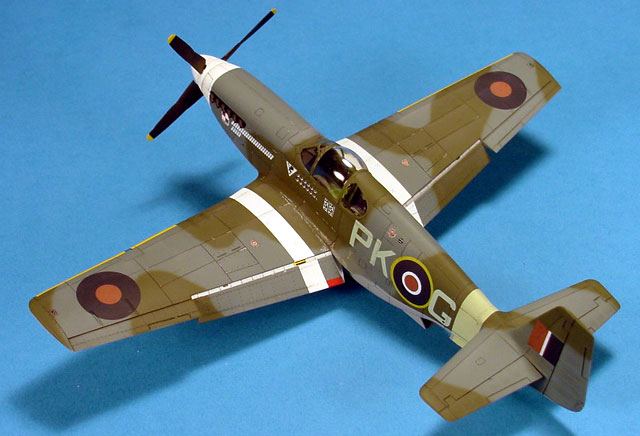
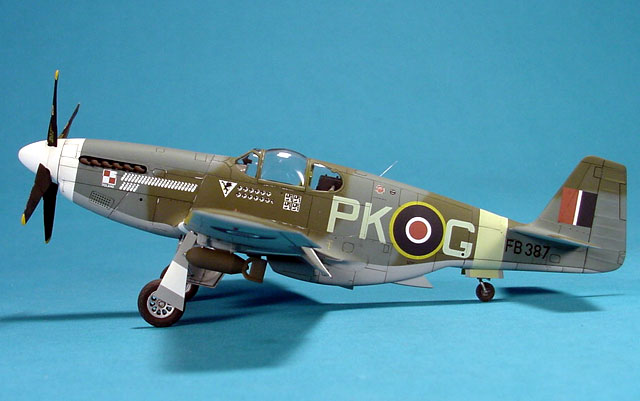
Decals were next. Tamiya's decals are produced by Scalemaster using the
Invisa-Clear process. Their adhesion is excellent, but registration is terrible.
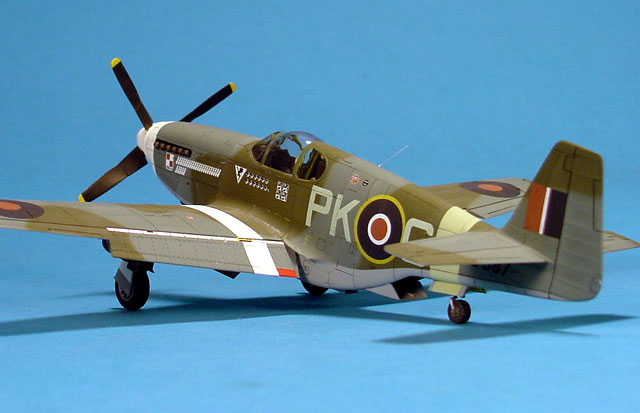
The focal point of any Aces' aircraft is the scoreboard, and on mine the victory
crosses were printed out of register. In fact they are so far off, I prefer to
look at the side without the scoreboard. Another problem with the decals is the
size of the personal markings. Based on photographs, the row of bombing mission
markers and the victory crosses are printed slightly oversize. Also, I tend to
think the row of bombs on the nose should be yellow instead of the white as
given. I base this assessment on the detail photo found in the Aircam book. By
comparing the tonal values of the Polish chessboard which is known to be white,
and the bombs, you can see a difference in shades. When applying the fuselage
national insignia and squadron codes, make sure the "G" is slightly
overlapping the C1 type roundel. It is not shown this way in the instructions,
but is clearly shown on pages 122 and 123 of the Mustang at War book. Solvaset
was used as a setting solution and, if applied sparingly, will not damage the
decals.
On the underside of the starboard wing are three identification lights. In
the past I have tried painting these freehand and have never been happy with the
results, but I have since come up with a new method. I airbrush 3 pieces of
clear decal film with Gunze-Sangyo Transparent Red, Transparent Green and
Testors Turn Signal Amber. Using a Waldron punch, I am able to produce small
disks of coloured decal film which are applied like regular decals. Once the
model is finished, they are covered with Future Floor Wax to give them a high
gloss appearance.
Prior to painting the wheels and undercarriage, both halves of the wheel hubs
were drilled out, as well as the landing gear oleo scissors and tie down rings.
The struts and hubs were then airbrushed in Metalizer Steel, given a dark wash,
and small strips of aluminium foil, shiny side out, were glued to the shock
portion of the gear leg.
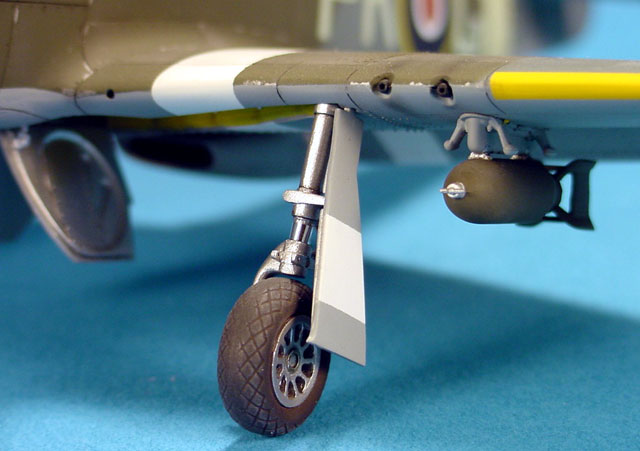
Testors Pla Rubber was sprayed on the tires, and then
they were dry brushed with dark, medium, and then light grey to add depth and
define the tread detail.
All the all panel lines were treated to a dark grey wash, and a black wash
was flowed into all the control surfaces. Minor chipping and scuffing was
accomplished with a mixture of silver enamel and Windsor and Newton Raw Umber
oil paint, which was thinned slightly with turpentine and applied with 000
brush. The model was then airbrushed with Testors Dullcoat. At this time, the
gear doors (tacked in place earlier) were removed and the inside surfaces were
sprayed with Testors Metalizer Buffing Aluminium. On the inboard gear cover,
there is a reinforcing plate that was polished to a higher shine than the
remainder of the door using SnJ polishing powder. With the undercarriage glued
in place, the model was ready for the application of chalk pastels.
Starting on the underside, the wheel wells were given a dusting of dark grey
pastels in the corners, and immediately behind the oil cooler and radiator
outlet. A medium grey was applied along all the panel lines and then gently
streaked back using a large sable brush. Various shades of green and grey were
applied to the topsides. To accentuate the ribbed framework on the fabric
control surfaces, dark grey pastels were brushed into all the low areas between
the actual ribs. Then, lighter shades of green and grey were applied to the high
points of the ribs. The undercarriage was dusted with a light tan, while the
propeller blades were streaked with light grey.
The last details included the addition of the whip radio antenna which was
made from fine surgical wire, and the painting of the navigation lights.
Overall, this model was a breeze to assemble. Tamiya has engineered the fit
of components as if it were a Swiss watch. To date, it ranks as the finest
aircraft model I have ever built. Sometimes model building can be a frustrating
pastime, but this model was nothing but pleasure. I give it two thumbs up!
- Aircam Aviation Series No.3, Mustang in Foreign Service. Osprey
Publishing. Page 5. (This publication has some of the best photos of
Horbaczewski's personal markings.)
- Camouflage and Markings, N. A. Mustang, RAF Northern Europe 1936-45,
Ducimus Books Limited.
- P-51 Mustang in Color, Squadron Publications
- Mustang at War, Roger A. Freeman. Ian Allen Ltd., Surrey England.
Pages 122 and 123. (Provided the only photos in my collection that showed
the correct placement of the squadron codes in relation to the fuselage
roundel.)
- P-51 Mustang Detail and Scale by Bert Kinzey. Squadron
Publications, Carrollton Texas.
Click on the thumbnail to view the
image full-size.
Click on your browser's back-arrow to return to this page.
Article, Model and Images Copyright © 1999 by Randy Lutz
Page Created 26 October, 1999
Last updated 04 June, 2007
Back to HyperScale Main Page
Back to Features Page
|
 Home
| What's New |
Features |
Gallery |
Reviews |
Reference |
Forum |
Search
Home
| What's New |
Features |
Gallery |
Reviews |
Reference |
Forum |
Search