|
Messerschmitt Me 264 V1
by Alan Wanta
 |
|
Messerschmitt Me 264 V1 |

Special Hobby kits are available online from
Squadron.com
The Me 264 was designed from the beginning as an 'Amerika' bomber. Its goal
was to be able to carry a small load to the United States and return or a
heavier load and ditch at sea and the crew picked up by U-boat.
The first prototype flew in December 1942, but soon Allied pressure forced
Messerschmitt to slow development and the prototypes were eventually destroyed
by Allied bombing.
|
Special Hobby's 1/72
Scale Amerika Bomber |
The 'America Bomber' actually did exist, although only one prototype flew,
and it flew well according to information collected on the Internet. How does
the new Special Hobby kitting of this obscure aircraft stand up to an assembly
review? Read on.
I was waiting for this kit to appear for over a year since hearing that Special
Hobby, a division of MPM, was making it in injection kit form. Cautiously
putting the Airmodel vacuform aside I waited. This kit came from NKR models on
the Island of Australia less than a week after it was offered and ordered. All
the gray injected plastic parts are neatly fit on two enormous sprues, a bag of
resin bits, decals and two sets of perfectly clear vac canopies in another
separate bag. There was a moment of hesitation as to whether such a large kit
should be attempted knowing I had a short window of time to assemble it, but
what the heck.

The resin bits are again are a highlight in this kit, second only to the long
run nature of MPM/Special Hobbies latest kits from steel molds. Smooth surface
features, very little flash, very nicely done mold alignment greeted me with
sprue cutter in hand. First off is to plan some strategy, never go into a battle
without a game plan. This is not a Tamiya or Hasagawa kit, bring courage, skill,
and imagination with you for this assembly.
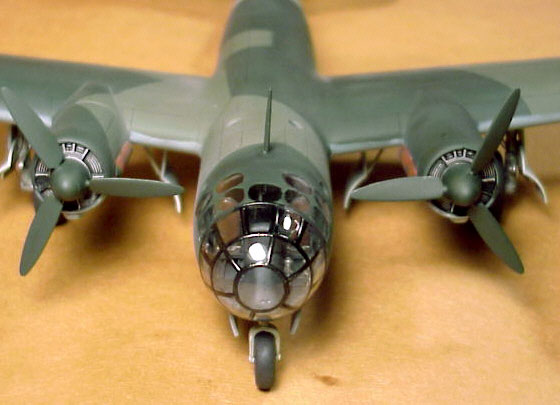
The wings are the first assembly task. They have no alignment pins, but they
are a perfect fit. As a matter of fact, that word 'perfect' could be used an
awful lot in the following paragraphs, but only when caution and skill are used
in putting this one together. Let me touch on a few areas that might help you
through this kit.
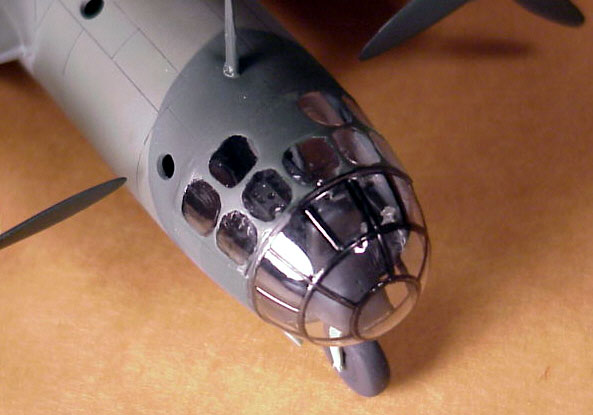
The Resin cockpit is best left out until final painting; it can be slid in
through the front opening with little trouble, keeps from having to protect it
from over spray. Although well detailed, some extra detailing could be done
forward of the two seats, but nothing behind them will be visible.
The two main wheel wells in resin are perfect fits to the wings, as long as all
of the pouring blocks are sanded off, same with all the other resin bits. Take
your time and clean them up.
The instructions would have you add some weight behind the cockpit bulkhead;
problem here is there is not enough space for the needed weight. I filled up the
engine nacelles as well, but still ended up with a tail sitter.
If you've assembled the main components correctly, there should have been no
filler added to your kit, it fits that well! Decide whether you want to
reinforce the wing/fuselage joint, add a spar or something, as the thin plastic
wing material may just not be enough.
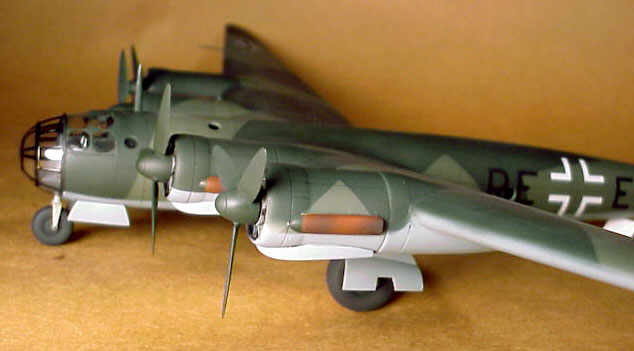
On the downside of the kit we have some soft detailing and simplified
structures when compared to period photos of the original. But overall this was
a fantastic offering of a long overdue kit. If esoteric aircraft is your bill,
here is the best one to date of a long range, four engine German aircraft.
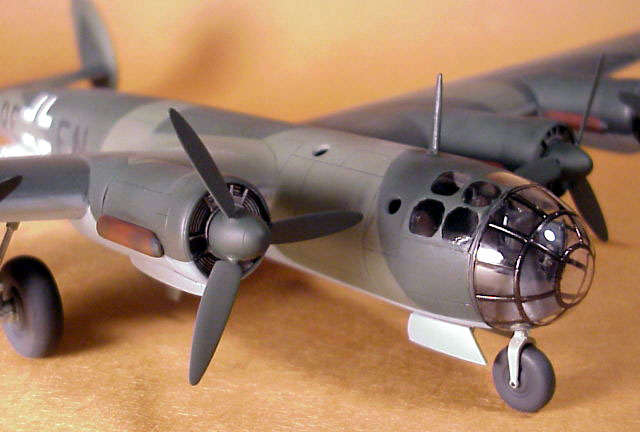
This model rates a 8 on the FUN-O-METER, 7 for engineering, and a 9 for it's
large 23 inch wingspan COOL factor. Thank you Special Hobby - now how about a
BV-222 or 238 flying boat? Hah, in my wildest dreams.
Click
the thumbnails below to view larger images:
Model, Images and
Article Copyright © 2002 by Alan Wanta
Page Created 15 March, 2002
Last updated 04 June, 2007
Back to HyperScale Main Page
Back to Features Page |
 Home
| What's New |
Features |
Gallery |
Reviews |
Reference |
Forum |
Search
Home
| What's New |
Features |
Gallery |
Reviews |
Reference |
Forum |
Search