|
by Brett Green
 |
|
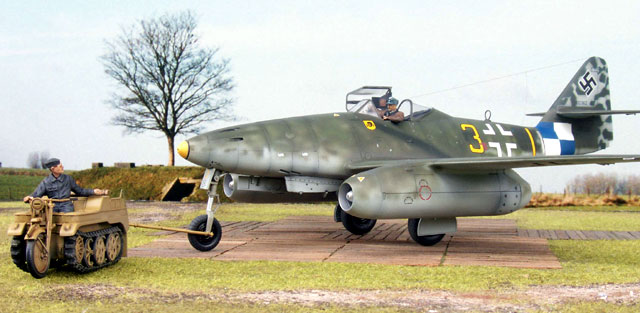
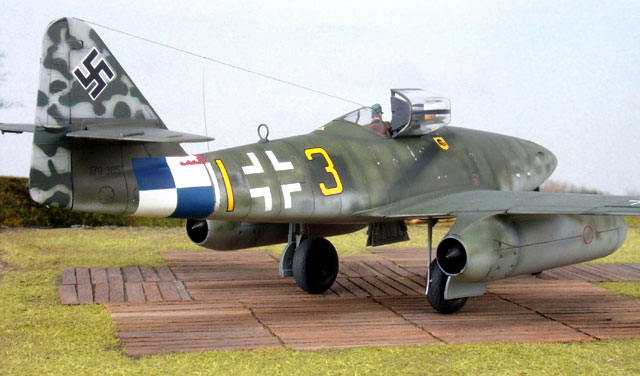
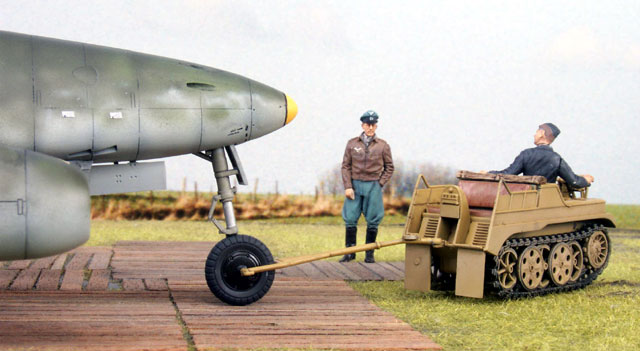
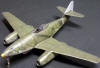
Messerschmitt Me 262A-1a
KG(J)54, 1945 |

Tamiya's 1/48
scale Messerschmitt Me 262A-2a be ordered online from Squadron.com
Tamiya's latest release is the first all-new 1/48 scale
Messerschmitt Me 262 to hit the market in 13 years. The first variant is the Me
262A-2a fighter/bomber version with two 30mm MK108 cannon in the nose.
Tamiya's 1/48 scale Me 262A-2a comprises 116 parts in grey
styrene, 8 parts in clear styrene and one white metal piece for the forward
landing gear bay that doubles as a hefty noseweight.
A full in-box
review of the kit may be seen by following this link.
Building the kit reaffirms Tamiya's reputation for superb detail, intelligent
engineering and simple construction.
I bought Experten's booklet and decal sheet for a Messerschmitt
Me 262A-1a, "Yellow 3" of KG(J)54, when it was released in 1997. I opened the
box of the Dragon 1/48 scale Me 262 on a number of occasions with the intention
of using the Experten decals, but I always experienced unpleasant flashbacks to
building one of these kits in the early 1990s.
The release of Tamiya's 1/48 scale Me 262A-2a seemed to be a
good opportunity to finally make use of these decals. However, I would have to
make one modification to the kit to depict the Me 262A-1a variant.
I decided to build this kit almost straight from the box aside
from modifying the nose to represent the four-gun variant.
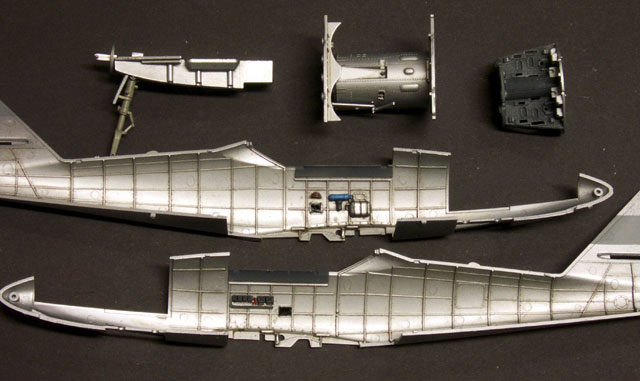
Interior and Fuselage
Before commencing construction, I painted the inside of the
fuselage, the internal bulkheads, lower surfaces of the cockpit tub and detail
parts with a coat of Tamiya AS-12, Bare Metal Silver, straight from the spray can. This
was followed by a wash of thinned Raw Umber oil paint. The oil wash really
brings out the structural detail of the interior surfaces and will be on display
through the open wheel well even after the fuselage is joined.
However, the
silver paint and subsequent wash highlighted a number of ejector pin circles
that would also be on display through the wheel well. I will fill these on my
next Tamiya Me 262!
The cockpit is simple but convincing. I only used kit parts,
including the decal for the instrument panel. The decal dials and coloured
bezels looked good on the blank instrument faces. The decal harness was not used
because I planned to install the pilot.
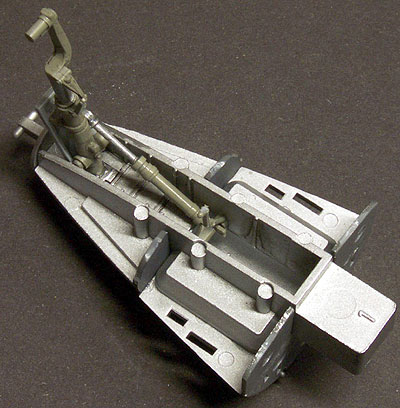 The interior of the forward fuselage was the next sub-assembly.
Tamiya's assembly sequence requires the nose gear, including the forward gear
door, to be installed at this time. The interior of the forward fuselage was the next sub-assembly.
Tamiya's assembly sequence requires the nose gear, including the forward gear
door, to be installed at this time.
I was not totally comfortable with this
sequence as I was worried that I would break the gear leg at some later stage of
construction. However, the engineering of the kit does not offer any easy
alternative so I decided to follow the instructions. I painted the gear bay
silver, the gear leg RLM 02 Grey and the forward door Aeromaster RLM 76 Light
Blue before joining these parts. Note that it is not necessary to glue
the nosegear assembly to the metal noseweight. As it turned out, the gear leg was very sturdy
and suffered no damage despite my usual ham-fisted handling. I did manage
to break off the delicate gear door actuator though!
The cannon access hatch was destined to be glued shut so I did
not install the cannon or the shell ejection chutes.
After small details were glued to the fuselage interior
sidewalls, the cockpit and nose gear sub-assemblies were secured to one fuselage
half before trapping them with the other half. Interestingly, Tamiya have used
locating tabs for the fuselage instead of pins and holes. I assume that this
minimises the risk of sink marks on the outside of locating holes. It also
permits some welcome adjustment when joining the fuselage halves.
The fit of the fuselage was perfect - no seams or gaps
whatsoever. However, for some reason the cannon bay floor rode fractionally high on one side,
resulting in a small step. In turn, this meant that the forward bulkhead in the
cannon bay was also marginally too high, interfering with the fit of the closed
cannon bay cover. I addressed this problem by trimming the top of the forward
cannon bay bulkhead. This would not have been an issue if I opened the gun bay.
The Four-Gun Me 262A-1a Nose
Tamiya's kit only supplies the two-gun nose for the Me 262A-2a
but my subject aircraft was a four-gun Me 262A-1a.
Modellers wishing to pursue this option now can purchase a resin
four-gun nose panel from either Eagle Editions or Cutting Edge, but my
impatience did not permit me this option. I therefore needed to add two cannon
troughs to the kit's upper nose.
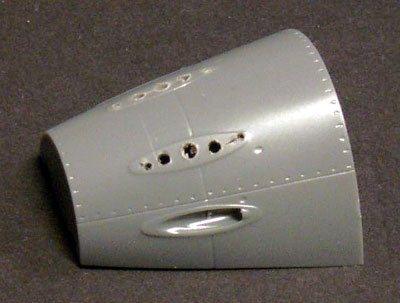
Fortunately, Tamiya outline the position of the upper guns with
raised oval fairings.
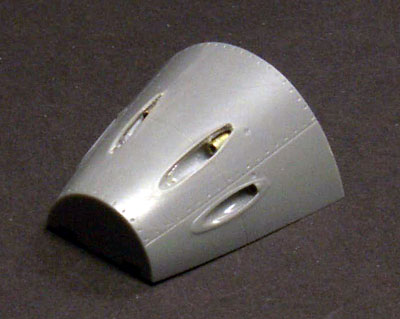 First I cut the oval holes in the kit nose. I marked the cutting
position by drilling tiny holes with a pin vise at each end of the new troughs.
I drilled larger holes in the centre of the fairing. These holes corresponded to
the full width of the troughs. For good measure, I drilled another two holes for
each trough too. First I cut the oval holes in the kit nose. I marked the cutting
position by drilling tiny holes with a pin vise at each end of the new troughs.
I drilled larger holes in the centre of the fairing. These holes corresponded to
the full width of the troughs. For good measure, I drilled another two holes for
each trough too.
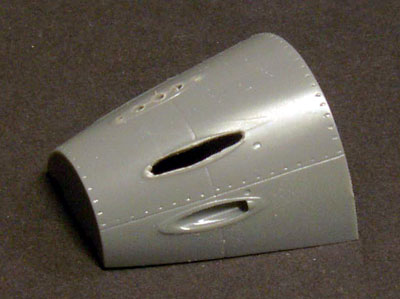
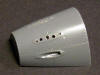
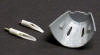
Now that the nose resembled a sieve, I used a sharp hobby knife
to cut out the plastic between the holes. Both rough oval holes were cleaned up
with sandpaper and knife. I thinned the plastic under the holes with coarse 180
grade sandpaper.
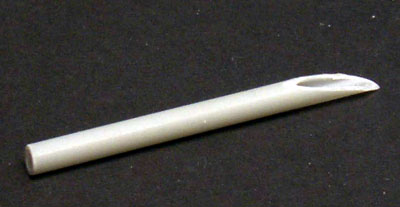
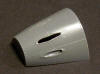
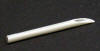
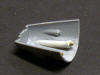
Next, I cut two length of Contrail .060 (internal diameter) plastic tube for the
troughs. I sliced each tube diagonally into a wedge shape, then offered the
trough to the underside of the holes in the nose. The plastic of the troughs was
trimmed and sanded until they matched the oval profile of the holes. A short
length of brass was added to each trough to represent blast tubes. In
retrospect, these were neither accurate nor necessary - I should have simply
blanked off the end of the troughs. The completed troughs were glued underneath
the holes and a thick coat of Mr Surfacer was applied inside the troughs to
blend the tubes with the oval holes.
Click the thumbnails below to view
larger images:
|
|
|
|
Holes were drilled to mark the outline of the oval to be cut from the upper nose.
|
|
|
|
A sharp hobby knife was used to cut out the spaces between the holes.
|
|
|
|
Contrail .060 plastic tube was sliced to match the profile of the hole in the kit nose.
|
|
|
|
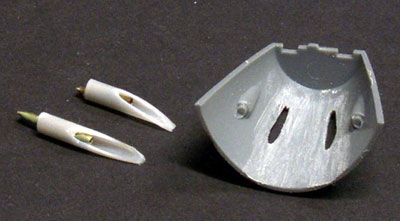
The plastic of the nose was thinned and the tubes were trimmed to fit. Brass tube was used to represent gun barrels.
|
|
|
|
The view from underneath the modified nose.
|
|
|
Wings, Engine Nacelles and
Tailplanes
The wings and engine nacelles for the Jumo 004 proved to be
completely trouble free.
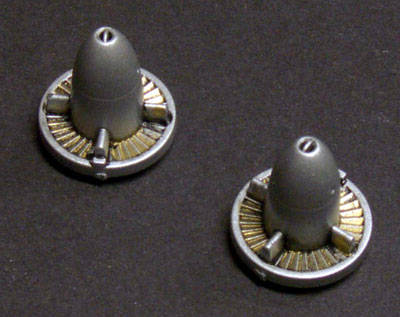 I took a
little time to paint the details of the intake, including the gold turbine
blades. A wash of thinned black oil paint deepened the appearance of these
blades. The main nacelle halves are equipped with styrene spacers. Don't cut
these off even though they may look like scrap! I took a
little time to paint the details of the intake, including the gold turbine
blades. A wash of thinned black oil paint deepened the appearance of these
blades. The main nacelle halves are equipped with styrene spacers. Don't cut
these off even though they may look like scrap!
I followed this sequence when assembling the wings and nacelles:
-
Glued upper and lower wing parts
-
Glued engine nacelle halves
-
Added jet intakes
-
Glued partially assembled nacelles to
lower wings
-
Assemble and add jet exhaust to rear
of nacelle, taking care to align the top with the trailing edge of the upper
wing.
The fit of my wing and engine assemblies was perfect.
I offered the wing to the assembled fuselage to test fit these
major components. The fit was so good that I decided to leave the wing in place
and simply run a bead of Testor's Liquid Glue around the join lines to bond the
fuselage and wings.

The horizontal tail parts are joined using dovetail tabs. This
ensures correct alignment. I also liked the inclusion of separate, delicate trim
tab actuators. Take a few minutes to figure out their alignment before gluing
the parts - they are a tiny bit tricky, but they look great in-place.
The rudder is separate. It attaches to the fuselage with the
aid of a long, thin tab. This method works very well.
Finishing Touches
The windscreen is cleverly moulded with a section of the forward
upper fuselage deck. The vertical and horizontal joins both fall on panel lines.
Furthermore, the internal armoured glass is a separate part that is glued to a
locating pin under the front deck section. For a reason I do not remember
(probably because it was very late at night), I did not paint the prominent frame
around the armoured glass. This error was impossible to correct once the
armoured glass was secured behind the windscreen, so don't forget to paint this
part before assembly.
A small step was revealed on one side of the windscreen when it
was glued to the fuselage. This will be easily eliminated with a few swipes of a
sanding stick or a little putty.
The cannon ejector panels were glued to the lower fuselage. The
top join of these panels do not represent a panel line on the real aircraft, so
I brushed on a thin coat of Mr Surfacer in this area. Light sanding later
eliminated the join line altogether.
The navigation lights are very impressive. The clear parts have
tiny holes to represent the globes of the navigation lights. I used a fine piece
of brass wire to fill these tiny holes with spots of green, red and white. The
reflecting surfaces of the lights were then painted silver before gluing the
parts to the wings and the rudder.
The remaining parts including the main undercarriage, the
wheels, pitot tube and FuG-XXXX aerial were painted at this stage, but they were
not actually fitted to the kit until after the whole model was painted.
|
|
|
|
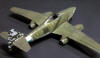
The model has received its basic paintwork.
|
|

|
|
The pattern and conformity of the Cutting Edge dappled fin decal was excellent, but the colour looked too blue.
|
|
|
|
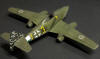
The dapple pattern on the tail was resprayed with a dark mix of RLM 83.
|
|
|
|
Decals were added from the Experten sheet.
|
|
|
|
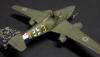
The model after its weathering, top coat and with its RV band resprayed blue and white!
|
|
|
|
Building the Sd.Kfz. 2
Kleines Kettenkraftrad |
Click the thumbnails below to view
larger images:
Model, Images and
Article Copyright © 2002 by Brett Green
Page Created 29 April 2002
Last updated 04 June 2007
Back to HyperScale Main Page
Back to Features Page |
 Home
| What's New |
Features |
Gallery |
Reviews |
Reference |
Forum |
Search
Home
| What's New |
Features |
Gallery |
Reviews |
Reference |
Forum |
Search