|
Messerschmitt Me
163B
by Peter Kormos
|
|
|
Messerschmitt Me 163B |

available online from
Squadron.com
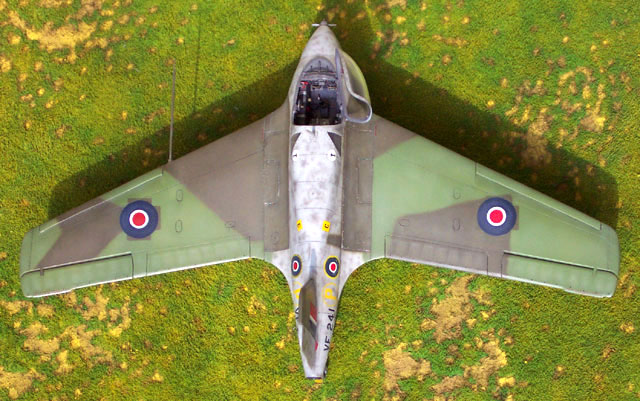
Here is my 1/48 scale Messerschmitt
Me163B-1a kit from Revell. Most of the detailing was done with copper
wires, copper film and hypodermic needles. I didn't use any resin or PE
update sets ... except for the seat belts which came from my Eduard Me
262 PE set.
Wings
I started construction with the wings. I
glued the halves together and after the glue was dry, I cut in the
ailerons with a little saw. Then I sanded the wings' trailing edges
because they looked a little bit thick to me. Later, when I glued the
wings to the fuselage, I noted, that each wing was about 1 mm thicker
than the wing root's joint on the fuselage. I sanded down the surplus
both on the top and bottom of the wings and rescribed the lost panel
lines. Some of the rivets were lost during sanding, so I had to replace
them with a needle.
Removing the long pitot tube from the sprue
is a tough job and I didn't bother. Instead, I scratch built one from
two hypodermic needles in different diameter. Hypodermic needles do not
bend or crack that easily, and there's even that little hole at the
tip...just perfert.
Cockpit
Next came the cockpit. Along with my resources, I managed to download
some super pictures from the Net. These were on my PC and I made some
sketches on A4 papers to help me when detailing the cockpit.
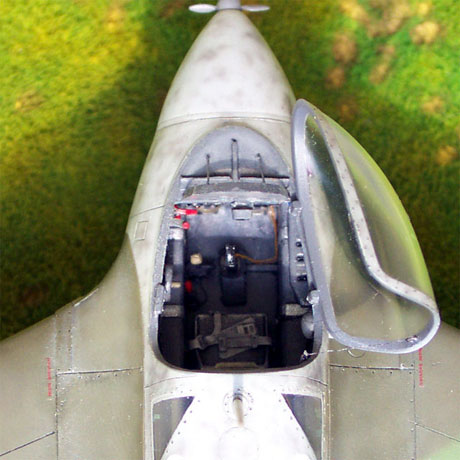 I
replaced the tube of oxygen regulator with one made from copper wire,
and added some other cables to the cockpit's starboard side. I sanded
the sides of the seat a little, because they were a bit thick. Then came
the instrument panel. First I sprayed a coat of white, then RLM66 and
painted the instruments houses in black. Then I carefully washed back
the white to show the little details of the instruments and each little
instrument received it's drop of clear varinsh to make the impression of
glass in the instrument. I
replaced the tube of oxygen regulator with one made from copper wire,
and added some other cables to the cockpit's starboard side. I sanded
the sides of the seat a little, because they were a bit thick. Then came
the instrument panel. First I sprayed a coat of white, then RLM66 and
painted the instruments houses in black. Then I carefully washed back
the white to show the little details of the instruments and each little
instrument received it's drop of clear varinsh to make the impression of
glass in the instrument.
There was quite a big opening at the front
of cockpit, where the rudder pedals go. I decided to scratch build this
area from flattened sprue because this area is barely but visible on the
finished kit. I also worked on the gun sight, but after examining my
VF-241 pics I noted that it was removed, so I didn't build it in. Next
to the control stick, there's a little pump, what I've scratch built
from sprue and copper wires in different diameter. In front of the
cockpit, before the wide glass plate there was a "little bump" which
supposed to be some sort of support for the gun sight. I sanded this
area down and added some detail with copper film and hypo needle.
The overall cockpit color is RLM 66. After
spraying the base color, I sprayed a mist of slightly whitened RLM 66
(post-shading) and a wash of well thinned black color was used at the
corners.The headrest was painted in leather and the instruments, levers
and other gadgets were highlighted in red, yellow and blue as apprpriate.
After I glued in the little levers and handles with super glue, the
whole cockpit was secured into the upper fuselage half.
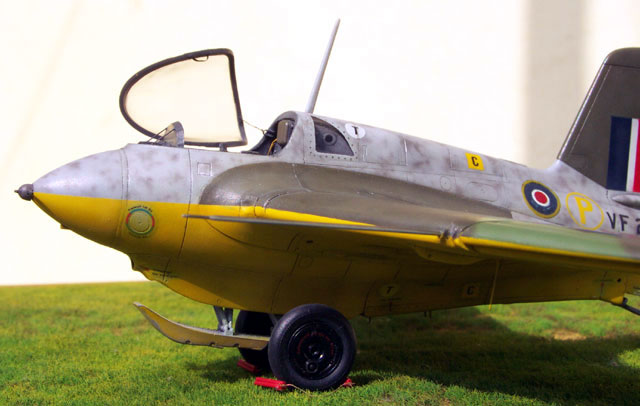
The windshield had some scars and bumps
which were sanded with #500, #1000 and #2000 sanding papers and then
polished with Tamiya polishing compound. I cut a thin stripe from copper
film, then a little CA to glue it in place and there was a little handle
for the canopy.
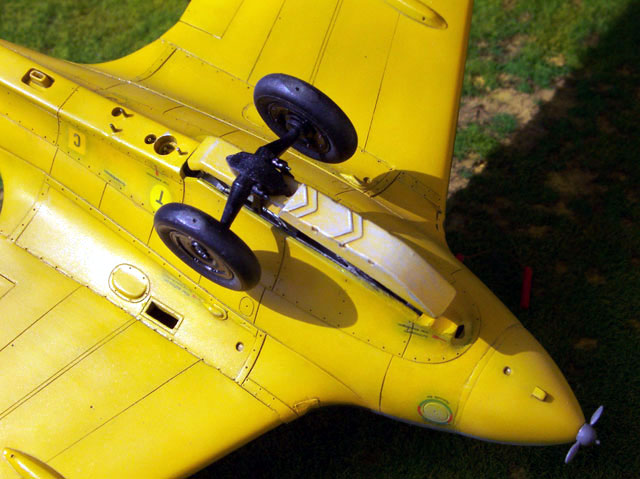
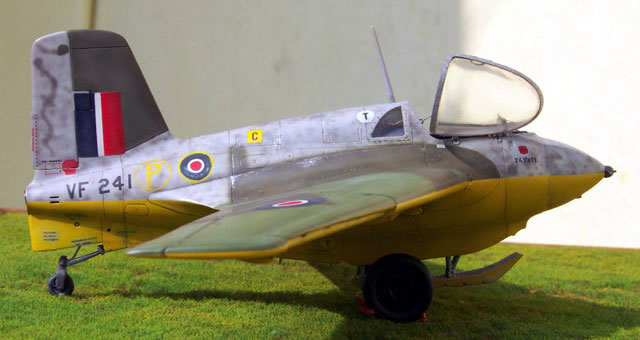
Landing Skid
Next I started to work on the landing-ski and the ski-bay.
On the sidewalls of the bay, there were
some holes but they looked a bit small to me, so I widened them a little
bit with a drill. Then I thinned down the sidewalls where the holes were
to make them look a bit more real ... although not much can be seen from
this area on the finished kit... The ski itself comes from two parts,
which fit together badly, so plenty of putty was used there. Then I
glued the landing-ski and actuators together, and added little copper
wires where the hydraulic lines run. Then the ski-bay, landing-ski and
actuators were painted in Testors polished aluminium. Lower half of the
actuators and the ski was then roughly sprayed in RLM76, leaving the
aluminium finish on the upper half.
Fuselage
On the bottom of the fuselage, there are little drain pipes for dumping
C and T stoff. These were replaced with thin hypo needles (same one was
used at the pitot tube). Behind the cockpit, there are two triangular
shape windows. These come in one, clear, U shape part. Because there was
quite a big gap between this part and the fuselage, I fought with the
elements for some time util I managed to glue it in place. In the little
tail gear bay, there were two ejector pin marks, what I had to seal and
then sand.
I glued together the tail section. In the
tail gear bay, there was a big opening to the vertical fin what I've
sealed with the help of my old credit card. I cut down the actuator from
the tail gear, and carved two holes into the strut, where it connects to
the fuselage. Then, I've made a little hydraulic bin with the pipe for
the gear bay and glued it in place. Along with the landing-ski, the tail
gear was glued in place after painting the kit, too.
The question now was: how could I make this
little kit a little bit more attractive?
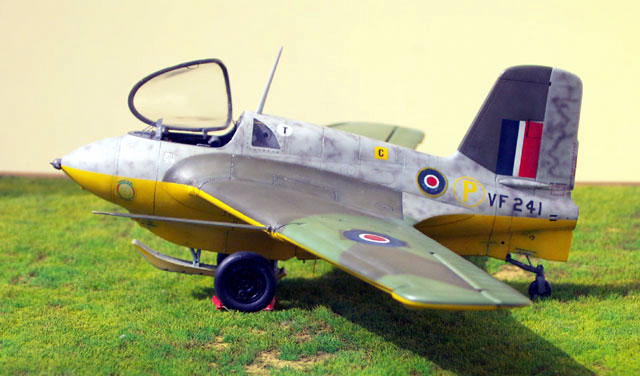
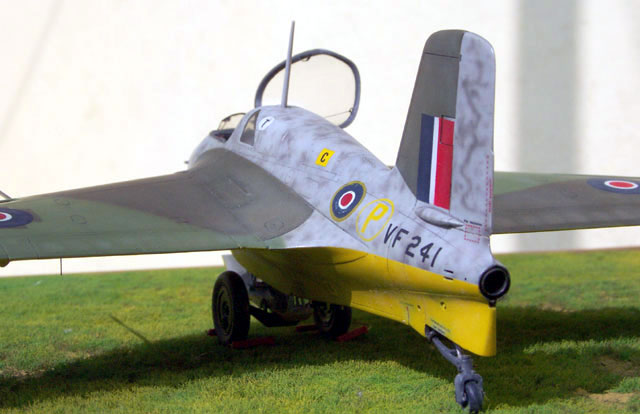
I found the answer when I saw a photo of
VF-241 in my Me163 book. I knew I had to build this version. It still
wears the original German camo and stencils but with the extra of RAF
touch ups.
The fuselage and the lower surfaces - where
stencils go - were painted in RLM76. Then came the RLM74 mottle which
took me 2 hours to complete. Next came the yellow for the lower surfaces
and for the ski (by now, the ski was in aluminium, RLM76 and yellow).
Upper wing surfaces were painted in RLM 81/82 and then a light coat of
pale RLM81/82 came (post-shading). Wing roots and the vetical fin were
painted in RAF dark green. For masking, I used Tamiya masking tape and
Humbrol masking liquid.
For the camo colors, I used Gunze acrylics: H417, H69, H421, H422 and
H73 and Gunze H413 for the yellow.
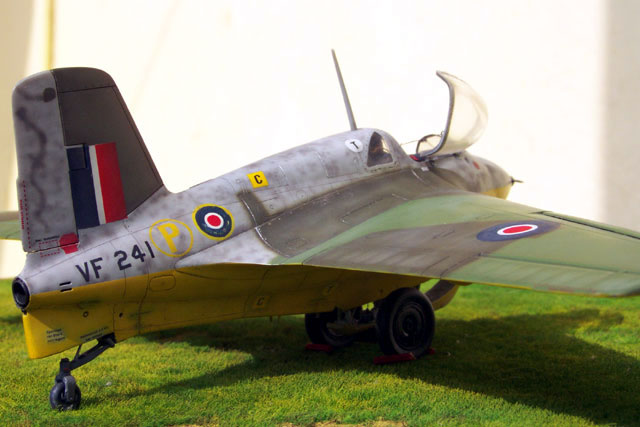
The finishing clear and flat coats were Gunze H30 and H20. "VF 241"
letters came from a Carpena decal sheet, and the kit's original stencils
were also used. National insignia, markings and touch-ups were sprayed
on with home made masks. For the roundels I used the following paints:
Panel lines were flown in with a thinned mixture of Tamiya X-18 and
XF-49.
One of my long time dreams came true when I
got my hands on this Komet kit.
At first I thought it was going to be an
easy ride to finish this little bird - no main gear bay or piston engine
to fiddle with, nice little shapes, etc. First, I planned to build the
kit straight from the box, but I wound up adding some little details
here and there and it took a little longer to finish this little model
than I had planned.
Thanks to Internet, I could complete the
kit with the help of some fellow modellers, like David Fleming, Frank
Pipek, Mikael Dahlström, Mark Mills and special thanks to the help of my
great mentor, István Vadász.
Thanks guys for the support!
Click on the thumbnails
below to view larger images:
Model, Images and Text Copyright © 2002 by
Peter Kormos
Page Created 05 May, 2002
Last Updated 04 June, 2007
Back to HyperScale
Main Page
Back to
Features Index
|
 Home
| What's New |
Features |
Gallery |
Reviews |
Reference |
Forum |
Search
Home
| What's New |
Features |
Gallery |
Reviews |
Reference |
Forum |
Search