|
Messerschmitt Me 163B
by
Pierre-Edouard Coiffard
 |
|
Messerschmitt Me
163B |

HyperScale is proudly supported by
Squadron.com
I am a French modeller and I came back to the hobby two years ago
- very gradually. I specialize in 1/48 aircraft and I have
recently started some 1/35 military models. In common with a lot of
modellers I have 3 or 4 models in progress (the first to be finished
not being necessarily the first to be started). This Me-163 Komet is
the first one I'm close to completing since my reintroduction to
modelling!
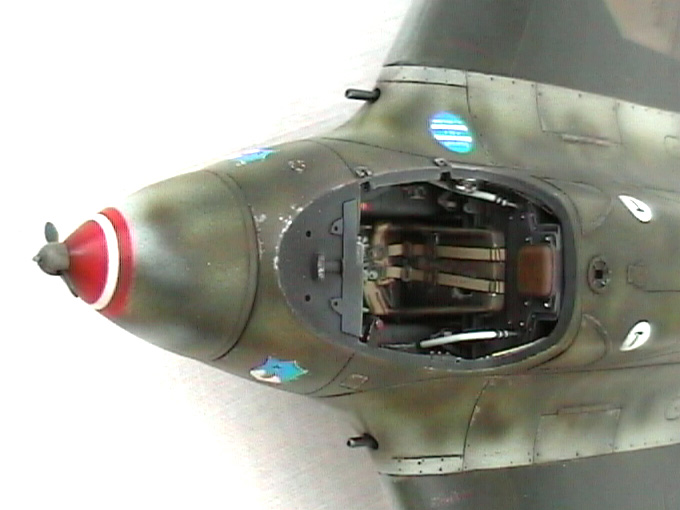
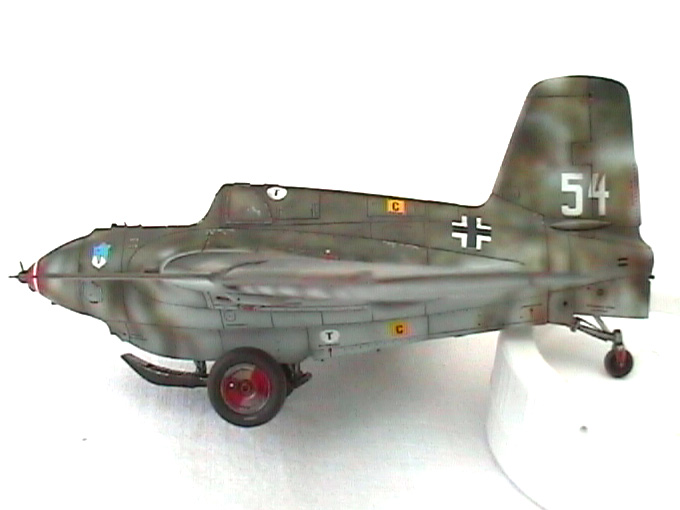
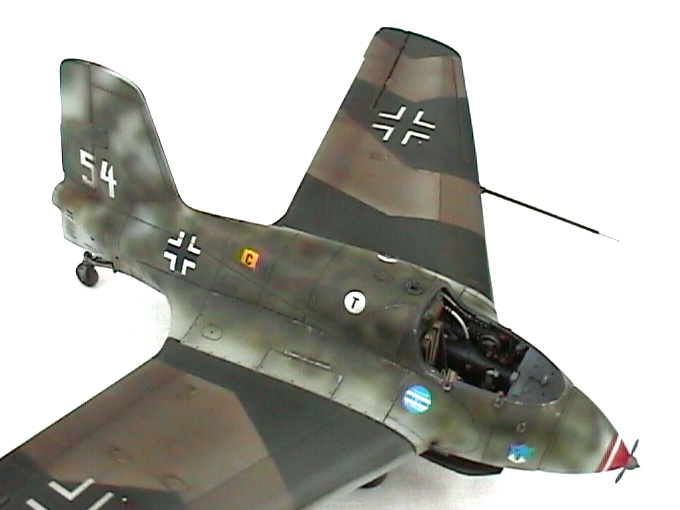
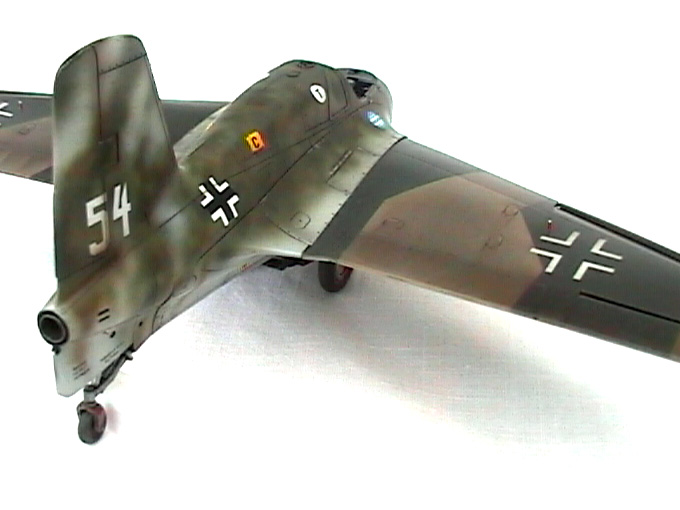
This is the 1/48 Revell model (ex Dragon).
It's a good base but not a model to the Tamigawa standards. I have
noted a lot of flash, poor detail, poor fit and panel engraving is a
little crude (was it already the case with the original Dragon kit
?). I'm not really picky about accuracy. I give preference to a
general appearance, weathering and painting than to a quest for the
ultimate accuracy.
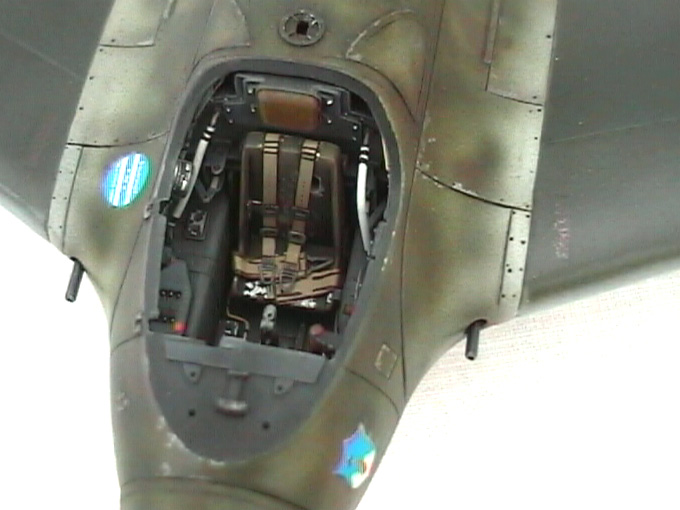
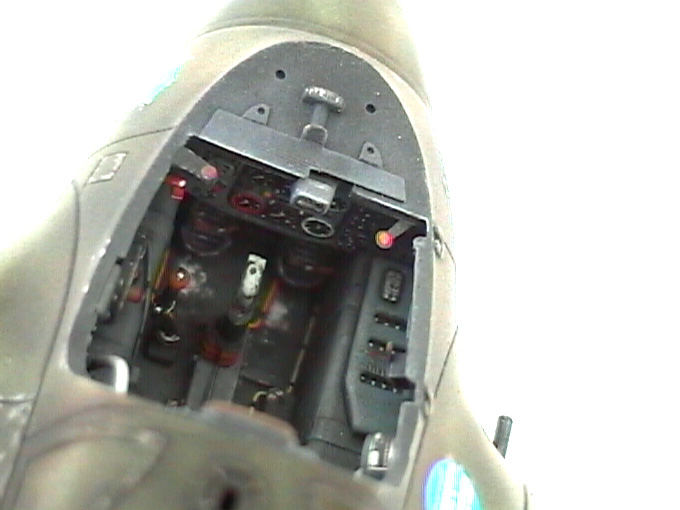
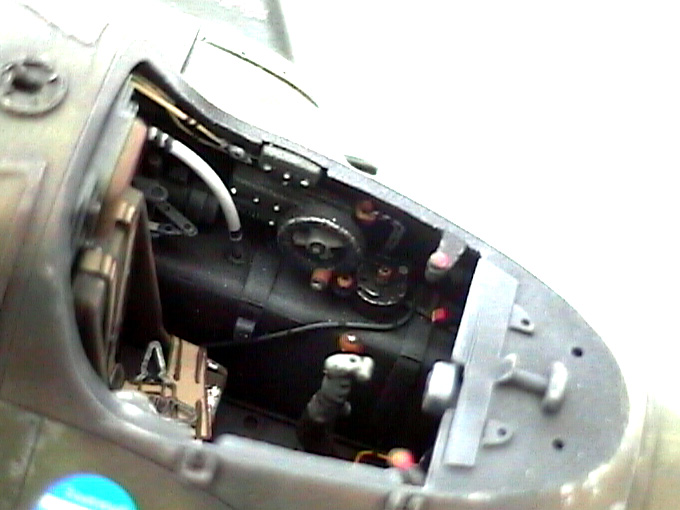
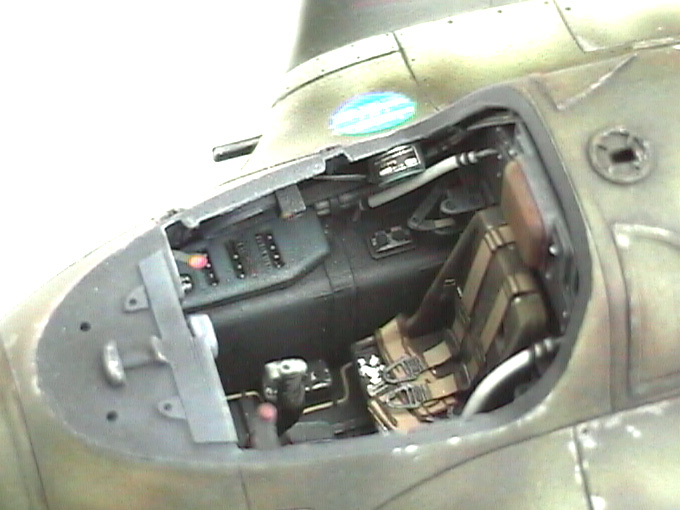
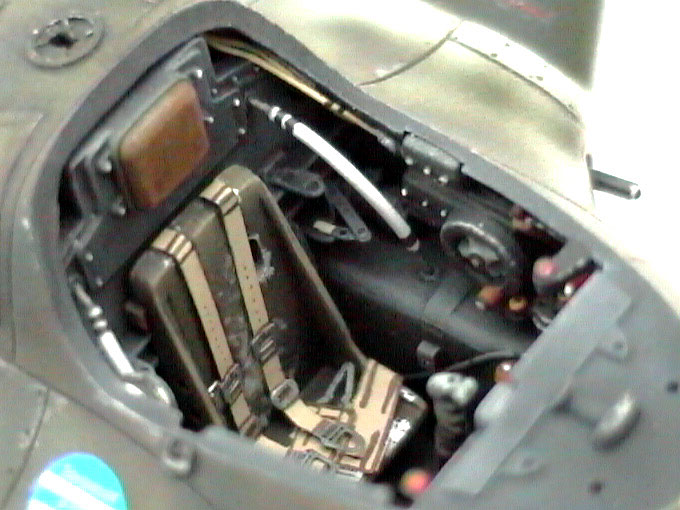
I used some of the Part photo etch set and a lot of scratchbuilt
items (copper wires, plastic rods and strips...), essentially for
the cockpit. Taking advantage of my new involvement in military
models, I used PE parts to detail the cockpit from Aber PE sets
destined for Panzers! Aber sets have a multitude of small parts that
you rarely use entirely, the remaining parts can increase your
spares box. This is another advantage of sharing different modelling
disciplines as aircrafts and AFV apart from the obvious weathering
and painting techniques. I've found, as an example, AFV modellers
much ahead as far as developping weathering and painting techniques
are concerned. I've been able to learn a lot from them to improve my
techniques in building aircraft models.
Click the thumbnails below to view
larger images:
I had difficulties with the clear kit part featuring the
observation windows behind the canopy and seat and the structure
provided by the Parts set surrounding those windows. First because
there was a gap between the kit part and the fuselage. Some putty
came to the rescue. Secondly I had to bend and glue a metal part on
the clear part. For this I used precauciously CA, not too much no to
alter the transparency, but enough to make the metal part take the
exact form of the plastic part. The joint was nevertheless not
perfect and I had to use some Mr Surfacer to obtain a proper
junction.
I then had to sand and finally use a good quantity of Tamiya
compound to give back transparency to those windows. Next time I
won't use those PE parts, unless somebody gives me some good tricks.
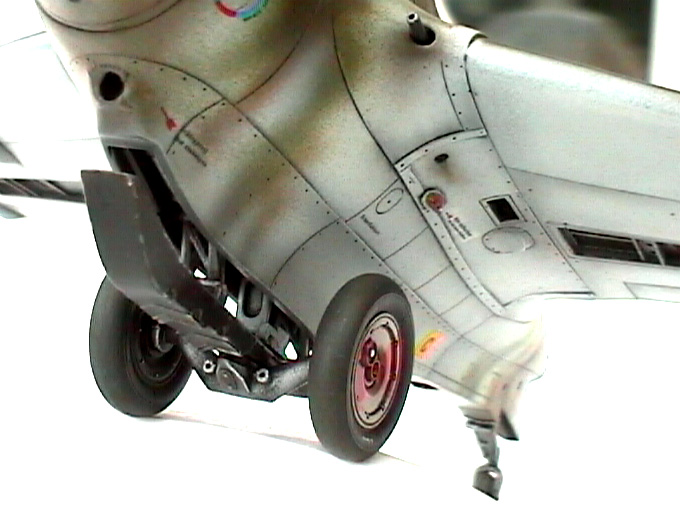
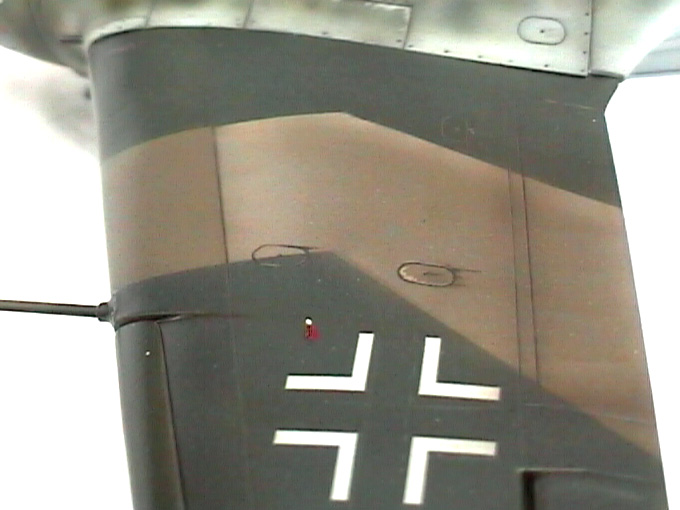
I wondered whether I should open the ejection port for spent
cannon cartridges (rectangular opening on the underside of the wing
root). In the end I decided just to paint it black.
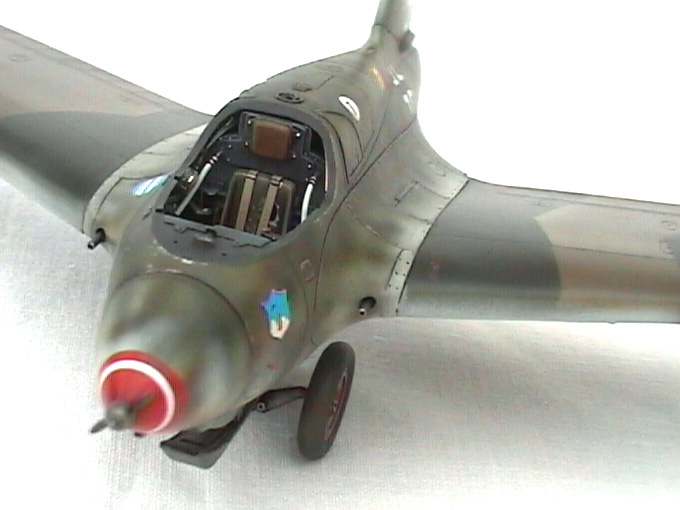
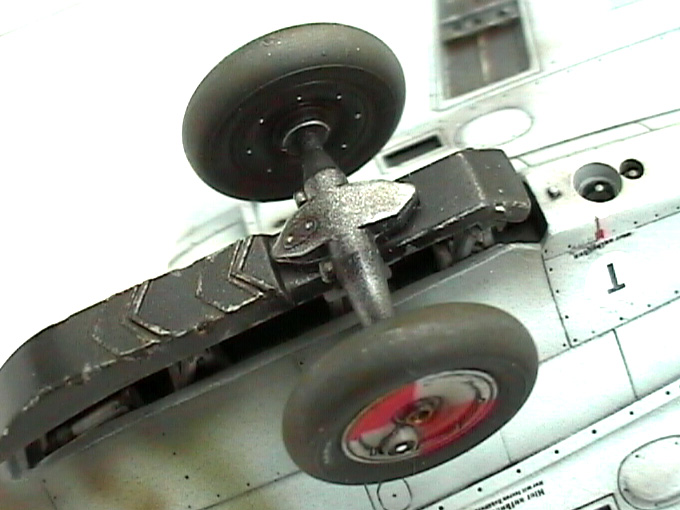
The wings roots needed some good sanding as the nose, the tail
section, the hole for the rocket motor and the tail wheel bay also,
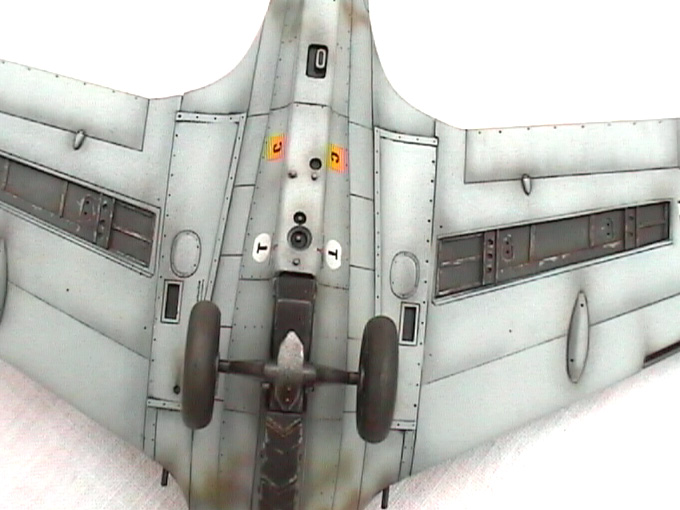
but nothing serious. The landing flaps on the Parts PE set was a
good idea. It is easy to cut the underside wings, to scratchbuild
the interior with plastic strips and at the end it makes the model a
little more dynamic. For a next Me-163 project I'll try to cut
elevons, trim flaps and rudder to position them more dynamically.
Another good idea is the slats at the leading edge of the wing.
Even though the kit proposes them separate probably for a moulding
commodity and not for anything else as they were fixed on the real
aircraft, I would love to see our preferred manufacturers be
inspired by that idea when moulding leading edge slats of modern
aircrafts...
I chose to show the tail wheel with the fairings removed.
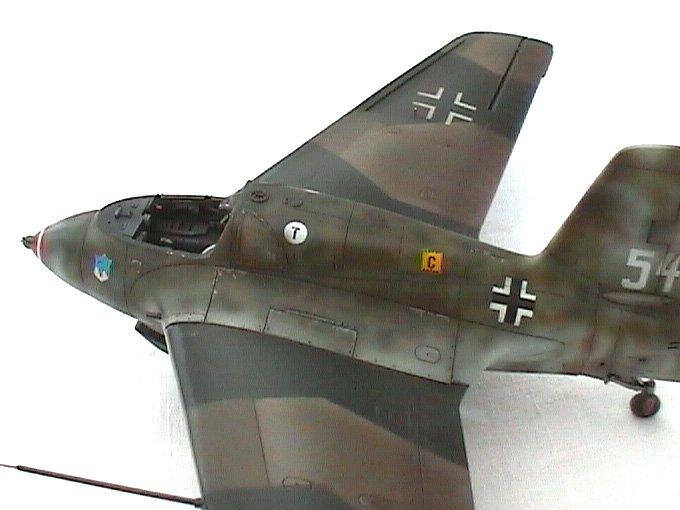
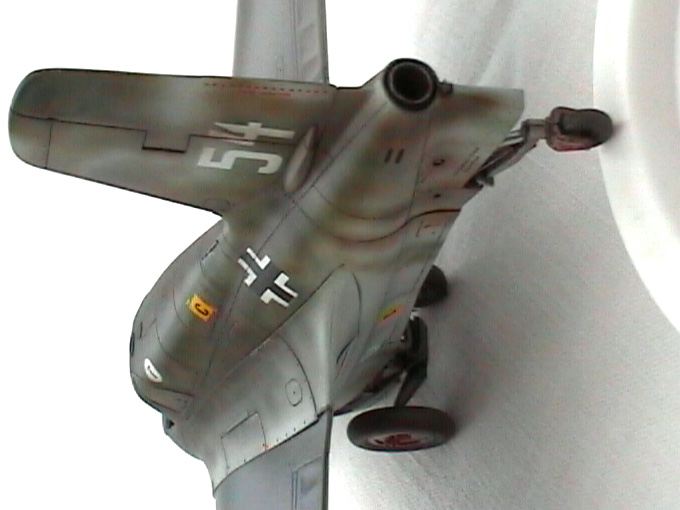
Painting was delicate with the mottling on the fuselage made from
different green and brown colors and with fading the bicolor
painting scheme of the wings by creating different shades for the
green and brown.
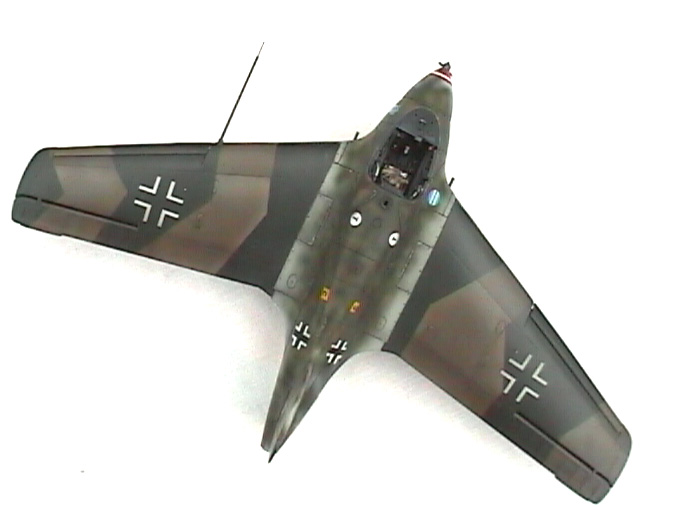
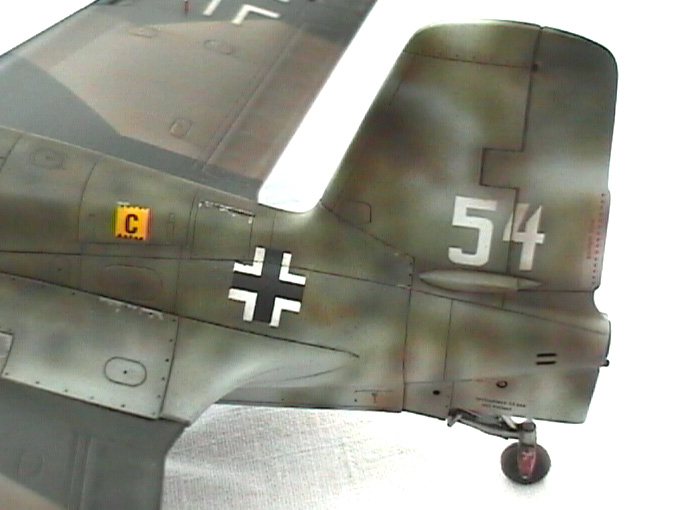
A lot has been said about the fading technique of panels for
single color paint scheme (l applied those advices on the underlying
of the aircraft) but until I face the problem I didn't realize how
fading a bicolor paint scheme was challenging. There's a lot of
possible ways to fade bicolor paint schemes, I choose the more
obvious one to me given my project which was to paint the bicolor
scheme in a normal way and then to take faded tones for the two
previous colors by adding some white. The issue is that the logic of
airflow and panel structure is different from the logic for
camouflage colors demarcation: the airflow blows the same way
whatever single or multi-color camouflage. I had to respect the
panels structure, the logic of how and where the airflow is supposed
to erode the paint, and keep a certain coherence in the faded shades
of the camouflage colors, especially where they coexist in the same
worn area. In other words, in an area destined to be faded and where
both colors joint, the faded appearance must look close for each
color, the two colors must seem to blend due to fading. As an
example on each wing or panel, I defined the sub-area that should be
faded. I then applied the two toned down color camouflage using the
same masks used to apply the initial paint scheme. I didn't exactly
fade the center of panels but the higher and front portions of wing
panels where the airflow is supposed to be the stronger.
After I finished, I thought that next time, instead of using
white paint to fade each color I would use a light grey or sand
color that would better blend the two toned down camouflage colors.
Another technique would have been to airbrush a different color as
buff or light tan to give this faded appearance. It is used in AFV
modelling to give a dusty appearance to lower hulls of tanks. The
drawback is to control the quantity to airbrush to keep a faded look
and not a dusty look.
This method was purely experimental, as on each of my model I try
a new technique to improve. It doesn't pretend to be any better than
other techniques that, by the way, I'd be curious to hear about.
I also first used on that occasion Kleer acrylic varnish. One single
word: great ... until I used decal solvent on it which I think
dissolved it leaving around some decals unwanted rings. Next time
I'll let the Kleer coat dry a little more and I'll be prudent not to
use too much solvent for decal application !!! Another good thing
with Kleer is that it even fixed this little mess as when I
airbrushed further coats after decals were applied, it gave back to
the surface a very smooth finish and you could not even tell that
something had happen. I even decided to finish the model not with my
usual flat clear but with a mix of Kleer and flat clear to give it a
satin appearance which I think suits perfectly jet aircrafts. Decals
are from the kit.
The model is still not finished. I have to paint the bulletproof
glass, then glue the canopy, landing flaps and different little
antennas.
At that time I'd like to thank the Revell support team in
Germany, as the bulletproof glass in my box was unusable, I've sent
them an e-mail and received promptly a new part by mail. I'll send
you additional pictures of the finished model in due time.
In the end it was a nice little bird to build with so much
character. May be this project took me more time than expected given
what I mentionned earlier about details and fit, but being a small
plane there was not a lot to be built.
I plan to build other Me-163, one replicating the aircraft captured
by the British with this mix of German and British camouflage and
markings, another one with all bays open may be with the help of the
Aires detail set (any comments on it ?). And finally I'd like to
built the "Shusui" J8M1 Interceptor, the Japanese version of the
Me-163, anyone told me that this kit was a jewel ... (any other
comments on that kit, may be even a perfect base for a german Me-163
??). Any other ideas guys?
I can heartily recommend the Aero Detail volume 10. These
monographs are as usual of great help. Plus in this volume you get
two monographs for the price of one, as you also get precious
information on the He-162 too (that I plan to built soon).
I would also like to thank several websites and their webmasters
for providing unvaluable information about the Me-163.
Click the thumbnails below
to view larger images:
Model,
Images and Article Copyright © 2002 by
Pierre-Edouard Coiffard
Page
Created 12 December 2002
Last updated
04 June 2007
Back to HyperScale Main
Page
Back to Features
Page |  Home
| What's New |
Features |
Gallery |
Reviews |
Reference |
Forum |
Search
Home
| What's New |
Features |
Gallery |
Reviews |
Reference |
Forum |
Search