|
LAV-25 Mortar
Carrier
by
Mike Grant
|
|
|
LAV-25 Mortar Carrier |

HyperScale is proudly supported
by Squadron
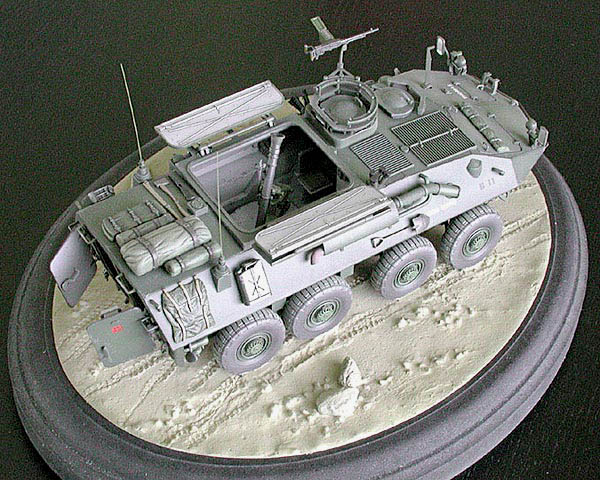
Here is my Italeri 1/35 LAV-25 Mortar Carrier
This is the first armour kit I've built in 30 years as I'm predominantly
an aircraft modeller, so please be gentle. Judging from the reaction of
some of my aircraft-model building friends I should perhaps start the
article with "Hi, my name is Mike, and I built an armour model".
I bought this kit when I stopped by at a local
hobby store to pick up the Monogram F-86D. They didn't have it in stock,
and being unable to leave the store empty-handed I emerged with this
Italeri LAV-25 kit instead.
When I opened the box that evening I was amazed at the number of pieces,
virtually none of them recognisable to my aviation-skewed eyes. For some
reason though its chunky lines really captured my imagination and I
started building it almost immediately (ignoring the feelings of guilt
on behalf of the stack of kits sitting patiently waiting to be started).
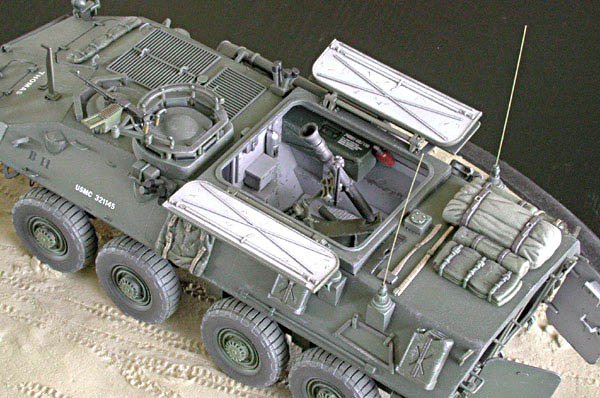
I was impressed with the level of detail and the
overall fit of parts.
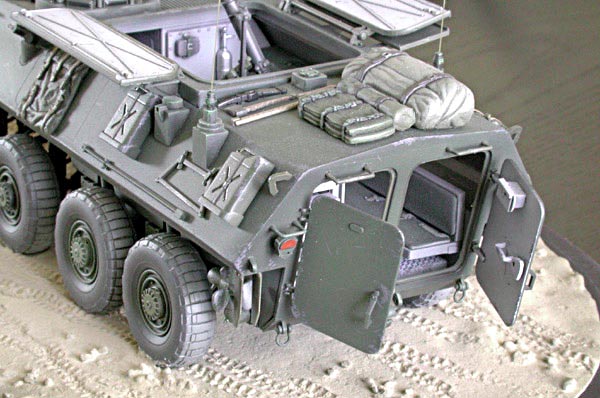
Cleaning up the ejector pin marks and seams on the
tiny parts was a chore, but the only slight problem I ran into was the
fit of the upper and lower main hull parts. A dab of filler cured that
easily enough.
The drab colour scheme needed livening up a bit, so
I undercoated the entire model in black then airbrushed into it with
gradually lighter shades of Olive Drab.
I selectively applied burnt-umber and black washes
around the raised detail followed by a light drybrushing of pale greens
and yellows.
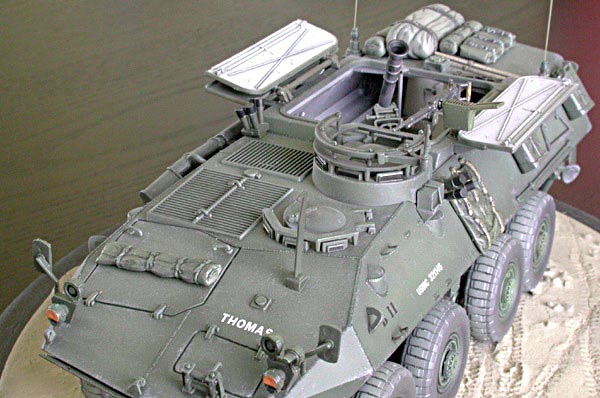
After the minimal decalling I painted scratches and
scuffs with dark grey paint, enhanced with pencil-graphite and the
occasional use of a silver 'Prismacolour' pencil.
After I'd completed the model I read somewhere that
Italeri's interior is totally fictional! Whatever :-) Looks OK to me.
My first attempt at the base wasn't too successful.
I'd got this elliptical base from a craft-store which I sprayed black.
Deciding it needed some kind of groundwork I went down to the
model-railway shop and bought a sheet of grass-textured paper. The grass
was brilliant green so I toned it down with a bit of buff paint until it
looked more realistic.
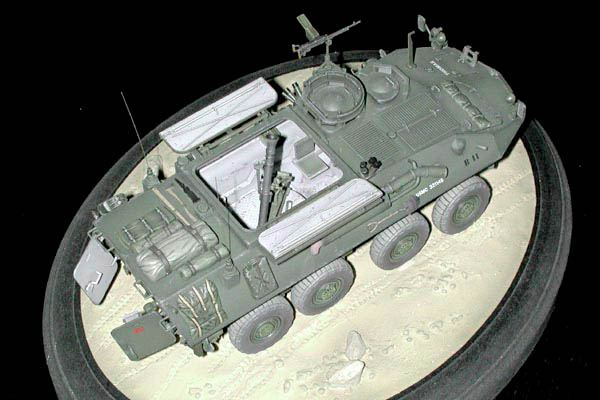
I then cut a random 'kidney' shape out of the paper
and glued it to the base. I was quite pleased with it until my
girlfriend asked why I'd modelled a tank sitting on a putting green (I
should say she's normally very supportive of my hobby), so I stripped it
off and built a more earthy texture using household spackle mixed with
PVA glue. A few bits of gravel and some rocks donated from my
girlfriend's potted-plant collection finished it off.
Model, Images and Text Copyright © 2002 by
Mike Grant
Page Created 16 April, 2002
Last Updated 04 June, 2007
Back to HyperScale
Main Page
Back to Features Index
|
 Home
| What's New |
Features |
Gallery |
Reviews |
Reference |
Forum |
Search
Home
| What's New |
Features |
Gallery |
Reviews |
Reference |
Forum |
Search