|
Nakajima Ki44-II Shoki ("Tojo")
by
Ian
Robertson
 |
|
Nakajima Ki44-II Shoki ("Tojo") |

Hasegawa's 1/48
scale Ki 44-II is available online from
Squadron.com
The Ki.44 Shoki was Japan's answer for a single engine interceptor that could
climb rapidly to meet American bomber formations. What the aircraft gained in
speed it lost in maneuverability - the unusually stubby wings limited the
aircraft's stability during rolling maneuvers.
However, in the hands of a skilled pilot the Ki.44 was an effective, if not
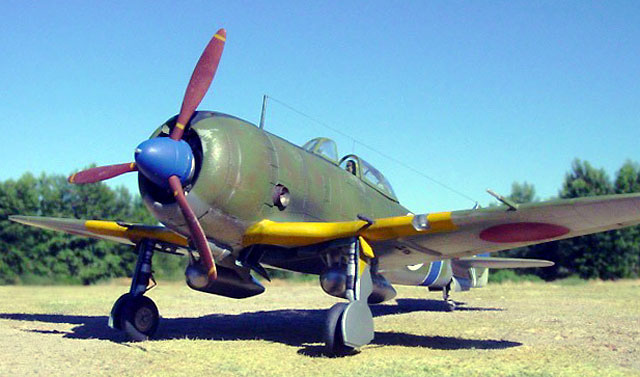
well-liked, weapon. My model depicts a Ki.44-II flown by Major Tojo Saito,
commander of the 85th Sentai in Canton, China during the summer of 1944.
Based on the relatively small number of these models displayed on internet
websites and in magazines, Hasegawa's kit could be described as a well kept
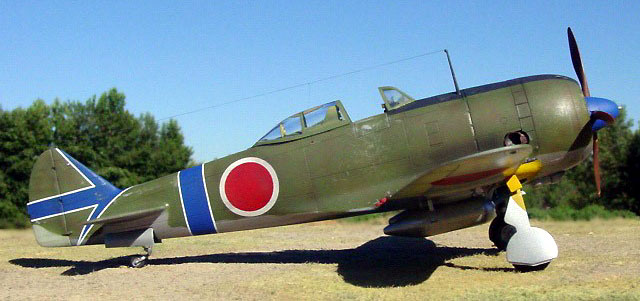
secret. With its stocky fuselage, stubby wings, and unconventional tail, the
aircraft is by no means the epitome of elegance. Yet its these same features
that make the Ki.44 such an interesting subject to build, particularly for those
looking for something out of the ordinary. Hasegawa has once again produced a
kit that fits perfectly and can be built easily even by those with little or no
modeling experience - my model took about a week of modest effort in the
evenings.
Although the kit builds great out of the box, I decided to add Moskit exhausts
(which are made from thin metal), Eduard seatbelts, and generic etched metal
scissors over the oleos on the landing gear. The Moskit exhausts, which fit
perfectly, were well worth the expense in my opinion because they are so
prominent on the finished model.
Using Polly Scale acrylic, the cockpit was painted Weyerhauser Green (a
railway color which is a good match for Nakajima interior green). I then used a
blue-green chalk pastel to create an "aotake" effect - wasted effort perhaps
because the cockpit interior is hard to see once the model is put together.
The first step in painting the exterior was applying yellow bands on the leading
edge of the wings. The kit provides decals for these bands I recommend that you
avoid these at all costs. Each leading edge band consists of several decals that
have to fit over curved surfaces. I've tried these decals on another Ki.44
model...it just doesn't work, particularly since Hasegawa decals do not react
well to decal solvents.
Painting is far simpler. Once painted the yellow bands can be masked until the
rest of the model is complete.
The exterior of the model was sprayed with several light coats of SnJ Aluminum
Metallizer. I did not buff the natural metal finish. Fabric covered control
surfaces on the underside were sprayed with Tamiya's Japanese Army Grey acrylic.
Wheel wells and the inside surfaces of the gear doors were painted aotake using
a mixture of Polly Scale silver and aotake. The remainder of the undersides were
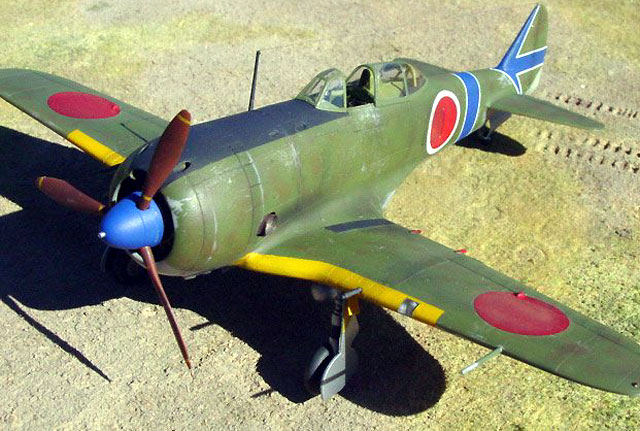
kept in a natural metal finish. For the upper surfaces of the model I mixed 2
parts Aeromaster Nakajima Army Green to 1 part Polly Scale I.J.A. Green. After
the green camouflage was applied I sprayed light mottles of I.J.A. red brown
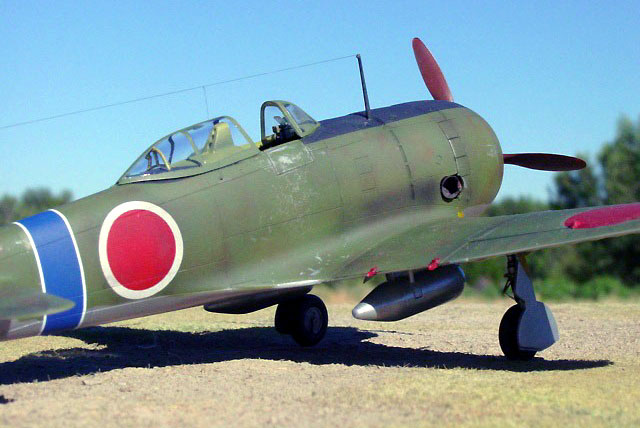
over the upper surfaces. The upper cowl was painted flat black with a touch of
gray for scale effect and fading. The propellers were painted Japanese Army
Red-Brown (note that the yellow stripes on the propellers were painted and
masked prior to applying the red-brown paint).
Once the camouflage scheme was complete, fine grain sandpaper was used to make
surface abrasions and expose the SnJ aluminum beneath, particularly on the cowl,
wing roots and near the cockpit entrance.
Exhaust stains were simulated by spraying highly thinned black paint.
The antenna wire was made from stretched sprue.
 The blue markings (Polly Scale's ATSF blue acrylic lightened with white) were
painted on using masks after the camouflage painting was complete. The thin
white strips that outline the blue markings are decals cut from spares.
Consistency in the width of the white strips was achieved by taping a pair of
#11 exacto blades together while cutting the decals. The strips were then
applied to the model and trimmed for length as necessary. The entire process was
much simpler than I had envisioned. The blue markings (Polly Scale's ATSF blue acrylic lightened with white) were
painted on using masks after the camouflage painting was complete. The thin
white strips that outline the blue markings are decals cut from spares.
Consistency in the width of the white strips was achieved by taping a pair of
#11 exacto blades together while cutting the decals. The strips were then
applied to the model and trimmed for length as necessary. The entire process was
much simpler than I had envisioned.
The hinomarus are decals taken from the kit (upper and lower wings) and my
spares box (fuselage). I toned down the bright color of these decals with chalk
pastels.
All images were taken outdoors on a bright day with a SONY S-75 digital
camera set at its highest picture resolution (2048 x 1536 pixels).
Other camera settings were as follows: 200 ISO film speed, 1000th/sec shutter
speed, F-stop 8.0, and fixed focus distance of either 20 or 30 cm. Images were
cleaned up using Adobe Photoshop 6.0 for the Macintosh. Specifically, the
interface between the base and background were merged using the software's
"blur" tool.
Click
the thumbnails below to view larger images:
Model, Images and
Article Copyright © 2002 by Ian
Robertson
Page Created 20 August 2002
Last updated 04 June 2007
Back to HyperScale Main Page
Back to Features Page |
 Home
| What's New |
Features |
Gallery |
Reviews |
Reference |
Forum |
Search
Home
| What's New |
Features |
Gallery |
Reviews |
Reference |
Forum |
Search
