|
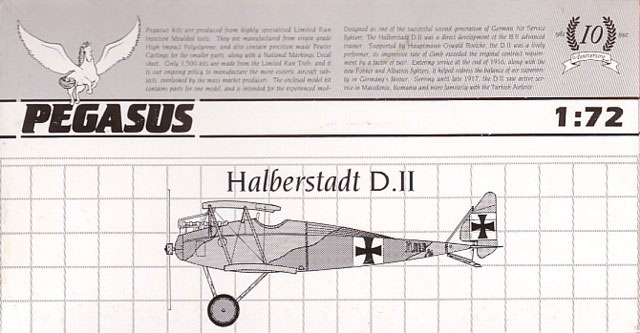
Halbertstadt D.II
by Robert Baumgartner
 |
|
Halbertstadt D.II |

Pegasus'
1/72 scale Halbertstadt D.II is available
online from Squadron.com
Kit
Advantages
Disadvantages
Recommendation Recommended to the experienced modeller.
The Pegasus release of the Halberstadt D.II was a much needed addition for
modelers of 72nd scale WWI aircraft. Now we have a kit that will build
reasonably easily into a faithful replica of an important German aircraft.
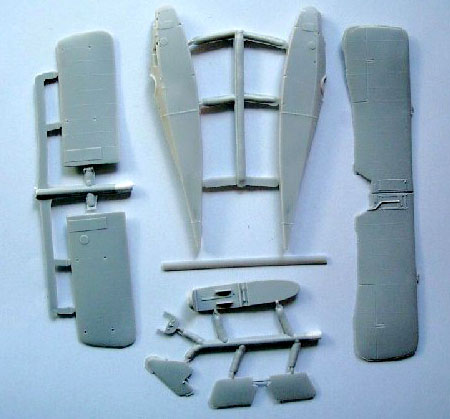
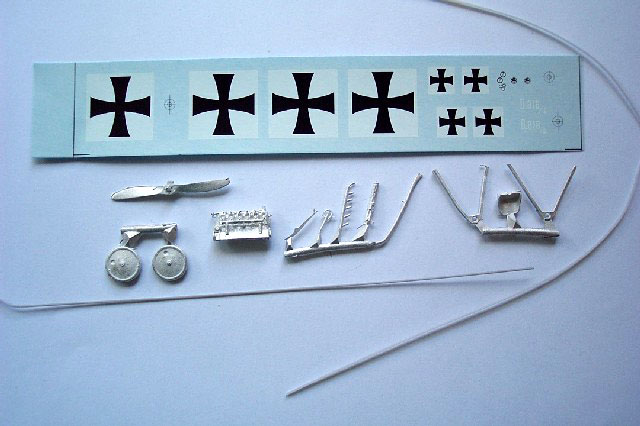
The usual style box contains 12 white metal and 9 plastic parts. Two
lengths of strut material, one of rod, and a small decal sheet completes
the package. Generally all parts are well molded with good crisp
detailing. The only blemishes were a small sink mark on the rear fuselage
halves and a bit of inconsistency with the wing trailing edge thickness.
Both can be fixed easily with a little care.
Click the thumbnails below
to view larger images of the kit parts:
The flowing lines of the Halberstadt are not easy to capture but
Pegasus has done an admirable job. The parts match Ian Stair’s drawings
very well in the Albatros Publications - Halberstadt Fighters by
Peter Grosz.
Sadly the photos were taken before it was realized that the radiator pipe
was lost in the trenches as was the windshield. This being due to the
model taking an unexpected test flight. The white datum line will also be
added at a later stage.
Fuselage
Construction commences with the cockpit and the kit provides the basics
to get you started. Supplied items are a plastic floor and instrument
panel, with the seat and control column being in white metal. All sit on a
plastic floor, which is thoughtfully extended to provide a stable platform
for the engine. It is easy enough for the modeler to then add any extras
according to taste. Recommended items being the pressure pump, magneto
switch, throttle, etc. Seat belts were made from thin strips of metal foil
and painted accordingly.
Plastic strip comes to the rescue when adding the interior structure as
does stretched sprue for the pilots control cables. A bonus on the decal
sheet means that instrument faces do not have to be found elsewhere. With
no locating pins inside the fuselage, the floor requires a little bit of
fiddling to ensure the correct height of the items that it supports.
The 120hp Mercedes engine is in white metal and cleans up very well. If
you had taken care in the previous dry fitting stage, the fuselage halves
will come together perfectly. Caution is needed when cleaning up the upper
fuselage join so as not to destroy the beautifully rendered stringer
detail.
Wings
As previously mentioned, the wings on my example showed the trailing
edges to be of varying thickness. This was fixed by sanding the underneath
of the wings until a constant thinness of this area was achieved. To
provide strength, the wings were drilled out at the roots to allow brass
rod to be inserted. Corresponding holes in the fuselage and a drop of
“superglue” ensured a secure join.
I decided to try the supplied strut material, which I have previously
avoided due to its apparent lack of strength. I was pleasantly surprised
that due to the short lengths needed, it kept its form pretty well. Care
must be taken with handling though as I found out later.
The instructions provide templates for the length of strut material
needed. The same is true for the rod, which needs to be cut for the axial,
tailskid, and cabanes.
Those of us that rig with “invisible thread” have to be careful in not
applying too much tension on the wings. This is a sure way of showing up
the weakness of the extruded strut material. Before assembling the top
wing, the modeler must decide whether to put in the various mid wing
support struts now or later. I chose the latter and had a tough time
lining everything up.
The tail assembly was a breeze to fit but I chose to substitute stretched
sprue for the rudder and tail skid supports. I thought the supplied rod
was a little over scale.
Finals
The white metal undercarriage was used and due to its softness, should
only be added near completion of the model. It required little in the way
of cleaning up except the straightening of the legs to the correct angle.
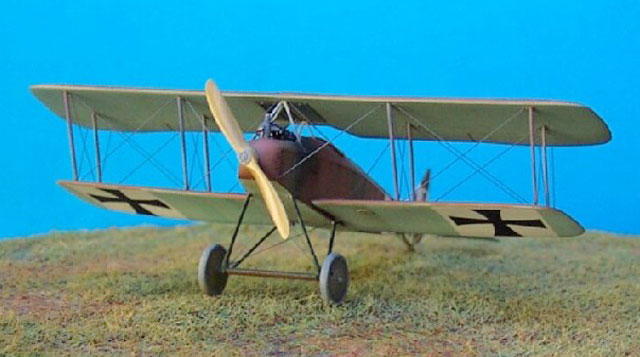
The exhaust was maneuvered into position and fitted a treat. The white
metal propeller and wheels are well cast but the tyres on my example
lacked definition when meeting with the wheel covers. The machine gun is
also white metal but its inaccurate proportions did not lend itself to
being used.
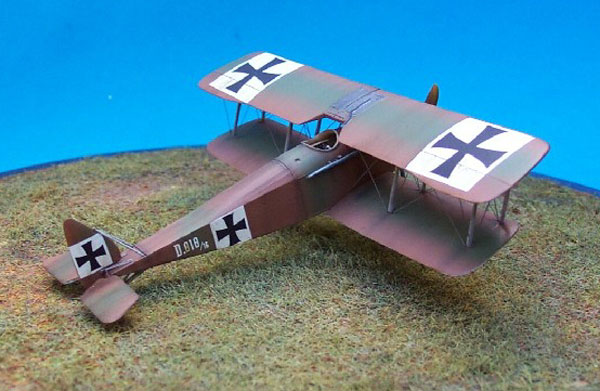
All parts were sprayed using Xtracolor paints, which gives the model a
hard glossy “shell” on which to apply decals and weathering. Pegasus
thoughtfully supplies both Methuen and Federal Standards references for
the colours so the modeler can choose there own favourite brand of paint.
As the paint was drying, the model decided to test its aerodynamic
abilities and thus required a rebuild. He white metal undercarriage did
not survive so replacement items were made from Strutz. This is airfoil
shaped extruded brass that comes in many sizes and saves a lot of models
from the spare parts box. Sadly two more rebuilds were needed soon after
when the rigging went slack due to the stresses of the previous flight.
Decals
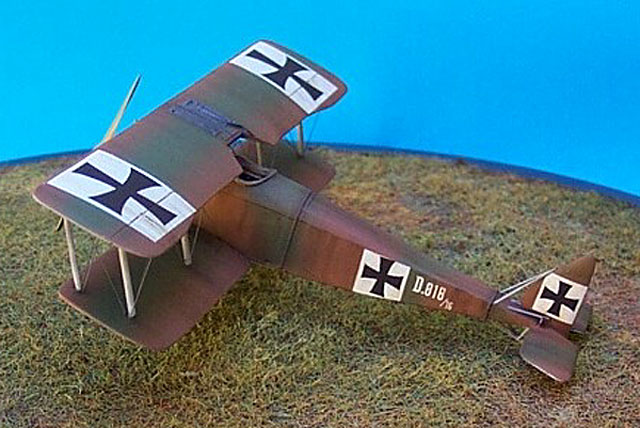
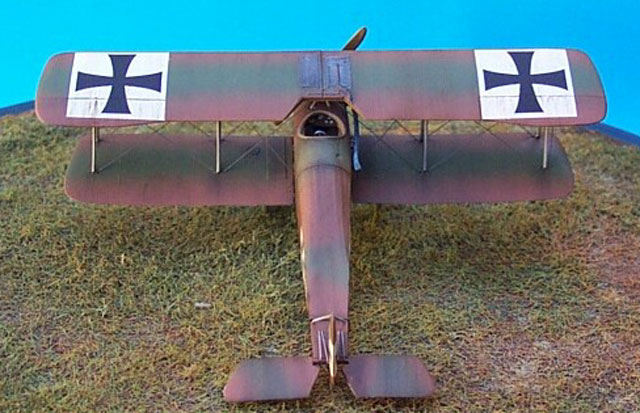
Markings options are for a Hanover-built machine (as evident from the
white serial number and datum line), 818/16 from 1916. The decals are
superbly printed and due to the thin carrier film, need no decal softeners
are needed or required. It was pleasant to see that the white of the cross
outline was opaque enough to not allow the camouflage demarcation to show
though. Axial logos for the propeller were supplied but did not survive my
aircrafts first flight test. The characteristic white datum line of
Hanover built D.IIs is not supplied but can be easily added from spare
decal stock.
|
Summary |
|
Kit: |
Pegasus 1/72 scale
Halberstadt D.II (kit number 2022) |
|
Advantages: |
Good, molded accurate
detail. Thin opaque decals. |
|
Disadvantages: |
Tricky assembly due to
the many struts |
|
Recommendation: |
Recommended |
This 1/72 scale Haberstadt D.II is another fine kit from Pegasus that
fills a gap in injection molded WWI kits.
It builds relatively easily into a fine replica straight out of the box
but also leaves room for the super detailer. The difficulties I
experienced were mainly of my own doing, and should not put anyone off
from trying this kit themselves.
Recommended.
Thanks to Squadron
for the Review Sample.
Model,
Images and Article Copyright © 2001 by
Robert Baumgartner
Page Created 23 September, 2002
Last updated
04 June, 2007
Back to HyperScale
Main Page
Back to
Features Index
|
 Home
| What's New |
Features |
Gallery |
Reviews |
Reference |
Forum |
Search
Home
| What's New |
Features |
Gallery |
Reviews |
Reference |
Forum |
Search