|
Focke-Wulf Fw
190D-9
by Franck Oudin
|
|
|
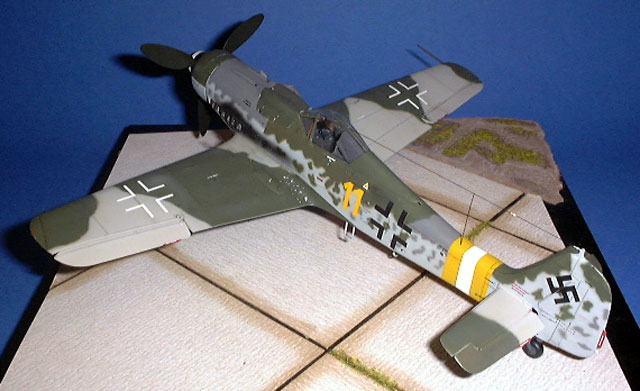
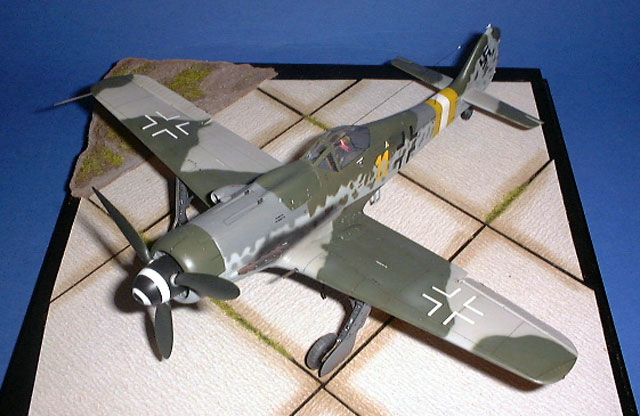
Focke-Wulf Fw 190D-9
"Yellow 11" |

Tamiya's 1/48
scale Focke-Wulf Fw 190D-9 is available online from
Squadron.com
Focke-Wulf Fw 190D-9 "Dora"
Project Summary: |
Kit
Paints
Decals
Resin Parts
|
Tamiya
1/48
Gunze-Sangyo
EagleCals
MDC Update for Fw 190D-9
KMC Control Surfaces |
I will not start this article with story of the Fw
190D-9 “Dora” because it as been told so many times, and I would not add
anything to all the existing books.
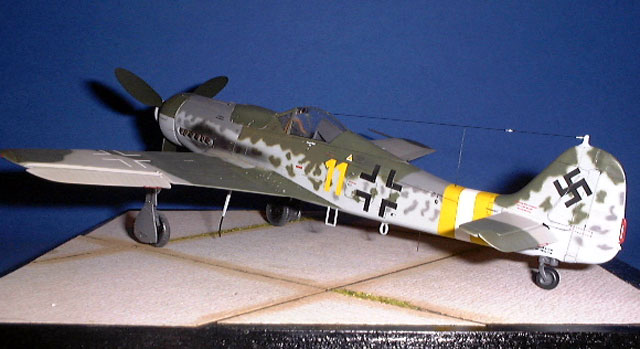
The subject aircraft is a Focke-Wulf 190 D-9 found in Stockheim, Germany
as a wreck in May 1945. This Dora belonged to II./.JG2. The pilot is not
known.
This Fw 190D-9 is a good example of a late war Luftwaffe aircraft
because we can readily see many colors on different airframe components.
That is why I chose this quite difficult paint scheme for my model.
Tamiya's 1/48
Scale Fw 190D-9
|
This the Tamiya Fw 190D-9 in 1/48 scale. The
general fit is good although there is a gap between the fuselage and the
wings. This was the only fit problem I found on my kit.
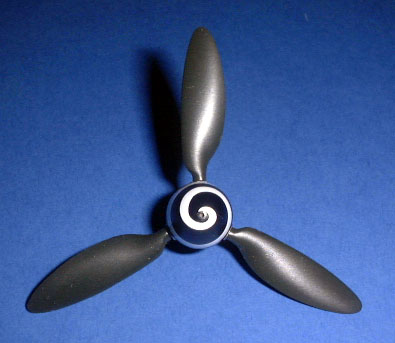
 The
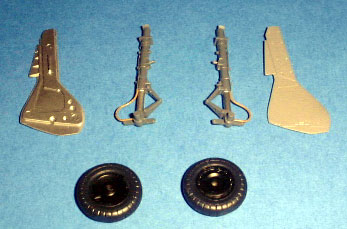
incorrectly shaped items in this kit, including the wheels, the spinner
and the propeller blades, have already been well documented. This is why
I decided to enhance my kit with the Wurger Mechanic update resin set
for the Tamiya kit. The
incorrectly shaped items in this kit, including the wheels, the spinner
and the propeller blades, have already been well documented. This is why
I decided to enhance my kit with the Wurger Mechanic update resin set
for the Tamiya kit.
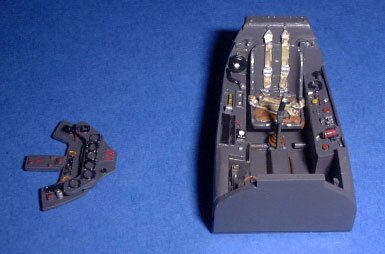
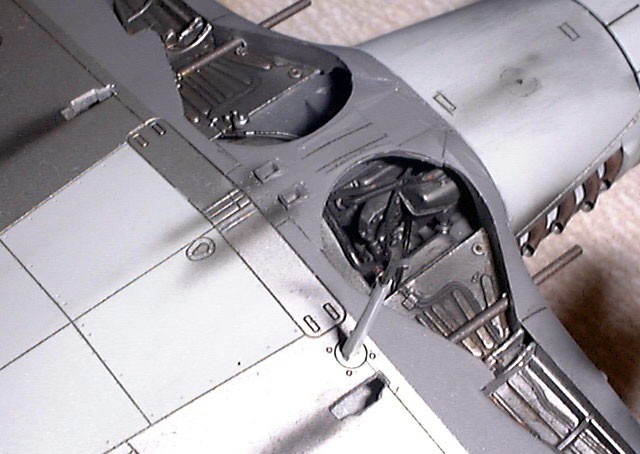
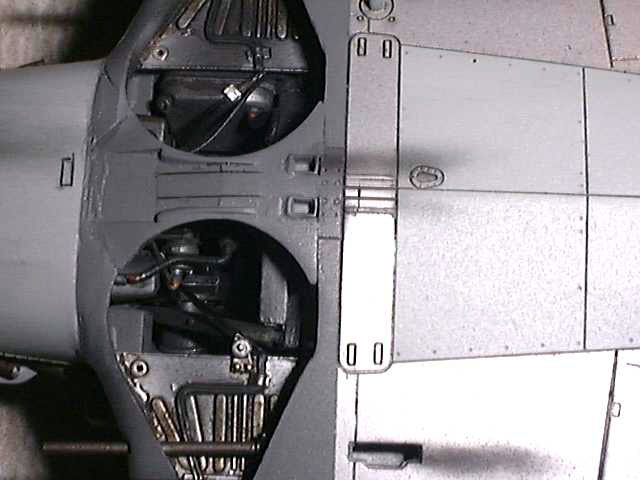
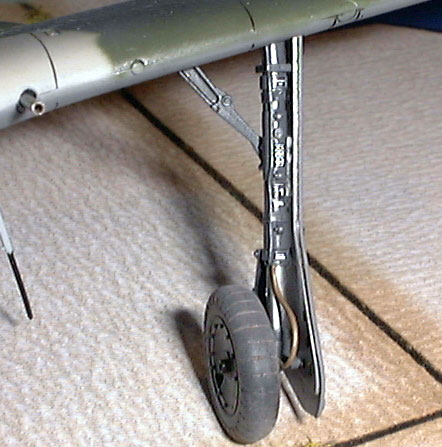
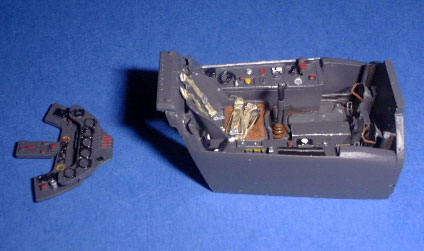
The wheel well area of the model is totally wrong, but now we have the
great MDC update designed by Vincent Kermorgant. This is, in my opinion,
the ultimate resin set to build a totally accurate Dora. The fit is
absolutely perfect, with no sanding or adjustment needed. Just paint it
and put it into place. The same can be said for the interior.
 For
a change, I started construction with the resin set for the wheel well.
I decided to leave some of the elements unpainted at this, just primed. For
a change, I started construction with the resin set for the wheel well.
I decided to leave some of the elements unpainted at this, just primed.
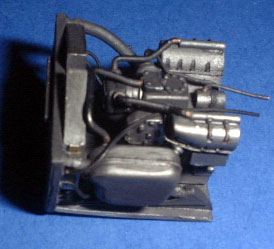
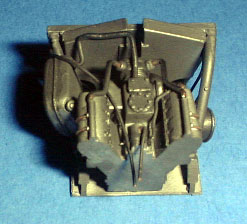
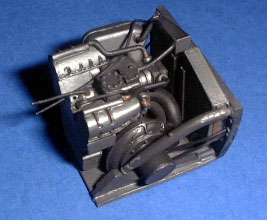
The engine was painted with Alclad aluminium. The remainder was painted
RLM 66 Black Grey. Copper wires are added to simulate all the
connections from the fire wall to the engine. A black wash and a light
graphite dry brush provided the weathering for these interior
structures.
I decided to remove all the control surfaces and replace them with the
KMC resin set.
Now it was time to close the fuselage, so I added the engine insert and
the cockpit in one of the fuselage halves, and then then secured the
parts using CA glue just to hold them in place. Five-Minute Epoxy Glue
was used to fix the parts permanently inside the fuselage, then enclosed
them between the fuselage halves.
The shell ejection chute of the Tamiya kit is wrong because it is based
on the Fw 190D-13 wings. There is only one hole under the central wing,
so the MDC parts are used to correct this area. Great care is required
for this operation because when you remove this part, the center wings
become very fragile.
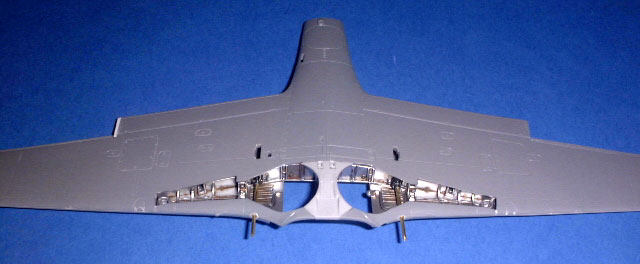
The inside of the wheel well is open and the replacement parts were
simply glued in place.
The wings were now assembled and fixed to the fuselage. This was the
main problem of this kit. A gap was present between these two major
components, so a piece of sprue was added inside the fuselage as a
spreader bar to minimise the gap. Mr Surfacer was then used to fill the
gaps. I sanded them until I was satisfied
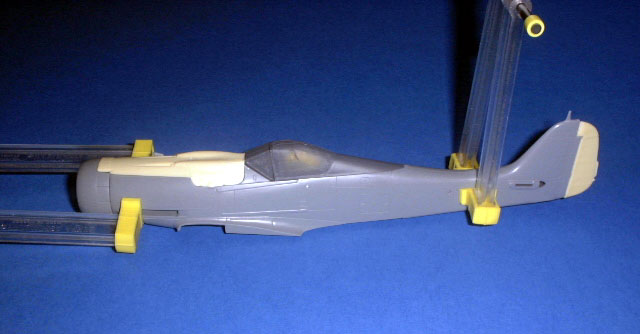
Now comes the most exciting part of the project - airbrushing!
I first cleaned my Dora with fine steel wool, then
polished the model with a soft cloth.
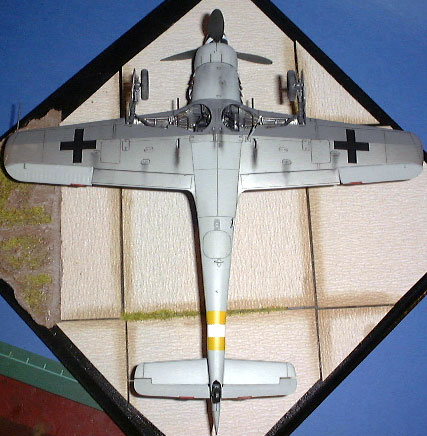
The paintjob commenced with Alcald for the undersurfaces of the wing.
This part was masked and then RLM 75 Grey-Violet was sprayed. RLM 76
Light Blue was sprayed after more masking over the whole fuselage, then
the wings were primed with RLM 77, and finally the RLM 83 Dark Green was
applied. The side of the fuselage was masked to ensure a straight
demarcation line, just like the real aircraft.
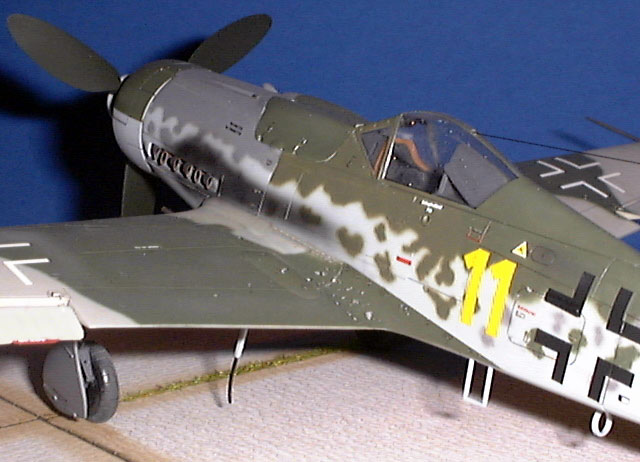
The front cowl and the top of the machine gun cowl were painted RLM 83,
masked and sprayed again with RLM 75 Grey-Violet. RLM 81 Brown-Violet
mottling was performed at this stage using paint diluted with up to 90 %
thinners. This very thin mix was sprayed at low pressure.
I painted the Reich Defense band, and finally sprayed a gloss clear coat
to seal the paint before decaling.
The decals come from the EaglesCals’ decal sheet
EC21, "Yellow Tail D-9's". They went on without any problems.
 All
the small components were added at this stage, including the landing
gear and aerials. All
the small components were added at this stage, including the landing
gear and aerials.
The exhausts are from Moskit. They require great
care when being handled as they are very fragile and the authentic
metallic finish can be damaged by excessive handling. The gun barrels
were replaced by microtubes from Tarmac.
Weathering is done with the airbrush, and paint “chipping” is achieved
using Humbrol 11 Silver.
A clear satin coat was sprayed over the entire model, and the project
was completed after a stretched sprue antenna wire was glued in place.
I would like to specially thank my friends Vincent
for the MDC resin set, Fillipo Rossetti for the paint ,and Jerry
Crandall for the scanned pictures of the real aircraft.
Click the thumbnails below
to view larger images:
Model, Images and Text Copyright © 2002 by
Franck Oudin
Page Created 22 April, 2002
Last Updated 04 June, 2007
Back to HyperScale
Main Page
Back to
Features Index
|
 Home
| What's New |
Features |
Gallery |
Reviews |
Reference |
Forum |
Search
Home
| What's New |
Features |
Gallery |
Reviews |
Reference |
Forum |
Search