|
Focke-Wulf
Fw190D-9
by Glenn Irvine
|
|
|
Focke-Wulf Fw 190D-9 |

Hasegawa's 1/72
scale Fw 190D-9 is available online from
Squadron.com
Detailing & Accurising
the 1/72 Hasegawa Fw 190D-9 - an exercise for the anally retentive...
I started building this Focke-Wulf Fw 190D-9 with the intention of
using some home cast resin parts created for a previous D-9 project,
then doing a quick build based on the finesse of the Hasegawa kit.
Nearly 7 years later, hundreds of dollars on references, materials, and
a trip to the USAF museum in Ohio USA, I finally have a completed D-9. –
and it still has faults - though admittedly not many.
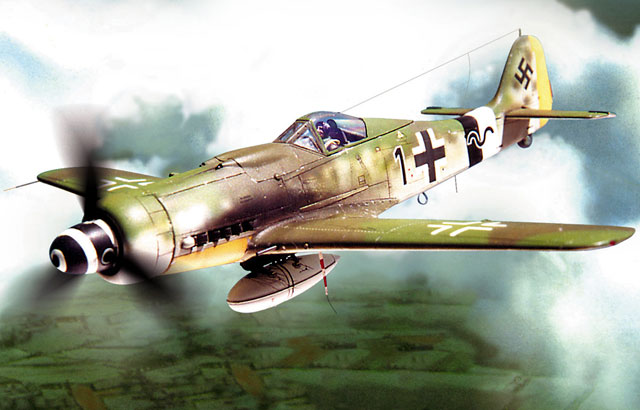
I decided on Hans Dortenmann’s aircraft as the subject, after seeing
Jerry Crandall’s evocative painting and profile of this aircraft
featured in “Green Hearts, First in Combat with the Dora 9” by Axel
Urbanke, published by Eagle Editions.
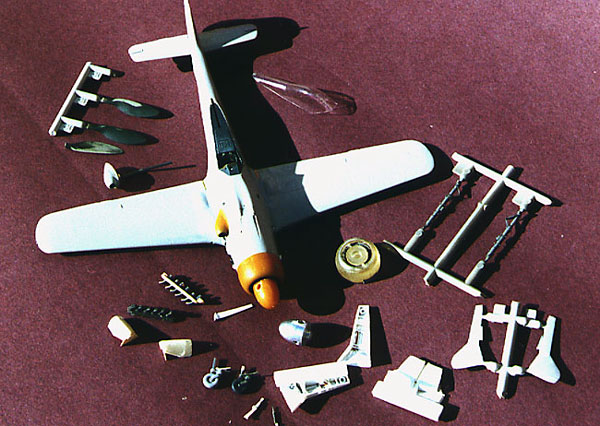
After initial inspection of Hasegawa's Fw 190D-9 I decided that the
manufacturer had basically got the shape right, and with a few
corrections it would build up into a nice accurate Dora with little
effort… ha! Famous last words!
Identifying the
Faults
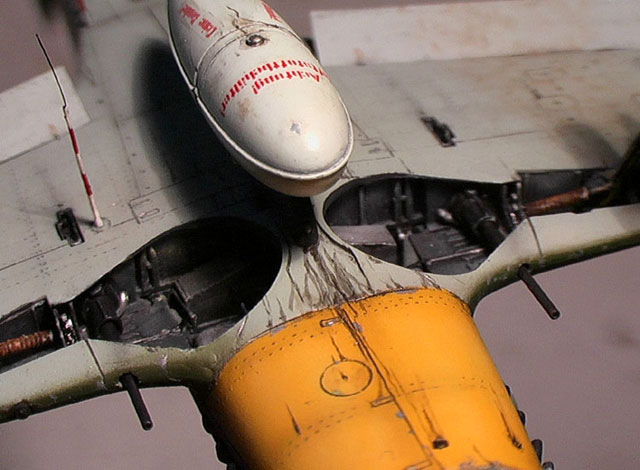
The main fault of the Hasegawa 1/72 scale Fw 190D-9 kit is the lower
wing centre section.
This has been moulded incorrectly due to an assumption that the lower
wing surface is a continuous line from the lower cowl surface through to
the tail. This is incorrect for the radial engined ‘A’ model but correct
for the inline engined ‘D’. The 190 A engine cowl is on a different line
than the lower front fuselage/wing due to the mounting of the radial
engine and its lower exhausts. As a result of this there is a distinct
‘step’ at the junction of the cowl to the wing lower surface and the
wing is almost a straight line from the forward edge of the wing to the
fuselage/tail junction.
The Hasegawa kit has a very pronounced curve to the lower wing centre
section due to the original lower surfaces for the ‘A’ series being used
as a basis for the ‘D’ wing and due to the incorrect cowl to wing
junction on the ‘A’, the ‘D’ wing is curved up at the front centre
section to meet the new cowl. This gives the ‘D’ fuselage a distinctive
‘belly’ or ‘banana’ shape in profile that is missing from the real
aircraft. I had to fix this to correct the shape of the model.
The cowling radiator is moulded with the louvers open and the
radiator face integral with the assembly which reduces the accuracy of
the part. I replaced this with a moulded resin part of my own
manufacture.
Correcting the
Faults
The following correction, conversion and improvement tasks were also
undertaken:
-
The main air intake for the engine does
not capture the appearance of the real thing so another of my resin
parts was used.
-
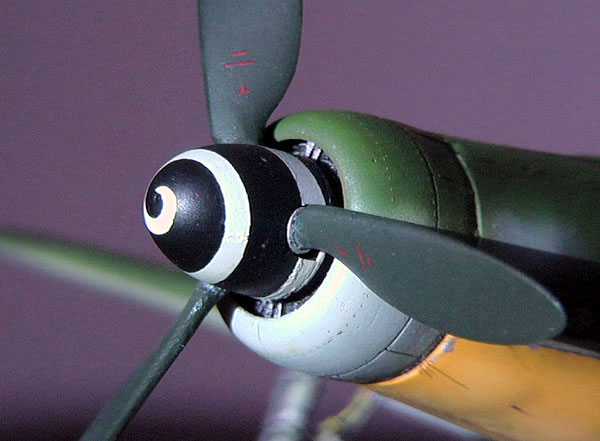
The spinner – the kit part is quite good,
but lacks the propeller hub ring detail, another modified resin part
was used for this.
-
The exhaust stubs are quite good – but I
had resin parts I made for separate exhaust stacks so I used these.
-
The tail wheel is too small. I prefer the
Airfix D9 one so I mastered a new one with better detail and used a
casting of that.
-
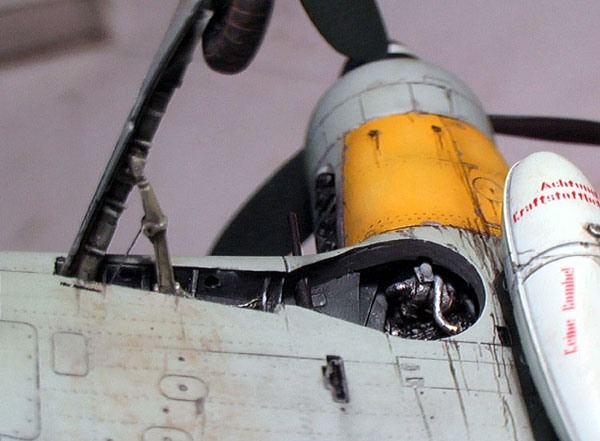
The cockpit detail was a bit sparse and
under-sized so I used my own resin cast tub and Eduards instrument
panel and rudder pedals.
-
I built a new instrument shroud with
handholds and a gun-sight.
-
I vacformed a new sliding canopy section
using the original canopy and detailed it with internal framing and
hand holds from wire
-
The cockpit sills were detailed with the
sliding tracks for the canopy runners
-
The head armour was replaced with a resin
casting I mastered.
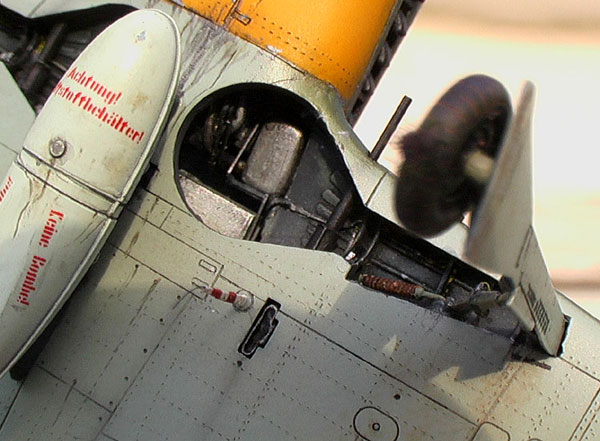
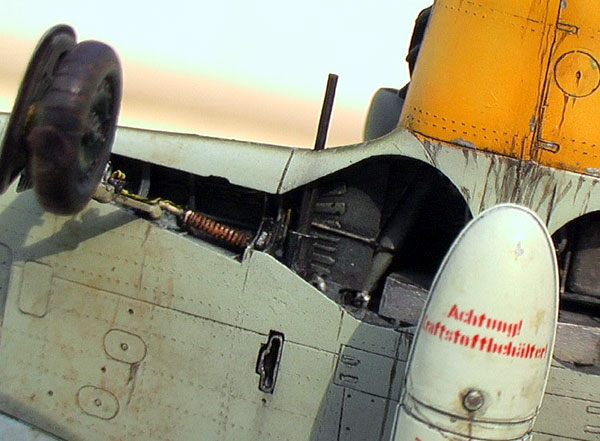
-
I used resin parts I made for the wheel
well inserts and scratch built the rear of the engine and associated
plumbing.
-
I detailed the undercarriage legs with
mounting bolts and brake lines.
-
I built new upper & lower radius rods
(extend/retract arms) and cast them and used the copies
-
The undercarriage covers were detailed on
the inner and outer surfaces including the tracks in the upper half
for the lower wheel covers
-
I sculpted a new cockpit intake scoop for
the forward cowl, cast it and used the resin part.
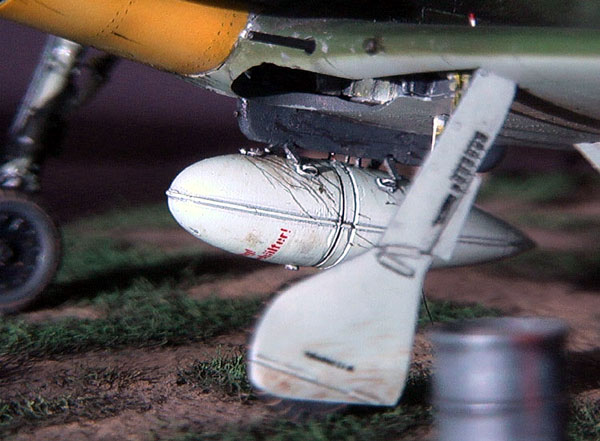
-
I made a new more accurate ETC 504 drop
tank mount.
-
I replaced the kit drop tank with a
modified and detailed one from the Airfix kit as the kit one is poorly
shaped.
-
All aerials were replaced
-
I rolled in complete rivet detail using
an Arlec photo-etched circular saw blade
-
The gun camera lens was replaced with
clear stretched sprue.
-
The gun barrels in the wing roots were
relaced with hypodermic tubing
-
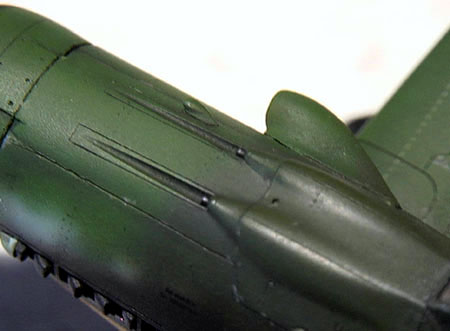 I
hollowed out the upper fuselage machine guns I
hollowed out the upper fuselage machine guns
-
All the lights were replaced with clear
sprue
-
I replaced the propeller blades with
resin copies of a master I made of the correct VS 111 type blade
-
The tyres were all flattened
-
The elevators were drooped for a more
candid pose
-
The flaps were detailed with strip and
Eduard parts
-
The pitot tube was made from fine wire
and stretched tube sleeved over it
-
various drain tubes in the airframe were
made from stretched tube
-
the shell ejection chutes were made up
and copies used to detail the wings.
Click the thumbnails below to view larger images of moulds and masters:
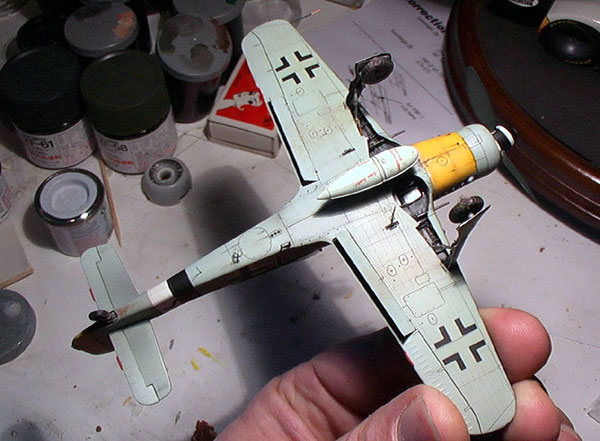
The model was painted using Aeromaster enamels using the profile and
photos in the ‘Green Hearts’ book as a guide as well as the painting
guide in the decal set from Eagle Cals. Stencilling was sourced from
various sheets, where better decals were available.
 Weathering was accomplished with washes of water -colour and dusting
with pastels. Exhaust staining was air brushed. Oil streaks were done
with Gunze oil. Testors Dull Coat and Polly S flat finish were final
coats. Paint colours were modified from the in bottle colours and
darkened to obtain a more accurate match with the paint chip chart. This
gives the model a darker appearance than would normally be seen, but it
is more accurate. Weathering was accomplished with washes of water -colour and dusting
with pastels. Exhaust staining was air brushed. Oil streaks were done
with Gunze oil. Testors Dull Coat and Polly S flat finish were final
coats. Paint colours were modified from the in bottle colours and
darkened to obtain a more accurate match with the paint chip chart. This
gives the model a darker appearance than would normally be seen, but it
is more accurate.
I feel that we as modellers tend to fall into the ‘scale’ trap when
it comes to the accurate depiction of camo schemes. I liken this to the
rule used when painting rooms in houses.
If it looks good on a paint chip lighten it a couple of shades before
you apply paint as it will tend to appear much darker when the whole
room is painted as the intensity of the chroma (colour) goes up as the
larger the area of painted surface is exposed to light as there is more
colour reflected.
Now to apply this to aircraft, the real aircraft appears much darker
than the chip for the same reasons, especially the closer you get to it.
As a result I believe the blanket approach to lightening all model
paints is incorrect and should only be done to those paints adversely
affected by the elements ie. Some US navy colours etc. and lighter
colours, those with a majority of white in there mix as they will tend
to appear lighter in large areas as they reflect more light and seem
much lighter, for example RLM 76.

I don’t claim to have achieved what I describe, in fact I have seen very
few models that have achieved the correct balance in terms of colour and
overall tone…..It is a subtle thing. However, one successful proponent
who comes to mind is Chris Wauchop.
One thing I will say is that there are a lot of models that are
far too light in overall appearance out there... unfortunately.
-
Squadron/ Signal Publications – Walk
Around FW 190D
-
Squadron/ Signal Publications – Walk
Around Focke-Wulf FW 190A/F
-
Koku-Fan No. 57 Me 109 Vs FW 190
-
Model Art No. 336 FW190D & TA 152
-
Green Hearts –First in combat with the
Dora 9 Author: Axel Urbanke
-
Aero Detail 2 Focke Wulf FW190D
-
Monogram Close-up 10 FW190D
-
Eagle Files EF1 Doras of the Galland
Circus
-
Eagle Files EF2 Yellow 10
-
Fighter Pictorials –Broken Eagles 1
FW190D
-
AJ Press FW190D TA 152
-
Aircraft Archive Classics of World War
Two
-
German Aircraft Landing Gear Author:
Gunther Sengfelder
-
German Aircraft Interiors 1935-1945 Vol.1
-
The Official Monogram Painting Guide to
German Aircraft 1935-1945
-
Eagle Editions Ltd Luftwaffe Colour Chart
-
The modeller’s Luftwaffe painting guide
with colour chart
-
Kookaburra Luftwaffe Camouflage and
Markings 1935-45 Volumes 1-3
-
Luftwaffe Colours 1935-1945 Author:
E.Brown Ryle III
-
Commentary on the Evolution and Usage of
Luftwaffe RLM colours 81,82 & 83 by David E. Brown
-
Notes on late on late war Luftwaffe
camouflage by Ken Merrick off Twelve O’clock high discussion group (
Internet source)
-
Personal notes and photos
Click the thumbnails below
to view larger images:
Model, Images and Text Copyright © 2002 by
Glenn Irvine
Page Created 12 August, 2002
Last Updated 04 June, 2007
Back to HyperScale
Main Page
Back to
Features Index
|
 Home
| What's New |
Features |
Gallery |
Reviews |
Reference |
Forum |
Search
Home
| What's New |
Features |
Gallery |
Reviews |
Reference |
Forum |
Search