|
F-94C Starfire
by Phil Brandt
 |
|
F-94C
Starfire |

Hobbycraft's 1/48 scale F-94A Starfire may be ordered online from
Squadron.com
Although the sleek F-94C Starfire was the definitive version of
Lockheed's all-weather fighter series of the middle Fifties, no high quality
quarter scale kits existed six years ago when Bondo embarked on this industrial
strength sojourn.
Today I'd pass on the 'practice bleeding' and simply hand over a
check to Collect-Aire. The Starfire is one of Lou's better releases.
For the benefit of those who would rather not part with the
serious bucks, Revell has reissued its 1/56 box scale kit of the Fifties,
complete with raised insignia outlines and one-inch rivets. Lindberg's "1/48"
version has the early, blunt -C model radome and is equally crude by today's
injected standards. Hobbycraft, to its credit, took on the F-94A and B, two
decent, engraved kits which, however, exhibit the relative lack of detail that
modeler's have come to expect of that firm's releases.
But, the Hobbycraft -B model, when combined with portions of the
Revell F-94C, photo etching from Reheat and Airwaves, and moderate--you may
think heavy--scratchbuilding, can be converted to an accurate representation of
the beautiful -C model.
|
Kitbashing a Decent
F-94C |
Fuselage
The most difficult portion of the conversion was the mating of
the front (windscreen forward) portion of the Revell fuselage to the windscreen
aft portion of the Hobbycraft -B model. The quite different Revell -C intakes
were grafted and faired with putty onto the roots of the Hobbycraft intakes
after the forward intake fairings inherited from the P-80 were removed. Splitter
plates were fabricated from thin sheet. The Revell -C tail transition fairing,
that is, the complex sheet metal area on top of the afterburner section, into
which the drag chute housing, stabilizers and vertical fin mount, was grafted
onto the HC empennage.
Since the -C model used the larger, more powerful J-48 engine,
it was necessary to enlarge the diameter of the Hobbycraft afterburner section
from the aft wing fairing to the exhaust outlet. This was done by gluing many
.040" thick Evergreen strips lengthwise along the fuselage all the way back to
the aftterburner outlet, followed by rough fairing of the strips forward to
blend gently with the original fuselage cross section. Then, multiple thin
layers of 3M Blue Acrylic were applied and ample drying time allowed for
shrinkage between layers before wet sanding.
Now that the fuselage is fatter, you'll need a larger
afterburner can to match. Check the spares box for an appropriate Century Series
or equivalent can; I used one from the Monogram F-8. The -C's aft fuselage spine
was scratchbuilt with half-round plastic tubing and kitbashed with the canopy
transition piece from the Revell kit. Since the Revell forward fuselage is on
the small side, it was built up with thin sheet on the flat portions just
forward of the intakes, and the radome, rocket door and nosegear area were
thickened and accurized with lacquer putty layers. The small airscoop on top of
the fuselage, just behind the radome, was scratchbuilt.
Wings
The Hobbycraft wings work well - the F-94C used new, thinner wings, but I made a
command decision to use the -B wings, under the
"close-enough-for-government-work" theory--with some judicious bending of the
bottom portion to provide the industrial strength dihedral of the real thing.

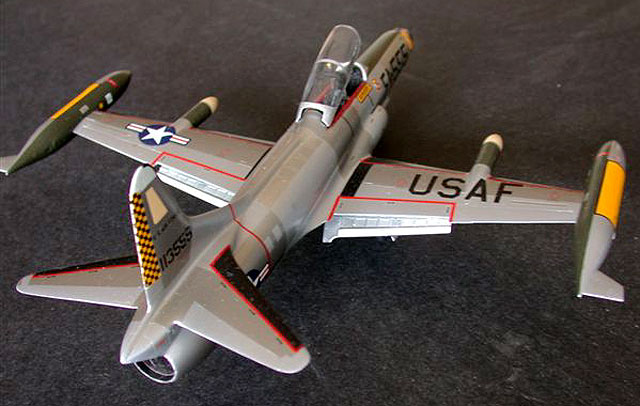
Use the Hobbycraft maingear and nosegear wells as is, but modify
the shape of the maingear door cutouts to match the new -C gear doors. The
ventral speedbrakes were cut out and detailed with photoetch from the Airwaves
F-94A/B sheet. Speedbrake wellswere formed by cementing thin plastic sheet on
the inside of the wing, over the openings; the well depth may not be scale, but
will not be easily noticed.
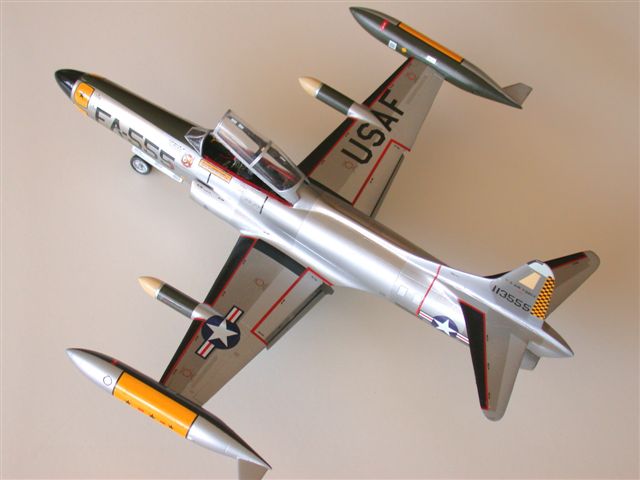
The wing-mounted rocket pods were kitbashed with Hasegawa 1/48 weapons kit
rocket pods. The fun part is fairing the pods into the wings--I cut slots--and
again applied layers of lacquer putty, roughing in and wet sanding.
The -B wing tanks must be lengthened approximately 1/4". The tanks were detailed
with photoetch filler caps from the Reheat F-94A/B detail sheet.
Tail
The stabilizers and vertical fin were cut from .060" plastic sheet. The leading
and trailing edges were roughed out and then progressively shaped via sanding.
Landing Gear
Since the -C main landing gear struts differ significantly from the -B, I
kitbashed the Hobbycraft disc brake hubs w/axles with P-51 main gear struts from
the old Hawk (now Testors) kit. A small slotwas Dremmeled in each hub to receive
the end of the P-51 strut--note that the scissor links face aft--minus the P-51
axle. The upper portion of the strut is trimmed to the appropriate length and
thinned to mate in the gear hole of the Hobbycraft well. Retraction links were
created from plastic rod. The HC nose gear mounts "as is" into its well. The -C
model outer and inner main landing gear doors are unique to the type and were
scratchbuilt from plastic sheet. I laminated interior panels to all gear
doors--the inner gear doors were posed down to increase the "busy" factor--for
added detail, and I scratchbuilt hydraulic inner door cylinders from plastic
rod. The -B main wheels were used, but the nose wheel must be smaller and much
thinner than the Hobbycraft version. Again, you'll have to go to the spares box
; I stumbled on two old Japanese UPC F-104 main wheels from a now-derelict 1965
project; the hub ribs even matched! I sanded off the unribbed side of each wheel
and cemented the remaining ribbed sides together.
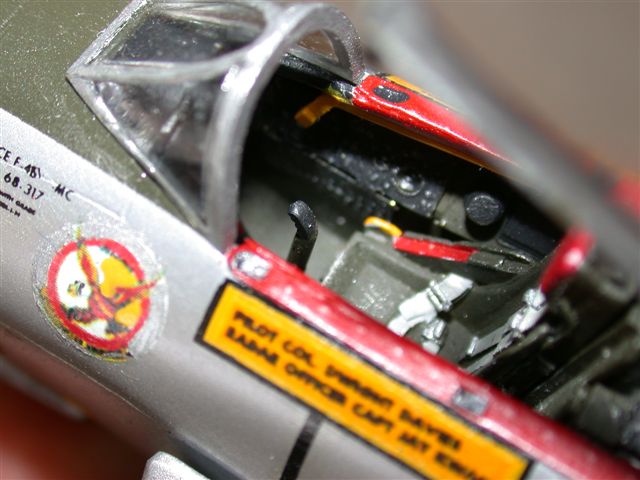
Cockpit
The cockpit tub is from the Hobbycraft kit. The instrument panel, consoles and
radar set were scratchbuilt, using Reheat generic photoetched instruments and
switch panels. True Details T-33 seats were used because they're very close to
those of the F-94C and because they've got nicely molded seat belt assemblies.
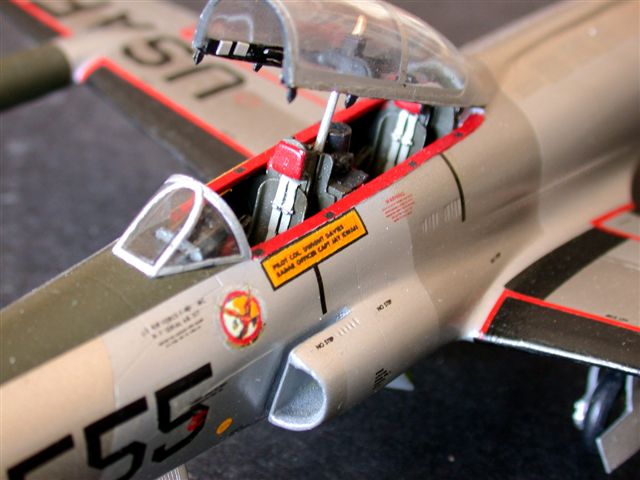
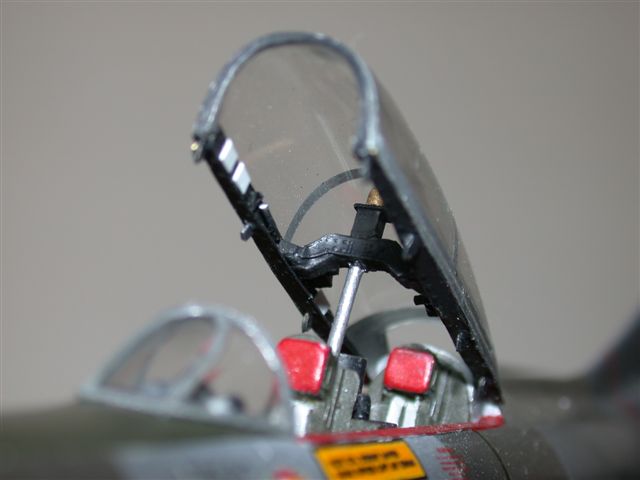
Reheat F-94A/B photoetch was used for the canopy ledge and canopy interior,
including the radio direction finder mount. Additional canopy details were
scratchbuilt, using photo references.
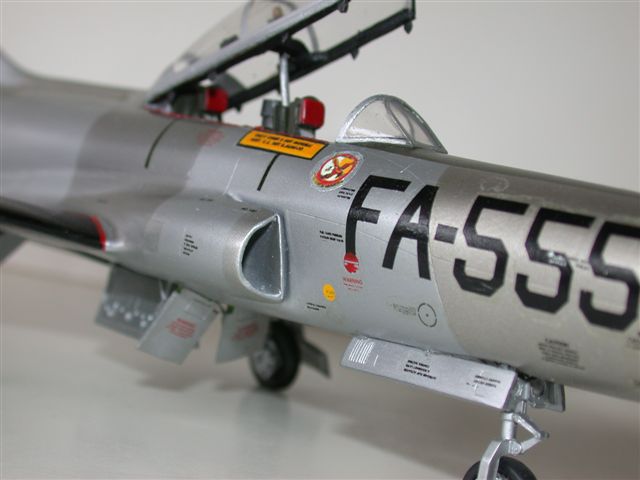
The model was completely rescribed with the Bare Metal tool.
Bondo's favorite gray automotive lacquer primer was applied overall because the
acetone in the original formula Alclad--lacquer in Alclad II-- etches bare
plastic to an unnacceptable degree. Finish wet sanding was with 1000 grit paper.
Four shades of original formula Alclad , thinned 40% with acetone, were
airbrushed. For further variance in paneling shades, I used Microscale aluminum
and stainless steel decal film.
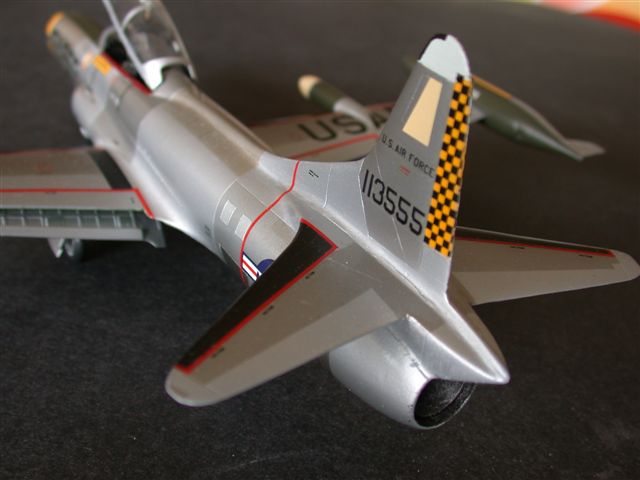
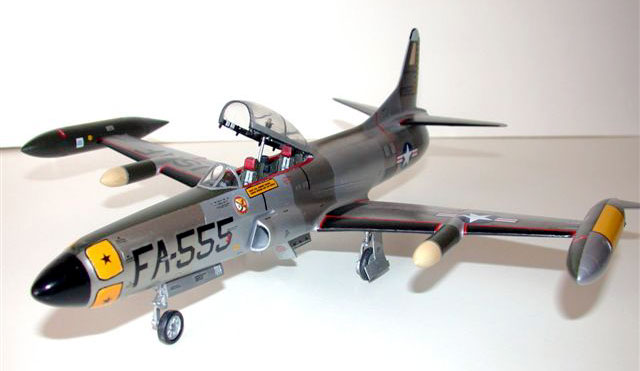
Although clad overall in natural aluminum panels, many F-94Cs
were colorfully marked. Among the brightest were the chrome yellow-trimmed birds
from the 27th FIS at Griffiss AFB, NY.
To obtain the squadron insignia and yellow aircrew placards, I
had the Emhar 1/72 F-94C (late) decal sheet enlarged 150% and color copied onto
Walthers clear decal paper. When applied, I backed the squadron insignia and
placards with white decal film. Yellow Microscale decal film, underlayed with
white film, also served for the wing tank and rocket door trim. The black edging
on the rocket doors was achieved by an underlying third layer of slightly larger
black film. Black anti-icing wing/stabilizer leading edge panels and red, "No
Step" stripes were all from Microscale stripe sheets. Black stars came from a
1/72 RA-5C Superscale sheet. The anti-glare panel in front of the windscreen and
the rocket pod paint were formed from clear decal sheet, pre-painted in green
drab enamel, and the inner wing tank surfaces were masked and then airbrushed
with green drab enamel. The canopy ledges were painted insignia red per the
color pix in the Aerofax reference.
The most difficult markings to find were the 1/16" black checks
on the rudder which were applied over chrome yellow enamel. I finally found
self-adhesive ones from an architectural supply house. National insignia, USAF
and ID codes came from generic Superscale sheets, and stencilling is from
various 1/48 jet fighter sheets, ie. F-111 and F-4. Two coats of Future sealed
all markings.
This entire project lasted over three years, but that's because the project was
on the back burner for much of the time. Realistically, the project could
probably be completed in a few weeks of concentrated effort.
The 'Real Thing' at:
-
The USAF Museum, Dayton, Ohio
-
Pima County Air & Space Museum, Tucson, Arizona
-
Aerofax Minigraph 14, "Lockheed F-94 Starfire", Francillon and
Keaveney
-
"Lockheed F-94 Starfire--A Photo Chronicle", Isham and McLaren
-
"The F-80 In Action", Squadron Signal Publications
Accessories
-
Airwaves F-94A Photoetch Detail Set, AC48-41
-
Reheat F-94A/B Photoetch Detail Set, RH057
-
True Details F-80/T-33 Ejection Seats, #46018
Click
the thumbnails below to view larger images:
Model, Images and Article
Copyright © 2002 by Phil Brandt
Page Created 17 June, 2002
Last updated 04 June, 2007
Back to HyperScale
Main Page
Back to Features Page |
 Home
| What's New |
Features |
Gallery |
Reviews |
Reference |
Forum |
Search
Home
| What's New |
Features |
Gallery |
Reviews |
Reference |
Forum |
Search