|
The Westland F. 7/30
by
Frank Mitchell
|
|
|
Westland F. 7/30 |

HyperScale is proudly supported by
Squadron.com
When I submitted pictures of my S.E. 100 to HyperScale a while back,
a number of viewers seemed to get a kick out of seeing something on the
odd-ball side. Therefore, although it has been pictured on a couple
websites over the years, I thought I would send in some detail and
construction pictures of another model that can definitely be described
as “different”.
Background
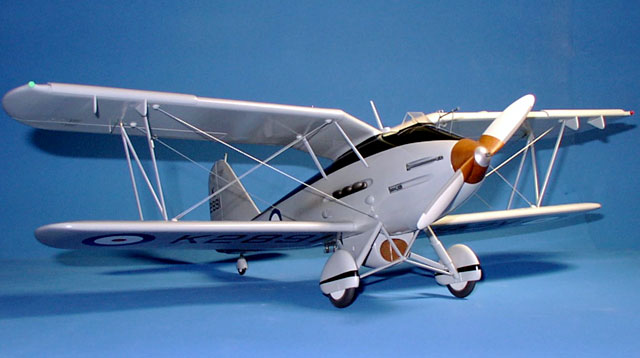
The full-sized Westland F.7/30 was a one-off built in 1930 for an RAF
competition to design a high-speed single-seat fighter to be powered by
the Rolls-Royce Goshawk engine. The competition produced several rather
strange aircraft. The Westland offering mounted the engine at the center
of gravity and turned the propeller via a long shaft, anticipating the
later Bell P-39. It was armed with four machine guns in the nose.
Because of difficulties with the engine, the competition ended with the
selection of the Gloster Gauntlet, but the Westland aircraft served
almost into WWII as a an experimental testbed and mechanic training
airframe.
Like most experimental prototypes, the airplane shows some differences
in almost every photo available. It appeared, for example, in closed and
open-canopy form, had several different exhaust layouts, and was
refinished at least once.
Scratchbuilt
1/24 Scale Westland F.7/30
|
This model was originally built in about 1977, and is 1/24th scale,
giving a wingspan of about 19.5 inches.
I ran across the plans for the airplane in 1950s book on Westland
aircraft that I found in a little English bookshop that no longer
exists. It was the most complex scratchbuilt I had attempted up to that
time, and it provided learning experiences that I have used many times
since.
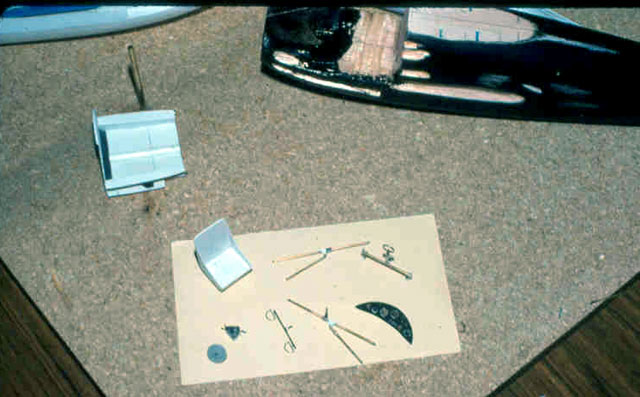
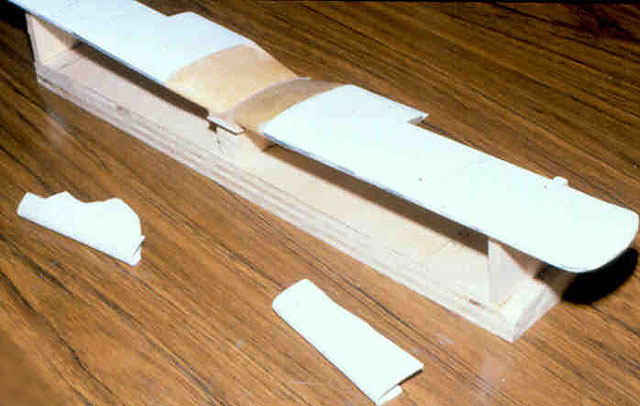
Although I have attached a few construction shots, some of the details
of construction have been lost in the mists of time. What I do remember
is that it was built by vacuum-forming balsa forms. As much wood as
possible was left inside the fuselage for strength, and the wings were
actually skinned with the plastic, leaving the wood inside. All
measurements and assembly were done on building jigs.
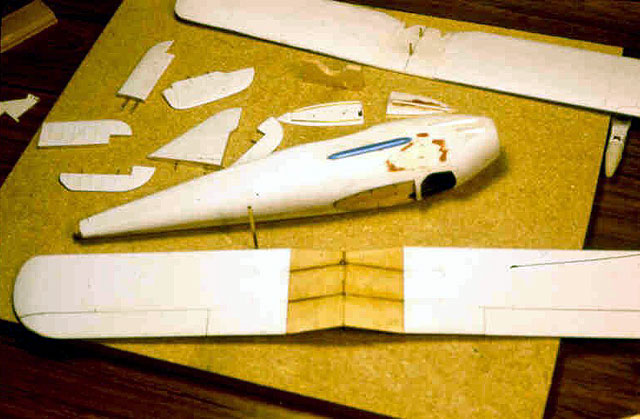
Because of the aircraft’s construction, the entire upper wing was built
as one piece and actually attached only after all painting was complete.
The gull-wing was strengthened and built around two brass tubing
“spars”. The lower wings and the tail surfaces were built in the usual
way. All struts were made from soldered brass wire with balsa fairings
attached and sanded to streamline shape. The wheel pants and the
radiator housing were built up from vacuum-formed pieces. One wheel was
turned, cut in half, and each half mounted on shelves built into the
pants (this was in the days before resin casting).
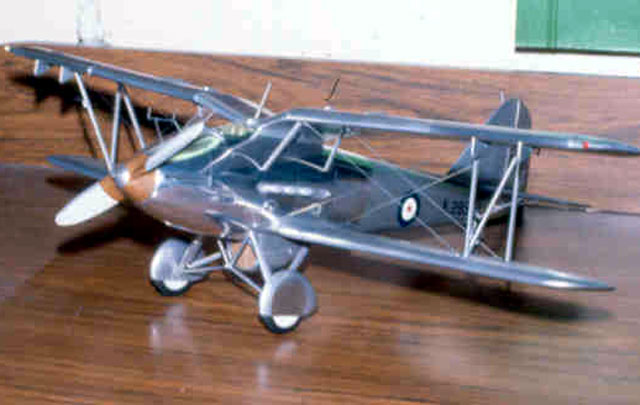
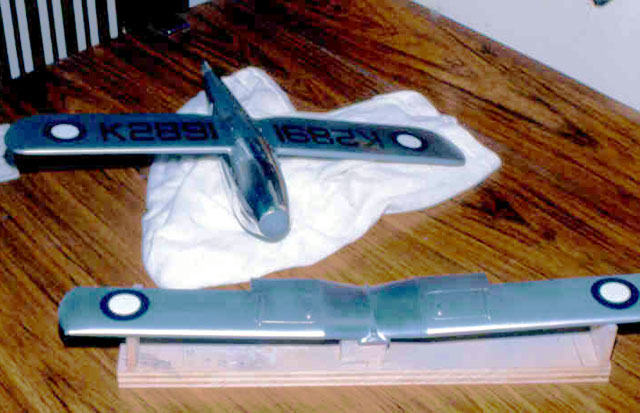
When first built, it was finished in natural metal using Reynolds Wrap
and the old Spray ‘N Plate metalizer paint. The prop was carved from a
block of Cherry wood, and the roundels sprayed on using prepared frisket.
By the mid-nineties, the poor thing had become pretty shop-worn, but I
could not bear throw it out, so it was stripped and some re-construction
carried out (this is one of several models of mine that have had [at
least] two lives). The refurbishment mainly involved closing seams that
had popped, stripping off the foil, re-doing the rigging, etc. However,
because I had never been happy with the way the ribs had been done
originally, the wings were sanded and smoothed as much as possible and
masking tape strips cut to the width of the distance between the ribs
were applied. This left a space of about 1/16th inch where each rib
would be. A heavy coat of automotive lacquer primer was sprayed-on, and
after being allowed to dry thoroughly, the tape was removed and the
whole wing gently sanded with fine (600) wet or dry leaving a very
slight elevation where the rib tape would be. This gave the effect I was
looking for, since I have long felt that the sag so often seen on kit
fabric wings is very unrealistic. After all, the object of doping the
fabric was to eliminate that sag, and maintain a constant airfoil.
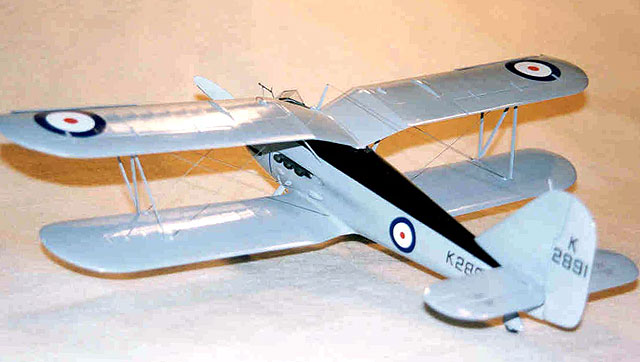
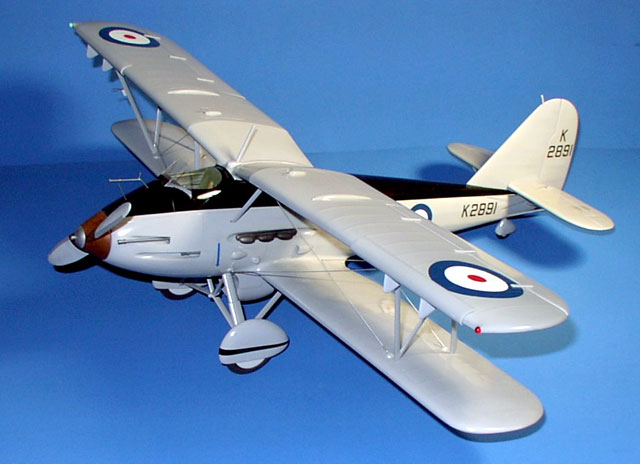
This time, I painted the aircraft in a later scheme of light gray and
black. The paint was then coated with clear automotive lacquer. The wing
serials were done on the computer, and the small ones were from the
decal stash. The roundels were again sprayed-on using frisket.
In summary, building one-offs and odd-balls can be fun, partly because a
lot of digging has to done just to come up with sufficient information
to begin. I guess I should also mention another advantage: there are
usually very few people around that know more than you do about such
aircraft. This significantly reduces the nit-picking and
color-correcting.
Click the thumbnails below to view larger
images:
Model, Images and Text Copyright © 2002 by
Frank Mitchell
Page Created 30 December, 2002
Last Updated 04 June, 2007
Back to HyperScale
Main Page
Back to
Features Index
|
 Home
| What's New |
Features |
Gallery |
Reviews |
Reference |
Forum |
Search
Home
| What's New |
Features |
Gallery |
Reviews |
Reference |
Forum |
Search