|
|
|
F-19
Stealth Fighter |

available online from Squadron.com
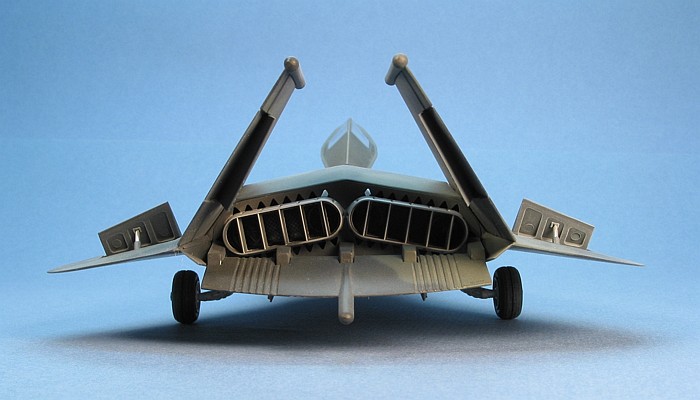
This is the old Testors (Italeri) 1/48th scale F-19 Stealth Fighter.
The kit is long out-of-production, but I've had one sitting in the attic
since back when the kit was new. It is a very unique shape, and I always
wanted to build it but never took the time. While looking for something
different (and quick) to build, I came across this kit in the attic and
decided it was time to finally build it.
It is a shame that this model is hypothetical. It has some really great
lines that I would love to have seen a full-size aircraft use. The name
"Frisbee" comes from Tom Clancy's Red Storm Rising book. The stealth
fighters used in the story are described as looking like the Testors
kit, and the pilots are said to refer to the aircraft as the "Frisbee".
I liked the analogy.
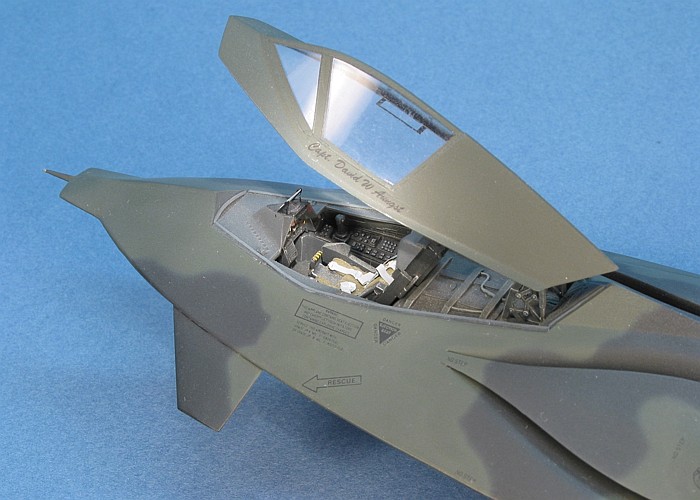
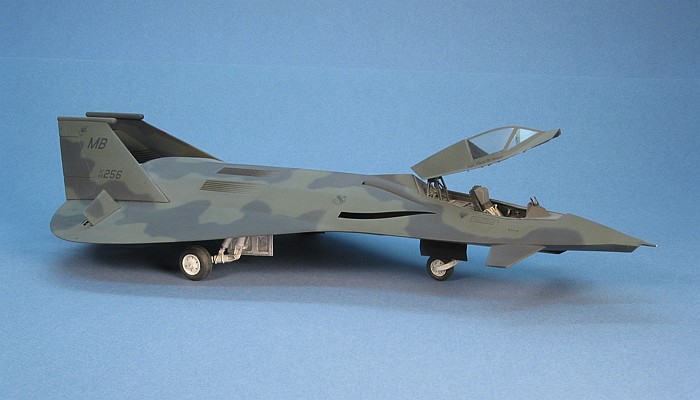
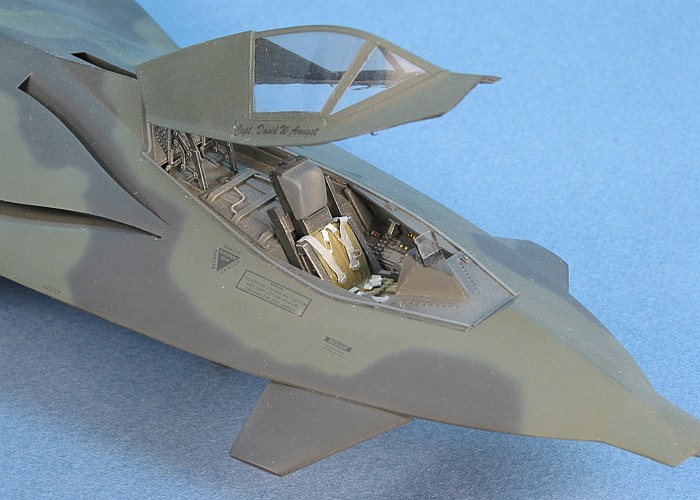
It is a very simplistic kit. The cockpit is only four pieces. After
constructing the cockpit, you sandwich it between the two main pieces
(top and bottom) that construct the entire airframe. Then you insert the
engine exhausts and add the "vertical" tails. Adding the landing gear,
horizontal tail slab, and assorted minor details completes the kit.
As simple as the kit was to build, I couldn't resist doing some easy
modifications, hence the model is not built out-of-the-box. I made the
following changes to the kit:
-
I incorporated an old Model Technologies
cockpit etchings detail set (#MT061) which includes (mostly) a lot of
cockpit goodies:
-
Canopy Details (latch hooks, hand grips,
etc)
-
Forward Instrument Hood Cockpit Sill
Details
-
Cockpit Side Walls
-
Head-Up-Display (HUD)
-
Tie Down Lugs for the Landing Gear
-
Wheel Door and Weapons Bay Door Actuators
-
I further enhanced the cockpit details by
doing the following:
-
I increased the cockpit sills to match the
Model Technologies side walls.
-
I increased the size of the instrument hood
to fit the base of the Model Technologies HUD.
-
I added the canopy seal around the
perimeter of the entire cockpit sill.
-
I reworked the kit ejection seat to provide
better detailing.
-
I added True Details etched harnesses to
the ejection seat.
-
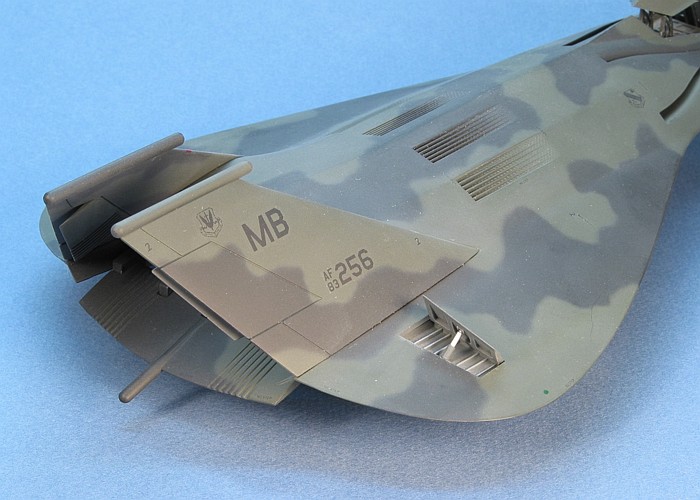
Inspired by lots of "concept drawings" from
the 1980s, I relocated the kit provided forward stabilizers to new
positions along the fuselage chine, below the cockpit. This looked
better to me than the location the kit uses sticking out on top of the
engine intakes.
The kit provides two AGM-65 Maverick missiles to hang inside the
weapons bay. While not as nice looking as the Hasegawa weapons set
missiles, they are not bad. My trouble was time. I needed to complete
this project within a short three week period and did not feel I would
have time to do the work for having an open weapons bay with weapons.
Hence, I pushed the bay doors into place (they fit tight enough to not
need glue) and finished the model with closed bays. I may someday pop
the doors off and place weapons in the bay, but I have not done so yet.
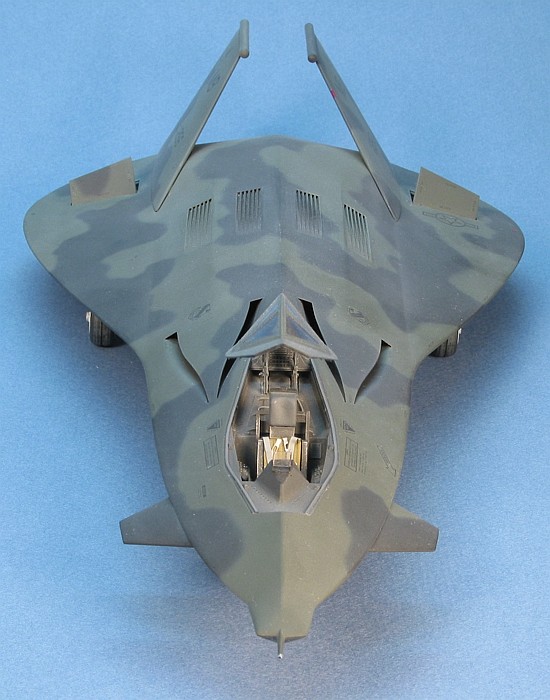
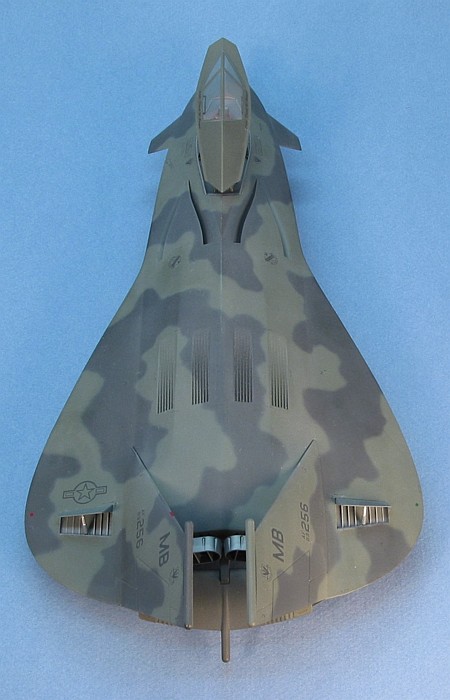
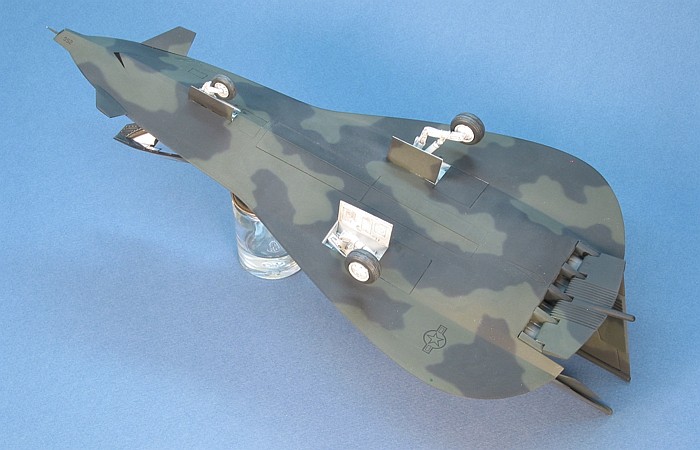
For the camouflage, I used Testors Model Master enamel and Floquil
Military enamel paints.
I find overall black to be a boring camouflage. As this is a
hypothetical aircraft, I planned out a hypothetical low-visibility
camouflage pattern using European Gray (F.S.36081) and Flat Black
(F.S.37038). I actually used Black-Gray (RLM 66) for the black as this
provided a good "scale black" color.
In designing the camouflage, I had to keep an eye on where various
markings would later get applied. I wanted the aircraft to have a
"positive/negative" look, but I did not want to try to find gray
markings to match my paint. So, I planned the camouflage so that the
points were markigns would go were all painted in gray. It was a
challenge to make the pattern look random but still have the gray
apprear in symetrical locations for the markings on the left and right.
The interior areas of the split rudders and wing spoilers are Gunship
Gray (F.S.38118). The landing gear and wheel well interiors are gloss
white.
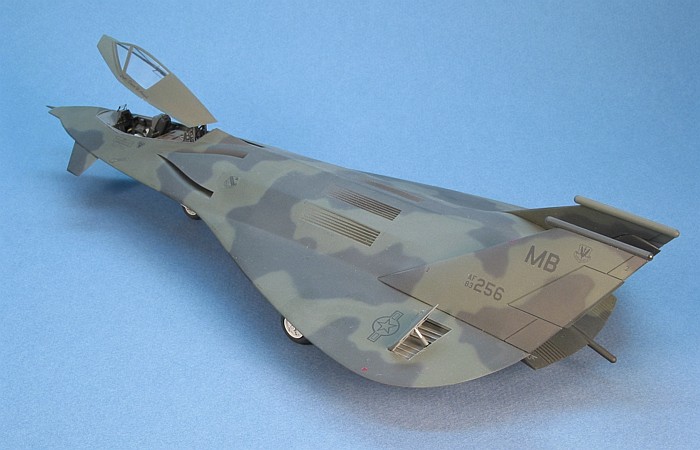
The markings are a mixture of SuperScale decals and custom printed
decals from my PC and laser printer. I used various decal sheets looking
specifically for decals pertaining to attack units. The majority of the
unit markings came from SuperScale sheet #48-069 (Early A-10 units),
with the markings being those of the 354th Tactical Fighter Wing. I
could not resist adding my own name on the canopy trim.
Weathering is done with thinned down enamel paint washes and air
brushing to highlight the few panel lines that exist. For a more
complete discussion of what I do to weather my models, see my posting on
"Weathering Aircraft".
This is a great little kit that (in spite of being "stealth") really
stands out on my model display shelves. I have a couple 1/72nd versions
of the kit stuck away in my stockpile. I will have to dig them up
someday and make a diorama or something.
|
Additional
Images and Project Summary
|
Click the
thumbnails below to view images full-sized.
Click the "Back" arrow on your browser to return to this page.
|
|
|
Project
Statistics
|
|
Completion
Date:
|
1 November, 1998 |
|
Total Building
Time:
|
33.3 |
|
Research:
|
2.1 |
|
Construction:
|
7.2 |
|
Painting
(includes creation and printing of custom decals):
|
13.0 |
|
Decals /
Markings (includes creating and printing custom decals):
|
6.3 |
|
Extra Detailing /
Conversion:
|
4.7 |
|
Model, Description and Images Copyright ©
2002 by David Aungst
Page Created 22 February, 2002 Home
| What's New |
Features |
Gallery |
Reviews |
Reference |
Forum |
Search
Home
| What's New |
Features |
Gallery |
Reviews |
Reference |
Forum |
Search