|
F9F-8 & F9F-8P
Cougars
by
Fotios Rouch
|
|
|
F9F-8 and F9F-8P Cougars |

HyperScale is proudly supported by
Squadron.com
The F9F-8 was the last production variant of the Cougar family. It
was an all around improvement over the F9F-6. It first flew in January
1954.
600 F9F-8 aircraft were delivered to the Navy up to 1957. The F9F-8
served with the Navy squadrons up until 1959. They served with the
reserves up to the mid-60s. The Cougar was replaced by the F11F starting
in 1957.
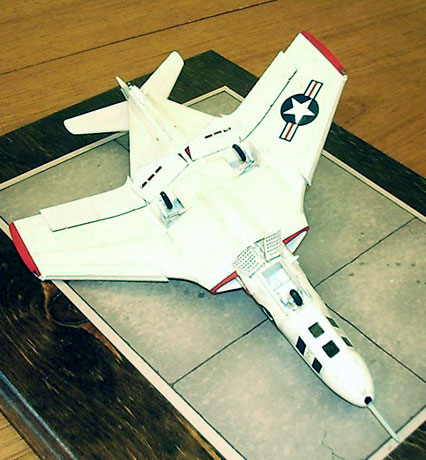
The F9F-8P was the photo recon version of the Cougar and it carried no
weapons. The bigger droopier nose of the 8P carried forward, vertical
and oblique cameras. It first flew in 1955. 110 recon Cougars were
delivered to the Navy but they were made obsolete by the F8U-1P
Crusader. The last F9F-8Ps served with the reserves up to the mid 1960s.
The F9F-8 was well liked by its crews for its handling characteristics
and robustness but it was soon surpassed by faster supersonic navy jets.
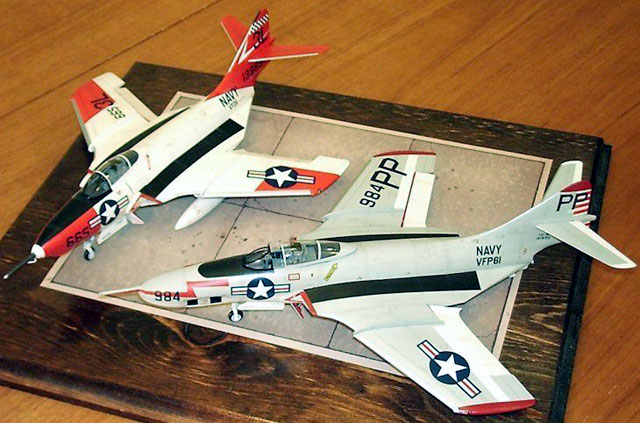
The Collect-Aire Cougar is mastered by the Russian maker and like all
of his other works it is very good. I got my first one some years ago
and soon followed it by another one. The reason was that I could not
make up my mind about which configuration I liked the best.
The kit gives an extra nose to do the reconnaissance version as well
as the standard gun nose. It also gives decals and mod instructions to
do the Blue Angels variant but I am not into aerobatics teams. I let the
kits seat in the closet for a while and then one day I decided to start
work on both of them at the same time. I have not done that before with
resin kits. I thought that if I encounter a problem with one of them, I
could learn and make the other one better.
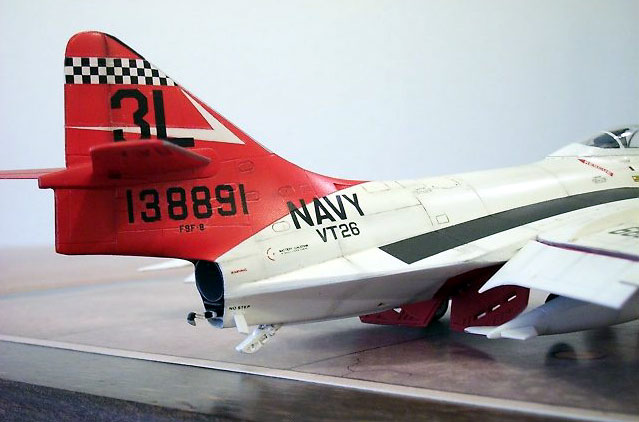
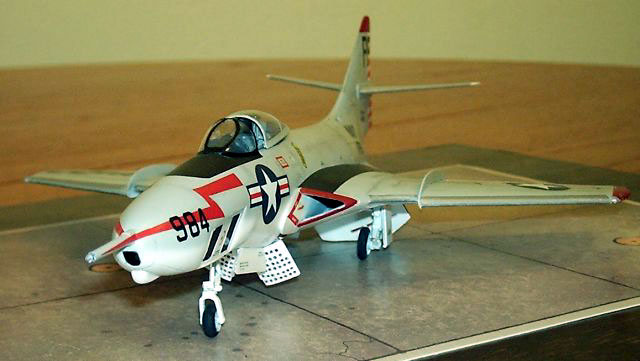
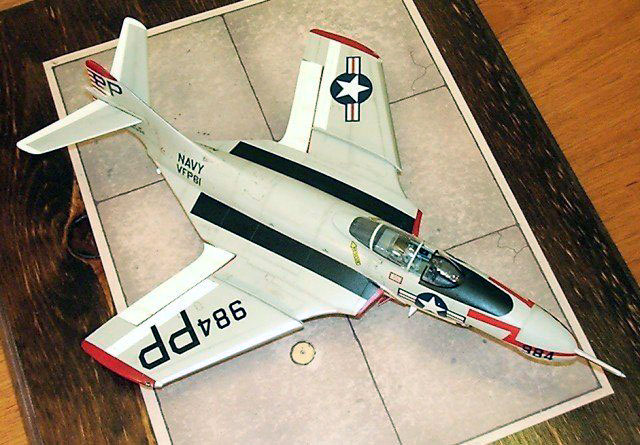
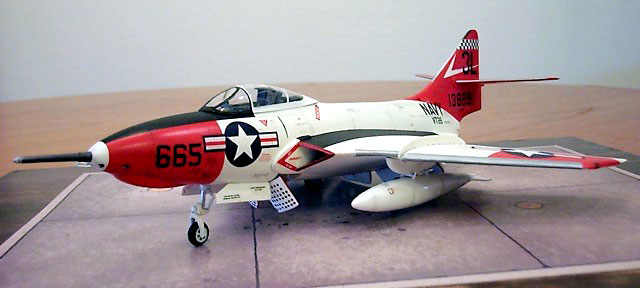
The kit offers decals for a white/orange VT-26 F9F-8, a VFP-61 recon
F9F-8P circa 1961 and the Blue Angels one.
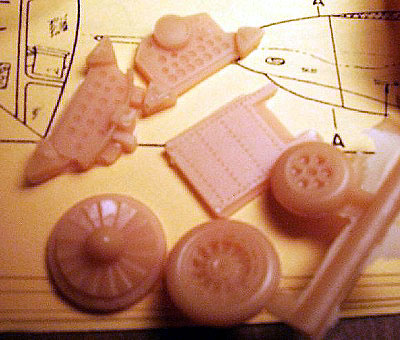
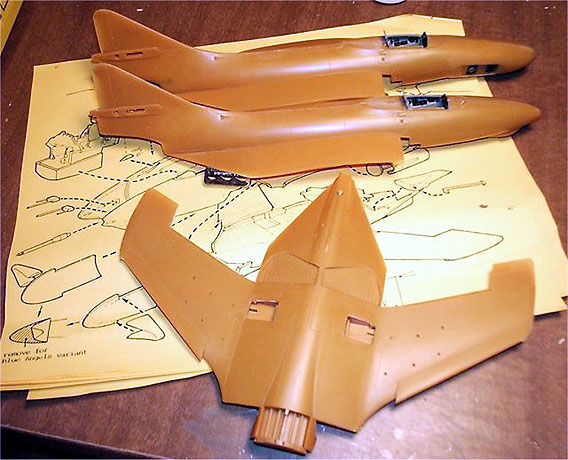
The usual caramel brown color is used again as it seems to be a
favorite of the US resin shop. It certainly has a smell to it and it is
a bit brittle but the resin shop does a good job with it. I need to
mention also that this resin shop has some idea about quality control
and a grasp of more modern casting methods.
Click the thumbnails below
to view larger images:
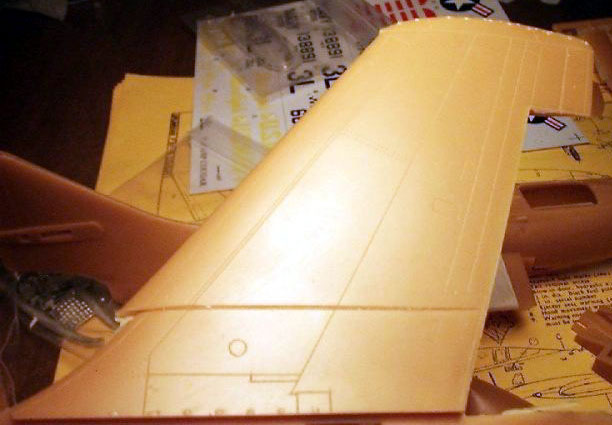
The fuselage is split in left/right halves. It is a little sensitive and
a little prone to warping because it is so elegant and thin. Pay
attention to remove any warpage with hot water before assembling
anything. I found that I had to do a little trimming on the cockpit
sidewalls so the fuselage would close with no squeezing anything. I also
trimmed the bottom rear edge of the cockpit assembly so that the wing
would make a good fit. You might need to insert a "spacer" to push out
the fuselage edges where they will meet the wing tops for a good fit.
The rest of the kit will go together reasonably fast. I had few pinholes
and other resin defects. The scribing is exemplary again and there is
great correspondence of the panel lines on the fuselage left/right
halves.
Click the thumbnails below
to view larger images:
The only inaccuracies on the kit are found on the flaps and the flap
bays. The flaps look like they belong to a Panther. The flap bays do not
match what I have seen on the real Cougars from the museum. Some time
ago one of the flaps of one of the Pima Museum Cougars became unhinged
and dropped in the open position. It was left like that for a while
before the museum maintenance crew got to screw it back together. I took
a lot of pictures of how the flap looks inside and out. The pictures
were sent to Collect-Aire and the next release of the Cougar (TF-9J or
F9F-8T) will have the flaps redone. This indicates commitment to the
product on their part since they could have easily ignored the problem
and reused the existing masters.
Using the pictures I took, I fabricated the inside surface of the
flaps with plastic strip. I left the inner flap surface alone.

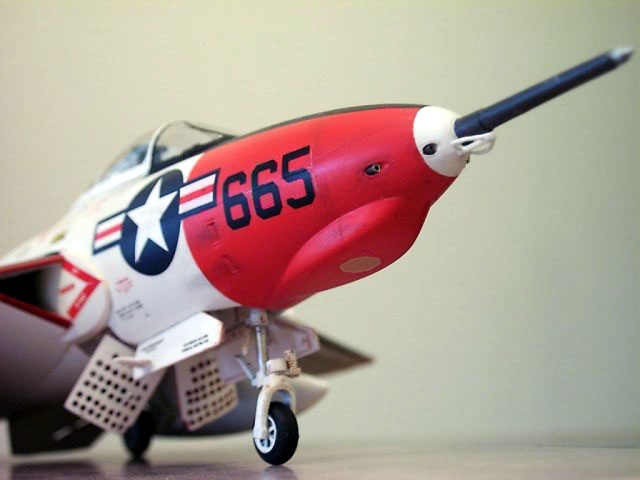
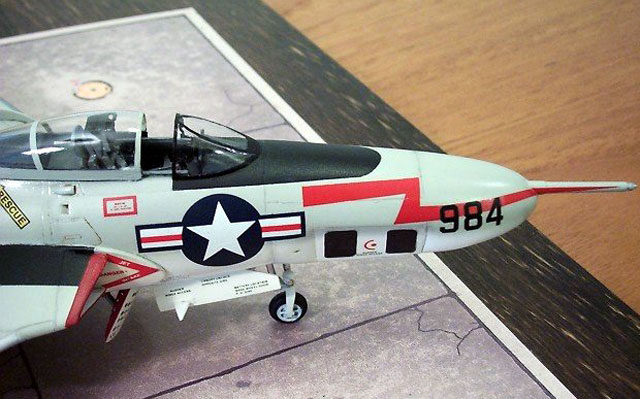
Another thing I had to fabricate was the antenna loop that is found at
the front of the F9F-8 nose. I made it with bent wire and plastic rod.
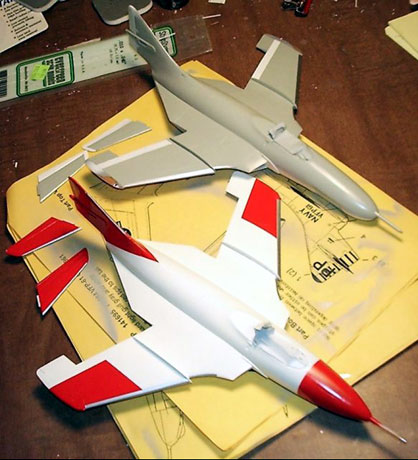
The F9F-8P went together okay as well. I had to cut off the nose at the
specified panel line and insert the new nose but it went together so
well that I did not have to use any putty. The only difficulty with the
recon nose is the little camera windows. The instructions give you a
template as a guide and also some clear stock to use. I made scans of
the template and flipped it in my software so I could have both sides in
one sheet of paper. I used left over Black Magicä to make the little
camera window masks and it worked great for me. I used also a mixture of
Tamiya clear tints to make the dark tinted look of the camera windows
but I made it too dark and you cannot see the cameras inside the nose.
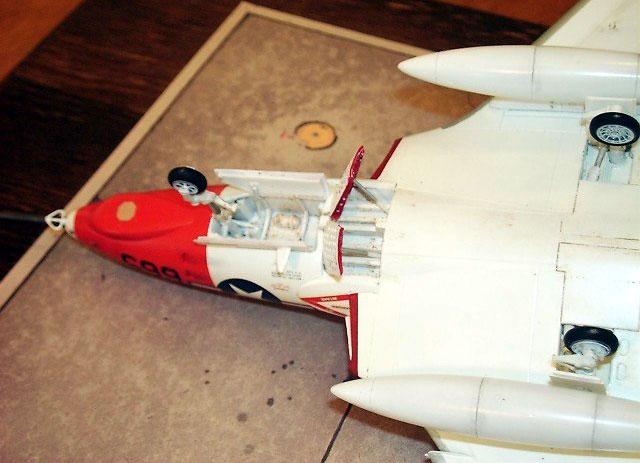
The cockpit on both variants is good and certainly adequate with the
canopy closed. Two instrument panels are provided for the two variants.
The maker used Reheat parts for the instrumentation and they make for a
nice looking cockpit (even if a bit inaccurate).
I drilled the soft metal spoilers for a more realistic look. I also
inserted hypo needle tubes to represent the machine gun nozzles.
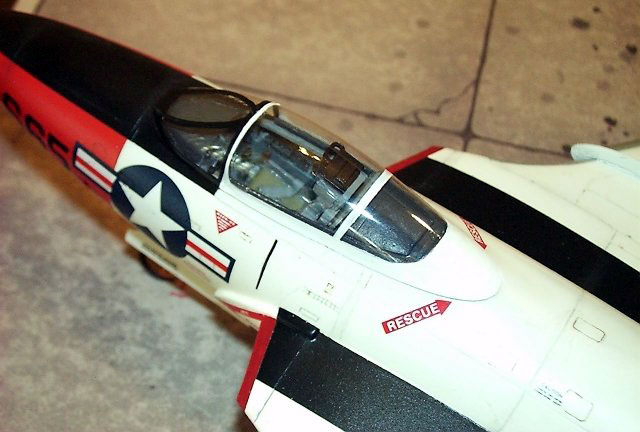
The decals worked ok. They are a little matte in finish. Since I had two
kits I doubled up some decals wherever there was darker color
underneath. I also had to find all of the warning decals from the spare
box since there was very little provided in the kit. The rescue arrows
are identical and not handed.
Other helpful hints
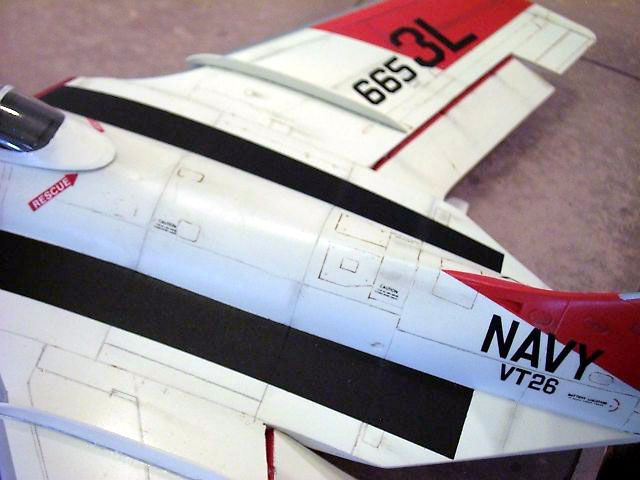
Thin the metal wing fences as much as you can to get a scale look.
Optionally, redo the area were the tail hook comes out of per the
pictures in the provided walkaround. Do not make the mistake I made when
I missed painting a white border around the national insignia on the
orange portion of the top wing. I caught it late and did not fix it. The
decal if researched properly could have solved that.
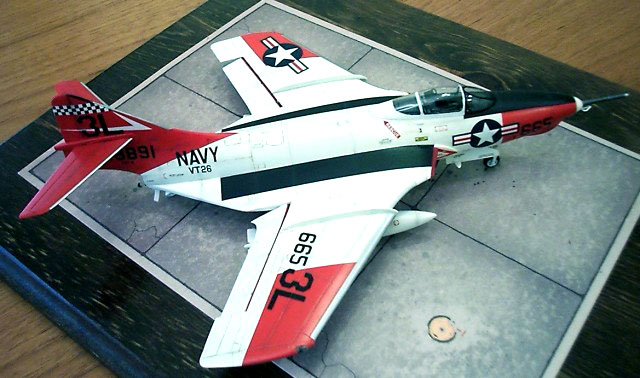
The Cougars will come out seating a little low as when seen in the fully
loaded position. This does not bother me. You might want to extend the
main gear struts for a more elevated stance.
Collect-Aire's Cougar is a very enjoyable build for both kits with
little fuss. The best advice is to test fit things many times before you
commit them to scalpel or glue but that goes for every modeling venture
outside of the mainstream injected model kits.

I still recommend them as very nice and accurate models. Who knows,
maybe one day Hobbycraft will find someone else to master the Cougars
for them and they will proceed past the box art stage…. Until then (and
maybe even after that) these are the best Cougars in any scale.
Click on the thumbnails
below to view larger images:
Model, Images and Text Copyright © 2002 by
Fotios Rouch
Page Created 10 October, 2002
Last Updated 04 June, 2007
Back to HyperScale
Main Page
Back to
Features Index
|
 Home
| What's New |
Features |
Gallery |
Reviews |
Reference |
Forum |
Search
Home
| What's New |
Features |
Gallery |
Reviews |
Reference |
Forum |
Search