|
Bristol Blenheim Mk. I
by
Pablo Calcaterra
 |
|
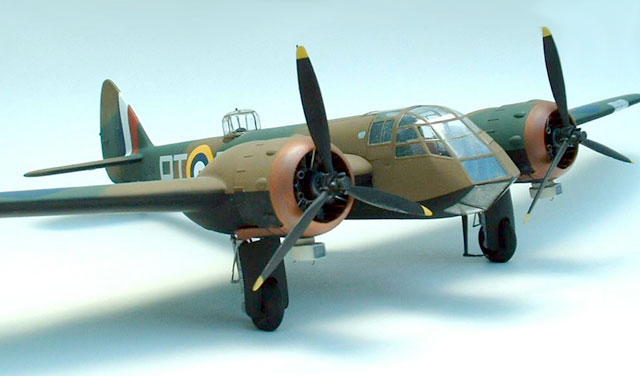
Bristol Blenheim Mk. I |

Classic Airframes' 1/48 scale Blenheim Mk. I is
available online from Squadron.com
62 Sqn. RAF – Malaya 1941
The Bristol Blenheim was faster than any fighter in service in the Royal Air
Force when it was first designed. Such was the impact in the top brass of the
RAF that the plane was ordered into production even when the Hurricane and other
faster single winged fighters were ordered as well, leaving the Blenheim behind
in speed and other flying characteristics.
The short nosed version, the Mk 1, was totally outclassed in the west, but was
in strength in some squadrons in the Far East when war broke out in that region
in 1941. Soon almost all the planes in the squadrons were destroyed.
On Dec 9, a full strength attack was to be carried out by 12 planes made of the
remains of 2 different squadrons, led by Sqn. Leader John “Pongo” Scarf. Seconds
after he took off from Alor Star in the Malay Peninsula, while circling the
field to wait for the rest of the planes, he saw that they were caught unaware
on the ground by a surprise attack by the JAAF. No plane survived this attack,
but instead of turning back, Scarf decided to carry on with the mission alone.
On the trip to the Japanese held aerodrome, he was attacked several times by
fighters. He bombed the parked planes while his rear gunner machine gunned them.
Now, on the trip back, things got hotter and the Japanese pilots carried their
attacks with more stamina. With his left arm almost severed from his body (he
was left handed) and his back riddled by bullets (his seat was not armoured),
helped by his crew, he made a wheels up forced landing in British territory,
thus saving his men’s lives and avoiding being taken prisoners by the Japanese
(which almost inevitably ended in death).
Shortly after being admitted to the hospital, he died of secondary shock.
Coincidentally, his wife was a nurse in that hospital and gave blood for the
surgery that never took place.
With all the Far East records lost in the retreat, it was not until 1946 that
Scarf’s sacrifice was known and he was awarded the Victoria Cross. By doing so,
the RAF also wanted to recognize all the unknown sacrifices made by several of
the fighter and bomber crews in those desperate years of retreat.
|
Building Classic
Airframes' Blenheim Mk. I |
I started by painting the entire interior (including the wheel bays) with
green. The back of the cockpit is made of resin and needed a lot of filling to
decrease it’s width in order to let the fuselage halves close.
The cockpit floor instructions are vague and differ from one step to another in
the booklet. Therefore, using some photo references I was able to place it
almost in between the places shown in the instructions.
Both nose halves were glued together. I used them to align the cockpit walls.
With stretched plastic I build the 3 support of the seat for the bomb aimer.
 Apart
from the position of the floor and the alignment of the walls, the rest of the
cockpit just falls in place quite easily. I added a rudimentary gun sight for
the pilot using a plastic hair of a brush. Apart
from the position of the floor and the alignment of the walls, the rest of the
cockpit just falls in place quite easily. I added a rudimentary gun sight for
the pilot using a plastic hair of a brush.
Once the cockpit was ready, I attached the transparent nose. A lot of sanding
and putty was required to get a smooth union of the external walls in this zone.
The wheel bays needed a lot of filling as stated in several publications, and I
also had to trim the inside of the upper wing halves to get a decent fit. The
landing gear was assembled and placed in its’ place to help with the alignment
of the bays inside the wing halves.
The turret structure was glued in place before doing the same with its cover.
The union of the cover with the fuselage must be merged using sandpaper and
putty. The border of the ring that is close to the tail has two little scalloped
form which I proceeded to do using a file and sand paper.
Both wings were glued in place. The horizontal surfaces of the tail were trimmed
for them to have the correct angle with the fuselage.
 The
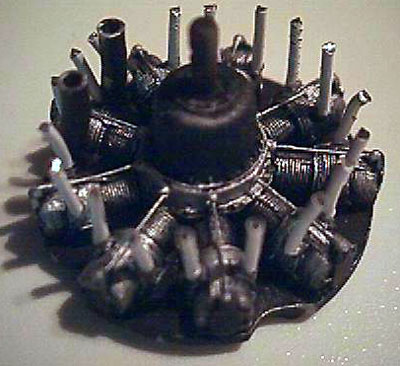
engines proved to be tricky as well, as the following areas had to be corrected: The
engines proved to be tricky as well, as the following areas had to be corrected:
-
Addition of push rods made of brushed of an old
tooth brush, glued in place with cyano and painted silver.
-
Trimming of the borders of the engine to help the
nacelles halves close around it
-
The exhaust cylinders are wrong in shape and half
of them are missing. Therefore I built them using thick wire.
With everything painted and glued, I added 3 struts that support the
collector ring, again using wire. The small “window” in front of the pilot view
was also added.
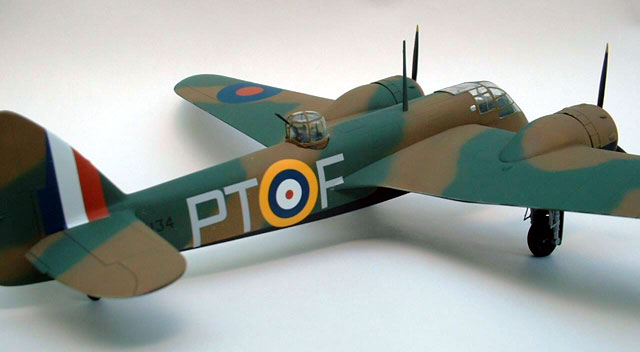
With all sanded and checked, and all the transparent pieces covered as
required with Tamiya masking tape, I started painting the plane in this order:
-
Interior green for all the cockpit and gun
turret,
-
black undersides,
-
dark brown and green upper surfaces.
-
The collector ring and exhaust were painted in
copper and then drybrushed with Humbrol 113
-
The tropical air filters were painted light grey.
A generous amount of clear varnish was applied after all the moveable surfaces
were marked with a much sharpened black pencil, and the bomb bay doors were
highlighted scrapping the paint on the edges using a pin.
Decals were applied and, once dried, given a matt coat of varnish.
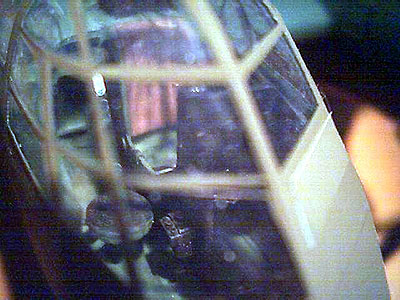
Other pieces that were glued at this step were the tail wheel, a semicircular
protection for the back of the turret (see picture), the gun with a little
modification to its mount, the pitot and antenna and the landing gear doors.
Landing and position lights were painted, as were the two little windows behind
the cockpit and the left wing machine gun cover.
As I believe that the turret sits too low if you want to hide a gap between it
and the fuselage, I added a small band of photoetched tree to the bottom of the
Plexiglas. This allowed me to put the turret in its correct high attitude, while
avoiding the mentioned gap.
The final touch was a couple of little pieces of wire that made the retainers
for the tropical filter.
With a lot of patience and some scratch building (gunsight, modifications to
the turret zone, tropical filters, etc), I finally had a long awaited Blenheim
that rendered my tribute to the valiant wings that flew and fought against the
wall in 1941/2 in the Far East.
Sources
-
Air VCs – Chaz Bowyer
-
Bristol Blenheim – Theo Boiten
-
Valiant Wings – Norman Franks
-
Blenheim Squadrons – Jon Lake – Osprey
-
Bombers of WWII – Edited by David Donald
Acknowledgements
-
Steve Murray
-
David Yodens
-
Juan Carlos Ostolaza
Click the thumbnails below to view
larger images:
Model, Images and
Article Copyright © 2002 by Pablo Calcaterra
Page Created 30 March 2002
Last updated 04 June 2007
Back to HyperScale Main Page
Back to Features Page |
 Home
| What's New |
Features |
Gallery |
Reviews |
Reference |
Forum |
Search
Home
| What's New |
Features |
Gallery |
Reviews |
Reference |
Forum |
Search

