|
Messerschmitt Bf 109K-4 Night Intruder
by
Ian
Robertson
 |
|
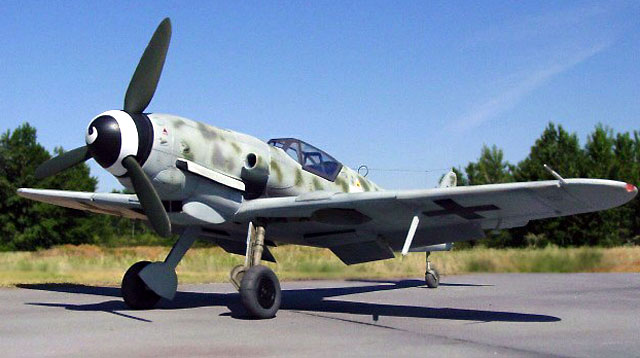
Messerschmitt Bf 109K-4 night intruder |

Hasegawa's 1/48
scale Bf 109K-4 is available online from
Squadron.com
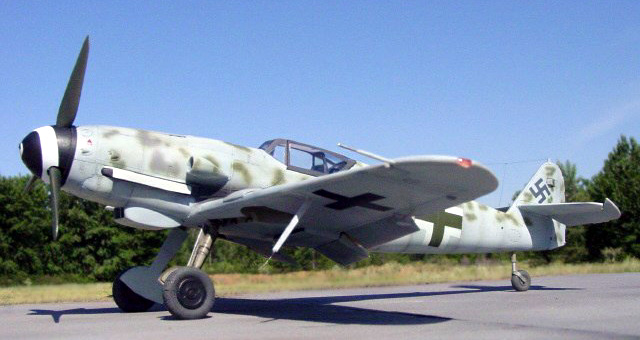
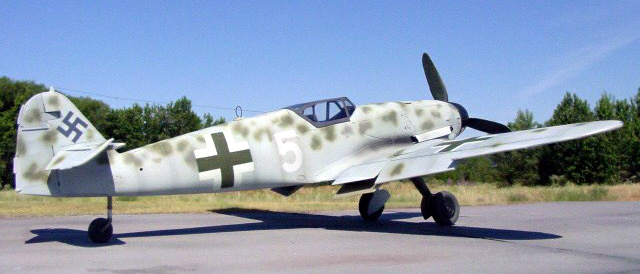
This is Hasegawa's 1/48 Messerschmitt Bf.109K-4 in a rare night intruder
camouflage scheme. According to the 2000 edition of JaPo's book "Messerschmitt
Bf 109K - Camouflage and Marking" this aircraft most likely belonged to NJG 11
although its identity has not been confirmed.
A color profile of the aircraft is shown on the back cover of the book, and a
black and white photograph and line drawing appears within.
Much has been said about Hasegawa's Bf.109's so I'll defer to other articles
for construction notes. My model was built with the following modifications and
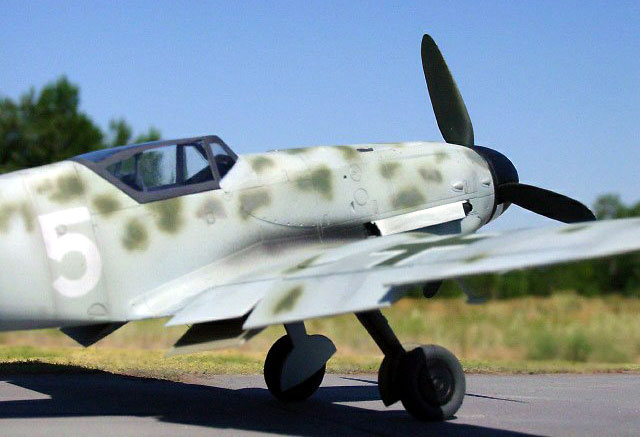
additions: thinned headrest with clear acetate window, repositioned control
surfaces on tail, wire loop antenna, stretched sprue antenna wire, wire brake
lines, etched metal seatbelts (Eduard), wing tip lights shaped from clear sprue,
and extended exhaust shrouds (indicative of a night fighter) made from sheet
styrene.
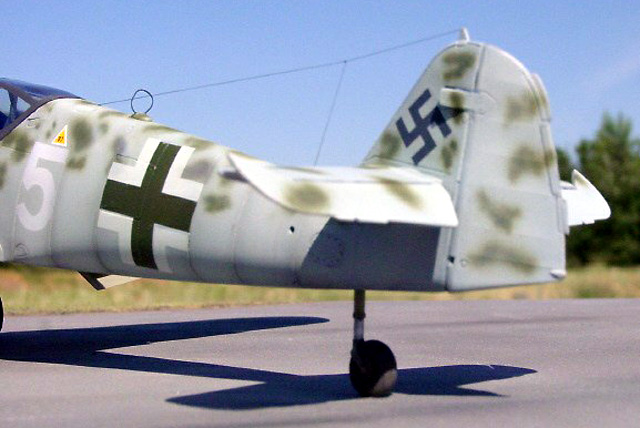
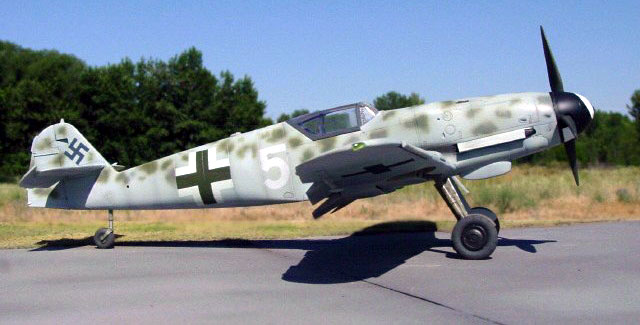
Most photographs of the Bf.109K-4 show the tail wheel doors closed, not open as
done by Hasegawa. Therefore, I cut the doors off my model and used "half round"
styrene and CA glue to close them up. When the CA glue dried the area was sanded
flush with the model's surface and gear doors were scribed.
Markings for this particular aircraft have been produced in 1/48 scale by
KommanDeur Decals. However, because the markings are relatively simple I opted
to use a combination of spare decals and templates for the markings on my model.
 All
painting was done using Polly Scale acrylic paints and an Iwata HP-C airbrush.
Panel lines were pre-shaded in black. White was then painted on the fuselage
sides just aft of the cockpit. Masks (made from Tamiya tape) for the number 5
were then applied and they remained on the model until camouflage painting was
complete. A spare #5 decal (of the proper configuration but wrong color) was
used as the template for the masks. All
painting was done using Polly Scale acrylic paints and an Iwata HP-C airbrush.
Panel lines were pre-shaded in black. White was then painted on the fuselage
sides just aft of the cockpit. Masks (made from Tamiya tape) for the number 5
were then applied and they remained on the model until camouflage painting was
complete. A spare #5 decal (of the proper configuration but wrong color) was
used as the template for the masks.
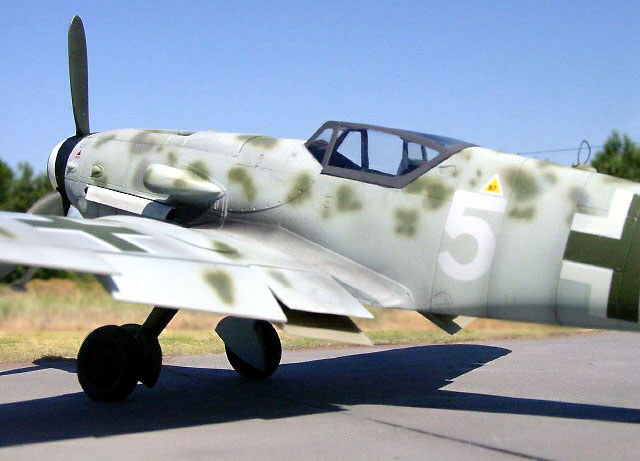
The centers of the wing and fuselage crosses were painted RLM83 and then masked
as described above until the camouflage was painted.
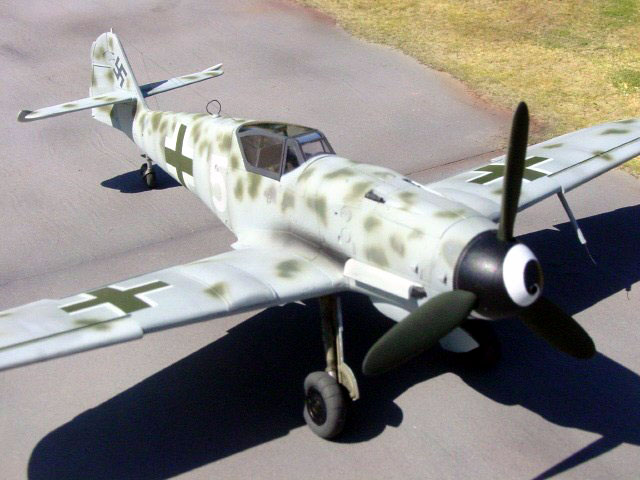
The upper and lower surfaces of the model were painted RLM 76 followed by
mottles of RLM83 (and a few RLM75 on the nose) as indicated in the JaPo book
(note that Kommadeur suggests RLM81 and 83 mottles). The cockpit and canopy
frame were painted RLM66. The spinner was painted black with RLM70 propeller
blades. Wheel wells and the interior gear door were painted RLM02.
The model was sprayed with Testors Metallizer Sealer prior to the addition of
decals. The fuselage and upper wing crosses were carefully aligned with the
RLM83 centers which had been masked on the model earlier. The simplified
underside wing crosses were applied as a black decals.
Exhaust stains were sprayed using highly thinned black paint. In addition,
uneven applications of highly thinned black paint were sprayed over the model to
subdue it's "clean" appearance.
All images were taken outdoors on a bright day with my SONY S-75 digital
camera set at its highest picture resolution (2048 x 1536 pixels).
Other camera settings were as follows: 200 ISO film speed (even though
digital cameras don't have film!), 1/800thsecond shutter speed, F-stop 8.0, and
fixed focus distance of either 20 or 30 cm. Images were cleaned up using Adobe
Photoshop 6.0 for the Macintosh. Specifically, the interface between the base
and background were merged using the software's "blur" tool, and the "sharpen
edges" feature was used to compensate the lost resolution during image
compression.
Click
the thumbnails below to view larger images:
Model, Images and
Article Copyright © 2002 by Ian
Robertson
Page Created 29 August 2002
Last updated 04 June 2007
Back to HyperScale Main Page
Back to Features Page |
 Home
| What's New |
Features |
Gallery |
Reviews |
Reference |
Forum |
Search
Home
| What's New |
Features |
Gallery |
Reviews |
Reference |
Forum |
Search