|
Messerschmitt Bf
109G-6
by Peter Magee
|
|
|
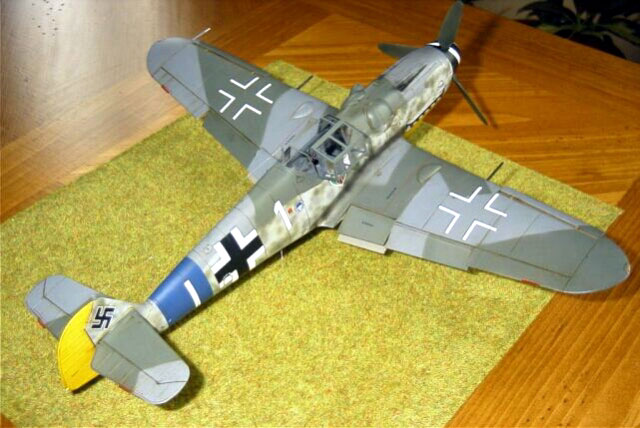
Messerschmitt Bf 109G-6 |

Hasegawa's 1/32
scale Messerschmitt Bf 109G-6 is available online from
Squadron.com
Here are some images of my Hasegawa 1/32
Messerschmitt Bf 109G-6.
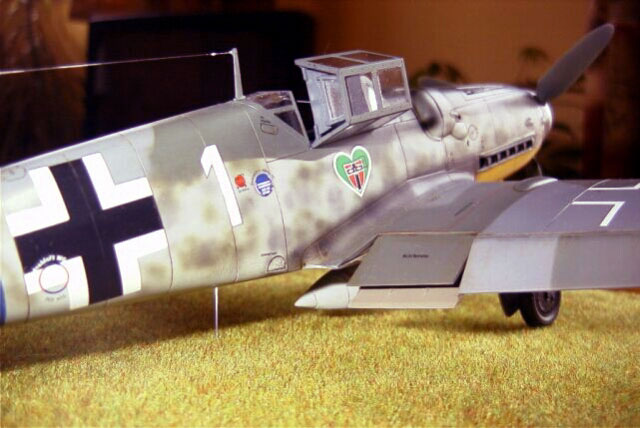
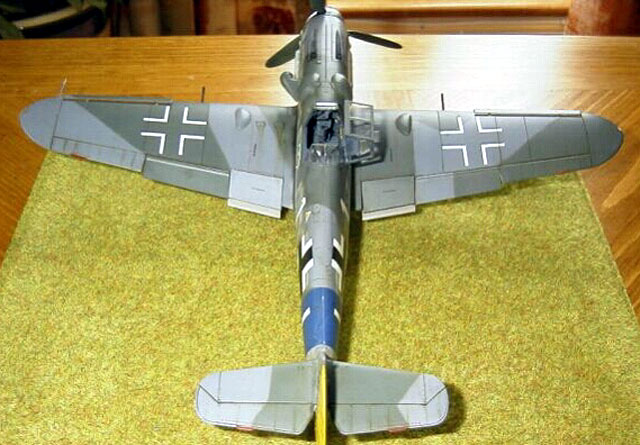
The kit is finished as the aircraft flown by
Staffelkapitän Oblt. Rudolf Klemm 7./JG 54 Northern Germany in the
spring of 1944.
I think sufficient has been written regarding the
quality and accuracy of the kit, all I will add that this kit is an
absolute pleasure to build. The method of attaching the wings to the
fuselage is particularly well done.
For me (my opinion only) the only weak area of the
kit was the cockpit and as such decided to use the Cutting Edge resin
set to replace the kit parts. I used the set that included ‘poseable’
seatbelts. Although I like the concept of these belts I experienced
difficulty in trying to remove them from their backing sheet. The first
cut with a new scalpel blade was fine, but subsequent attempts resulted
in simply stretching the backing material without cleanly cutting
through. A combination of frustration and a limited supply of new
scalpel blades forced me to abandon the poseable belts and replace them
with etched ones.
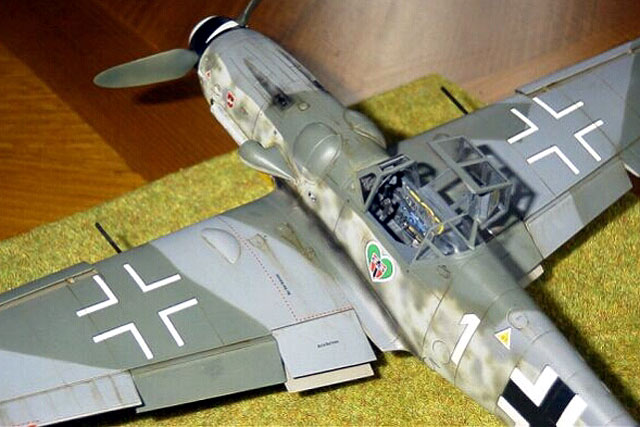
The Cutting Edge set is superbly moulded and offers
near perfect fit, however, here in the UK it costs more than the kit
itself, albeit only by 1p.
Other areas of the kit that I decided to improve
were the moulded brake lines on the main undercarriage which were
removed and replaced by electrical fuse wire, and to drill out the
exhaust stacks, although neither are particularly evident in the
photographs.
 The
kit was primed using Halfords (Auto) acrylic and airbrushed using
Aeromaster and Pollyscale acrylic paints. Two thin coats of Klear were
applied in readiness for the decals. The
kit was primed using Halfords (Auto) acrylic and airbrushed using
Aeromaster and Pollyscale acrylic paints. Two thin coats of Klear were
applied in readiness for the decals.
EagleCals decals were used. These are superbly
printed and settled down beautifully with the aid of Microscale Set and
Sol solutions.
Water colours were used to accentuate the panel
lines and provide the minimal weathering. A couple of fine coats of
Aeromaster matt varnish were used to seal everything.
This kit was an absolute pleasure to build.
I for one can’t wait for the K-4. Lets hope that
Hasegawa will continue with their renewed interest in 1/32 scale.
Click on the thumbnails
below to view larger images:
Model, Images and Text Copyright © 2002 by
Peter Magee
Page Created 21 June, 2002
Last Updated 04 June, 2007
Back to HyperScale
Main Page
Back to
Features Index
|
 Home
| What's New |
Features |
Gallery |
Reviews |
Reference |
Forum |
Search
Home
| What's New |
Features |
Gallery |
Reviews |
Reference |
Forum |
Search