|
Messerschmitt Bf 109G-4
by
Ian
Robertson
 |
|
Messerschmitt Bf 109G-4 |

HyperScale is proudly supported by Squadron.com
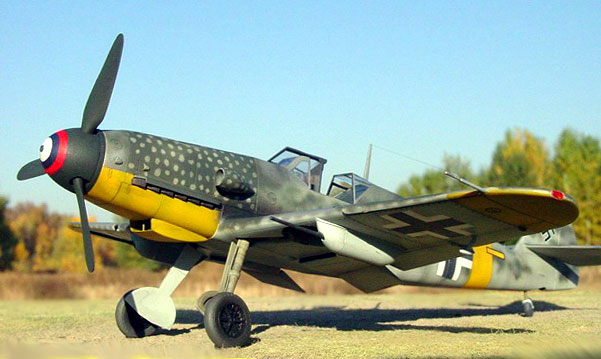
My model depicts a Bf.109G-4/R-6 from 13.JG52, a Slovakian fighter unit in
1943. Many of the aircraft in this unit had spotted cowls, a feature that caught
my eye and motivated me to build this model. I found this scheme in a recent
Czech publication by HT Models entitled "Messerschmitt Bf109F, G-2 a G-4:
slovenskych pilotov 1942-1943".
The book, written in Czech, is filled with color profiles and period photos
of the aircraft in 13.JG52, and it contains many detailed walk-around photos of
museum Bf109F's and early G's.
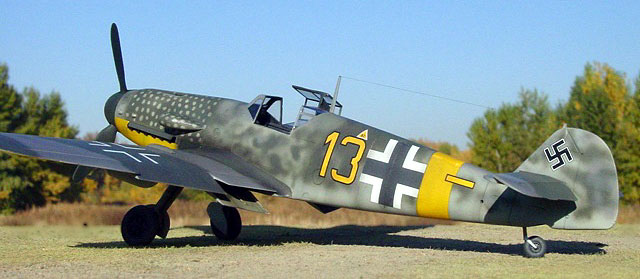
I converted Hasegawa's 1/48 Bf.109G-2 into a G-4/R-6 by adding underwing
cannons and bulges above the wheel wells, both of which were scavenged from my
Bf.109 spares box. Although G-4's typically had wider tires than G-2's (hence
the need for bulges on the upper wings), my reference photographs indicated that
the narrow, spoked wheels were present on some of the G-4's in this unit.

A number of minor enhancements were made to the kit.
-
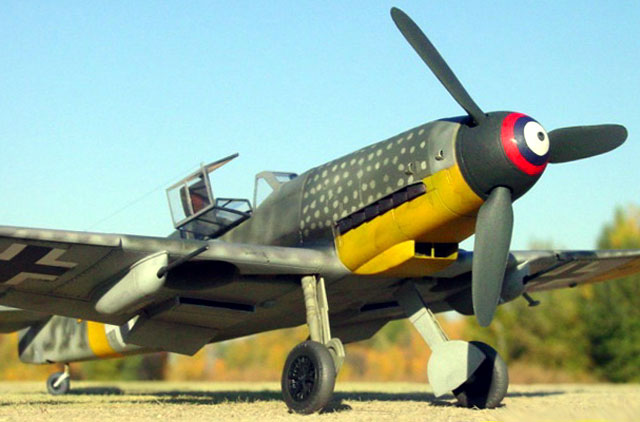
Ventilation scoops on the aircraft's nose were
made from sheet styrene. I heated the styrene under a flame and then poked a
toothpick with a blunt tip into the styrene, being careful not to pierce the
material. Scoops were fashioned from the hollow tips that resulted from the
stretched styrene (thanks to Boise Kent for the idea).
-
The control surfaces on the horizontal stabilizers
were repositioned.
-
Internal framing was added to the lower flaps of
the cooling radiators.
-
Brake lines were added to undercarriage.
-
Wing tip lights made from clear styrene were
molded into the wingtips.
-
A thin rod of styrene was added to the middle of
the oil cooler intake under the nose.
-
Etched metal seatbelts from Eduard were added. (8)
Antenna wire was made from stretched sprue.
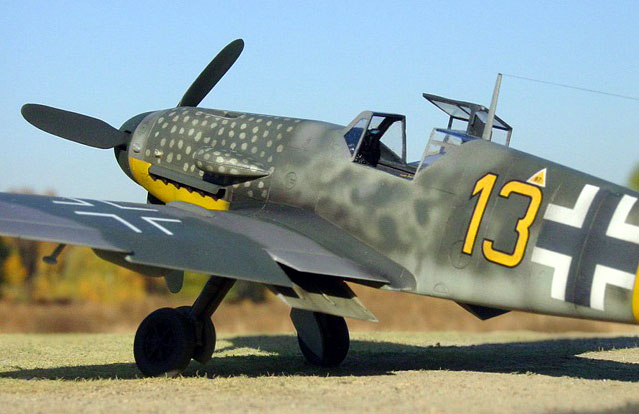
This aircraft displayed the standard Luftwaffe mid-war fighter scheme of
RLM74/75/76, with yellow theatre markings under the wing tips, around the
fuselage, and under the cowl. Photographs showed the camouflage pattern on the
wings to have deviated somewhat from the straight, hard-edged pattern often
shown in painting instructions. I sprayed the wing pattern and the fuselage
mottles free-hand using an Iwata HP-C airbrush and Polly Scale acrylics. The
cockpit was painted RLM66, and the undercarriage and wheel wells RLM02.
The spots on the engine cowl were easy, albeit tedious, to produce. I started by
spraying the cowl RLM76 light blue. Once the paint had dried, small pieces of
UHU-Tac (an adhesive product similar to blue-tac) were carefully positioned over
the cowl. The cowl was then sprayed RLM74. When the masks were removed the cowl
was spotted. I toned down the intensity of the spots by spraying a light coat of
highly thinned RLM74. I believe this method for creating the spots is much more
effective than adding spots with a brush.
Exhaust stains were made by spraying highly thinned black paint. Some additional
"post-shading" over the model was done in a similar manner, although more
lightly than the exhaust stains.
A gloss coat of Future floor wax was spayed over the model and left to cure
prior to adding decals. Most of the decals came from spare sheets, which I tend
to accumulate for 109s. Normally I would have painted the yellow fuselage band;
however, I decided to use a yellow decal for the band in order to ensure a close
match with the yellow numbers.
For the spinner I painted the tip white and then added a blue and red decal from
Eagle Strike's "Augsburg's Flyers" (sheet 48051, a/c number 3). The decal
reacted well to MicroSol and conformed perfectly to the curved surface of the
spinner. The rear half of the spinner was painted RLM70 (Black green), as were
the propeller blades.
For the final clear coat I spayed a mixture of 50% Polly Scale clear flat and
50% Polly Scale clear satin once the decals had dried.
All images were taken outdoors on a sunny autumn day with a SONY S-75
digital camera set at its highest picture resolution (2048 x 1536 pixels). Other
camera settings were as follows: 200 ISO film speed (a setting on my camera,
even though it is digital), 800-1000th/sec shutter speed, F-stop 8.0 (highest
possible), and fixed focus distance of either 20 or 30 cm.
Images were cleaned up using Adobe Photoshop 6.0 for the Macintosh.
Specifically, the interface between the base and background were merged using
the software's "blur" tool, and edges in some photographs were sharpened using
the "sharpen edges" tool.
Sharpening images in such a way helps to restore some of the clarity lost
during image compression.
Click the thumbnails below to view
larger images:
[photogallery/photo14289/real.htm]
Model, Images and
Article Copyright © 2002 by Ian
Robertson
Page Created 23 November 2002
Last updated 04 June 2007
Back to HyperScale Main Page
Back to Features Page |
 Home
| What's New |
Features |
Gallery |
Reviews |
Reference |
Forum |
Search
Home
| What's New |
Features |
Gallery |
Reviews |
Reference |
Forum |
Search