|
Martin B-57B
by
Fotios Rouch
|
|
|
Martin B-57B |

HyperScale is proudly supported by
Squadron.com
The Martin B-57B became operational in 1955. The B-57B Night Intruder
was practically out of operational service with the USAF by 1960 and
most aircraft were transferred to Air National Guard units. The
escalating conflict in Southeast Asia gave the B-57B a second chance.
B-57Bs operated from air bases at Da Nang and Bien Hoa until they were
finally withdrawn from combat in 1968. There were about 200 B-57Bs
produced.
The B-57 and its progenitor, the English Electric Canberra, have been
strangely ignored by the manufacturers of model kits and no 1/48 scale
injected kit has been produced to date. The only available kits to my
knowledge are the vac and metal Falcon kit, the Aeroclub offering,
presently covering the early British variants and the Resin/Vac/Metal
kit from Collect-Aire.
Collect-Aire's
1/48 Scale B-57B
|
The Collect-Aire kit arrived in its usual big yellow sturdy box. The
kit advertises that the B and G variants can be produced from the kit
contents. The contents of my kit were undamaged with little warpage on
the fuselage and some warpage on the wings.
Preparation
All the parts were prepared by washing them in warm water, a
toothbrush and 409 (a household cleaner). When I was sure that the mold
release agent and other impurities were gone I towel dried all the
pieces.
I prepared a pot with boiling water and dipped each wing until it was
pliable. This Collect-Aire maker chose to mold the wings as two big
solid castings. They are heavy and they will not respond to warm water
treatments. Careful with the hot water! It was fairly uncomfortable but
the wing would not respond to lower temperatures. This is a guessing
game because you do not want to over soften the part. After I dialed the
correct shape I immediately dipped it in cold water. All the parts
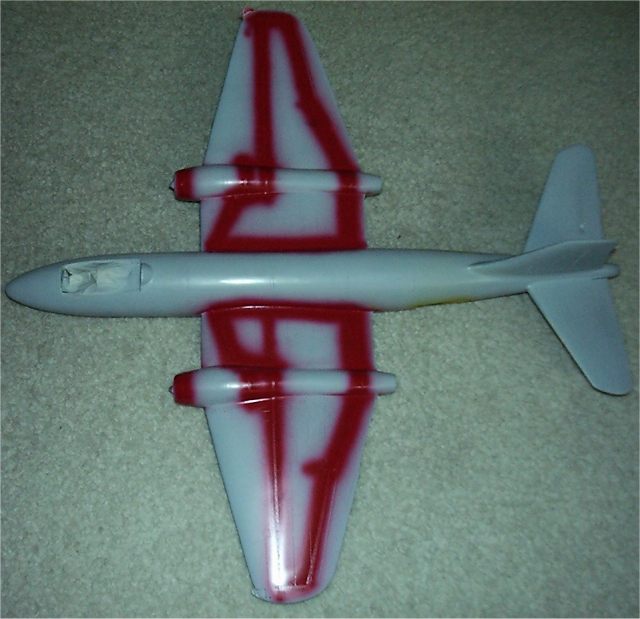
needed careful filling with 3M Acryl Blue due to the numerous pinholes.
When I thought that I had filled all the holes, scratches and blemishes
I primed the parts with thinned automotive primer. It helps me discover
the rest of the blemishes which I filled with Acryl Blue or Squadron
White putty. The whole part then was sanded down and washed and put
aside until assembly time.
Construction
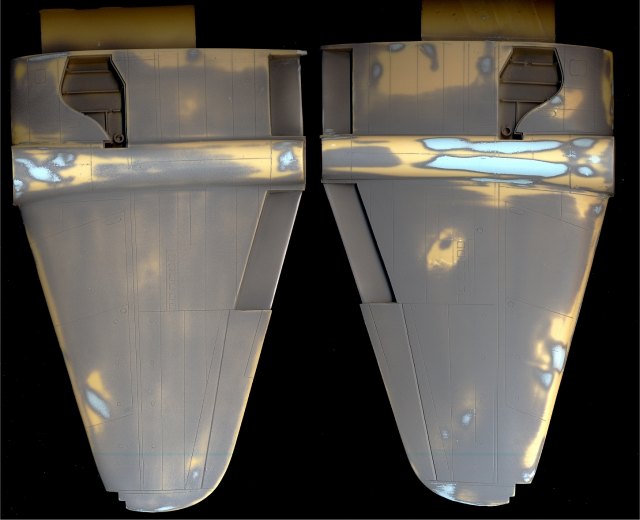
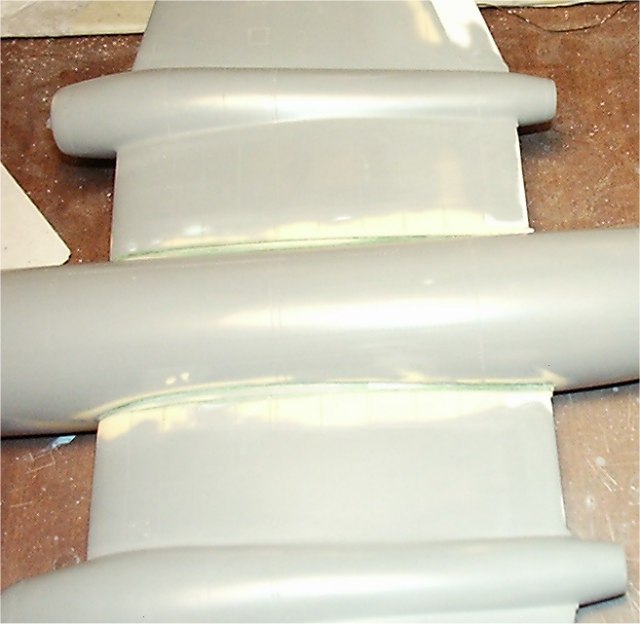
The wings took a lot of time to get ready for two reasons. One was
that they were cast as one big piece each. This caused uneven shrinking
of the huge resin mass. There were sunken areas on the engine nacelles
that had to be filled and feathered carefully. The other reason for the
slowdown was my need to have the plane with its flaps down. Being it a
solid wing it meant that I had to cut the wing up and rebuild it with
styrene sheet so I could have the flap cavity created.
Here are pictures of the wings with the styrene in place and also
pictures of the wings before and after the Acryl Blue applications.

Click the thumbnails below
to view larger images:
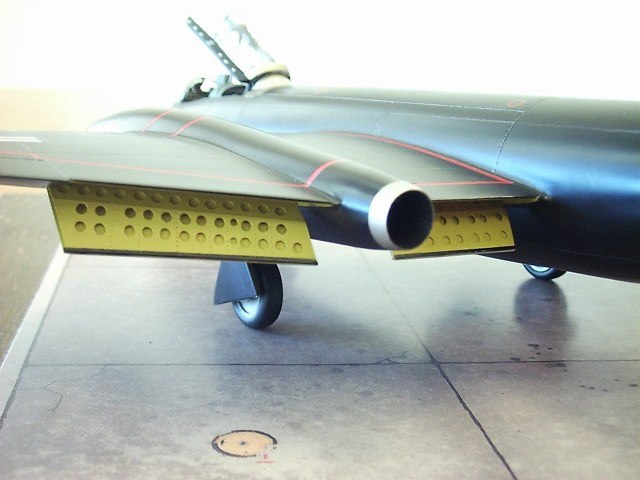
The flaps were also created by using styrene sheet and a Waldron
punch and die set. I used as a guide a blown up photocopy of the Edward
photo-etch set made for the 72nd scale kit. Here is a picture of the
flaps painted in their yellow primer.
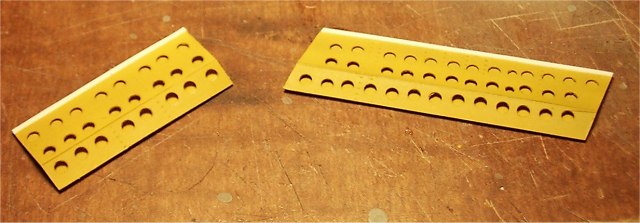
The unpainted area in white is the flap portion lip that matches with
the trailing edge of the wing when the flap is retracted and therefore
it will be painted black.
The fuselage features a cutout for the rotating bomb bay. If you pose it
open you are almost ok. If you want it closed up then you are in for
trouble. Look at the picture to see how much filler is required and how
much styrene had to be inserted for filler. Then the whole thing needs
to be smoothed out and rescribed.
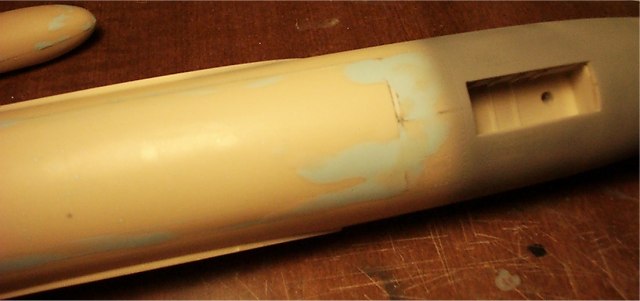
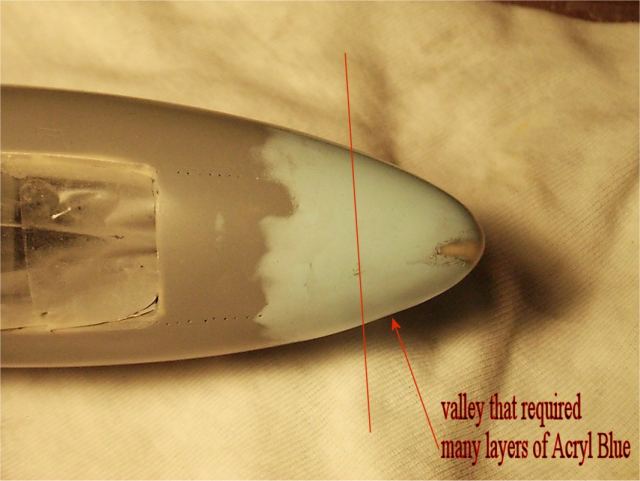
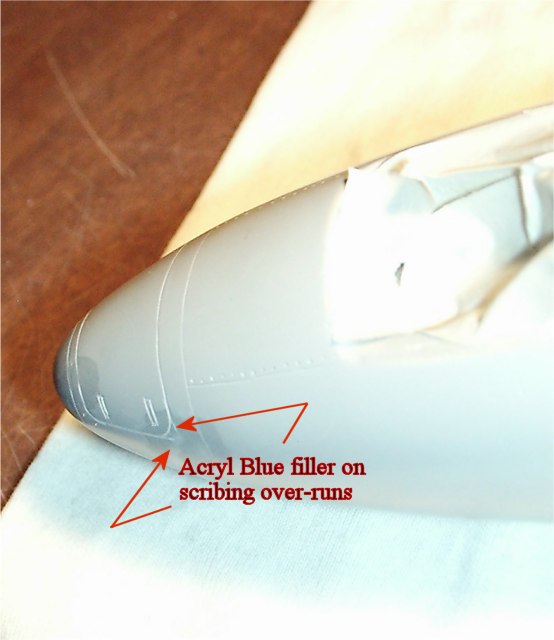
The nose cone on my example seemed to have shrunk a bit so it did not
match well at all with the fuselage creating a big valley to be filled
and smoothed out. The process obliterated all the surface scribing and
it had to be redone using Dymo tape and a Verlinden scribing template.
Click the thumbnails below
to view larger images:
A big problem with the kit was that the wings have a different angle
of incidence when comparing the left and the right side. If you were to
look at the plane from the back you will see that the left wing has
something like a 2-3 degrees difference in incidence from the right
wing. The problem is with the joining points that are placed by the
maker on the fuselage halves to aid with the wing alignment. I had to
reshape the joint points by carving out portions of them. After the
wings were attached I smoothed things out with Squadron Green putty and
later with Acryl Blue.
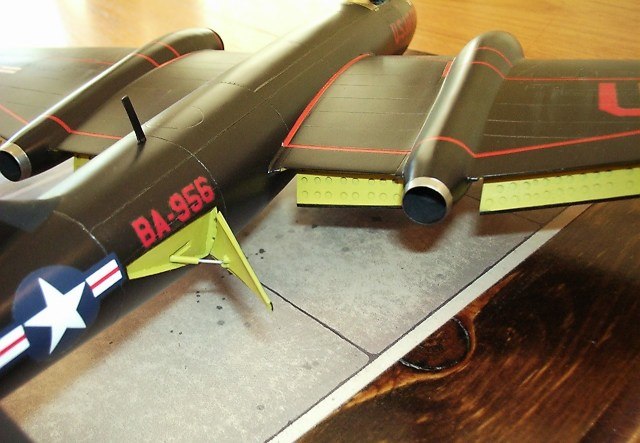
Another big problem is that the speed brake cavities are not aligned
from left to right. One is oriented pointing up and one is pointing
down. You can see that if you look at the model directly from behind.
There was no way I was going to cut them out and rebuild them so I left
them alone and compensated by posing the speed brakes at the correct
angles to each other and not respectively to their cavities. I cannot
believe that the maker who made the wonderful Demon for Collect-Aire
made such obvious mistakes on the B-57. The bad thing is that the same
is true for the WB-57F since the masters for the fuselage are common to
both. Remember to repair these areas as the wb-57F wings are mighty long
and it is going to show very badly!
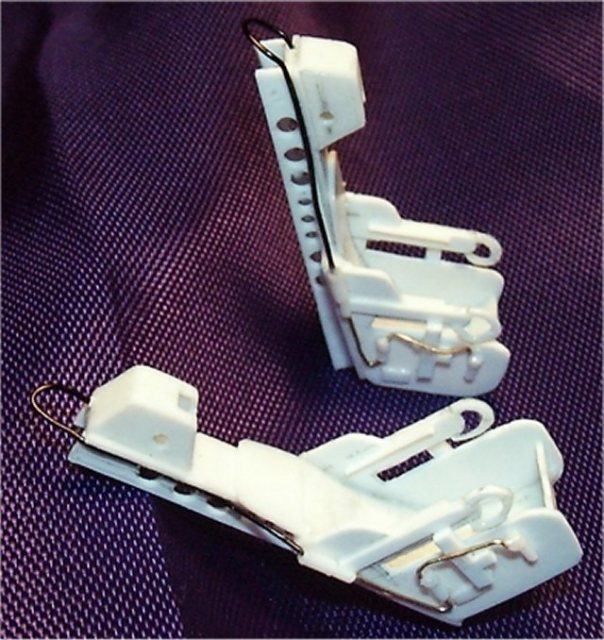
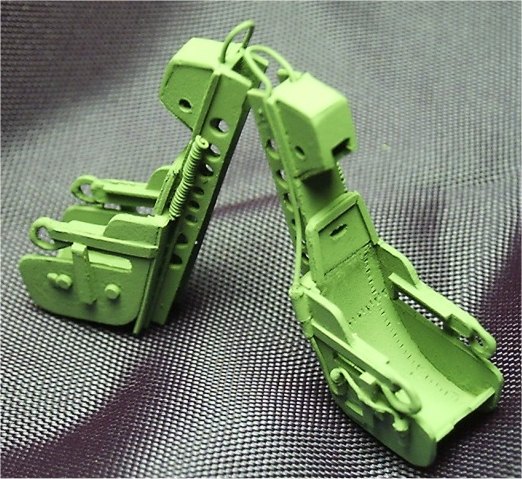
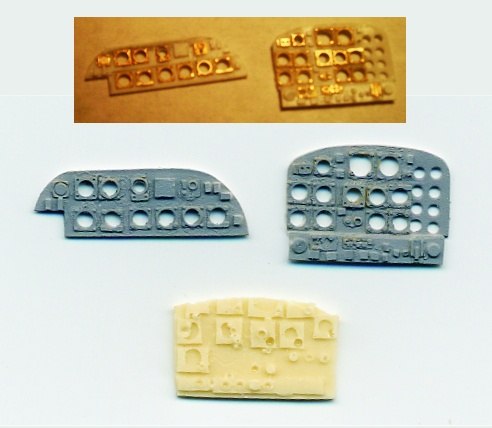
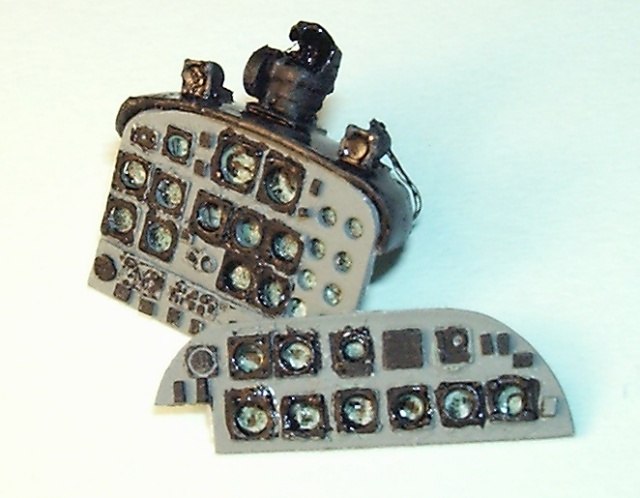
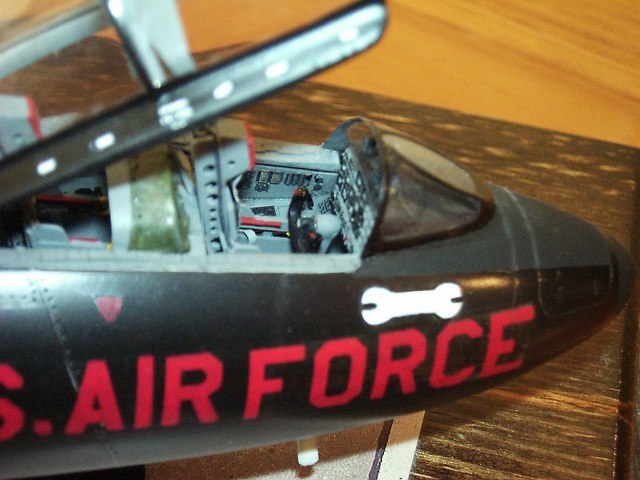
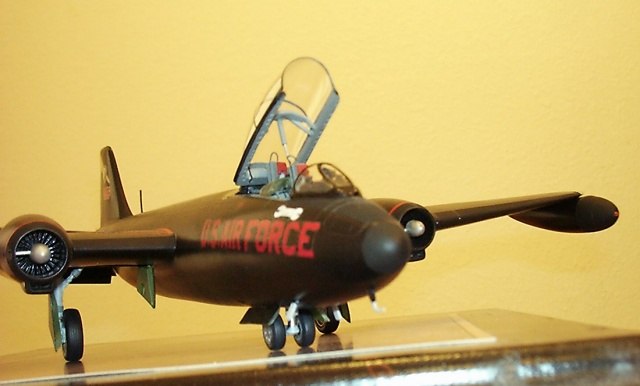
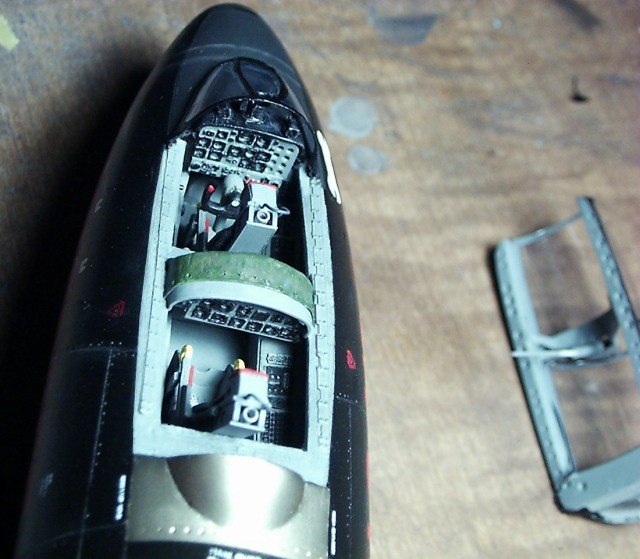
One more problem I had to deal with is the lack of an interior
representing the B-57B. The earlier B-57s did not have the Escapac
ejection seats provided in the kit. It was scratchbuilding time again.
Fortunately I have enough references from the Pima Air and Space museum
and a lot of styrene. Obviously Black Box and Cutting Edge have nothing
to fear from me but I think the end product is acceptable. While we are
at the subject of scratchbuilding, I also decided to give the plane a
better interior. I used styrene sheet again and Reheat photoetch parts.
Click the thumbnails below
to view larger images:
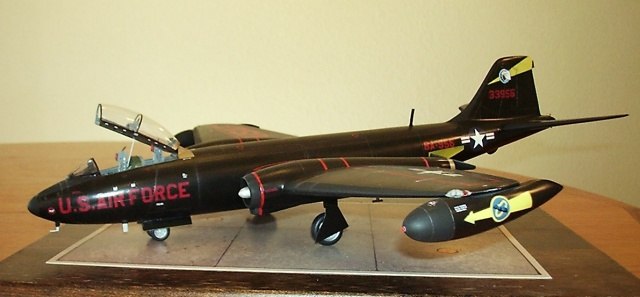
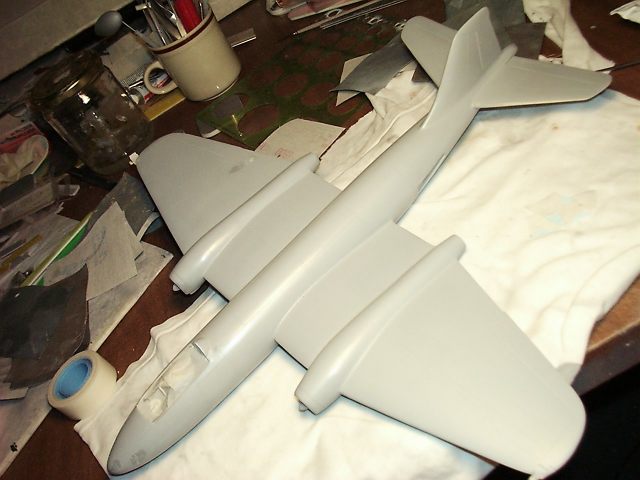
Here is the aircraft after a final coat of primer and
some minor corrections. This was the point were I elected to fix all the
scribing discrepancies I cared to attend to. There are some panel lines
missing, some that do not mirror well, some fictitious ones and some
that appear on one wing and not the other.
The little exhaust ports for the engine startup cartridges on the jet
intakes are missing. I drilled a hole on the side of the intake,
inserted a hollow tube and then covered the area with a half round piece
of styrene that I cut out with the Waldron punch. While we are talking
engines, you might want to drill out the exhaust fan blades attached to
the exhaust ring. The engine ends before the wing trailing edge level
and not at the nacelle tip!
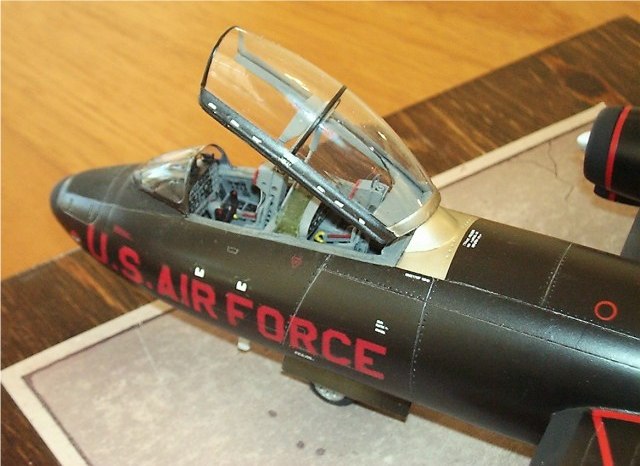
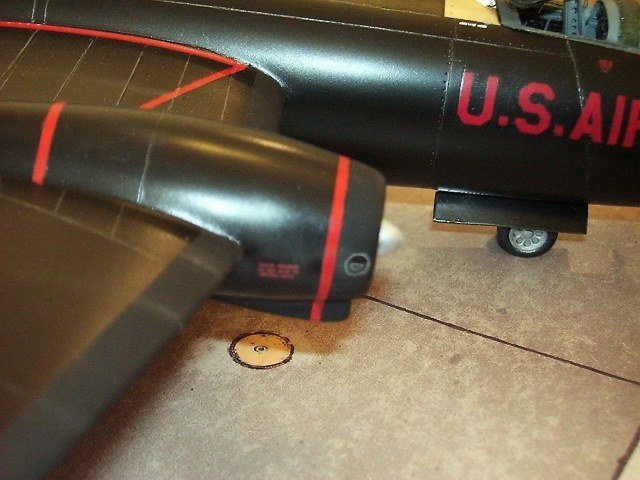
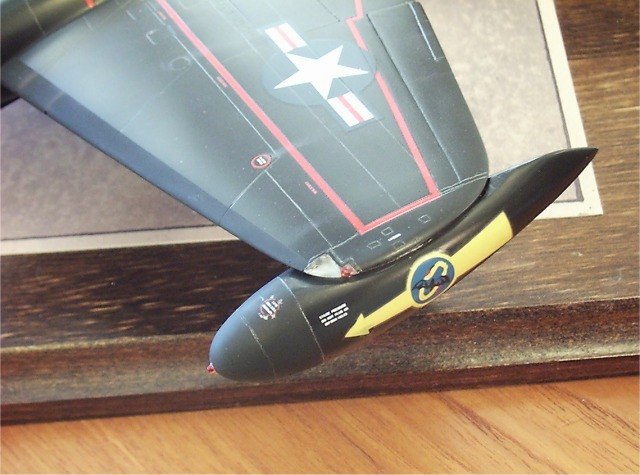
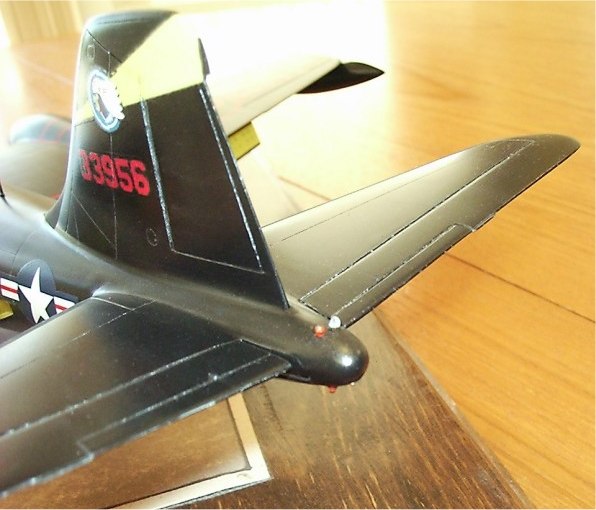
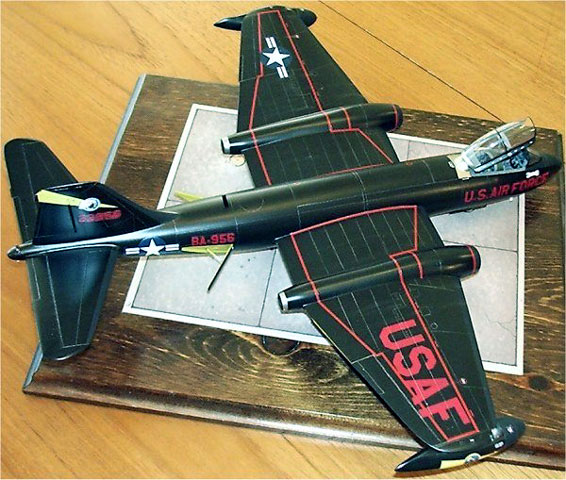
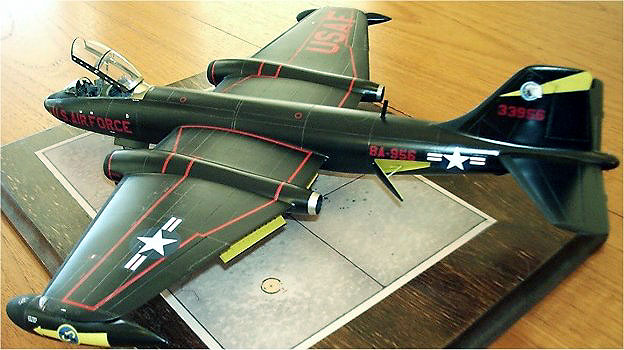
For painting I decided to do the all black B-57B 53-3956, one of the
last B models built that also had the four 20mm M39 cannon
configuration. I used the kit decals of the 499th Bombing Squadron "Bats
Outa' Hell". I like that on the tail it carries the crest of its parent
345th Bomb Wing, the Air Apaches. The kit decals are of a very matte
finish. My first set that came with the kit started falling apart after
a few minutes in the water. These are the old MPD decals done in the old
fashion way. Their new decals as seen on the YF-23 for example are
entirely different in quality and much improved.
Collect-Aire promptly sent me a new set of decals. This is something
I absolutely like with their service. The new decal set was okay. I kept
the old set and sprayed a coat of microscale liquid decal film. This
saved the decals. I needed to save them because they are very
translucent and the black paint clearly shows through the yellow and red
decals. Doubling them up improved the situation quite a bit. The only
problem I had was silvering due to their rough texture. I repeatedly
used the microscale setting solution and I even sliced them at places
with a new x-acto blade but to no avail. Mind you the surface underneath
was glass smooth! After the decals had dried up I coated them with
Future and left them alone for a few days. The only solution was to mask
the decals and overspray with the black color all the silvered areas. A
very laborious process. I had decided to paint the red walkway stripes
on the wings and not use the translucent decals. So before the black
paint was applied I painted the general areas red and after the paint
dried I used fine pin-striping tape. The tape was lifted later in the
project right before the final semi-gloss coat of varnish was applied.
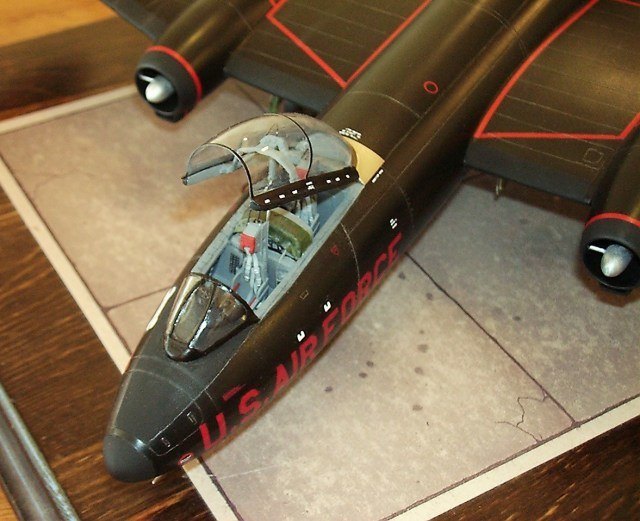
After the semi-gloss coat was dry I used silver prismacolor pencil and
pastels to accentuate the panel lines.

Here are the results of a few months of labor.
Was it worth it? Well, I love the B-57, so it was worth it to me.
Aeroclub puts out one variant every year and I am not sure that they
will ever make a B-57.
So Collect-Aire's B-57 is still the only game in town. I have to say
that it looks mighty impressive in my display case!
Fotios Rouch
P.S. I dedicate this build to my good friend Phil "Bondo" Brandt and
wish him a speedy recovery!
Click on the thumbnails
below to view larger images:
Model, Images and Text Copyright © 2003 by
Fotios Rouch
Page Created 13 January, 2003
Last Updated 04 June, 2007
Back to HyperScale
Main Page
Back to
Features Index
|
 Home
| What's New |
Features |
Gallery |
Reviews |
Reference |
Forum |
Search
Home
| What's New |
Features |
Gallery |
Reviews |
Reference |
Forum |
Search