|
B-25C Mitchell
by Tony Bell
|
|
|
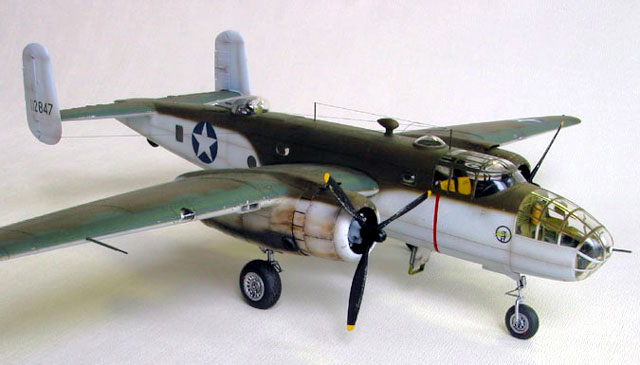
North American B-25C |

HyperScale is proudly supported by Squadron.com
 Of all the reference books in my somewhat large collection, Dana
Bell’s Air Force Colors, Vol. 2 ETO & MTO 1942-1945 has undoubtedly
provided the greatest inspiration for colour schemes. In particular, one
of the colour profiles that has always caught my eye is an early
production B-25C in Olive Drab over white maritime anti-submarine
warfare markings on page 41. Of all the reference books in my somewhat large collection, Dana
Bell’s Air Force Colors, Vol. 2 ETO & MTO 1942-1945 has undoubtedly
provided the greatest inspiration for colour schemes. In particular, one
of the colour profiles that has always caught my eye is an early
production B-25C in Olive Drab over white maritime anti-submarine
warfare markings on page 41.
My preferred scale being 1/48, it wasn’t until the Accurate
Miniatures B-25C/D was released that I could build a model in these
unusual markings.
This model actually started life as the AM B-25B, which I got in a
trade here on HyperScale. In a separate trade, I obtained the G
conversion kit which also provides all the bits necessary for the C/D.
Don Fenton’s feature article on Accurate Miniatures B-25G Conversion and
B-25 Variants proved invaluable for sorting out which parts were needed.
Rather than offer a blow-by-blow account of how the model was built,
I will simply refer instead to the Accurate Miniatures B-25B on-line
build. Instead I will concentrate on the changes and additions that I
made to the kit.

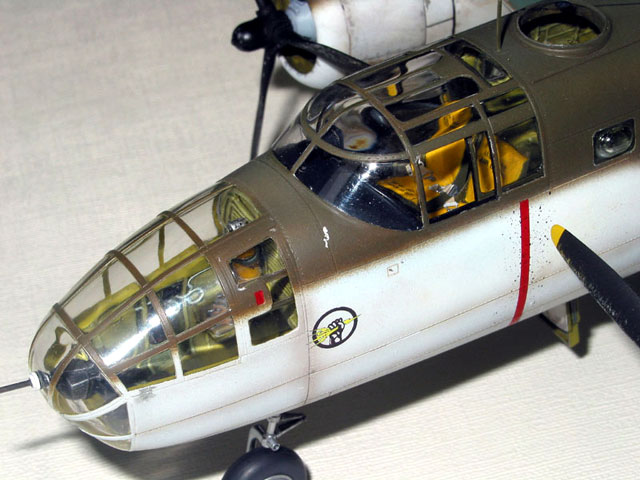
As usual, I started construction with the cockpit. The kit seats were
quite poor and didn’t resemble the real thing in any way. I used the
B-25B photoetch set from Eduard to replace the seats and lap belts, with
seat cushions made from epoxy putty and stencilling printed on bubble
jet compatible decal paper. The knobs on the ends of the Eduard throttle
levers were made from blobs of super glue. Fortunately Eduard provides a
couple of spares to replace the ones that fly off into a parallel
universe. I considered using the Eduard instrument panel, but decided
that the kit panel looked better and so used it instead. The kit panel
is moulded in clear plastic with a reverse-printed instruments decal
that is applied to the back of the panel. Why other manufacturers
haven’t adopted a similar approach, I don’t know. Maybe AM has a patent
on it.
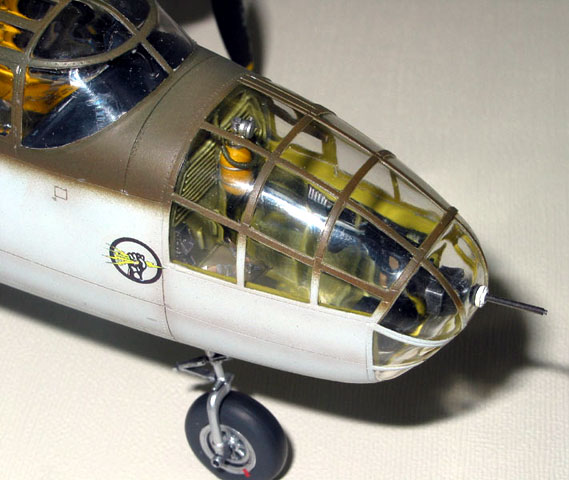
The bombardiers compartment also benefited from the Eduard set which
supplied ammunition box brackets and lap belts. The Norton bombsight was
detailed with bits of styrene, but only I can tell.
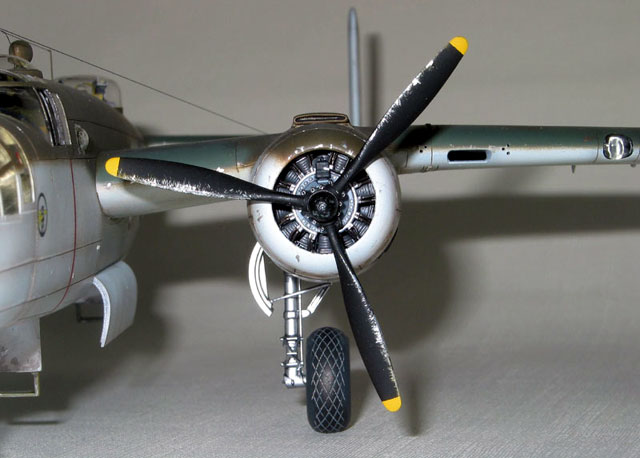
The engines also received some attention in the form of Evergreen
styrene stock pushrods and ignition wires made from fine solder. The
Eduard set includes ignition harnesses, but in my opinion they’re too
flat and 2-dimensional looking. The much-debated kit engine cowlings
were tossed in favour of the Cutting Edge resin replacements that have a
more accurate profile and larger opening. The resin cowls have a
(correct) circular cross section, whereas the kit cowls are slightly
oval. Because of this, some surgery was required to get the kit cooling
flaps to match up with the resin cowl.
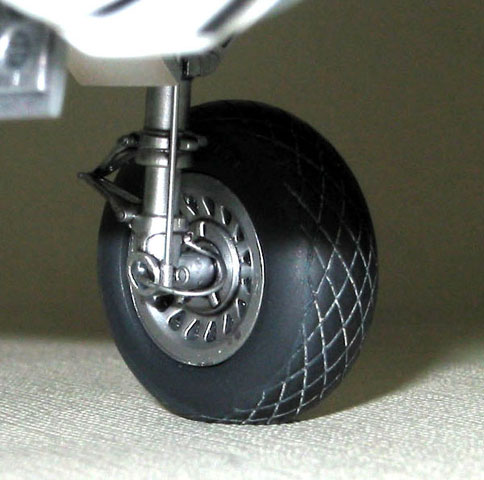
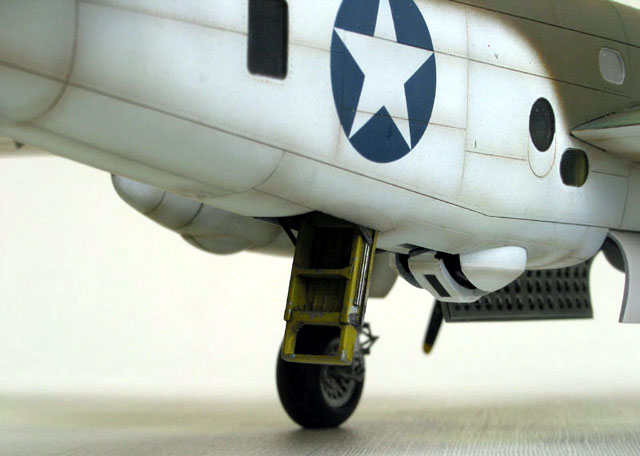
Using the Squadron-Signal B-25 Walk Around as a reference, the main
landing gear was detailed with solder, piano wire and Eduard bits. The
diamond tread pattern on the main tires was laboriously rescribed by
hand to give it more definition. The sprue attachment point on the nose
gear leg was on the oleo strut, and because of the somewhat brittle
plastic used by AM, I was unable to clean it up properly. I decided
instead to cut the oleo cylinder off and replace it with styrene rod. To
give it strength, I carefully drilled down the axis of the gear leg and
glued a steel pin in place with super glue. The oleo scissors were
replaced with ones from the Eduard set.
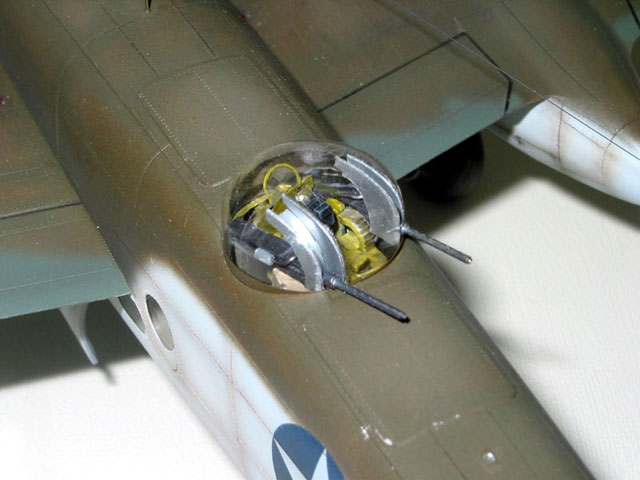
The ventral turret was detailed with Eduard brass and Aires resin gun
bodies. The brass cooling jackets proved surprisingly easy to work with.
The turret dome was vacuformed over an old Monogram B-26 Marauder turret
with sheet styrene gun slots. The navigator and tail blisters were also
replaced with home made vacuform parts.
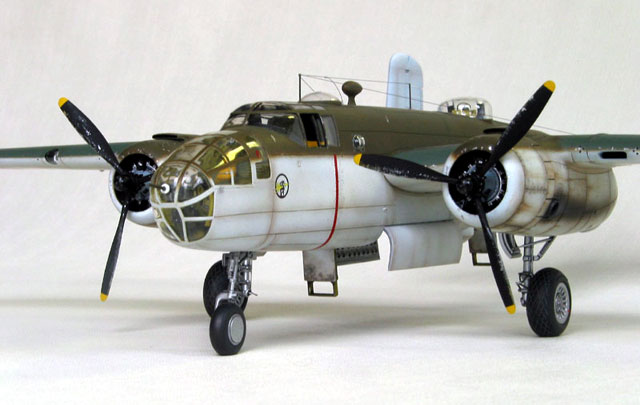
Painting, Decals
and Weathering
|
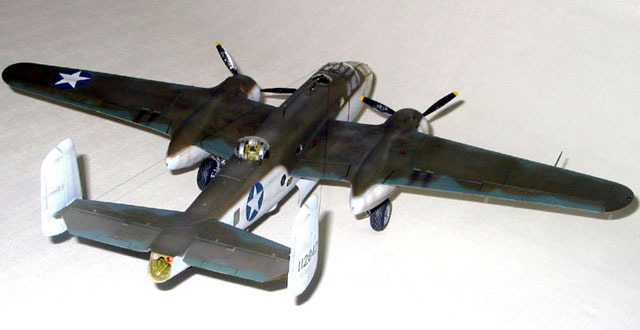
The model was painted with Polly Scale White (although I’ll use
Tamiya next time), Aeromaster acrylic Olive Drab 41 and Aeromaster
enamel U.S. Medium Green 42. Fading was accomplished by spraying heavily
thinned Aeromaster Olive Drab 41 Faded in a patchy, random pattern,
followed by a similar application of Tamiya buff.
The national insignia were masked with frisket paper and sprayed,
while the nose art was printed up on an ALPS MD-1000 printer, courtesy
of a fellow IPMS Toronto member (thanks, Alex!). The tail numbers came
from a generic Aeromaster sheet.
Some minor paint chipping was added with Humbrol 11 silver, and the
panel lines received a wash of burnt umber oil paint, followed by “post
shading” with a heavily thinned (95% isopropyl alcohol) brownish grey
mix of Tamiya paints. A slurry of ground pastels and water was used to
dirty up the areas of heavy ground crew traffic, and oil paints were
used for the streaking on the cowls and nacelles. The exhaust stains
were sprayed with Tamiya paints, again heavily thinned.
When you consider the glacial pace at which I work along with the
amount of detail featured in the kit, you can understand why this one
took me the better part of a year to complete. After getting this bout
of AMS out of my system I think maybe it’s time to do a few straight
from the box
projects, although the Marauder “Hard to Get” in Dana’s book is calling
out to me…
Click
the thumbnails below to view larger images:
Model, Images and Text Copyright © 2002 by
Tony Bell
Page Created 11 June, 2002
Last Updated 04 June, 2007
Back to HyperScale
Main Page
Back to Features Index
|
 Home
| What's New |
Features |
Gallery |
Reviews |
Reference |
Forum |
Search
Home
| What's New |
Features |
Gallery |
Reviews |
Reference |
Forum |
Search