|
Arado Ar 80 V2
"Einer Der
Zerüchbleibt"
by
Caz Dalton
 |
|
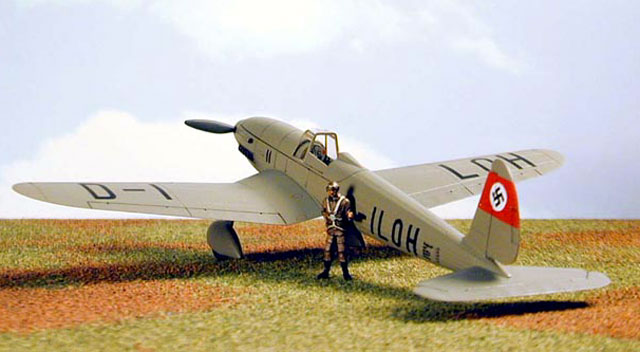
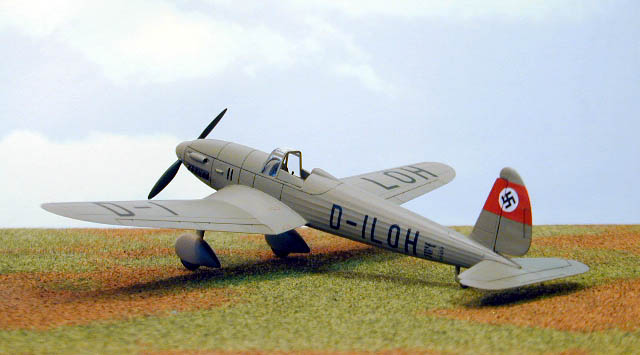
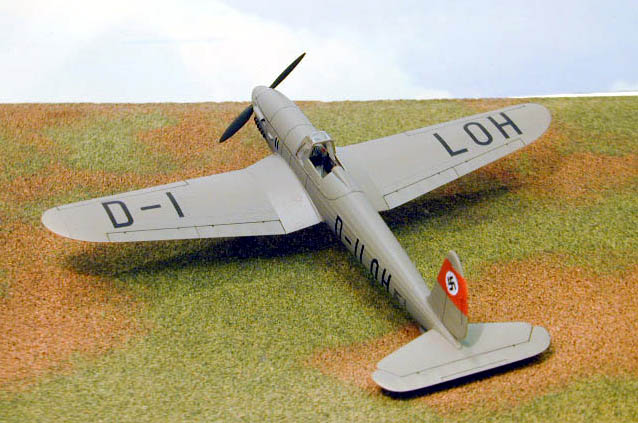
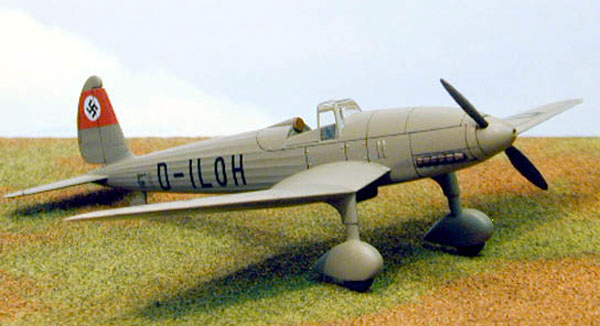
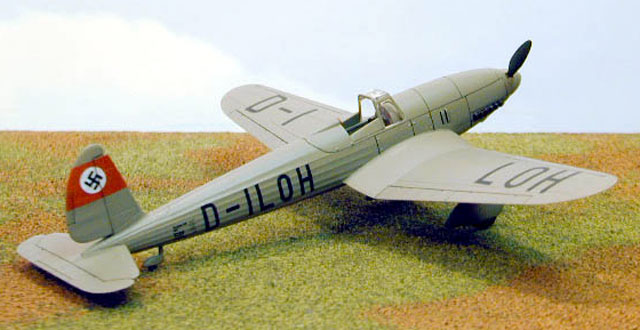
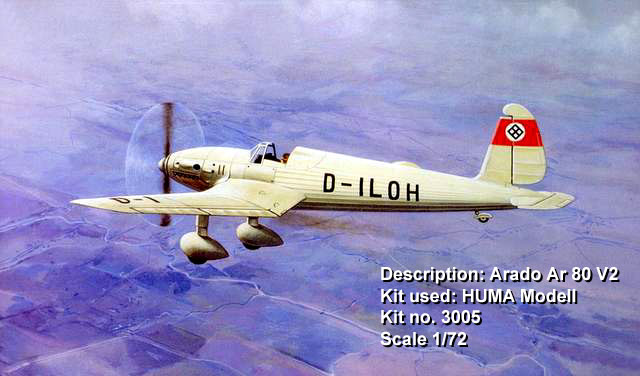
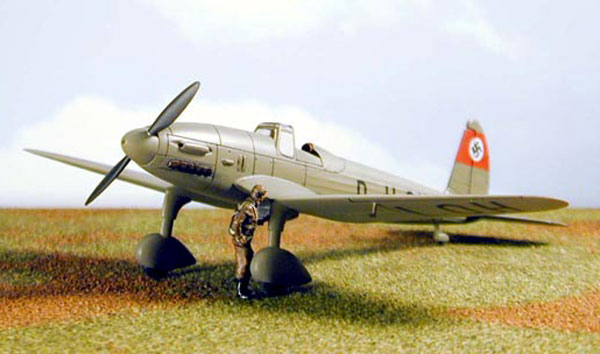
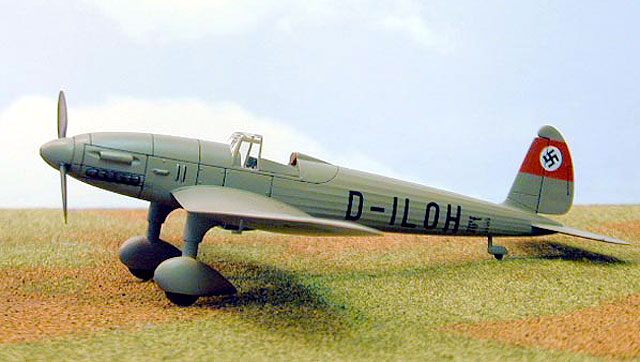
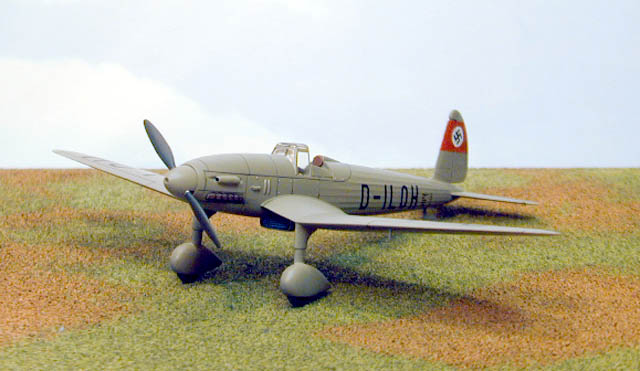
Arado Ar 80 V2
Germany, 1935 |

Huma's
1/72 scale Arado Ar 80 is available online from
Squadron.com
In 1934, the newly formed Luftwaffe sent out C-Amt (Technical
Procurement Section) specifications for both light home defense and
heavy offense fighters. The light home defense fighters chosen were
the Arado Ar 76, the Focke-Wulf Fw 56, the Heinkel He 74, and the
Henschel Hs 121. The eventual winner was the Focke-Wulf Fw 56 "Stosser".
In the heavy offense fighter, the main competition were the Arado
Ar 80, the Focke-Wulf Fw 159, the Heinkel He 112, and the
Messerschmitt Bf 109. As everyone knows, this competition was won by
the Bf-109, which has long been history. Even the He 112 was good
enough in trials (and many say even better than the Bf 109) to
warrant a production contract for home and for export. The Fw 159
was dismissed from the outset due to its parasol wing and abominable
retractable landing gear and Focke-Wulf engineers went on to design
perhaps the ultimate piston-engine fighter of the war for Germany.
But what of the also ran Ar 80?
Designed by Dipl-Ing Walter Rethal, the Ar 80 was a sleek design,
even for the Arado works. Not having any prior experience with
retractable landing gear, the Ar 80 was designed with fixed gear and
spats. The original prototype, Ar 80 V1, was powered by the
Rolls-Royce Kestral V producing between 695 and 812 hp for take-off.
The second prototype and the one represented by the model, Ar 80 V2,
was powered by the Junker Jumo 210Ca, which offered 695 hp on take
off.
The Ar 80 V3 was the first of the prototypes to be supplied with
armament, which consisted of an engine-mounted 20-mm cannon firing
through the spinner and two 7.62-mm machine guns in the cowling. The
V4 utilized the fuel-injected Jumo 210Ga engine and featured an
enclosed cockpit, yet retained the spatted undercarriage.
The series culminated with the Ar 80 V5, which was the first to
feature a retractable landing gear. Both the V2,V4, and V5 underwent
extensive testing at Rechlin for the evaluation of new
instrumentation and then sent to the Tarnewitz armament test
center(V4 and V5 only), finally being returned to Arado for defense
of the company's airfield at Warnemünde. The Ar 80 V3 was fitted
with a revised wing eliminating the inverted gull look and was
modified as a two-seater. A proposed production version of the Ar 80
with a Jumo 210Ea engine and a fully retractable landing gear was
discontinued upon the selection of the Bf-109 to fulfil the C-Amt
requirement. "EINER DER ZERÜCHBLEIBT" is German for "ALSO
RAN".
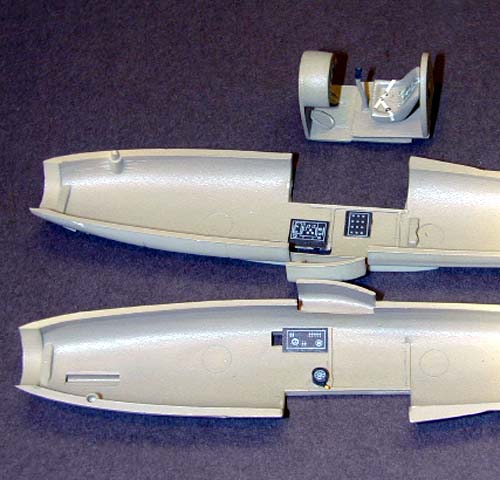
 Cockpit Cockpit
I spent the largest amount of time with this model correcting the
cockpit. The model has it all wrong in the molding and the seat
would fit under the windshield should one construct it that way, in
addition to sitting too low.
I cut the cockpit floor and placed the front section in its
correct location, then made a baffle for the front from sheet
styrene.
I made an instrument panel shroud from circular styrene tubing
and cemented the kit's panel to the shroud.
Some small detailing was done to the sidewall with styrene strip,
rod, and sheet. The rudder pedals were represented with two from
True Details photoetch sheet. Seat belts and shoulder harnesses were
done from my paper printed belts (I'm going to have to do a small
article on how you can do this some day, it works super for 1/72).
The interior was painted Polly Scale RLM 02 Green-Gray, with the
various instrument boxes painted flat black. The kits instrument
panel decal was used and looks very well for the scale. I also used
a few Reheat Models Control Panel decals.
Spats
Now why would I list these separate? Because they take a bit of
time to get the right look, that's why. The wheel spat halves must
first be cemented together and then carefully sanded and shaped up.
I carefully etched around the tires in the spats to get a recessed
opening. Next the gear legs must be fitted and carefully sanded to
an smooth appearance, no panel line appears on the original at the
spat, you see. I also had to cement the landing gear assembly to
their respective locations and sand here a little also before
priming.
Exterior
After closing the model up and getting the proper landing gear
look, everything else was a piece of cake. The fuselage halves fit
superb and requires only a little Mr. Surfacer (thanks Steve at NA).
Wing to fuselage fit was just as good, but I needed a little filler
in the horizontal tailplane mount after the cement had set up. Be
careful here! Attach the wings first, so that you can maintain
proper alignment with the tailplane.
The windshield, two side doors, propeller, spinner, spinner back,
the pitot (which was actually square-ducted, I started to sub small
wire), and tail wheel were painted separate and attached in the
final assembly. Most were attached with Elmer's white glue in the
final assembly, except the tail wheel, which is attached with CAN.
 After
masking the windshield framing with Bare-metal foil and closing off
the finished cockpit with masking tape, all but the propeller
received three light prime coats of Polly Scale RLM02 Green-Gray.
Finding several flaws, I refilled, resanded, and reprimed the areas
and finished with two light color coats of RLM02. After setting
everything aside for a day, I gave the model three light coats of
Model Master Clear Gloss Acryl and set it aside for another day
before decaling. The propeller was painted Polly Scale RLM70
Black-Green. After
masking the windshield framing with Bare-metal foil and closing off
the finished cockpit with masking tape, all but the propeller
received three light prime coats of Polly Scale RLM02 Green-Gray.
Finding several flaws, I refilled, resanded, and reprimed the areas
and finished with two light color coats of RLM02. After setting
everything aside for a day, I gave the model three light coats of
Model Master Clear Gloss Acryl and set it aside for another day
before decaling. The propeller was painted Polly Scale RLM70
Black-Green.
Decals from the kit were use for everything but the vertical tail.
Here I made the red strips using Superscale Red Trim film, the white
circle from the kit, and swastikas from a Hasegawa sheet featuring
such. The kit decals surprised me, as I was expecting them to be
like Revell-AG decals, but they nestled down using only a little
solvent in the recesses after slicing the recesses with a #11 blade.
Otherwise, I used only setting solution on them.
After a day of letting the decals dry, I sprayed two finish coats of
MM Clear Gloss and finished off with three coats of Polly Scale
Clear Flat (still the best acrylic flat IMHO). After a day, I like
to rub the flat out with a soft T-shirt, it gives the paint a proper
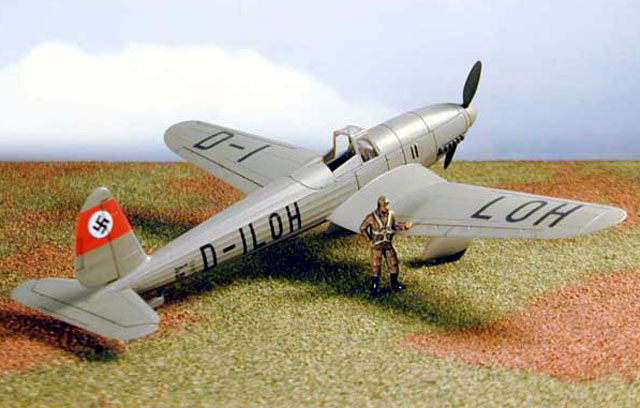
sheen and not that dull matte appearance. Also, I couldn't help but
prime a little Prieser Miniature 1/72 figure for the display. So who
cares if Ar 80 pilots used a butt-chute?
Are you kidding me? I had a blast building this kit.
It had its problems, all in the cockpit engineering, none in the
fit. But the Arado Ar 80 V2 is a unique looking plane and has its
place in history - my history anyhow.
The kit was a delight to cure modeler's block, which I have had
all summer. This is the first completed kit from my bench since
mid-May. S'been a busy summer with the boys gang.
Click the thumbnails below
to view larger images:
Model,
Images and Article Copyright © 2002 by
Caz Dalton
Page
Created 03 October 2002
Last updated
04 June 2007
Back to HyperScale Main
Page
Back to Features
Page |  Home
| What's New |
Features |
Gallery |
Reviews |
Reference |
Forum |
Search
Home
| What's New |
Features |
Gallery |
Reviews |
Reference |
Forum |
Search