|
Arado Ar 68E & Ar 68F
by John C. Valo
 |
|
Arado Ar 68E |

Classic Airframes' 1/48 scale Arado Ar 68E/F may be ordered online
from Squadron.com
Classic Airframes' newest 1/48th scale release is the Arado Ar 68
biplane.
The Luftwaffe's last biplane fighter, the Arado Ar 68, straddled
the gap between fabric and metal, incorporating a mix of
construction. The kit captures the lines and feel of the time when
designers were starting to refine streamlined airframes, yet clung
tenaciously to the fabric-covered biplane concept.
|
Classic
Airframes' 1/48 Arado Ar 68E/F |
The kit provides parts and markings for either the elegant Ar 68E
version or the somewhat clunkier Ar 68F. The fuselage parts are
molded whole for the E version. You will have to replace the nose
with the parts provided to build the F version.
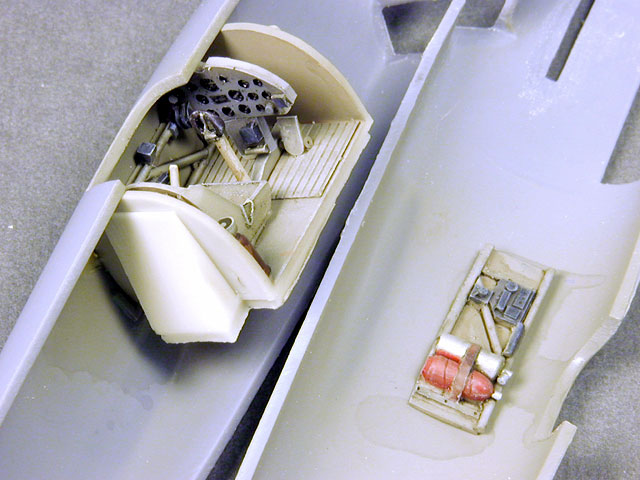
The kit is typical Classic Airframes with delicately scribed plastic
parts, resin interior and details and a vacuformed windscreen. My
kits exhibited quite a bit of very thin flash around the plastic
parts, which made for a touch more cleanup time than usual. The
resin parts were well detailed and fit well, with the usual
dry-fitting and sanding necessary (nothing like the Blenheim wheel
wells, though - happy to say!).
Obviously, the first order of business is to decide which version to
build.
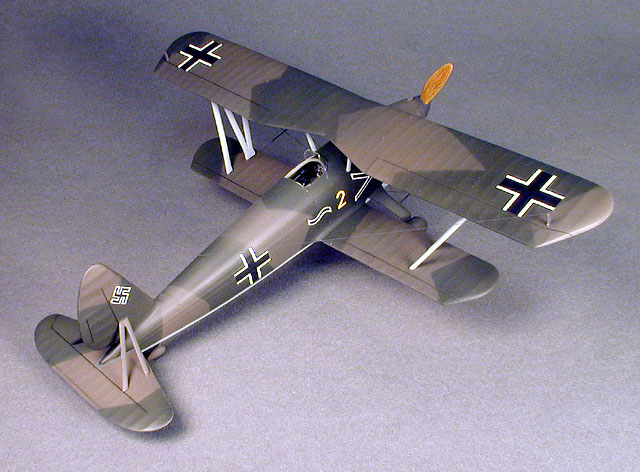
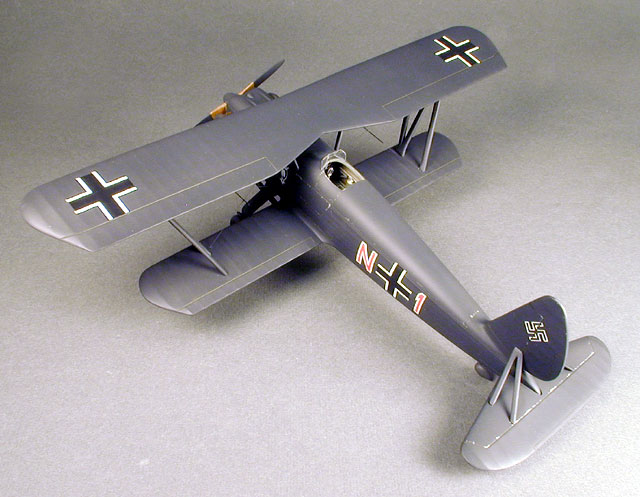
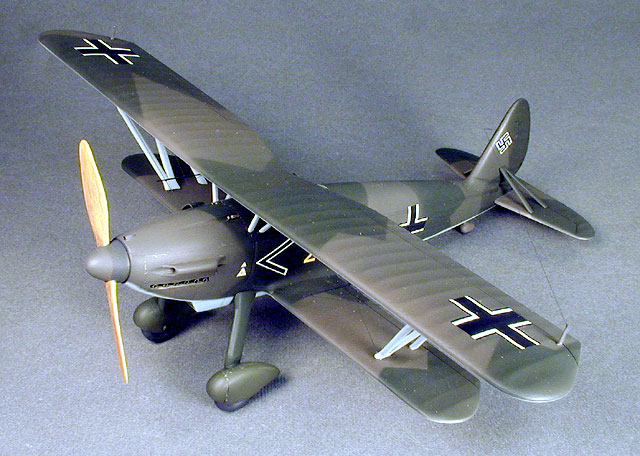
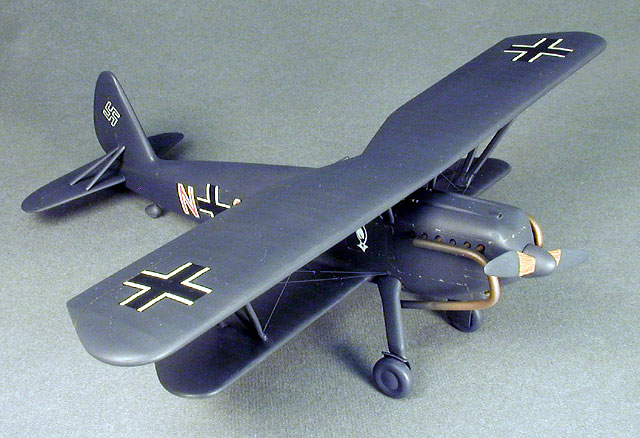
This release provides markings for four wartime aircraft, one
each of 68E and 68F in 70/71/65 or overall Black. I elected to build
one kit as 'Yellow 2', an Ar68E in splinter camouflage, the other as
a nightfighter Ar68F in overall Black.
A convincing resin cockpit is provided which looks great once
painted, washed and drybrushed. The cockpit opening is rather small
anyway, so it looks plenty 'busy' when installed.
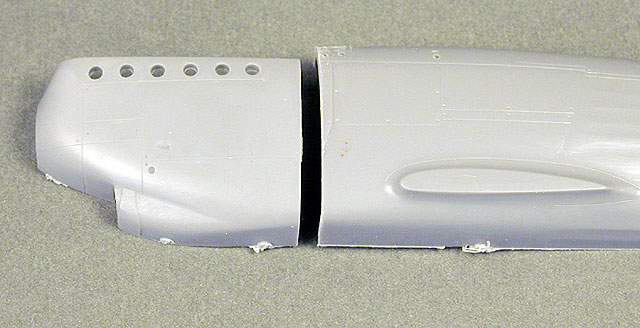
To build the F version, you must remove the nose of the fuselage
halves. This is a straight vertical cut.
The replacement nose parts are best assembled as a unit first,
then attached to the previously joined fuselage halves. Mercifully,
the fit was quite good on my kit. After this point, the fuselage
assembly is straightforward. The one-piece tailplane attaches right
at the point of the rear fuselage.
The upper wing has a very subtle flat section in the very middle,
with dihedral on the outer panels. The kit is designed to join the
upper wing sections at the center of the flat part, so care must be
taken to keep the joint straight to align the outer panels at the
proper dihedral. The lower wings are butt joins with no dihedral, so
this is helpful later on in the assembly.
Credit must be given CA for providing well-defined locating holes
for the interplane, tailplane and cabane struts, but the 'pins'
molded on the ends of the struts are too soft in definition to work
really well. I replaced the pins on the interplane struts with short
lengths of copper wire (a ten minute job) and sanded off the cabane
strut pins entirely. I assembled both kits' upper wings by virtue of
the old 'Mk.1 Eyeball', CyA glue and this third hand I seem to have
grown lately. Even so, I would heartily recommend a simple jig due
to the fact that this is not a 'lock-in-place' kit. The interplane
struts seem to be correct, but pay close attention to alignment and
especially the angle of incidence of the upper wing.
Alas, the cabane struts proved to be a bit of a challenge, not
aligning with the locating holes. This was the only real frustration
with the kit, and for any future builds, I think it best to simply
replace the cabane struts with airfoil shaped plastic stock,
measured to fit.
Care must also be taken when assembling the landing gear, as there
are no molded indications of the strut locations on the fuselage. A
small diagram is provided in the instructions showing the position
of the struts relative to the wing. The optional wheel spats are a
butt join to the struts, once again without any molded indicators,
so use slow setting glue, and use care in aligning them
symmetrically.
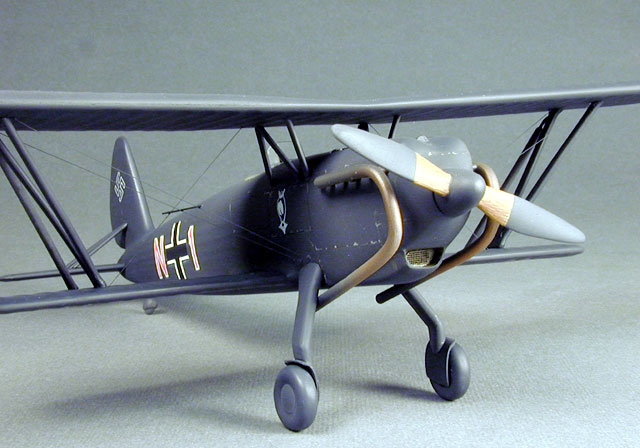
 The
kit provides flame damping exhaust extentions for the F nightfighter,
but compared to the few photos I have of the installation, they seem
too long. As well as shortening the parts, I cropped the rear of the
collector section and added a small piece of plastic rod to
represent the rearmost exhaust stub. The rest of the stubs were the
resin kit parts, to which I glued the collectors. The
kit provides flame damping exhaust extentions for the F nightfighter,
but compared to the few photos I have of the installation, they seem
too long. As well as shortening the parts, I cropped the rear of the
collector section and added a small piece of plastic rod to
represent the rearmost exhaust stub. The rest of the stubs were the
resin kit parts, to which I glued the collectors.
Overall the effect is quite convincingly goofy looking.
|  Home
| What's New |
Features |
Gallery |
Reviews |
Reference |
Forum |
Search
Home
| What's New |
Features |
Gallery |
Reviews |
Reference |
Forum |
Search