|
A6M5b Zero Type 52 Otsu
by
Ian
Robertson
 |
|
Mitsubishi A6M5b Zero |

Hasegawa's 1/48
A6M5b Zero is available online from Squadron.com
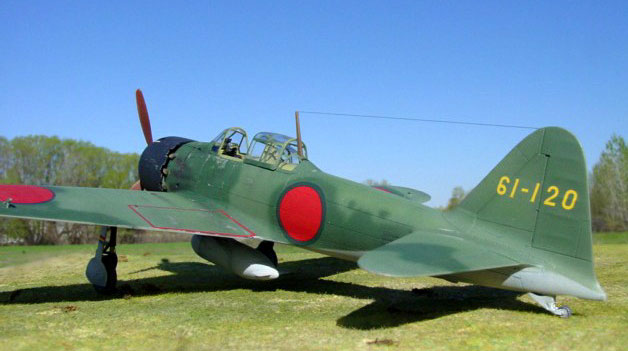
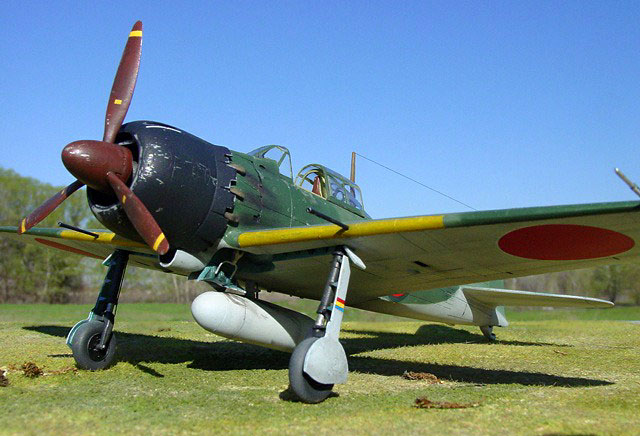
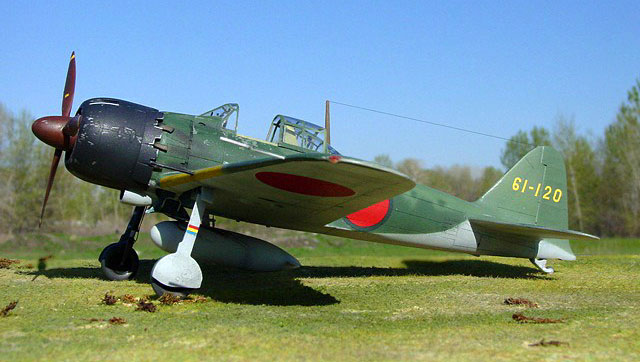
I built Hasegawa's 1/48 A6M5 out of the box, and opted for a controversial
but attractive two-tone camouflage scheme. At the time I started the model I was
blissfully unaware that there was controversy regarding the existence of
two-tone Zekes. As I learned more I was intrigued by the debate, although I
remain as uncertain as ever about the colors.
A Tale of Two Colors
The best images of Zekes with two-tone upper surfaces were taken aboard a US
carrier after the war, when the aircraft were being transported back to mainland
America. From the black and white photos there is no doubt that the aircraft
have two upper surface shades, light and dark. What is in doubt is whether these
shades represent a camouflage scheme. A popular theory holds that these aircraft
had collected a thick layer of dust while in storage after capture by US forces,
and that while on the deck of the US carrier the aircraft were washed in areas
to expose the hinomarus (better photos for the people back home perhaps?),
thereby resulting in a two-tone appearance (i.e., clean and dingy).

Indeed, the
photographs I have show that the darker shades of paint appear primarily around
the hinomarus and tail codes. There is even a photograph of sailors washing down
one of these aircraft to expose a darker, glossy finish! Thus, the two-tone
scheme may represent clean and dingy patches, not light and dark camouflage. On
the other hand, I also have an image purported to be Zekes lining a airfield in
Saipan in which some aircraft appear to have a two-tone scheme on their wings.
I’ll leave it up to the experts to debate - I just thought the two-tone scheme
was a welcome departure from the usual dark green over gray JNAF camouflage.
Besides, modelers of WWII aircraft are used to the possibility that their color
choices will eventually be disproved…....or vindicated.
Hasegawa’s 1/48 Zekes are a pleasure to build. The only modifications I made to
this model were in the form of details: thinning the fins on the centerline fuel
tank, adding brake lines to the landing gear, replacing the kit’s loop antenna
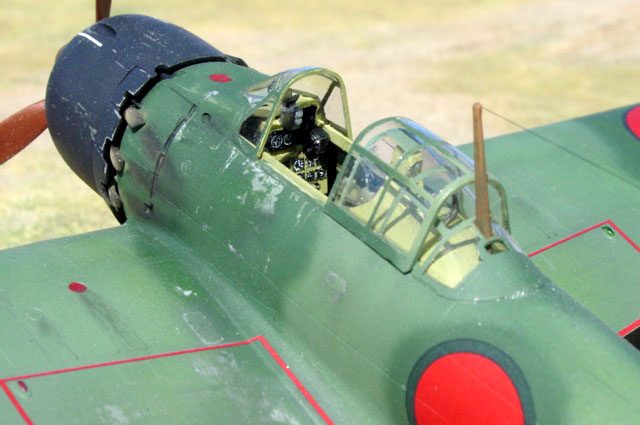
with a wire loop antenna, modifying the gun sight using clear acetate and spare
photoetch crosshairs, and adding etched brass seatbelts.

The cockpit was painted
in Polly Scale “Weyerhauser Green” (a model railroad color), which is a close
match to AeroMaster’s Nakajima interior green. The seat was left in a bare metal
finish (SnJ metallizer).
 I first sprayed the completed model with SnJ aluminum metallizer. Once the
metallizer dried I pre-shaded the panel lines with black. I then applied JNAF
light grey to the undersurfaces, followed by JNAF dark green and a 3:1 mixture
of JNAF dark green and RLM 02 (interior grey) for the lighter green areas. The
cowl was painted blue-black, and the wheel wells and interior gear doors aotake
(metallic blue-green). Apart from the metallizer, all painting was done using
Polly Scale acrylics. I first sprayed the completed model with SnJ aluminum metallizer. Once the
metallizer dried I pre-shaded the panel lines with black. I then applied JNAF
light grey to the undersurfaces, followed by JNAF dark green and a 3:1 mixture
of JNAF dark green and RLM 02 (interior grey) for the lighter green areas. The
cowl was painted blue-black, and the wheel wells and interior gear doors aotake
(metallic blue-green). Apart from the metallizer, all painting was done using
Polly Scale acrylics.
Medium and fine grain sandpaper was used to make surface
abrasions and expose the SnJ aluminum beneath, particularly around the port
entrance to the cockpit and the port wing root.

A coat of Model Master Metalizer sealer was used as a clear gloss coat prior to
the application of decals. I used the kit’s decals with Microsol decal setting
solution but no softeners. The markings are for an aircraft from the 261st Naval
Flying Group. A coat of Model Master dull clear lacquer was applied once the
decals had dried thoroughly. The antenna was made from stretched sprue.
Click the thumbnails below to view
larger images:
Model, Images and
Article Copyright © 2002 by Ian
Robertson
Page Created 03 June 2002
Last updated 04 June 2007
Back to HyperScale Main Page
Back to Features Page |
Home
| What's New |
Features |
Gallery |
Reviews |
Reference |
Forum |
Search