|
A6M3
Zero Type 32
by Alex Bernardo
 |
|
Mitsubishi A6M3 Zero Type 32 |

HyperScale is proudly supported by
Squadron.com
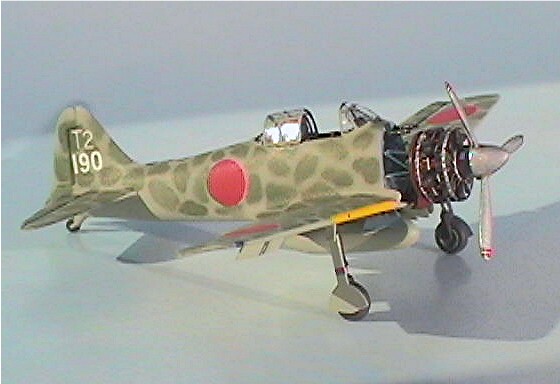
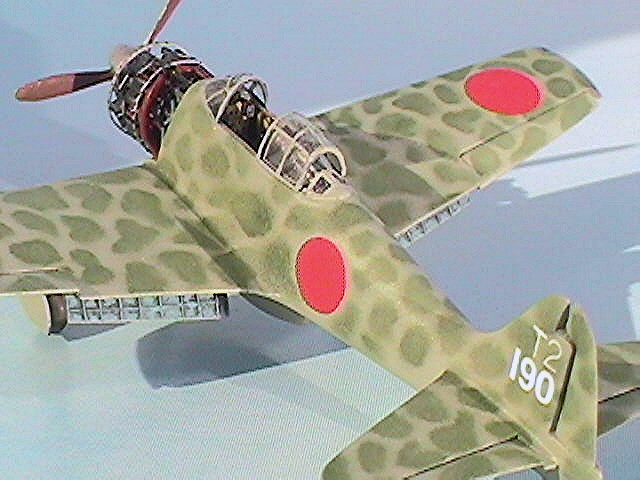
Here is the 1/144 Scale A6M3 Type 32 Zero (Hamp) by AMH/Arii/Crown
This Zero was assigned to the 204th Kokutai at Rabaul during the summer of 1943.
The subject aircraft did not have a antenna mast.
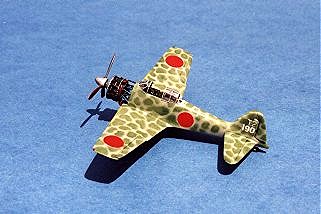
To help reduce the increase in weight brought by the installation of the more
powerful engine and to increase manoeuvrability at high speeds the 20 inch
folding wing tips were removed and faired over, creating squared wing tips.
Reducing the wing span by over three feet and increasing the engine power did
not bring about the anticipated increase in performance.
The engine installed in this aircraft was a Nakajima Sakae (Prosperity) Radial
engine.
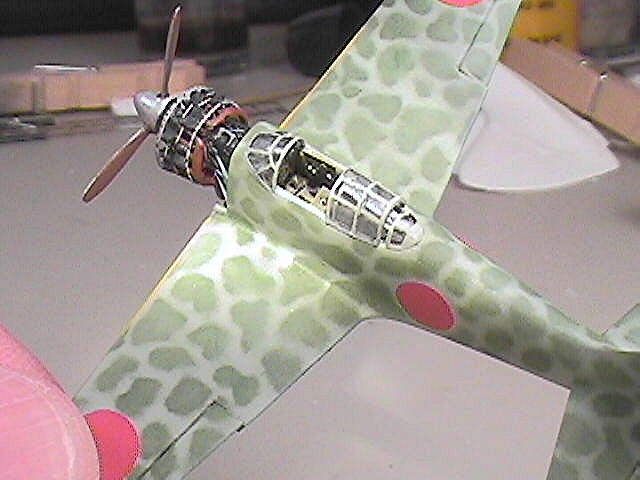
Engine
The scratch built engine was assembled from 116 parts. The engine includes 14
Piston heads, 28 Push rods, Ignition ring, 14 Plug wires, 14 Interconnecting oil
drain lines, 2 Cowling frame mounts, 32 piece exhaust system, 6 piece crank
case, 6 piece engine mount.
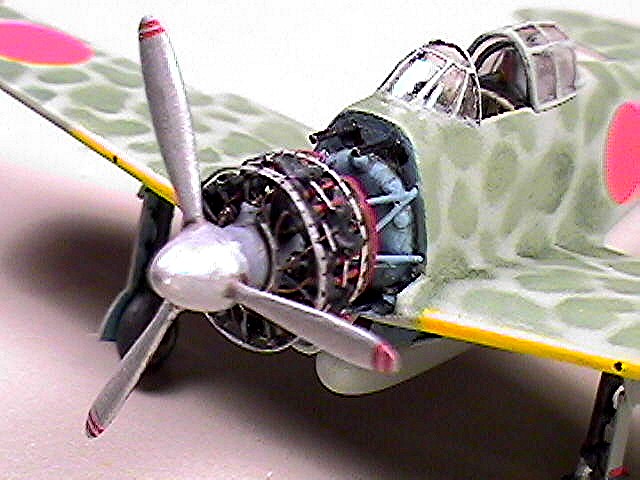
The piston heads were made from reshaped brass screws using a Dremel tool. The
push rods, ignition ring, plug wires, exhaust extensions, and engine mounts were
made from various sizes of wire. Exhaust ring was made from styrene rod. The
engine crank case was primarily made from a spare piece of styrene frame from a
Heller kit.
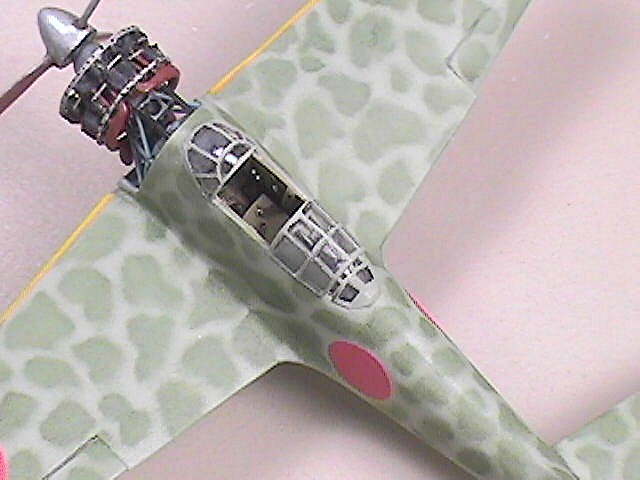
Cockpit
The original kit did not come with a cockpit so the cockpit was built from
the floor board and up. The cockpit includes: control stick, main instrument
panel, gun sight, machine gun butts, rudder pedals, wall stringers and ribs,
side consoles, seat with seatbelts, headrest, and circular radio antenna.

I used "Heat n Smash" method to create canopy.
Miscellaneous
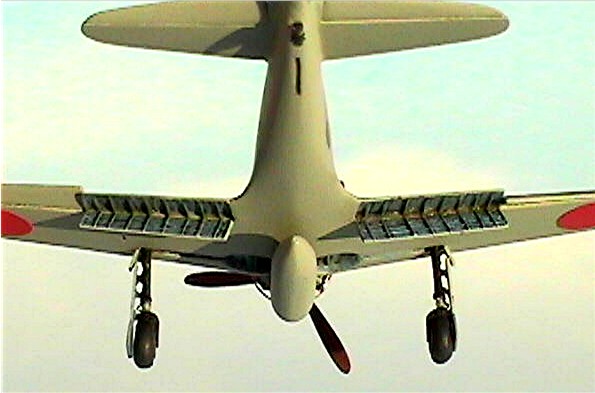
Flaps were made from paper thin styrene sheet using very fine copper wire for
the ribbs. All wheels had to be rebuilt, since the kit only provide one side of
each wheel.
I used piano wire to replace oversized main landing gear.
I used Tamiya Acrylics: IJN Gray and Clear Gloss; plus Polly Scale Acrylics:
Clear Flat
The disruptive dark green mottle was custom mixed oil based paints. The dark
green was applied by using a dry brushing technique.
Spare decals were used for the rudder codes. The Hinomarus were made by placing
a circular stencil over red decal sheet and lightly scoring the outlines.
Click the thumbnails below to view
larger images:
Model, Images and
Article Copyright © 2002 by Alex
Bernardo
Page Created 26 May 2002
Last updated 04 June 2007
Back to HyperScale Main Page
Back to Features Page |
 Home
| What's New |
Features |
Gallery |
Reviews |
Reference |
Forum |
Search
Home
| What's New |
Features |
Gallery |
Reviews |
Reference |
Forum |
Search