|
Douglas A-4E Skyhawk
by Mattias Ärletun
|
|
|
Douglas A-4E Skyhawk |

Hasegawa's 1/48
scale Douglas A-4E/F Skyhawk is available online from
Squadron.com
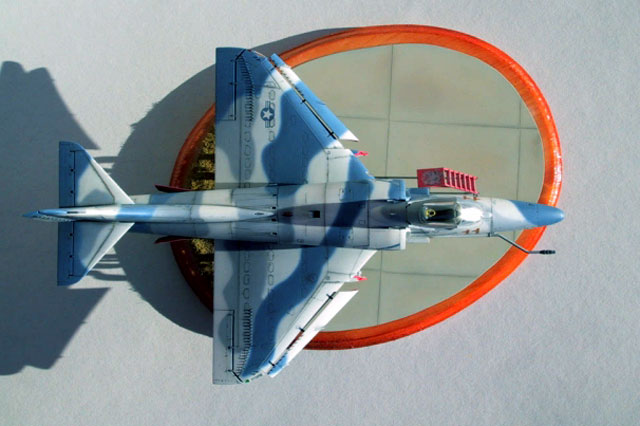
This is Hasegawa´s Douglas A-4E Skyhawk built and painted
to represent an adversary aircraft (Bu.No.152067) from
VF-45 Blackbirds at Key West, Florida, around 1989.
Construction was very straightforward and about the only thing I screwed up,
was when I forgot to add a nose weight to prevent tail sitting (yep, this kit is
one of those). This was fixed by a little surgery in the area under the fuselage
later to be covered by the wing and the insertion of some Blu-Tack combined with
a few dismembered white metal role-playing game figures (poor guys...) into the
area behind the cockpit.
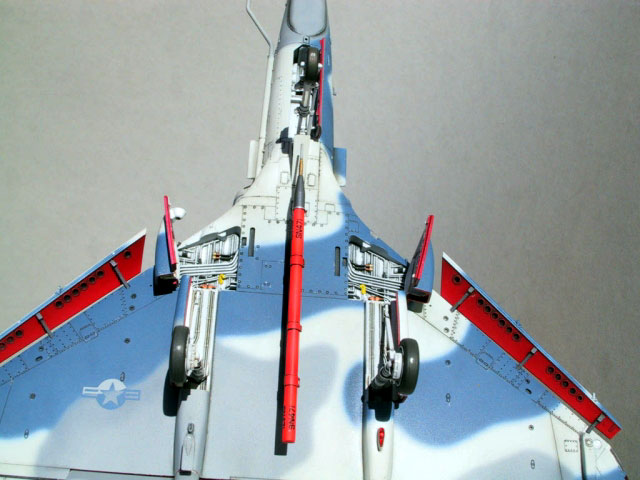
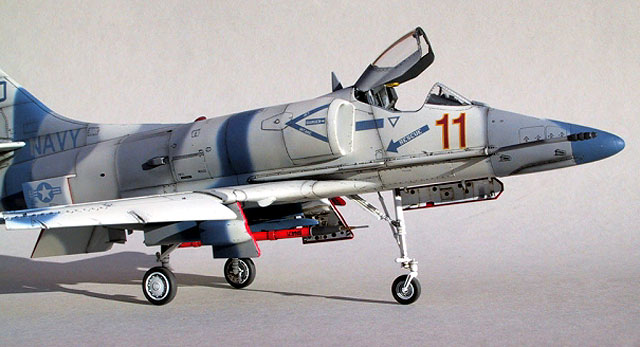
I chose to build the kit pretty much out of the box with just a few
modifications: Using a rescriber, I repositioned the rudder and fabricated new
hinges from sheet styrene. The air brake actuators were shortened and I made a
new AOA indicator using spare parts. I also added an ACMI pod from a Hasegawa
weapons set to the centerline station. I kept the ejection seat supplied in the
box and detailed it with stretched sprue and photo-etched belt buckles. The oleo
strut on the front gear was enhanced with Bare Metal Foil and solid fairings
(included in the kit) over the cannons were installed.
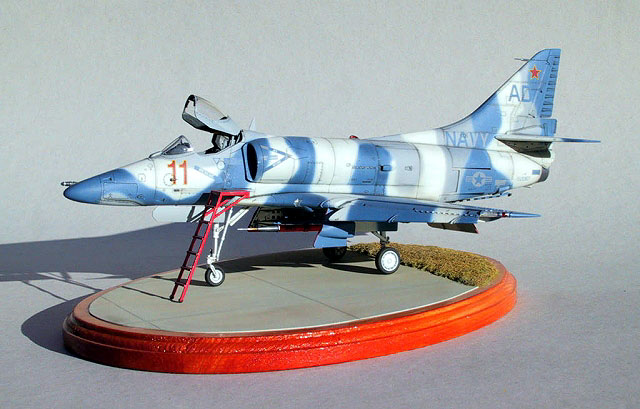
When I first saw the "Top Gun Tinker Toys" (48-018) decal sheet from
Twobob Aviation Graphics, I knew I just
had to build the grey/grey/blue adversary aircraft from VF-45. The color
combination is simply too attractive to resist! I used the Gunze Sangyo paints
(GUH322, GUH307 and GUH311)
called out for in the decal sheet painting instructions but found the
blue color to be to dark, so I had to mix my own using Gunze Sangyo
GUH322 as a base. I poured in some light grey and
and bluish grey to get the shade seen on photos of similar aircraft. On the
pictures, though, the blue color turned out brighter than in reality. Maybe it
was because I photographed the model in evening sunlight. The camouflage scheme
was sprayed freehand with a Hansa 251 airbrush and the tricky part here was to
get the demarcation lines to line up with the "inverted" lo-vis decals but by
marking out the lines softly with a lead pencil, it is possible to achieve a
good result.
Decals for four different adversary aircraft (one of which is Jester´s
Skyhawk from the movie Top Gun) is provided on the Twobob 48-018 sheet. The
decals are beautifully printed and even includes gold color on some name plates.
Apparently some of the decals on the main sheet have been revised and a smaller
extra sheet of accurate replacements was included. The decals are thin and easy
to apply as long as one takes care to apply them on a coat of gloss varnish or
Johnson´s, close to their "final resting place". Some Micro Sol was needed to
melt the decals into the panel lines in some places, though. After the decals
had dried thoroughly, the whole model was again sealed with Johnson´s and the
canopy dipped in the same product in preparation for the wash.
I have found that the simplest and non-smelliest way of creating a wash, is
to use black, brown, grey and white water colors (just cheap kid´s stuff,
really) mixed to a shade appropriate for the current project. I also add a drop
of washing-up liquid to the mix to get the capillary action to work its magic.
For the Scooter I opted for a slightly darker wash than I normally would have
used, but I think it turned out pretty well in the end. The wash was then sealed
with Aeromaster Flat Clear (I managed to buy the last 6 cans in Sweden I think,
MUAHAAHAAHAAAA...).

To soften up the panel lines, I mixed some black and dark brown chalk pastel
powder and, using a good quality flat tipped brush, I worked the powder into the
panel lines. It was a tedious task but worth it in the end. If the contrast
between the underlying color and the chalk powder is to big, a few passes with a
piece of foam rubber is usually all that it takes to fix it. At this stage,
using a silver Bruynzel artist´s pencil and with a soft lead pencil for the dark
and light camouflage colors respectively, small paint chips were added to places
likely to receive wear and tear. To protect the panel line shadings and paint
chips, I again airbrushed the model with Aeromaster Flat Clear.
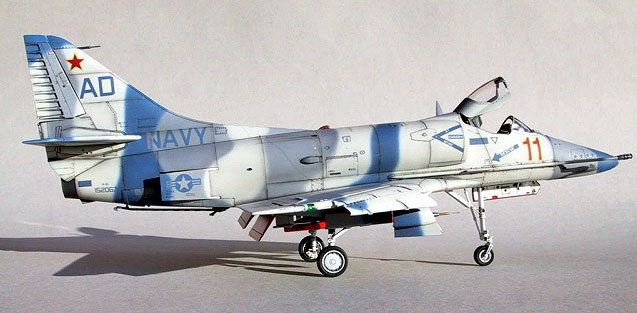
The jet exhaust was painted in my standard way: First I airbrush a coat of
Tamiya Flat White. Next comes a layer of Humbrol Polished Steel which is allowed
to dry and then polished with a cotton bud. After that I spray on a very diluted
coat of Pactra Pearl Purple (just a few quick passes) and seal it with Model
Master Sealer from their range of metalizers. This makes exhaust areas look
pretty realistic and thanks to the thin layer of Pearl Purple (which I think is
normally a product for painting RC car body shells) the color even changes
depending from which direction one watches the model, creating an illusion of
heat stained metal.
Tires were painted with Aeromaster Tire Black and then the tire sides were
misted with Tamiya Flat Black to make the tread pattern stand out a little more.
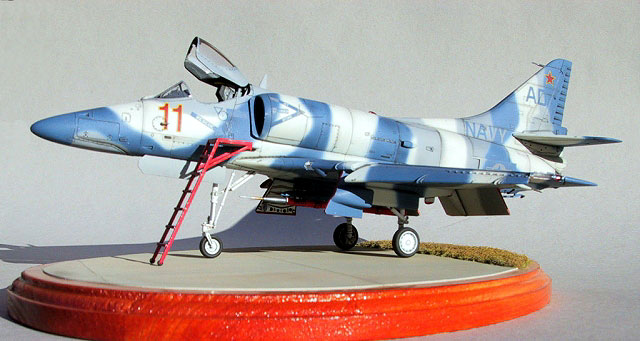
The ACMI pod (kindly supplied to me by a fellow modeler; thanks, Jon) from
Hasegawa´s latest weapons set was primed with Tamiya Flat White and painted with
day-glo orange in several thin layers. I chose to place it under the centerline
station, partly because it makes the aircraft look cleaner and partly because I
was to lazy to paint two extra pylons for and attach them under the wings. On
photos of similar aircraft I have seen the pod placed both on the centerline
pylon or under either of the wings combined with an AIM-9 under the
corresponding one, so it should be OK to use whatever placement suits the
modeler best.
Final details such as blade antennae, pitot tube and all the other fiddly
parts were then added and the model was finished.
This build is my fastest yet (five weeks) and the reason I chose to build the
kit (besides the fact that I got hold of the Twobob decals) was that I wanted a
shake-´n-bake kit after having struggled with the DML Me 262 Pulkzerstörer for
too long and before starting to build the Tamiya Dragon Wagon. Normally I´m
addicted to 1/48 German WWII subjects (preferably night fighters) but in this
case I made an exception, and it turned into a very inspiring build.
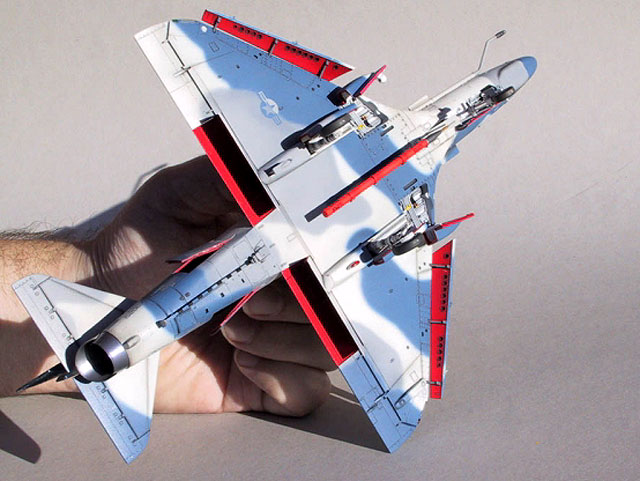
For the photos, I used a Canon digital camera
and the photographing was carried out in evening sunlight against a neutral
cardboard background. The hand in the photos does not belong to Mr Hairy Palms
but to Daniel Nylén, a member of our local model builder society, who was kind
enough to help me out during photographing.
Hasegawa´s "Scooter" really is a great kit; It is pretty accurate, the fit is
good, details are crisp (especially in the landing gear wells) and there is a
wide variety of colorful painting options to choose from due to the long service
life of the aircraft type and the period it served during. The only drawback is
that the ejector seat supplied with the kit, is rather on the crude side.
Fortunately there are plenty of aftermarket bang seats to choose between. Also,
one cannot help growing amazed by Ed Heineman´s simple yet brilliant design and
during the build and I have relly developed an affection for this little hot rod
of a plane. I definitely recommend this kit to anyone wanting a quick, rewarding
build resulting in an attractive replica of an important subject.
I hope you have enjoyed this article and that you find the tips of some use.
Please feel free to drop me an e-mail if you have any comments.
Click the thumbnails below to view
larger images:
Model, Images and Text Copyright © 2002 by
Mattias Ärletun
Page Created 23 April, 2002
Last Updated 04 June, 2007
Back to
HyperScale Main Page
Back to
Features Index |
 Home
| What's New |
Features |
Gallery |
Reviews |
Reference |
Forum |
Search
Home
| What's New |
Features |
Gallery |
Reviews |
Reference |
Forum |
Search