|
A-4C Skyhawk
by
Ingo Degenhardt
|
|
|
A-4C Skyhawk |
Images by Lutz Degenhardt

Hasegawa's
1/48 scale A-4C Skyhawk is available online from
Squadron.com
"Scooter".
The A-4's well-known nickname is what came to my mind when I heard
that Hasegawa was releasing their first A-4 kit of their 1/48 scale
Skyhawk series.
Quite some time has passed since, and now I have finally bought and
built the "C" version.
The kit is a state-of-the-art product and the part’s fit is something
near to perfect. A little disadvantage is that no ordnance comes with it
except for two external fuel tanks. Just a few items to fill the pylons
would be nice for a relatively high-priced kit like this one. I myself
would be perfectly satisfied with a pair of TER’s and/or MER’s to be
included as these are always in short supply.
As mentioned, the parts of the kit fit very well, making the assembly
pure joy. No problems, just a little filling, sanding and rescribing
here and there – for example when attaching the wing assembly to the
fuselage, there is something to be done about the connection fuselage
bottom/wing undersides – just aft of the nose wheel well.
The model was built mostly out-of-the-box, only brake pipes were added
on all three gear struts, according to some photography found on the
internet (although I have lost the URL).
The cockpit contains just the kit parts which is fairly good enough for
my choice of a closed canopy. With just two tiny drops of cyanoacrylate
on each side it snaps perfectly into place.
I have seen a lot of negative comments written about front wheels
moulded in place with the gear leg. I consider it no real disadvantage
after the part is neatly painted.
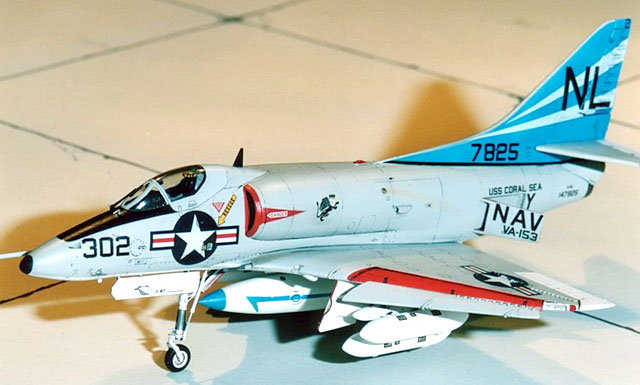
Because I wanted to do something about the external load, I looked into
my various Aircraft weapons Sets by Hasegawa. I would have liked an MER
for the centerline pylon, perhaps with something from the Mk 80 series
but of course I had none left. Instead I found two TER’s and decided to
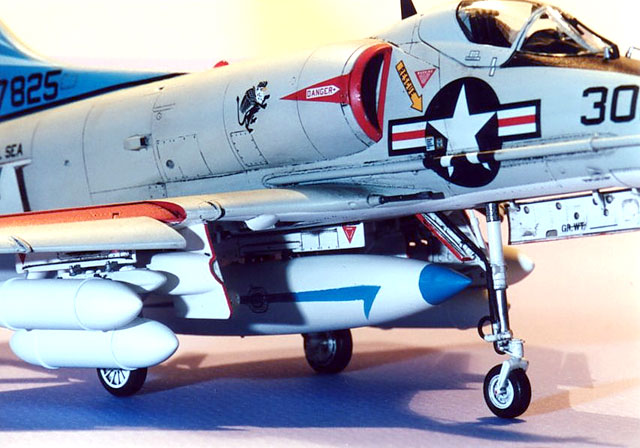
equip the A-4 with a centerline drop tank and the two TER’s under the
wing pylons – each loaded with two LAU-3 rocket launchers from Hasegawas
‚B‘-Set. This configuration looks quite probable to me for a Vietnam-era
Skyhawk .
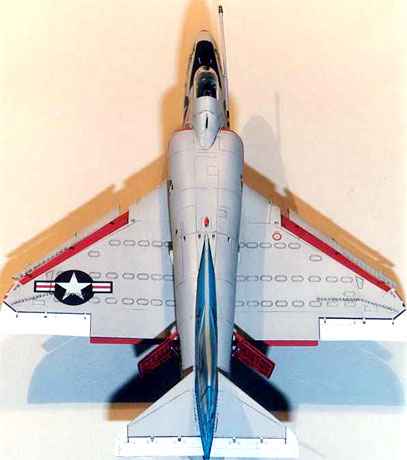
Likely or not for a parked and armed aircraft, I built the speed brakes
in the open position – just to display the red insides and the sliced
NAVY- stencilling
As always with my aircraft kits I used Xtracolor paints for their
high-gloss finish, making any clear gloss coat to prepare for the decal
job unnecessary. Furthermore they have a wide range of FS and other
colors.
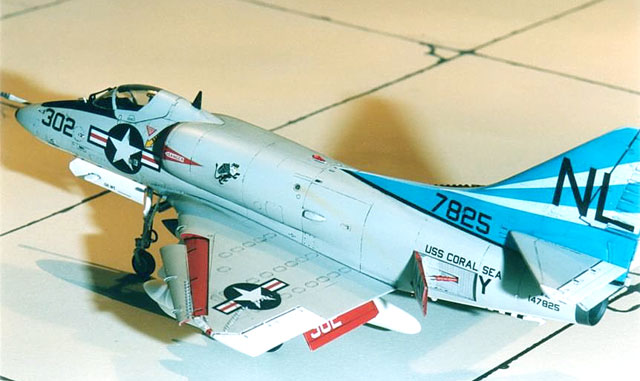
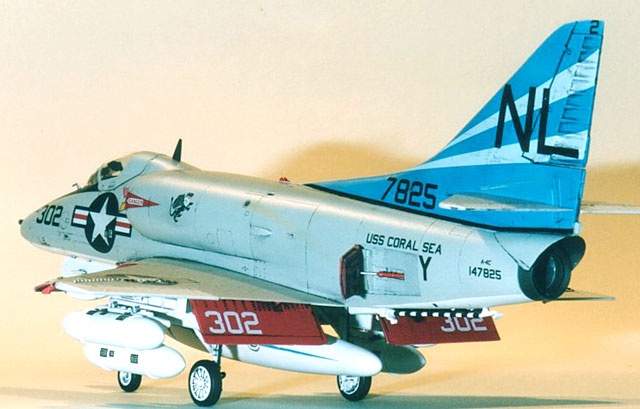
I went for marking option No. 2 of the kit with the whole vertical
stabilizer and rudder in light blue. Hasegawa provides a large decal for
each side, but I decided to spray-paint the whole thing in order to
avoid some major problems with the heavily corrugated rudder
construction. I also found the Blue chosen by Hasegawa being a little
too ‘bright’, according to a photograph of aircraft 302. So I started to
mix the color from various Humbrol Super enamels. It took some time but
finally I was satisfied with the result. Tip and chevron of the drop
tank were also painted in this mixture.
Main painting sequence was:
After a test fit of the intake leading edges (parts G3&4) and the
horizontal stabilizers I decided to paint them seperatly to avoid
masking during the following paint jobs.
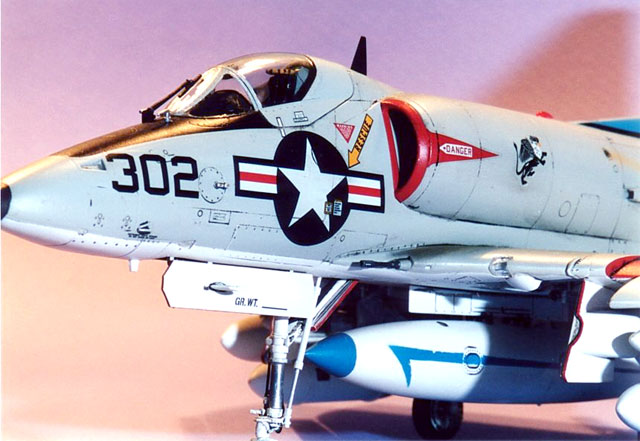
A nice decal is provided for the anti-glare so I didn’t have to mask and
spray this area.
After two days drying time, the whole model received a ‘wash’ of heavily
diluted enamels – dark brown for the White, dark grey for the Gull Grey
and black for the Blue surfaces. I worked in smaller sections that were
wiped with a thinner-soaked tissue after drying, just leaving the paint
in the engravings and recesses, as intended.
All Grey and Blue surfaces were then drybrushed with the respective
color lightened up with flat white.
The smaller clear parts (of course not glued on yet) had a coat of
‘Future’ brushed on to give them a more ‘glassy’ appearance , although I
did not dare to use it for the canopy and windshield.
Decals
Marking option No. 2 depicts an A-4C of US Navy Squadron VA-153 „Blue
Tail Flies“, USS Coral Sea, ca. 1965.
The decal job calls for some extra attention and care with several
decals to be applied in difficult areas.
Beginning from the aft, the first encounter of this kind were the white
chevrons running across the vertical stabilizer and rudder. As they
often do, Hasegawa made this a separate decal, leaving us the paint
option for larger areas just like the blue tail.
I pondered a while wether to paint the chevrons too (and cut out the NL-tailcode)
or to use the decals. But masking the rudder surfaces would not have
been much easier – so I went for the decals with all carrier film cut
off. It required a lot of assistance from Micro Set and Sol to get them
properly into place. But after several treatments with Sol and a lot of
piercing and cutting of the decals it finally turned out satisfying.
Next was the upper wing national insignia, that must be applied directly
over the boundary fences on the wing.
No chance for Set and Sol to deal with this, so I cut out the
affected decal section and put the rest of the decal into place – fore
and aft of the fences. Insignia Blue and White, applied with a fine
brush, filled the gap.
The third and last challenge is the nat. insignia on the right fuselage
side. Already enlarged by Hasegawa because it goes right over the tube
of the aerial refuelling probe fitted there. This is exactly what
Sol&Set were made for. The decal firmly pressed into place with a soft,
damp tissue, a drop of Sol brushed on top and after a few hours the
decal perfectly wraps around the tube and is ‘sucked’ into every panel
line.
With all the decals dry and the excess glue and Sol wiped off with
water, the ‘wash’ is carefully repeated for the larger decals.
After that, the model received a complete overspray with Humbrol Matt
Cote. Powdered pastel chalk was used for a little further ‘weathering’
of the plane.
In conclusion, I found this kit fun to build with no major
shortcomings or problems and as there is a whole series of A-4’s by
Hasegawa.
I am quite sure I will make another one sooner or later, although the
next one might be a ‘Camel’.
Project Summary
and Additional
Images
|
|
Project Statistics
|
|
Completion
Date:
|
26 January, 2002 |
|
Total Building
Time:
|
27.15 hrs |
|
Construction:
|
8.45 hrs |
|
Painting
(includes creation and printing of custom decals):
|
14.08 hrs |
|
Decals / Markings
(includes creating and printing custom decals):
|
3.09 hrs |
Click
the thumbnails below to view larger images:
|
 Home
| What's New |
Features |
Gallery |
Reviews |
Reference |
Forum |
Search
Home
| What's New |
Features |
Gallery |
Reviews |
Reference |
Forum |
Search