|
Messerschmitt Bf 110G-4
by
Ian
Robertson
 |
|
Messerschmitt Bf 110G-4 |

ProModeler's 1/48
scale Bf 110G-4 is available online from Squadron.com
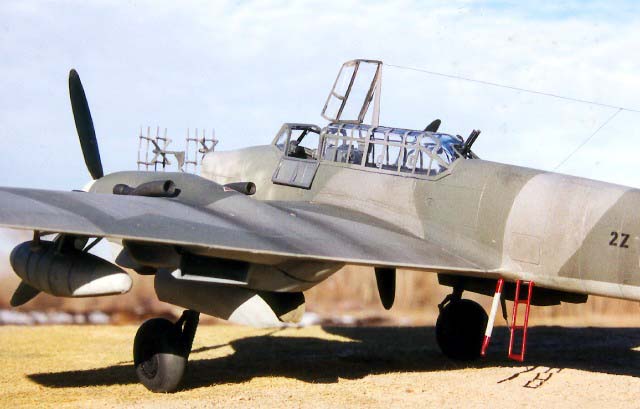
This is Pro-Modeler's 1/48 Bf 110G-4 night fighter shown in an unusual
Zerstörer camouflage scheme with FuG202 Lichtenstein B/C radar. The scheme is
based on photographs of a similar aircraft from 6/NJG6 (2Z + OP) that mistakenly
landed in Switzerland in March 1944 after becoming lost.
Bf 110G-4's with FuG202 radar retained the "narrow chord" vertical tail
surfaces typical of earlier versions of the Bf.110. However, Pro-Modeler's G-4
kit contains only the wide chord tail found on later G-4's. To solve this
problem I used the narrow chord tail in Revell's Bf.110G-2 kit. The G-2 kit is
basically identical to the G-4 kit except for minor differences specific to the
G-2 (e.g., different nose, no flame dampers, belly gun pod, narrow chord tail).
Both kits are excellent. As an aside, the "special edition" Revell Bf.110G-2
(ZG1 - Wespen) includes a resin nose for the earlier G-2 that can accommodate
various gun combinations.
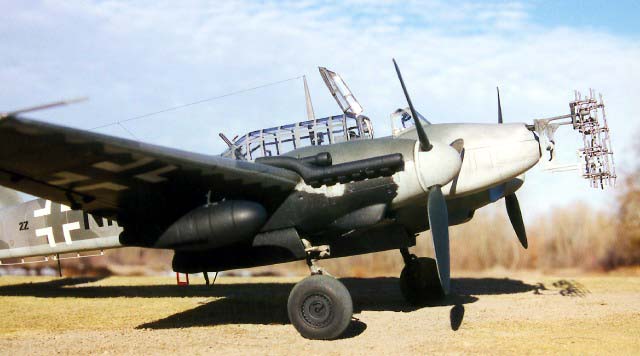
In addition to replacing the tail fins I made a number of minor modifications to
the Pro-Modeler kit. The pilot's seat was replaced with an etched brass seat
from Reheat and Eduard metal seatbelts were added. The rear gunner's crosshair
is etched brass from Reheat. The oil cooler flaps on the engine nacelles were
removed and replaced in the open position with sheet styrene. The ends of the
flame dampers were hollowed out. Armor plating around the cockpit was made from
sheet styrene using the template provided in Pro-Modeler's instructions. The
blind landing radio located midline on the underside of the fuselage aft of the
wings was made from pieces of stretched sprue. Handgrips on the cockpit
windscreen frame were made from wire. The opened panels of the cockpit were
scratch built using clear acetate and styrene strips for framing. The antenna
wire is stretched sprue.
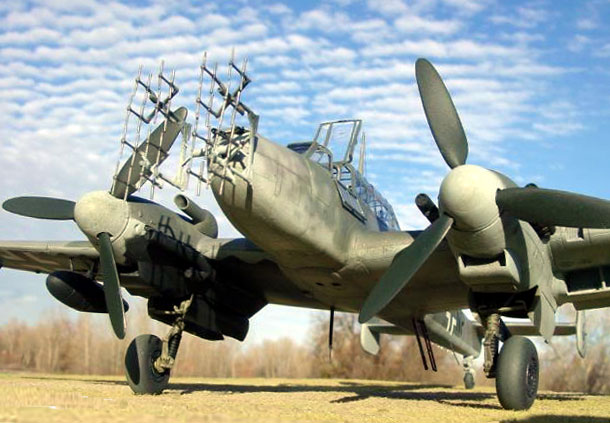
The FuG202 radar was made from Cutting Edge's resin and brass set. The parts are
costly, but in my opinion this particular type of radar array would be difficult
to build from scratch, although some might enjoy the challenge. The set contains
16 brass pieces (the radar tips) and 5 resin pieces (a nose mount plus 4
dipoles) which were attached using CA glue. Once assembled the array is
remarkably strong and resilient, just as the Cutting Edge instructions claim.
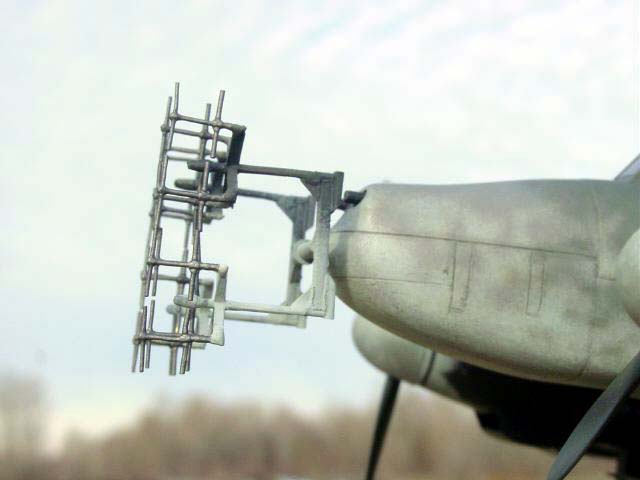
Getting the radar symmetrical is tricky and requires patience, particularly
since many of the brass pieces differ in size and required trimming. I used a
metal pin to help mount the array to the plane's nose. It goes almost without
saying that the radar assembly was the last part added to the model. Overall I
am satisfied with Cutting Edge's representation of the FuG202 radar, but
comparisons with photographs show the brass parts to be too thick for the
antennae tips (the tips are almost invisible in most photos). I would have
preferred it if these parts had been made from etched metal as done in Koster's
night fighter conversion for the Do.217N-1. The Cutting Edge resin and brass
radar system may be better suited to radar arrays with thicker antennae (e.g.,
FuG220 and FuG218).
The model was painted in an unusual RLM 74/75/76 scheme reminiscent of a day
fighting Zerstörer aircraft rather than a night fighter (it probably flew in
both roles). Aeromaster and Polly Scale acrylics were my paints of choice. The
underside of the starboard wing as well as the fuel tank were painted scale
black, the cockpit is RLM 66, wheel wells are RLM 02, and the propellers RLM 70.
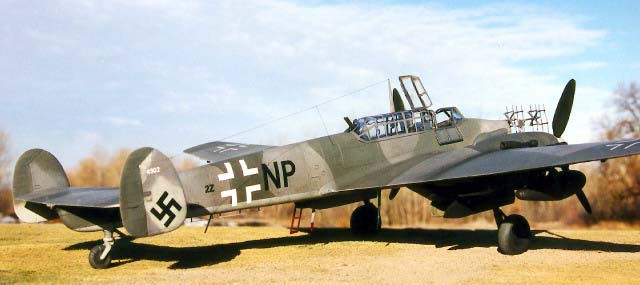
Exhaust stains were airbrushed using highly thinned black paint.
Prior to the application of decals the model was sprayed with Future floor
wax. The kit decals disintegrated on contact with hot water (perhaps due to poor
storage conditions - the decals were not sealed in plastic in the box) and were
replaced with spares.
Model Master dull coat lacquer was used to seal the decals and give the model
a flat finish.
The photographs were taken outdoors using both a standard 35mm manual camera
(32-80mm lens, tripod, shutter release, 200 ISO film) and a SONY S75 digital
camera. The model and its base were placed on a small table in a field with
trees in the distance to the west (see photo below).
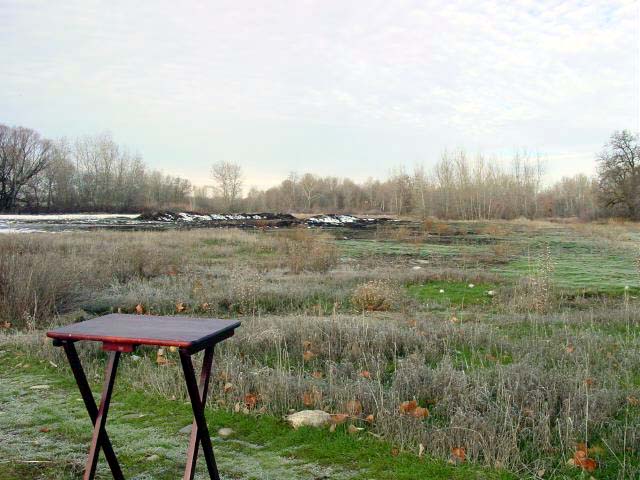
I always shoot my model pictures early in the day (OK, 10-11am, I'm not a
morning person) while the sun is low and behind me. Sunny days are preferable to
cloudy days - on cloudy days the sky's glare tends to bleach out the model's
colors.
Click the thumbnails below to view
larger images:
Model, Images and
Article Copyright © 2002 by Ian
Robertson
Page Created 31 January 2002
Last updated 04 June 2007
Back to HyperScale Main Page
Back to Features Page |
 Home
| What's New |
Features |
Gallery |
Reviews |
Reference |
Forum |
Search
Home
| What's New |
Features |
Gallery |
Reviews |
Reference |
Forum |
Search