|
A-10A Thunderbolt
II
by
Frank Mitchell
|
|
|
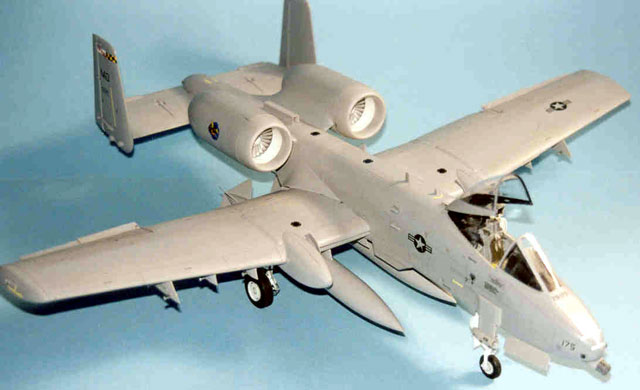
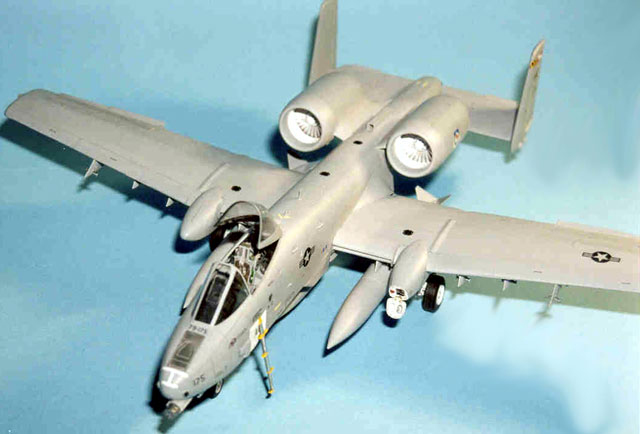
A-10A Warthog |

Trumpeter's 1/32
scale A-10A is
available online from
Squadron.com
When the Trumpeter A-10 was first released I
decided that, although I was not in a big hurry to build it, I had to
have one.
While I was fondling the various pieces and looking at
pictures of built ones, I came to the conclusion that the nose bothered
me - not just the windscreen , but the shape of the nose itself. So, out
came the references and, added to a couple of very welcome contributions
to HyperScale from someone who actually lays hands on the things, I made
up a mold for a new windscreen in which the flat panel was the correct
width.
After forming a couple of windscreens and taping components together, my
next conclusion was that the nose shape is right on the money in the
side view, but was too wide in plan view. To test my assumption, I
modified my single-seat kit and liked the end result, but put it back
into the box to await a stronger muse.
I did run off a few windscreens for the Atlanta “locals” and a few for
AAA Hobbies here in town to sell, but still didn’t get enthused.
However, after some more time passed without seeing any built with the
modified windscreen, I decided that the only way I would see what one
looked like in the finished state was if I built it myself. This is the
end result.
For the nose, I first applied a generous layer of
filled epoxy (I use a product called Epoxolite by SIG) to the inside of
the fuselage halves around the forward nose. When that was cured, I took
the Dremel and ground on the lateral sides of the nose until the shape
matched some drawings I had enlarged. The epoxy allowed me to go right
through the plastic where necessary to get the shape I was after. Of
course, that wiped out the scribing and the RWRs on both sides of the
nose, but no system is perfect.

The kit part that contains the nose wheel opening was treated in the
same fashion, and it was fitted to the fuselage halves. Somewhat
surprisingly, the kit nosewheel well fits fine, with just a little
messing about.
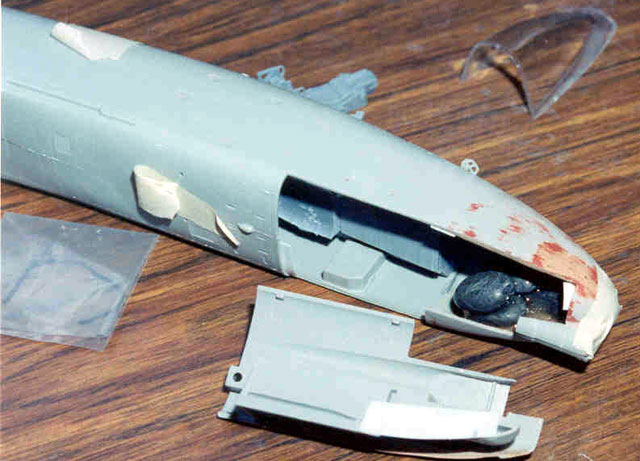
After the halves were glued together, the outer
surface of the modified nose was re-scribed as necessary and I replaced
the little RWRs on either side of the nose.
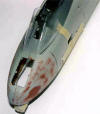 The
modified windscreen fitted pretty well with just some sanding being
necessary to make all the shapes match up (click thumbnail at right to
view larger image). The
modified windscreen fitted pretty well with just some sanding being
necessary to make all the shapes match up (click thumbnail at right to
view larger image).
See the pictures, and you will understand all of this.
I used the CE interior because I liked it a little better, but I did
delete the air conditioning pipes so it would better resemble a LASTE
aircraft. However, I could not use the CE piece that goes over the
instrument panel because it was now too wide to fit inside the narrowed
windscreen. I therefore used the kit piece with some modifications, and
attached it to the front piece of the CE set to get the nifty little
warning lights that were molded in.
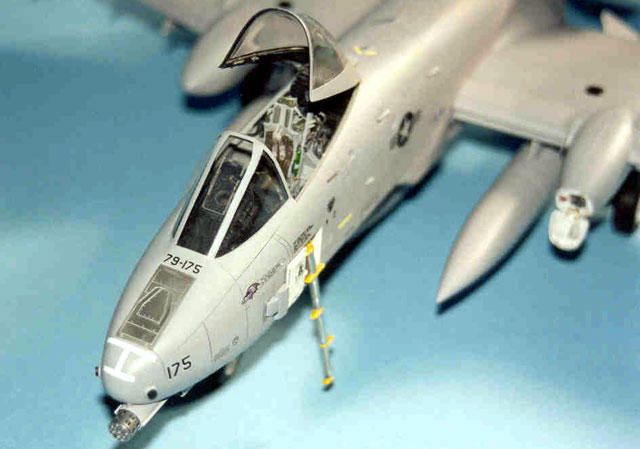
By the way, I really liked the way the CE set came out after being
painted and finished. I recommend both sets (but I have no commercial
interest).
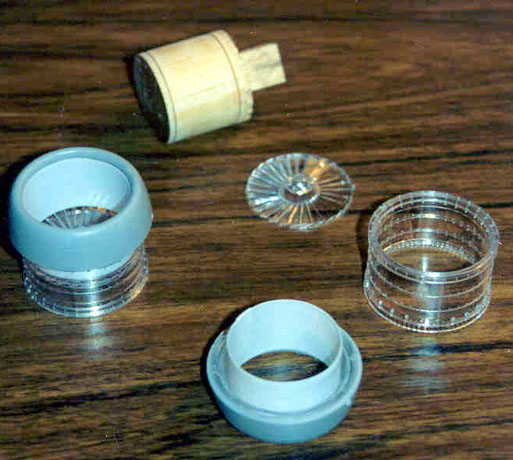
Except for the nose, the only other change I made was to the engines. I
used the Cutting Edge exterior set, but I also molded an inner “sleeve”
that was glued and faired into the leading edge of the engine intake
(see pictures). Then, by eliminating the kit engines but using the clear
forward piece, I was able to position the turbine face in its correct
position. To me at least, the engines looked a whole lot better.
I built the remainder of the kit pretty much the way it was designed. I
thought the fit was good except for the area around the wing joint,
which needed a little help.
The only further tricks were a bit of detailing in the wheel wells, and
the usual careful clean-up and attention to dry-fitting.
Painting, Decals
and Finishing Touches
|
The finish was standard for me: first priming with
automotive primer followed by Gunze paints. After using a coat of
Future, I used a Two Bobs decal sheet (also recommended). A little (and
I do mean a little) panel line emphasis was done, and the whole model
was finished off with a blend of Testor’s Gloss Coat and Dull Coat (be
nice to the sponsors).
Since painting munitions is not one of my joys in life, I traded for or
bought a couple of extra drop tanks from folks that weren’t going to use
them, and set mine up in ferry configuration.
I like the way the model came out, and I now have a
better appreciation for just how big the Warthog really is. Set it next
to and F-4 or the Buccaneer and you will quickly see that this is a lot
of airplane!
Model, Images and Text Copyright © 2002 by
Frank Mitchell
Page Created 24 April, 2002
Last Updated 26 July, 2007
Back to HyperScale
Main Page
Back to
Features Index
|
 Home
| What's New |
Features |
Gallery |
Reviews |
Reference |
Forum |
Search
Home
| What's New |
Features |
Gallery |
Reviews |
Reference |
Forum |
Search