|
MiG-3
by
Tony
Bell
 |
|
MiG-3 |

ICM's 1/48 scale
MiG-3 is available online from Squadron.com
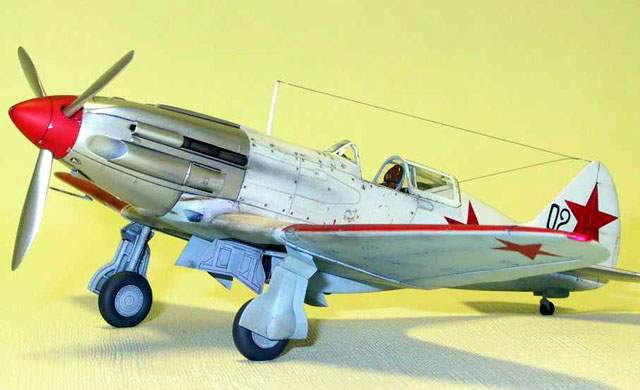
The 1/48 scale ICM MiG-3 has to have been one of the most
enjoyable kits I've made in a long time.
Although definitely not a Shake-n-Bake, it was detailed enough
to build into a nice replica while being challenging enough to exercise a number
of basic modelling skills.
By heeding the advice of others, I managed to avoid any fit
problems by omitting the engine and by attaching the wing root to the fuselage
before the wing. A lot of trimming and dry fitting was necessary to achieve a
good fit overall. Because I took the time to do so, only a minor amount of
filler was required. The prop blades were thinned considerably and the spinner
panel line engraved with a No. 24 X-acto blade. The appearance of the control
surfaces was greatly enhanced by sanding down the overdone fabric effect. The
whole model had to be rubbed down with 2000 grit wet 'n dry to rid it of the
slightly pebbly surface texture.
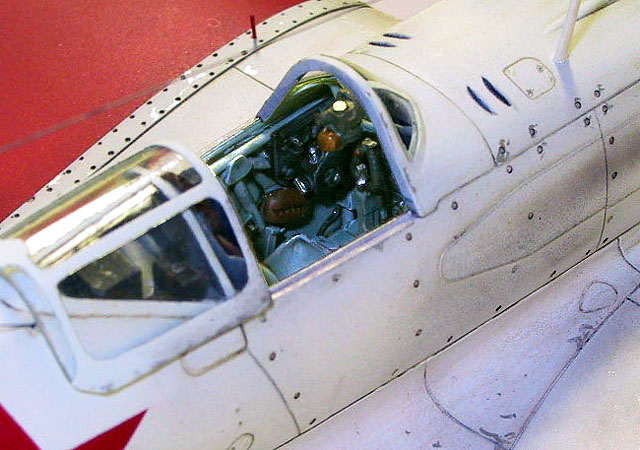
The kit cockpit was set aside in favour of the Cutting Edge resin replacement
set. Even though the kit cockpit is more than acceptable, the Cutting Edge set
is truly outstanding.

Exterior bits such as radiator face/flaps, landing gear doors
and wheel hubs were replaced with photoetch components from PART. This set also
includes an extremely detailed flap assembly which I elected not to use due to
it's complicated nature (OK, so I'm a bit of a chicken). Also, I couldn't find
any pictures of the MiG-3 with the flaps down.
The natural metal engine cowling and tail surfaces were painted
with Alclad II White Aluminium, while the white and red top surfaces were
painted with Tamiya acrylics. The undersides were painted with Model Master
enamel Russian Underside Blue (go figure).
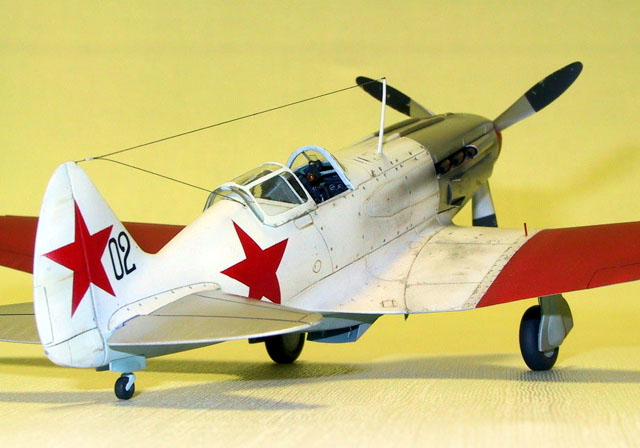
The red stars were sprayed on using masks cut from frisket
paper, with the rest of the markings coming from Aeromaster's "MiG-3's Early
Warriors Pt. I" sheet number 48-313. Looking at the photo of the original I have
since decided that I should have used the red tail number instead of the black
one. Oh well, I suppose I'll live.

Weathering was accomplished with pastels and a burnt umber oil
wash with paint chipping added with a 0000 brush and Humbrol No. 11 silver. The
exhaust staining was airbrushed on using heavily thinned (10:1, alcohol to
paint) Tamiya acrylics.
Click the thumbnails below to view
larger images:
Model, Images and
Article Copyright © 2001 by Tony Bell
Page Created 23 December 2001
Last updated 04 June 2007
Back to HyperScale Main Page
Back to Features Page |
Home
| What's New |
Features |
Gallery |
Reviews |
Reference |
Forum |
Search