|
MiG-3
|
 |
|
MiG-3 |
by
Aleksandar
Šekularac

ICM's 1/48
scale MiG-3 is available online at
Squadron
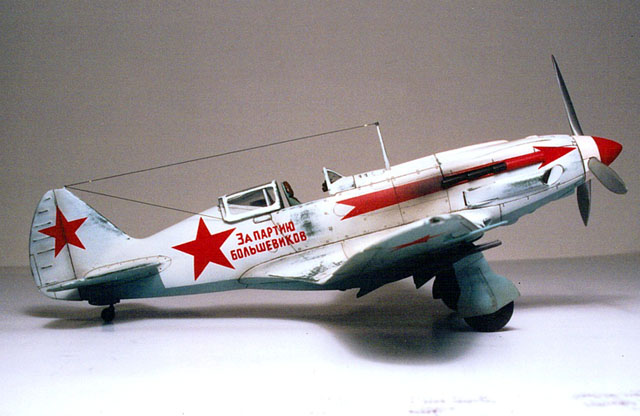
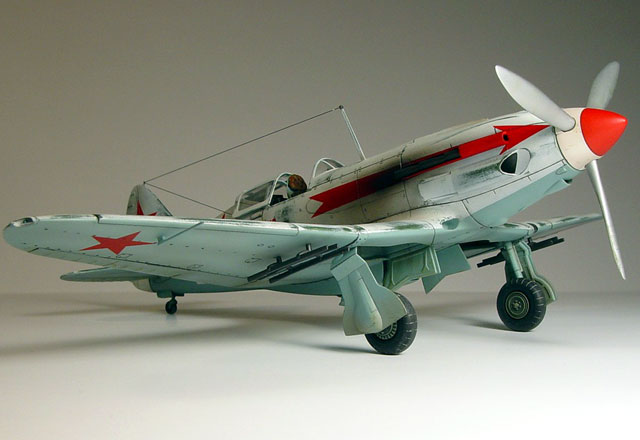
How long can a white airplane stay white, if the
white paint doesn’t really stick, and it’s the winter of 1941 in Russia?
Well, ‘ere’s what I recon…
Working on this ICM’s 1/48 MiG-3 was like returning to 1/72. Dimensionally
this aircraft looks like it belongs to the smaller scale, although it is
still bigger than Polikarpov fighters!
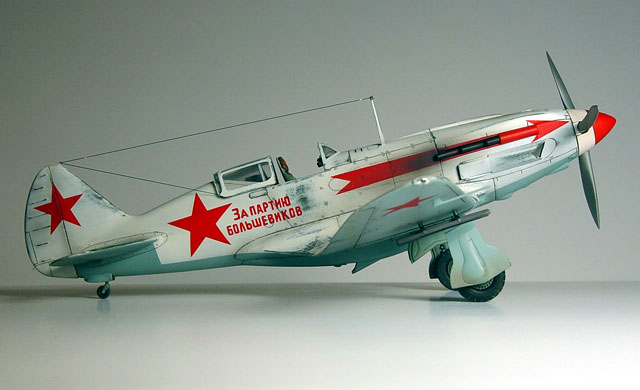
Looking through the plethora of different painting schemes available in
this kit I could not decide which one to build. But then, while surfing
the web, I stumbled upon a picture of three white airplanes pristine from
the factory, being displayed in front of large group of people. All three
of them had big arrows (or lightning bolts if you prefer) painted along
the sides of the fuselage and slogans as subtle as a sledgehammer: “Za
Stalina", "Za Partii Bolshevikov" and "Za Rodinu", and my mind was made
up.
Firstly, I was tempted to build the aircraft that
said it was for Stalin, but after a closer inspection I found that the
only one with radio equipment was “Za Partii Bolshevikov”, so I finally
set for this one. White camouflage really compliments graceful lines of
this fighter, and all three of these great looking machines are featured
on ICM’s decal sheet.
The kit was a real pleasure to work on. I had no
problems with the fit, even with complex wing that most people complain
about. It did benefit from some dry fitting and sanding, but finally it
went together very well and with the minimal amount of putty.
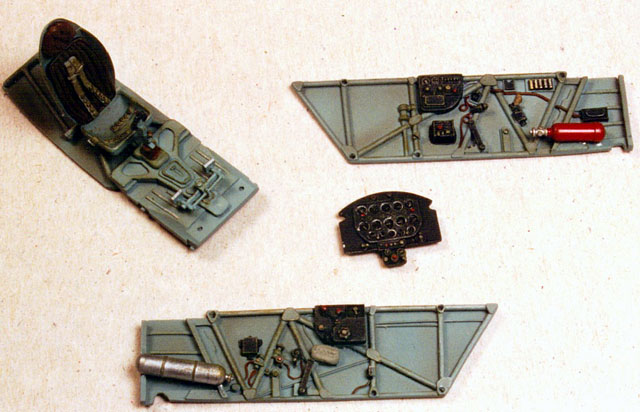
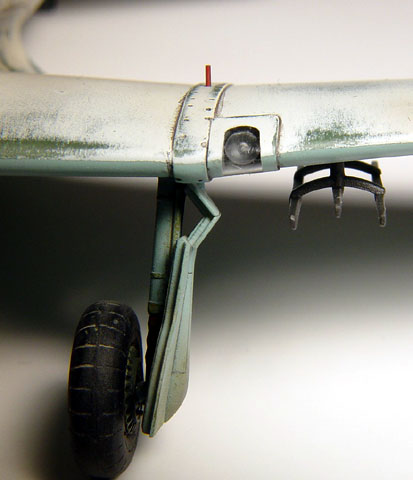
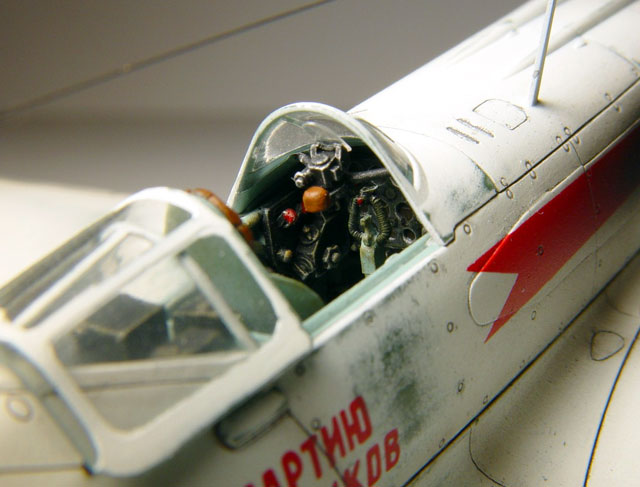
I added the excellent resin cockpit from Cutting
Edge, and vinyl/resin wheels from “Equipage”. The cockpit and the wheel
wells were painted in Russian Underside Blue, as advised on
www.kithobbyist.com/VVS web
site. By the way this site is an excellent reference for modeling Russian
WWII airplanes, and I would like to thank the creators for bringing us
very unique and detailed information on this topic.
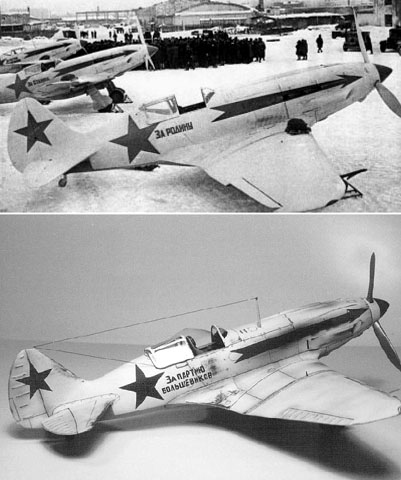
My limited references suggest that the kit is very accurate and it does
capture the “spirit of the animal”, as the comparison photo (below) shows.
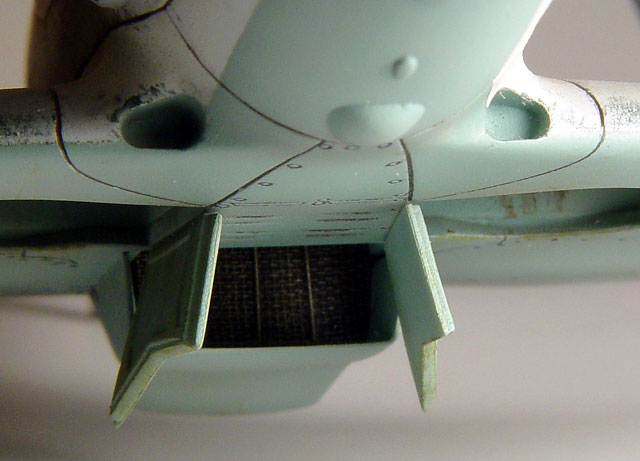
This being said, I did pay extra attention to details. The prominent
radiator on the bottom side of the fuselage is just a blank surface in the
kit. I enhanced this with mesh from a kitchen filter and some wire.
Details were highlighted by painting it black and dry brushing with
silver.
 Navigation
lights on wing tips are also small but very visible details. I formed hot
sheet of thin clear plastic over the very wing tip, removed it, and then
cut out a convex shape along the indicated panel line on the wing for the
reflector surface. I drilled little holes for the bulbs and made them out
of stretched clear sprue painted with transparent red and green. Painting
the convex surface silver, and super-gluing formed clear plastic over it
(just along the edges), finished the job. This is somewhat fiddly in this
scale but doable. The landing light on the wing leading edge received the
same treatment. Navigation
lights on wing tips are also small but very visible details. I formed hot
sheet of thin clear plastic over the very wing tip, removed it, and then
cut out a convex shape along the indicated panel line on the wing for the
reflector surface. I drilled little holes for the bulbs and made them out
of stretched clear sprue painted with transparent red and green. Painting
the convex surface silver, and super-gluing formed clear plastic over it
(just along the edges), finished the job. This is somewhat fiddly in this
scale but doable. The landing light on the wing leading edge received the
same treatment.
Oh, and before I forget, for the first time I used
Future floor polish to coat the clear parts. It really does stop fogging
from super-glue, and it gives a nice sheen.
The clear canopy parts are somewhat thick for the scale, so I thinned them
down by sanding from the inside and polishing them afterwards. Tamiya
Rubbing Compound does remarkable job of restoring clear parts after
sanding. Coat of Future here as well.
Next on the list was the pitot-tube and large antenna mast in front of the
canopy. Both were replaced with metal - the pitot-tube with a piece of
steel wire, and the mast was made from section of the photo-etched frame
(in this hobby nothing is scrap).
There is also a small antenna post on the tip of the
vertical tail surface that is not present in the kit. After some
pondering, and looking through spare bits I found just what I was looking
for. It was again a photo-etched bit, a buckle or something, I forgot, but
a very small part that looks like a eye of a needle on one side and has
wider base attached to it. I imbedded the base of the thing in plastic of
the vertical tail, letting only the “eye” stick out (to run the antenna
wire thru it). This worked excellently and it looks right to the scale.
Other details added include landing gear up/down indicators, drilled out
gun openings and exhaust pipes and replaced scoop on the bottom panel,
just underneath the spinner. I also added a long axle and bearing system
inside the empty engine compartment to insure that the propeller can spin
effortlessly and without vibration. Well, you can’t see that, but just
trust me, it spins with the breeze.
Why did people paint their planes in white color that wouldn’t stick to
the surface and looks like a mess a few months later? To present a problem
for us modelers some sixty years after, of course! There are some very
effective techniques described on the web (if you search hard enough) to
duplicate this complex weathering effect. Nevertheless, I decided to go my
own way.
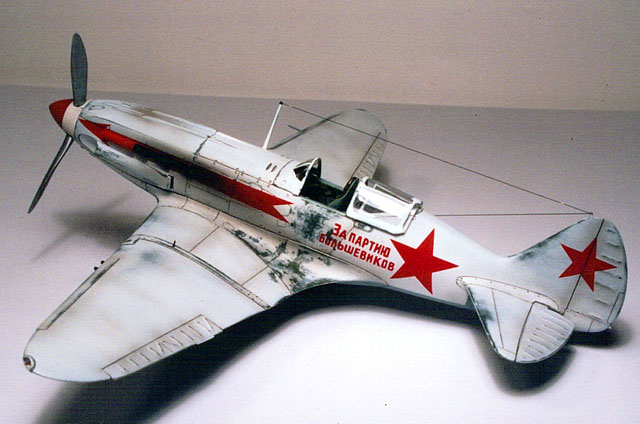
I painted the underside surface of the aircraft in Russian Underside Blue,
then masked the demarcation line, and painted the upper surfaces in RLM
80. This color looks close to a Russian color called Factory Green. Since
the next step will be over-painting the model in white anyway, it really
doesn’t make a difference what standard you use underneath it, as long as
it’s a dark green color.
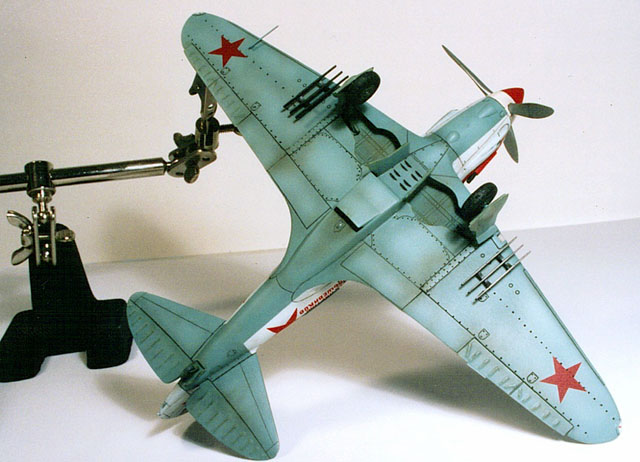
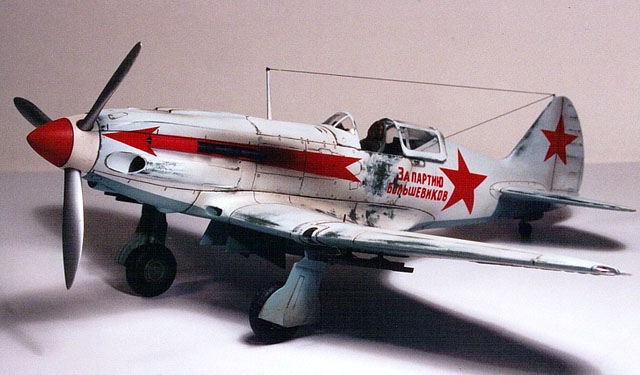
I coated the model with clear varnish, and then
sprayed white on top of it. After the white paint dried, I used a somewhat
radical technique for weathering. I took some 400 grit sand paper and
started scrubbing lightly in logical places. I also used my hobby-knife to
“shave off” some paint, especially on the sides of the fuselage near the
cockpit. While this technique is not for the faint of heart, it produced
the desired effect very well in my case. I wanted an uneven look from port
and starboard side, and you can tell that the starboard is definitely
preferred side by the pilot.
The kit decals went on nicely. My only complaint is that they are very
thin and somewhat transparent. The big arrow was painted on, with the
exception of the arrowhead. The trick here was to mach the red color of
the decal as close as possible. The arrowhead on the decal was oversized
so I trimmed it down with a sharp scalpel, and then applied it.
After applying decals some more “dirt” was added to the look, mostly using
Tamiya Smoke and a bit of Olive Drab dry-brushed here and there. For the
panel lines I used mixture of black, white and raw umber water-based
artist colors. Couple more coats of varnish and that’s it.
All photos are taken on my workbench using Canon EOS Rebel 2000 with
tripod (or just a table surface as a support), 28-80mm lens and a blue
filter, to compensate for tungsten lights.
How long did it take? I don’t know, it took some time, but I never measure
my hours so I can’t really tell. After the model was finished, I noticed
that I forgot to drill out back-faces of the intakes in wing roots, which
is again a small but noticeable detail. Oh well, maybe next time… I also
plan to finish the engine that comes in the kit separately and display it
on a stand by the model.
ICM’s MiG-3 is an excellent kit, and it only cost me $10. Of course, I
spent more on resin parts and accessories, but then this is a habit that I
adopted some time ago.
Now I just wish ICM’s announced early La-5 was on my
workbench already…
Click the thumbnail to view
the larger image on this page:
Text, Images and Model Copyright © 2001 by
Aleksandar Šekularac
Page Created 11 October, 2001
Last Updated
04 June, 2007
Back to HyperScale Main Page
Back to Features Index |
 Home
| What's New |
Features |
Gallery |
Reviews |
Reference |
Forum |
Search
Home
| What's New |
Features |
Gallery |
Reviews |
Reference |
Forum |
Search