|
Su 57 (Zvezda) Pt.1
3D Cockpit Decals
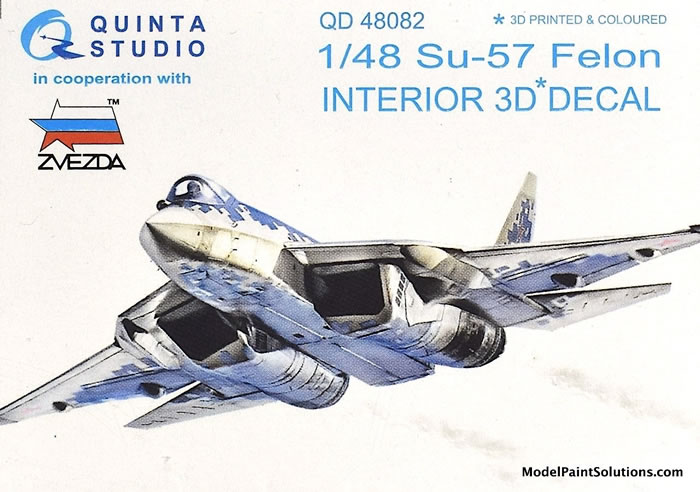
Quinta Studio, 1/48 scale
S u m m a r y : |
Catalogue Number: |
Quinta Studio Item No. QD48082 - Su 57 (Zvezda) Pt. 1 |
Scale: |
1/144 |
Contents & Media |
39 3-D printed parts all affixed to two decal sheets and a small color instruction booklet. |
Price: |
£11.99 Plus Shipping from Hannants
Click here for currency conversion |
Review Type: |
First Look. |
Advantages: |
All parts come off the sheets like decals dipped in water. There are no stubs or edges to sand/file allowing for a quick and enjoyable installation. |
Disadvantages: |
Some of the parts have edges devoid of color that require touch-up. Likewise, some harness details like buckles benefit from being refreshened by touch up with silver/chrome paint. |
Conclusion: |
The level of detail is amazing but the really astounding thing is the ease with which they install. |
Reviewed by John Miller

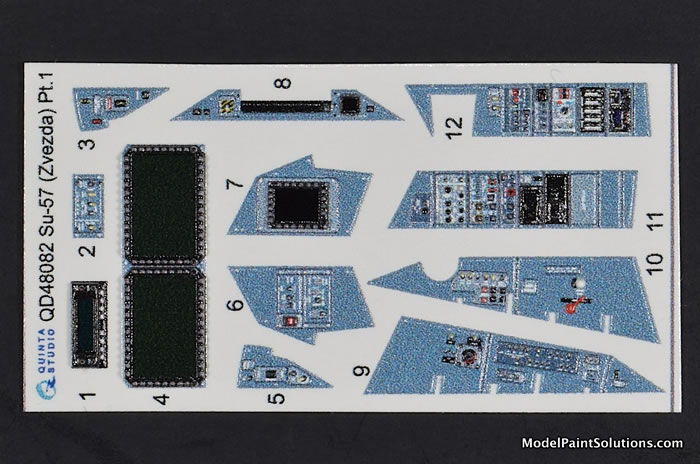
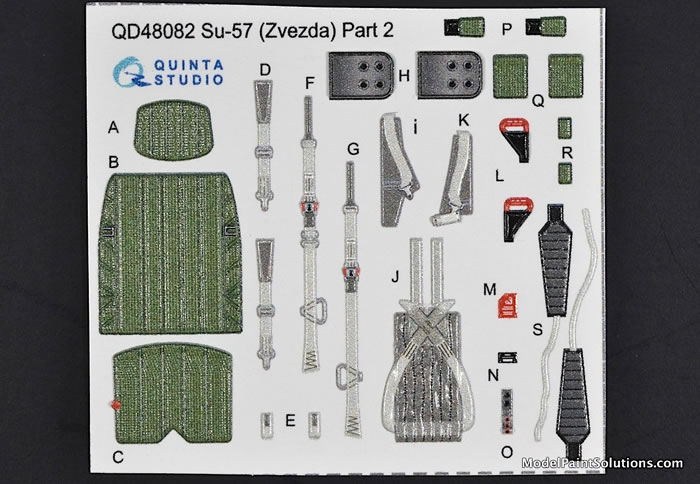
The parts are conveyed on two decal sheets with each denoted by a letter that corresponds to those in the instruction booklet. One sheet is devoted to mostly parts for the ejection seat while the other carries the main panel and side cockpit consoles.
What really pops out is the three-dimensionality of these parts. Unlike photo-etch (PE), which is quite flat even when layered, these 3-D printed parts have a pronounced height that can be appreciated while they’re still on the decal sheets.
This three-dimensionality translates into very convincing parts, especially with things like the seat cushion and head rest.
I’m building the new Zvezda 1/48 Su-57 so with the kit cockpit tub shot with Mission Models Russian Cockpit Blue and seat previously sprayed with Mission Anthrazite (Black-Grey), I got to work installing this Quinta cockpit set. I wasn’t let down.
Installation of each piece was as simple as dip in water, dry with a tissue, affix with a few drops of odorless CA glue, and then sit back and admire the detail. No cutting or clipping; no filing to remove little knubs: very nice.
The seat details were installed first using the instruction booklet as a guide. The seat back has folded sides that run the length of the part. I anticipated a lot of trial and error would be required to get this to fit into the allotted space on the kit’s ejection seat. I was wrong. The material these parts are composed of has a small amount of give such that a tight fitting part can be wedged into place without gross deformation; very nice.
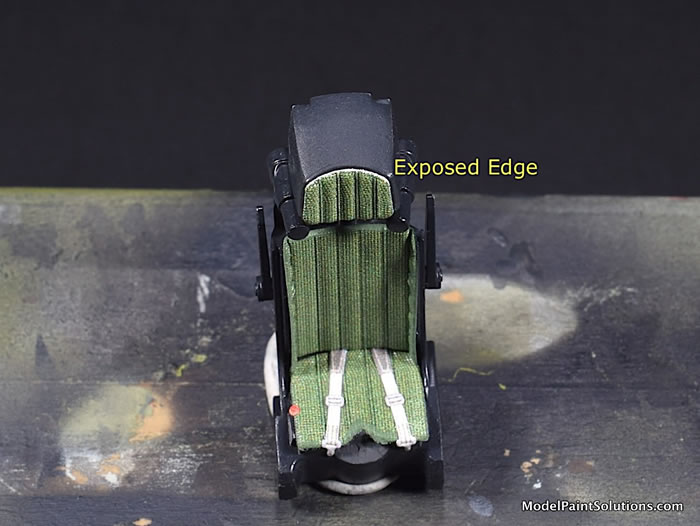
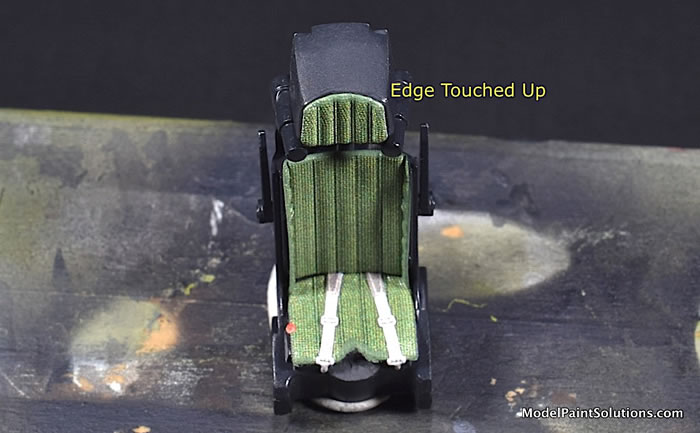
The leg restraint cords/lanyards are particularly well done but the only piece of the kit that gave any trouble. If the white, inner cords are installed as depicted in the instruction booklet (at the center of the seat) they will interfere with the control stick pedestal when assembled. The fix is simply to glue the cords a few millimeters to the left and right of the center of the seat.
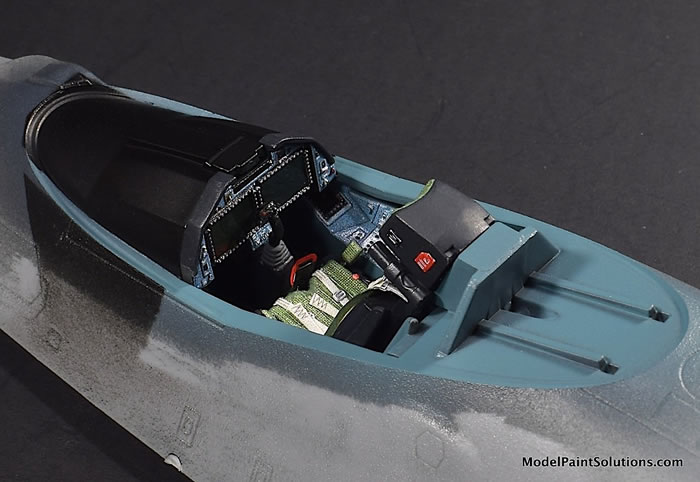
With the seat completed, I moved on to installing the 5 parts that comprise the main instrument panel. The details here are beautifully done. In contrast to the surrounding panels, the screens are so smooth and appropriately shiny, I had to buff out my fingerprints prior to taking pictures.
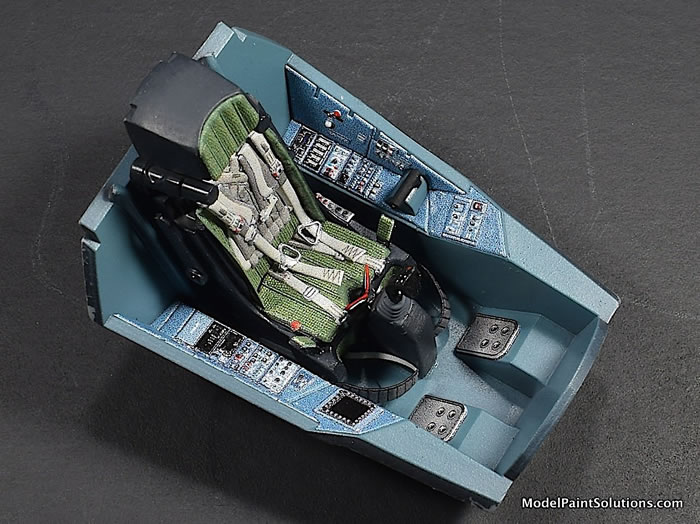
The easy installation of the side cockpit panels really showed the utility of this malleable, 3-D printed polyvinyl material. Many is the time I’ve installed similar interlocking panels made of PE and spent multiple hours adjusting each with a file. Fitting an assembly such as this with PE panels usually requires a fair amount of trial and error. Not so with these panels. Since there is a bit of give to the material, nudging the parts into proper position is much easier and faster than with PE.
With the completed cockpit tub and seat fitted to the upper fuselage halve of the Zvezda Su-57, it is quite clear this Quinta set ups the level of detail considerably. Moreover, it does so after only requiring a total of 2 hours for installation; that’s 2 hours from cutting them from the sheet to putting the assembled cockpit in the photo booth. It was so easy I even had a second tumbler of adult modeling fluid to celebrate.
A few additional notes on installation:
The instructions recommend using Microscale Metal Foil Adhesive and CA glue to affix these 3-D printed parts. I opted to use small drops of odorless cyanoacrylate glue (Bob Smith Odorless Gold—Black Top) based on the experience of Mike M. who reported warpage of the panels in response to exposure to strong glue fumes. Of note is the rapidity with which the panels stick when using CA glue; it’s fast with very little time for adjustment or sliding of the part. That said it’s best to have test-fitted the part prior to committing with glue.
I really like this set. Although the details are beautifully rendered they defied my attempts to capture that photographically. The panels don’t look as stippled to my naked eye as they do in some of the zoomed pics.]
The level of detail is amazing but the really astounding thing is the ease with which they install. These sets and the technology they represent are going to be well received by guys that suffer through working with PE. I’ll be getting some more for sure. Highly recommended!
Now go paint something!
--John
Review kit provided by Skyway Models via my retirement fund, again.
For more on this review visit Modelpaintsolutions.com
https://modelpaintsol.com/reviews/quinta-su-57-detail-zvezda-48082
Review Text and Images Copyright © 2021 by John Miller
Page Created 17 March, 2021
Last updated
18 March, 2021
Back to HyperScale Main Page
Back to Reviews Page |
