Arma Hobby 1/72 scale
Grumman FM-2 Wildcat
by John Miller
S
u m m a r y : |
Description and Item No.: |
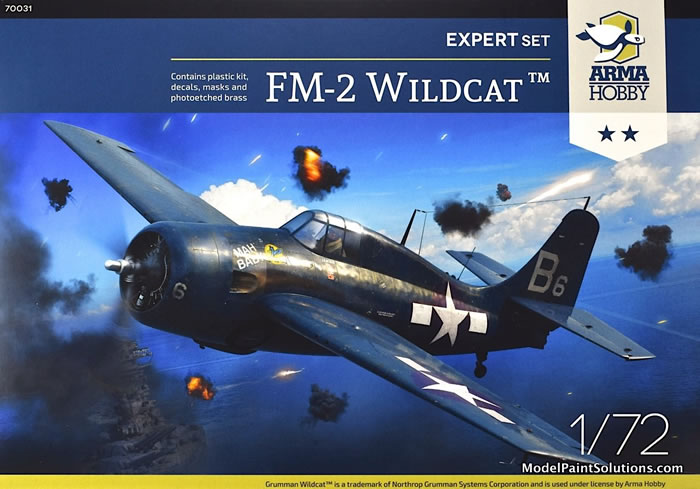
Arma Hobby Kit No. 70031 - Grumman FM-2 Wildcat |
Price and Availability: |
£18.50 plus shipping available online from Hannants
and hobby retailers online and worldwide |
Scale: |
1/48 |
Review Type: |
First Look |
Advantages: |
Finely rendered surface details and inscribing, good fit of all major components, very detailed cockpit, photo-etch, masks, and a good choice of schemes. |
Disadvantages: |
The artwork for the first paint scheme (“Mah Baby,” Pilot; Lt. Bruce A. McGraw) lacks numbers for the corresponding decals. Fortunately, by comparing the other schemes and the art work provided, the correct decals can be identified. Assembly of the main landing gear entails a step that is quite challenging. This step is made easier by using a part of the model as a building jig. Details are provided in “The Build” section. |

The kit was assembled straight from the box with little deviation from the instructions except for substituting an Eduard colored seat harness for the kit’s straight PE version and assembly of the main gear.
For this step, an approach was devised that differs greatly from that suggested in the instructions and is detailed below. But, before the main gear, construction begins with the amply detailed cockpit.
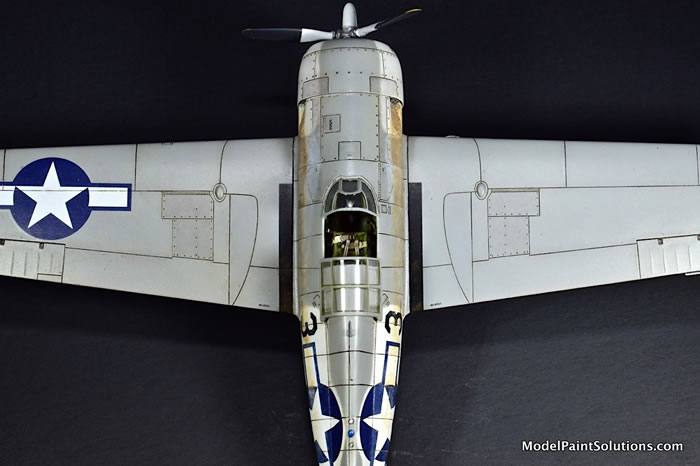
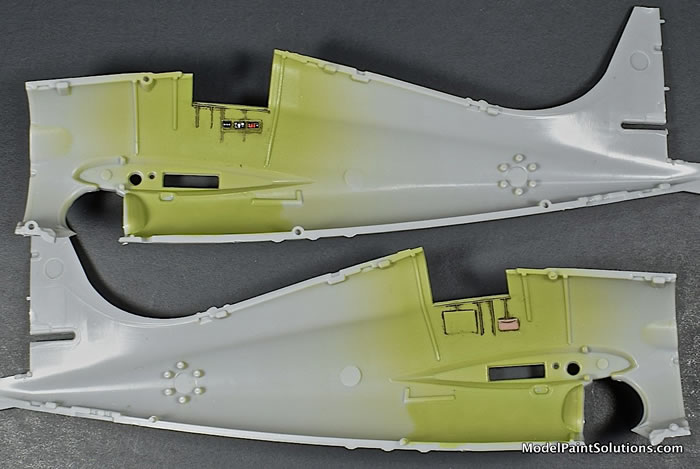
The “pilot’s office” in the kit is quite extraordinary for this scale. The main panel, comprised of a crisply printed decal and a PE overlay, looks very convincing when assembled. Most of the cockpit parts and inner fuselage halves were shot with Mission Chromate Green lightened ~10% with Mission White. This was diluted ~50% with CP30 (CP30 = 30% Mission Clear Primer, 70% Mission Thinner or a ratio of 30:70). The diluted, Chromate Green was applied at ~12psi with an H-S Evolution fitted with a 0.20mm tip.
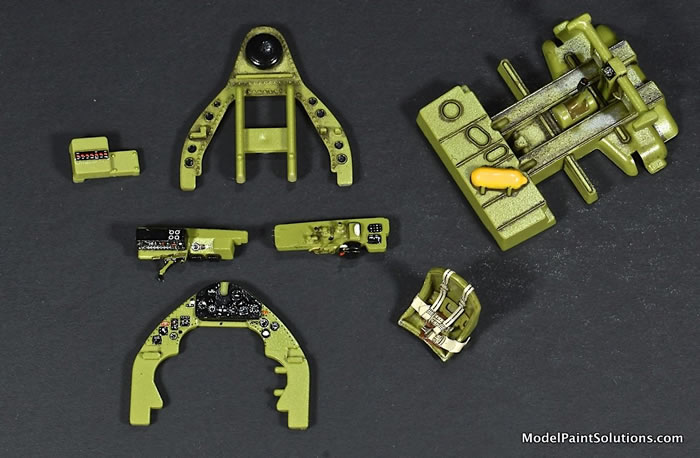
The side panels were, picked out with LifeColor Black, augmented with decals and PE bits, and enhanced with a wash of Tamiya Dark Brown (enamel). Once completed the panels fit snugly between the rear seat bulkhead and the instrument panel making for a very detailed assembly that’s easy to handle.
With the cockpit tub installed in the right fuselage half, the next steps focus on the amazingly detailed firewall and engine. The firewall is augmented by photo-etch gear retract chains that look awesome when installed.

The heads and cylinders of the nicely molded engine were sprayed with Mission Black diluted 1:1 with CP30. The PE ignition harness was painted Aluminum and Black and installed with CA. The addition of the 4 PE intakes adds a nice bit of detail. The cowl, comprised of a single-piece circular front with upper and lower halves fit perfectly.
Using the Keel as Assembly Jig:
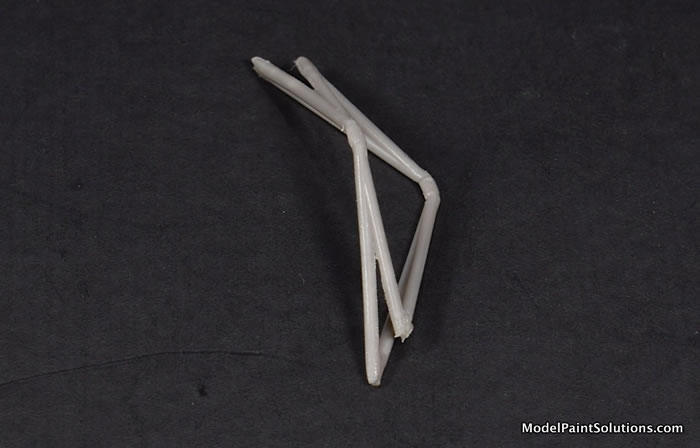
The next major assembly in the instruction sequence is the main gear. I found fitting and assembling the upper retract arms to be a major challenge especially if the kit instructions are followed. The builder is directed to glue the arms (Parts A11 and A12) together by their bevelled ends; all four of them. A quick look at the ends reveals no bevel. In addition, holding the parts together in the appropriate orientation for gluing was a Herculean task only made easier by utilizing part A19 (the keel) as a building jig.
The process was started by removing parts A11 and A12 still attached to their sprue supports. This provides something to hold while removing flash with fine files and folded pieces of sandpaper.
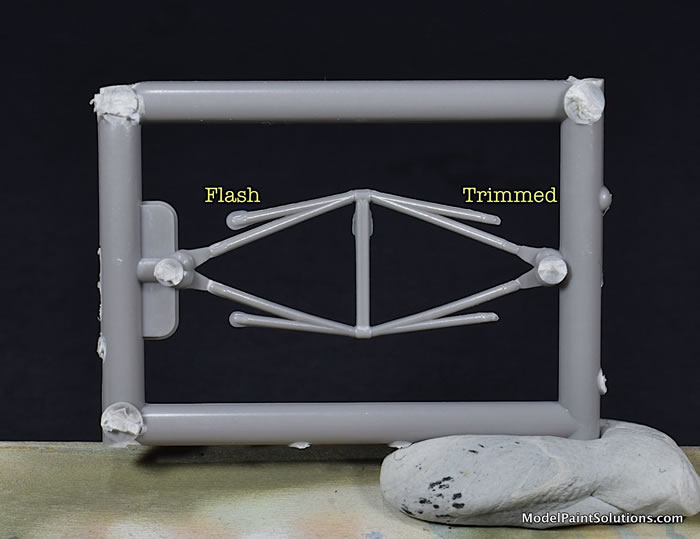
Once the parts are removed from the sprues, the cylindrical center sections on each were completely cleaned of flash in order to fit into the round slots in the keel piece (A19). In addition, the ends of A11 and 12 were bevelled with a sharp X-Acto and mini-files to facilitate a better fit between the two.
The two cylindrical slots on part A19, intended for the center sections of A11 and A12 have to be cleaned and enlarged for proper fit.
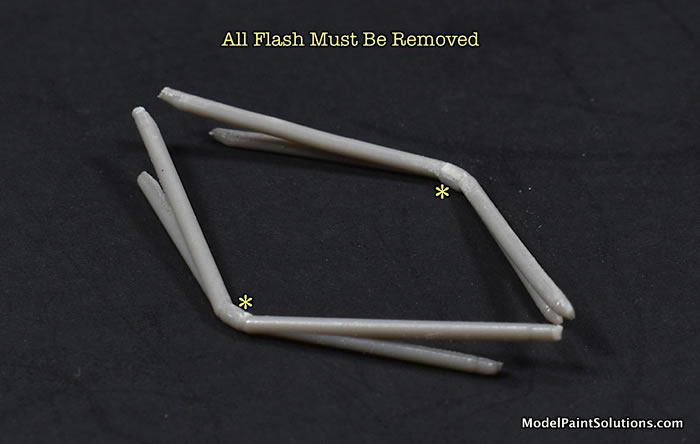
With part A19 immobilized on a building board by a wad of putty, parts A11 and A12 were held together in the appropriate orientation by a length of 1mm-wide Aizu masking tape. Note that the correct orientation of parts A11 and 12 within the assembled gear is with the shorter arms above the longer ones. A small dollop of thick CA applied to the bevelled ends and the upper retracts were assembled.

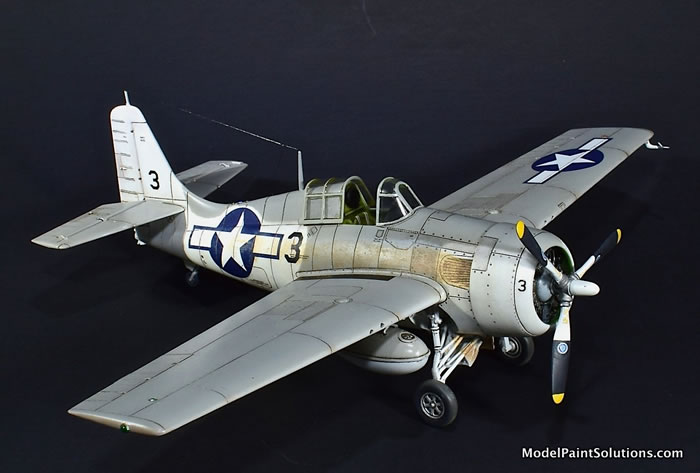
With parts A11 and 12 glued in the correct orientation, affixing the additional pieces (lower retract arms and main gear legs) is quite easy and went without a hitch. It’s worth noting that the main gear, one of the more notable features of the Wildcat, is accurately captured by the kit’s components.
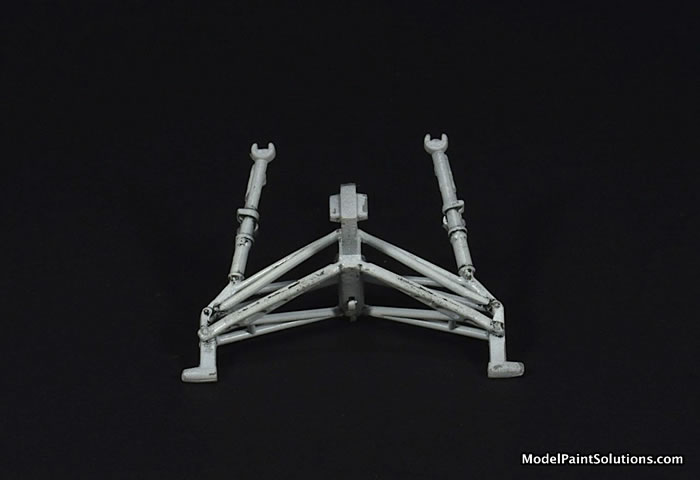
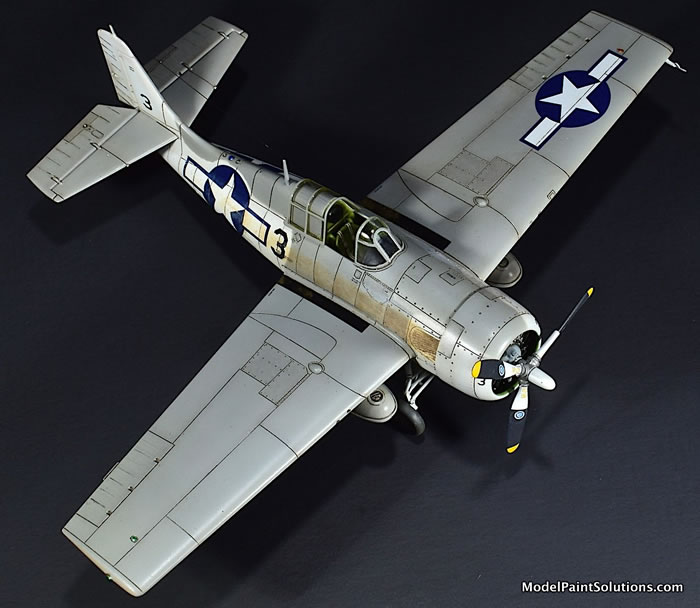
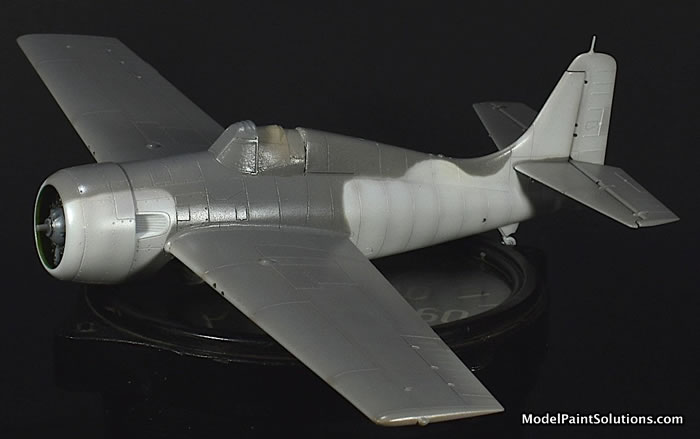
The fuselage and and wing halves (glued with Tamiya Thin Cement) come together effortlessly requiring little-to-no filler for blending. The previously assembled main gear slots into the belly of the fuselage and the beautifully molded empennage composed of single-piece horizontal stabilizers with separate, single-piece elevators completes the airframe. The fit of the major components is as nice as it looks.
Prior to priming, the kits canopy masks were used and worked beautifully. In preparation for priming, the model was wiped down with a Kimwipe saturated in a 1:1 mix of 90% Isopropyl alcohol and Windex (with ammonia). The de-greased model was then lightly buffed with multiple dry Kimwipes to remove static charge from the plastic. It was then shot with a mix of Mission White with ~5% Mission Black added for a slight grey hue. This was diluted 1:1 with CP30 and sprayed at ~15psi with an H-S Evolution fitted withy a 0.20mm tip. I used this light grey coat as the primer coat.
When dry, the primer coat was lightly buffed with a Micromesh 8,000 grit pad and then panel lines and other airframe details were pre-shaded with a mix of Mission Tan with ~25% Mission White added. This was diluted for fine-line spraying (40% Paint with 60% CP30) and shot at ~10psi with an H-S Infinity fitted with a 0.15mm tip.
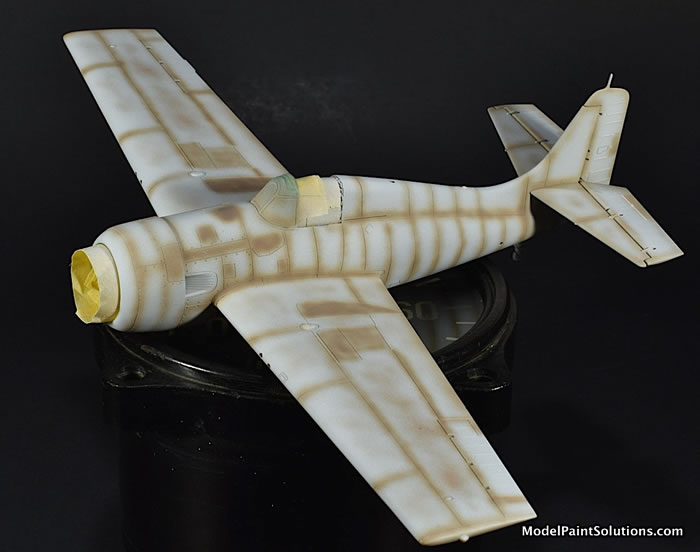
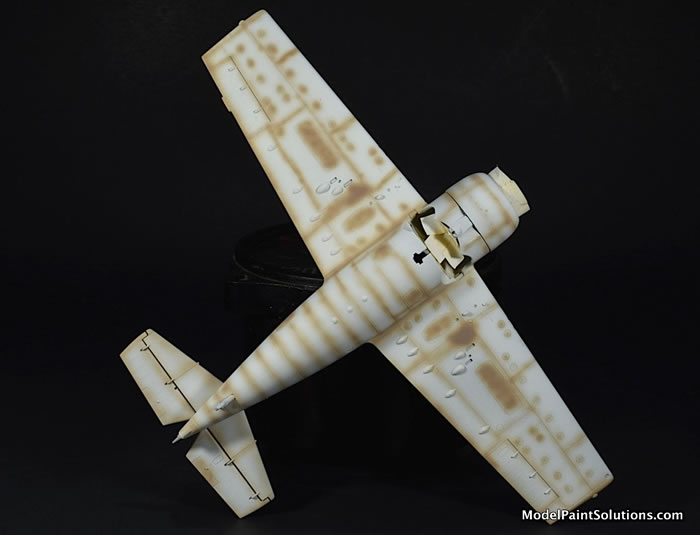
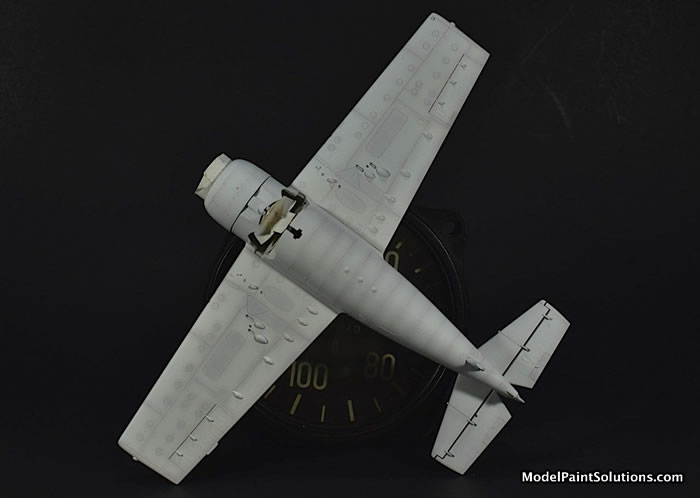
The belly, fuselage sides, and lower wings were then shot with a mix of Mission White with ~10% Mission Elfenbein added to achieve a slightly off-white hue. This was diluted 1:1 with CP30 and sprayed at ~15psi with a 0.20mm tip.
To achieve a soft line on the horizontal stabilizers where the the White meets the Dark Gull Grey, the vertical was masked with Tamiya tape and white putty. Careful application of Mission Dark Gull Grey lightened 10% with White and diluted 1:1 with CP30 resulted in the desired effect.
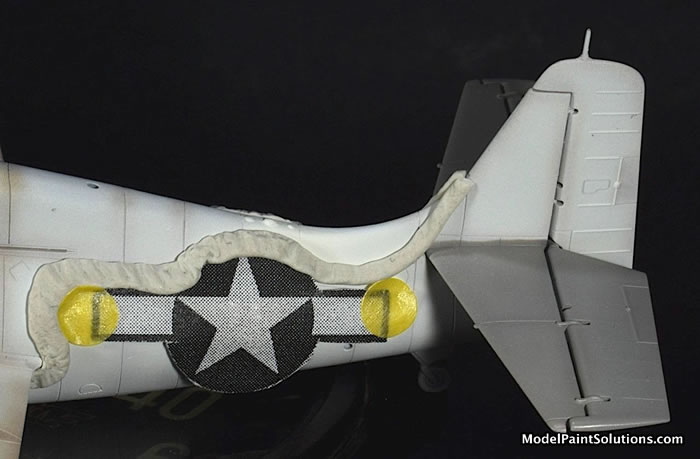
To achieve a soft White-Grey join along the upper cowl area, the desired line was masked with white putty, Circle masks, and Tamiya tape.
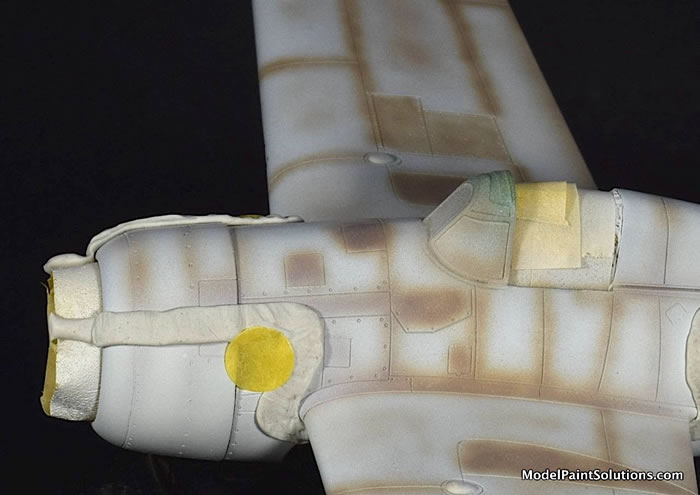
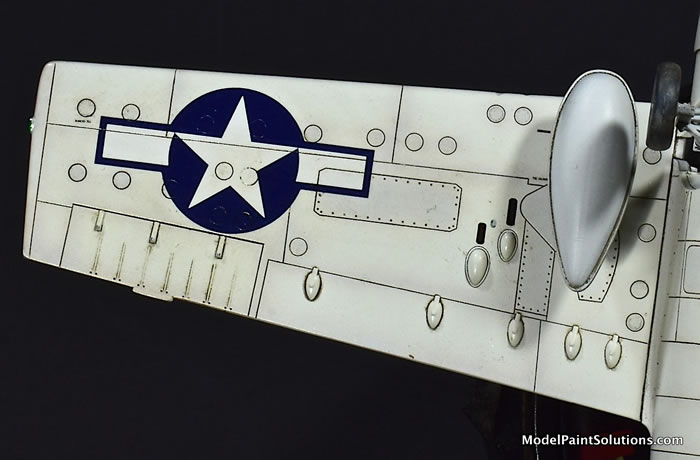
To accurately mask for the soft White-Grey join that follows the upper contours of the fuselage national insignias, the decal sheet was scanned and a 1/1 copy was printed onto paper. The insignias were then cut out and held on the fuselage with small dabs of White Putty. More White Putty, Circle Masks, and Tamiya tape were then placed prior to painting.
Mission Dark Gull Grey (diluted and sprayed as described above) was applied at ~15psi with an H-S Evolution fitted with a 0.20mm tip. The paint was applied first as a dry coat followed by a wet, fill coat. The density of the coverage was modulated so as to maintain the underlying pre-shading. When this was dry, the putty and tapes were pulled and the model given a coat of CP30 in preparation for decals.
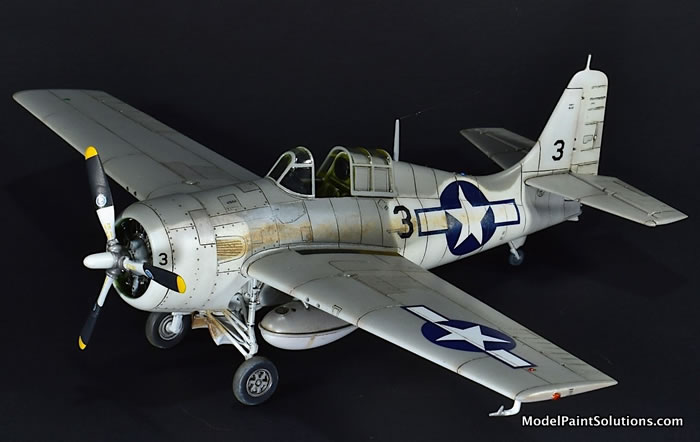
The decals are crisply printed with good registration and color density. Unfortunately, the art work for the first scheme (“Mah Baby,” Pilot; Lt. Bruce A. McGraw) lacks numbers for the corresponding decals. Fortunately, by comparing the other schemes and the art work provided, the correct decals can be identified. I opted to do the third scheme offered on the kit's decal sheet, FM-2 Wildcat, BuNo 16130/3, Composite Squadron VC-8, CVE-60 USS Guadalcanal, Pilot F. H. Behlen III, North Atlantic, May 30th, 1944. The decals were applied with Micro-Set and Sol and went down beautifully.
After the decals were sealed with a coat of CP30, various panels were weathered with rendered oils mixed with Mona Lisa Odorless Thinner.
The exhaust stains on the fuselage, were applied by stippling rendered oils (applied darkest to lightest) with a short, bristled brush. Once satisfied with the look, the work was sealed with a coat of CP30.
To add a little interest to the model, one of the drop tanks was painted with the same Dark Gull Grey but with a few drops of Mission Black added for a slightly darker hue. The tanks were attached with a little thick CA and the entire model given a light dusting with Mission Flat diluted to 25% with Mission Thinner.
The tapes were pulled, the canopy was glued in place, the aerial was added from Uschi light gauge line, and it was time for a glass of adult modeling fluid:)
The ARMA FM-2 is a beautiful model and another 1/72nd ARMA kit with a 1/48th-style cockpit. It is not, however, free of issues. The biggest of which is assembly of the upper main gear retract arms. This is a challenging step for anyone lacking experience. Once this step is cleared, the model comes together with little effort and the result is easily the most detailed Wildcat in this scale currently available. Highly recommended for those with experience building limited-production kits.
Now go paint something!
—John
For more on this review visit Modelpaintsolutions.com:
https://modelpaintsol.com/builds/arma-hobby-72nd-grumman-fm-2-wildcat-build
Happy Modeling!
Text and images copyright © 2021 by Model Paint Solutions.
Text and Images Copyright © 2020 by Model Paint Solutions
Page Created 22 April, 2021
Last updated
23 April, 2021
Back to HyperScale Main Page
Back to Reviews Page

|
 Home
| What's New |
Features |
Gallery |
Reviews |
Reference |
Forum |
Search
Home
| What's New |
Features |
Gallery |
Reviews |
Reference |
Forum |
Search