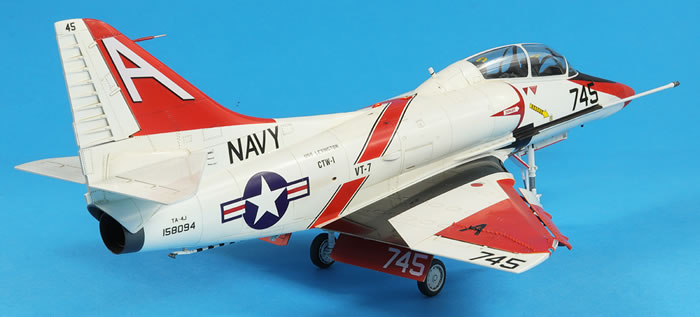
Hasegawa 1/48 scale
Douglas TA-4J Skyhawk
|
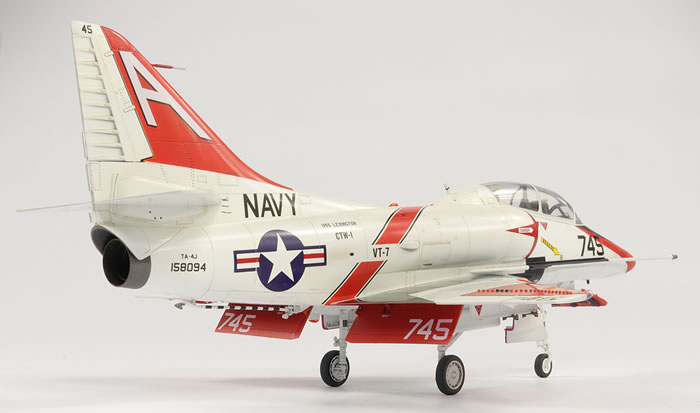
Douglas TA-4J Skyhawk
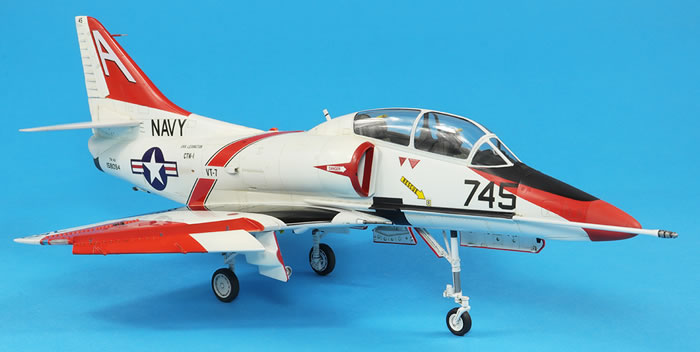
VT-7 ‘Eagles’, US Navy, USA 1989
|
by Jon Bryon

Hobby Boss's 1/48 F4U-7 Corsair is available online from Squadron.com
As seems to be the case with a couple of the major Japanese kit producers, they tool their kits for multiple variants, but are very slow to release some of them (Hasegawa’s 1/48 TF-104 and RF-4 kits immediately spring to mind) or, in some cases, still have yet to do so. Hopes were high for a Tamiya F-16D in 1/48 scale, and it still has yet to materialise…
So with Hasegawa’s two-seat Skyhawk, which finally trundled along 8 years after the single-seater was released – a gap so long that Classic Airframes actually plugged it a little earlier. I have a lot of Classic Airframes kits and have built a few, and all I can say is I’m glad I waited for Hasegawa to issue the real deal.
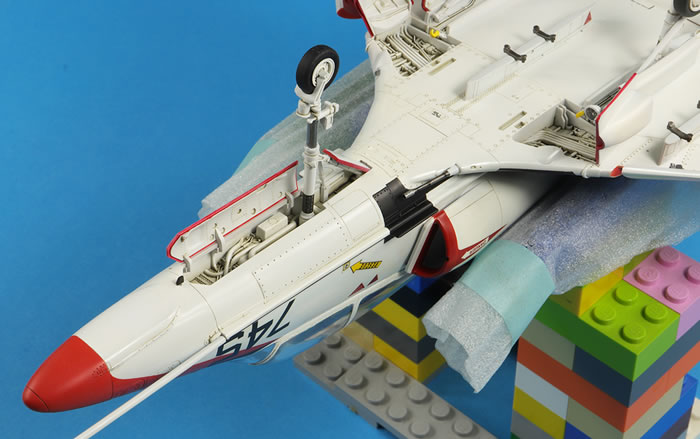
One addition I did make was to replace the tail-mounted pitot with one fashioned from Albion Alloys brass tubing.
Hasegawa's 1/48 scale TA-4J Skyhawk kit is comparable to the single-seaters, although in my view the new components are ever so slightly inferior to the moulding of the original parts. The kit goes together in pretty much the same way as its older cousin with the expected good fit of the major components, and somewhat poorer fit for all the minor ones.
As with the other A-4s I was building alongside this one, I removed the fictitious lip that Hasegawa moulded on the upper wing where the leading edge slats retract to. Other modifications I made were:
-
Hasegawa would have you install a blanking plate on the fuselage spine, part A11. This is wrong; it should be the vent part put here (part A12).
-
Photos of this particular aircraft showed it had one gun on one side, and not on the other. Now, I could not find photos of both sides taken at the same time, so I cannot prove this, but it seems to be the pattern for quite a few TA-4Js, so it’s what I went with.
-
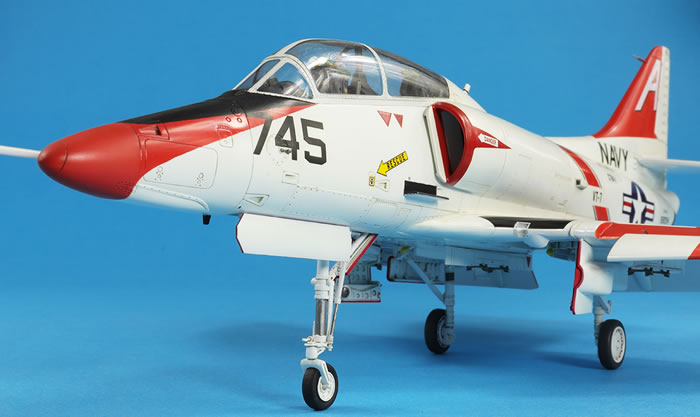
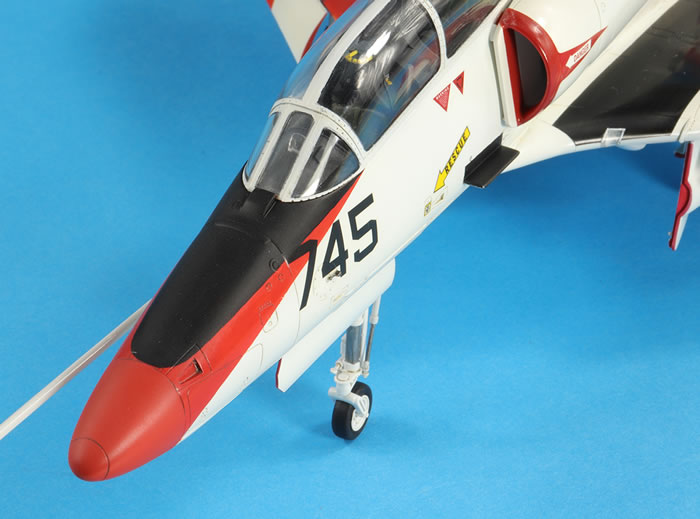
All three of the triangular static points moulded around the nose need to be removed.
-
There is a small recessed intake on the rear left fuselage ahead of the speed brake. This needs to be removed.
-
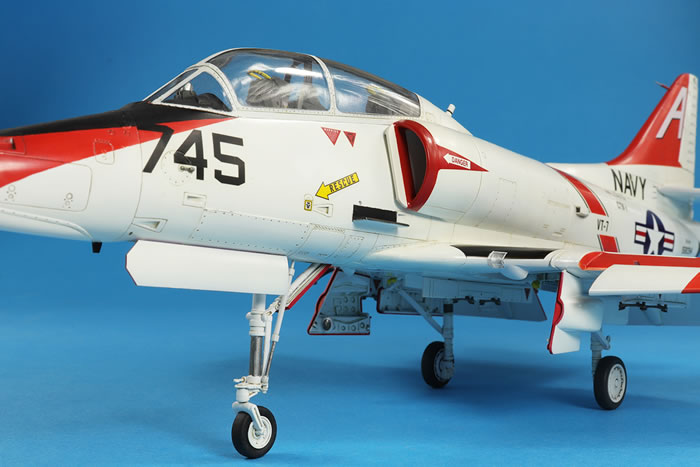
The windscreen did not fit as well as the single-seater versions, and I had to modify it slightly to fit properly behind the windscreen demister. It would have been easier to do this had I installed it before the main canopy… The main canopy itself sits high and slightly wide at the rear and took a fair amount of sanding down to get the transition to the fuselage spine looking good.
-
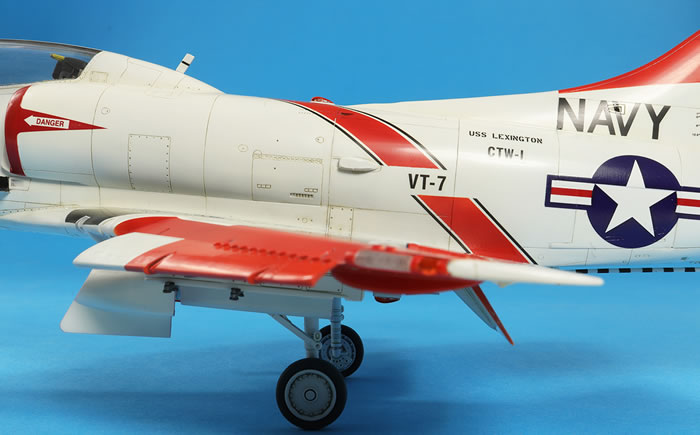
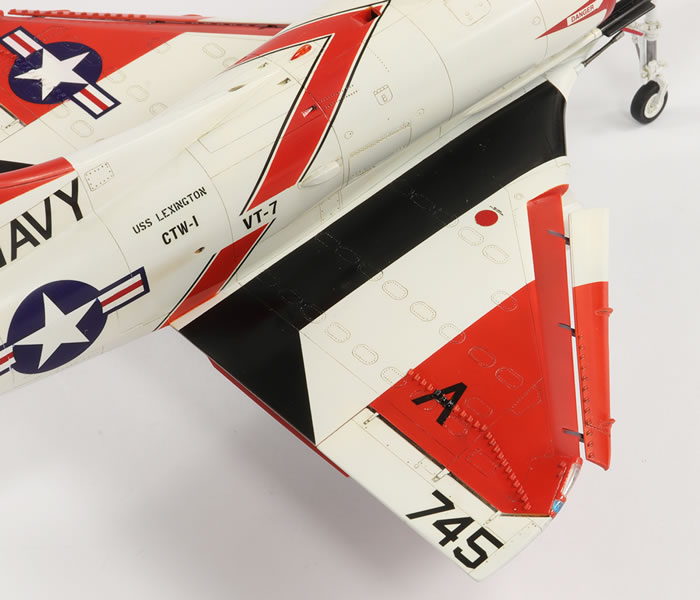
The intake lips don’t fit quite as well as for the single-seaters (they are different parts on a new sprue). Because the red demarcation between the intake lips and the trunking is hard to mask, I left the front of the intakes off until after painting. They then needed to be faired in with the fuselage. The red portion of the intake lips should be about 50% narrower than on my model, but I compromised in order make the painting and masking easier.
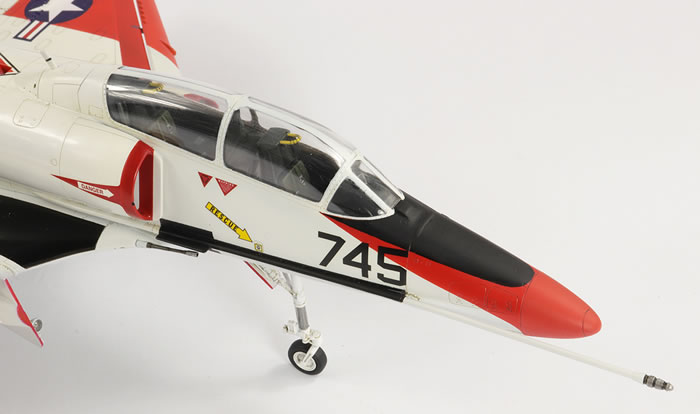
No aftermarket has been added to the kit, and I left some of the cockpit detail out because, to be frank, I can’t be bothered. One addition I did make was to replace the tail-mounted pitot with one fashioned from Albion Alloys brass tubing.
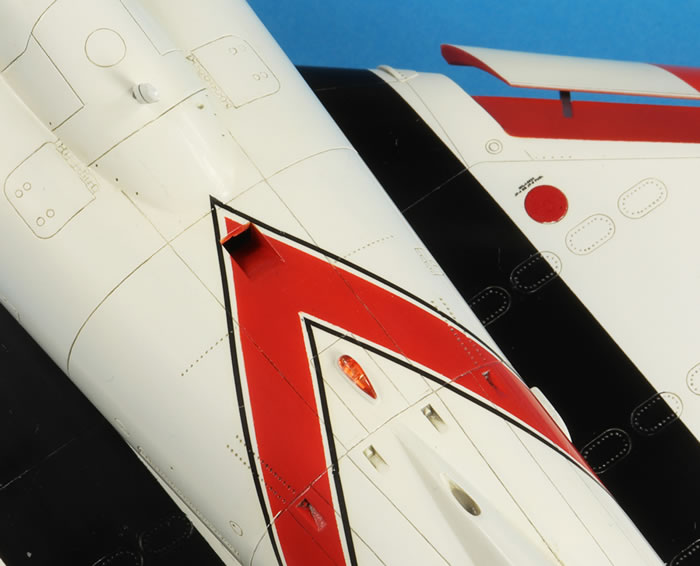
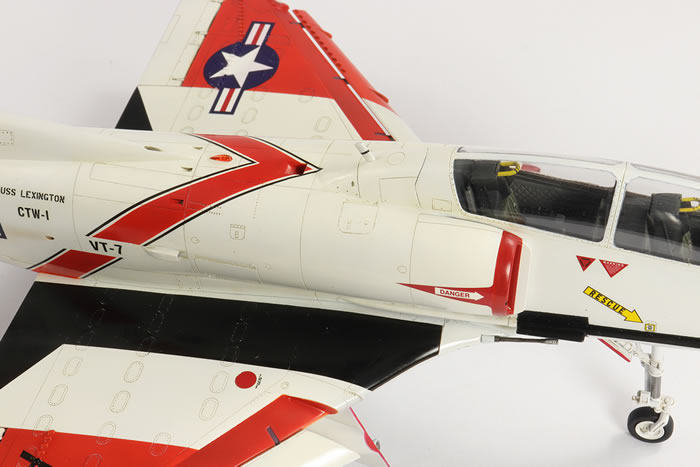
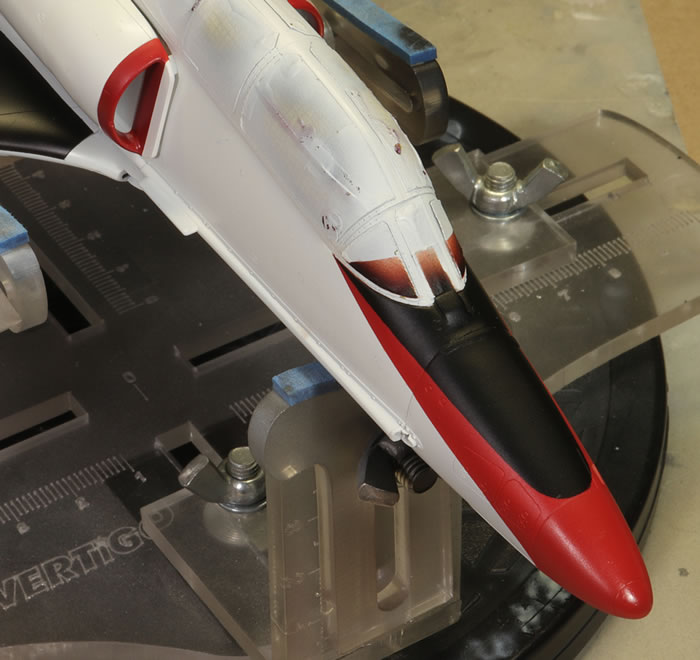
I used Mr Finishing Surfacer 1500 White as both a primer and the main colour for the airframe. However, there were quite a few painting imperfections that needed to be sorted out, and so I also used Mr Color 316 White to get a more patchy finish. The 316 is a bit warmer than the primer. The red portions were a real struggle and I mixed a concoction of Hataka lacquer Insignia Red and International Orange. I made a mistake here as I mixed the colour by eye, using a ratio of 4(red):1(orange). This looked right in the paint jar, but dried much, much darker. I should have used something more like a 2:1 ratio. This colour is elusive at the best of times, and the images I had of this particular aircraft showed a variation from quite orange to almost identical to Insignia Red.
I decided to mask the anti-glare panel and red fuselage stripe rather than use the decals provided. The anti-glare panel was easy enough; I scanned the decal sheet, printed a copy and cut a mask:

The fuselage stripe was harder. I used my printed decal sheet as a template for masking:
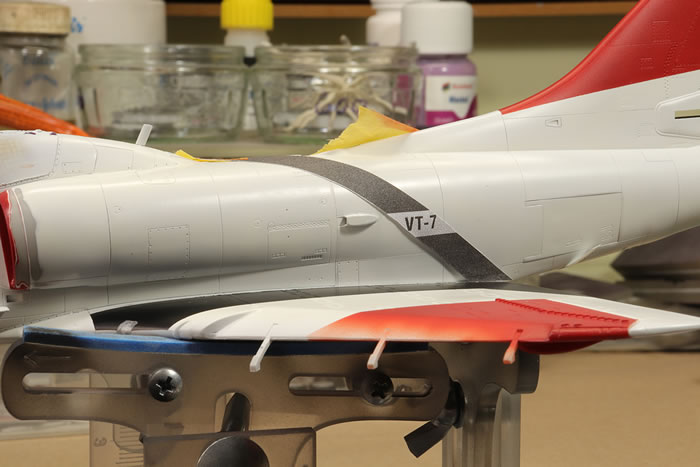
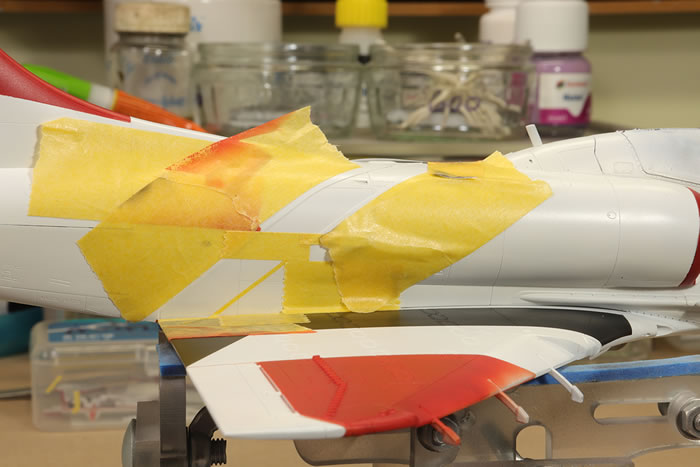
I always intended to use the black lining from the decal sheet, so only painted the red part of the stripe.

In order to stop the surface detail getting clogged up, I actually applied a pin wash of Abteilung 502 Faded Grey thinner with Zippo lighter fluid directly on top of the white paint. In the red areas I used a Neutral Brown panel line wash by Ammo. Over the top of this I sprayed some generous wet coats of Tamiya X-22 thinned 50:50 with Mr Leveling Thinner through my Iwata RG-3L with 0.6mm needle.
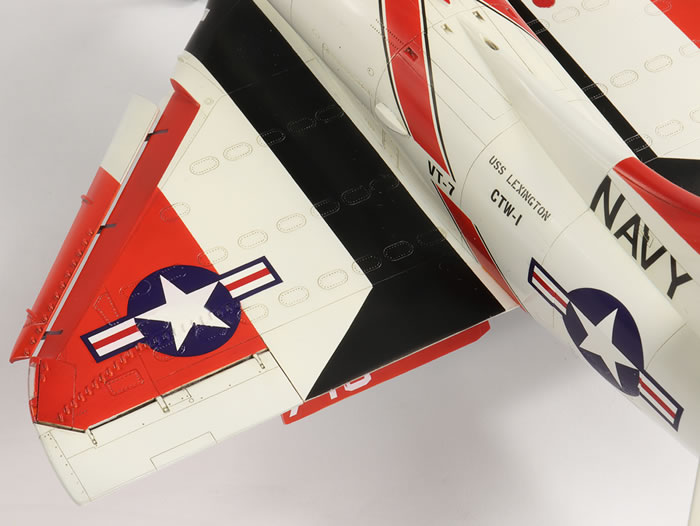
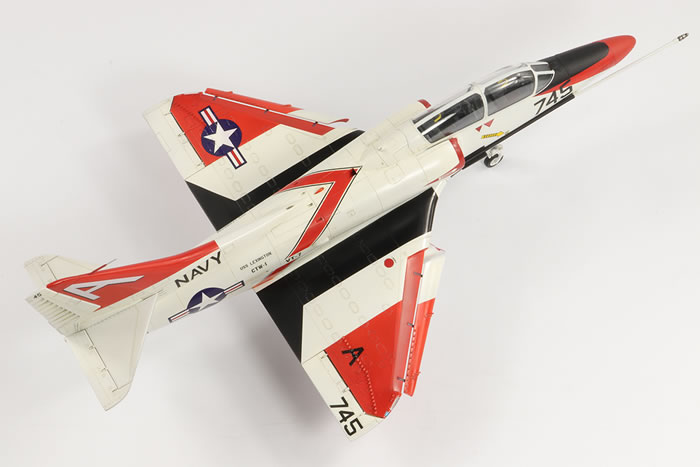
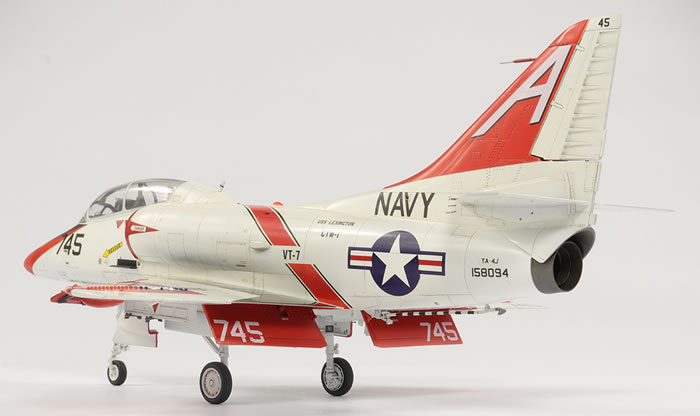
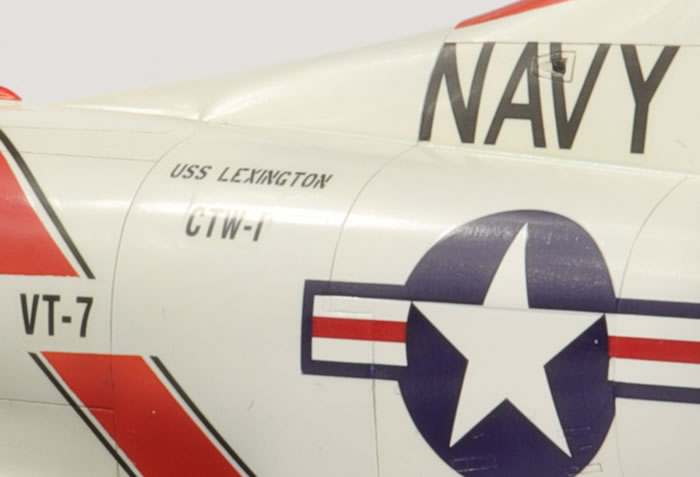
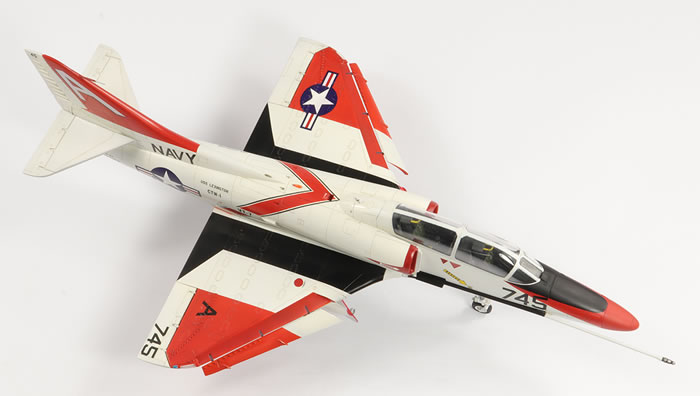
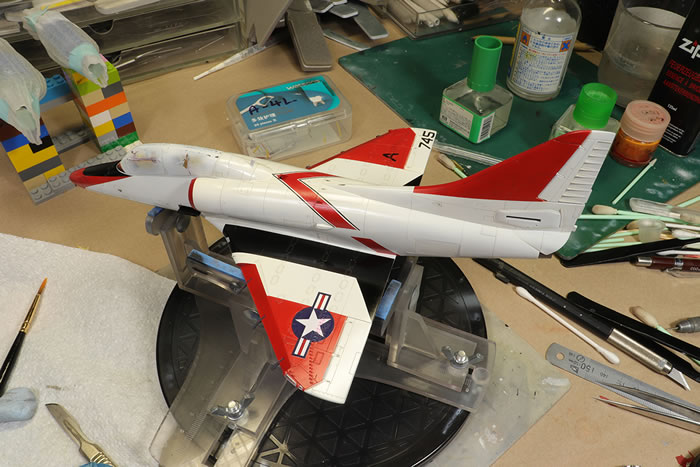
Hasegawa provide two decal options, and I plumped for the colourful training version from VT-7 with the large walkway markings. Photos showed these to be fairly glossy (there’s a great shot on the Detail & Scale website, as well as several others kicking around on the internet). The kit decals were used, except for the national insignia. Those provided by Hasegawa are cut into sections for the airbrakes, which I did not like, so those on my model are from a generic sheet by Furball.
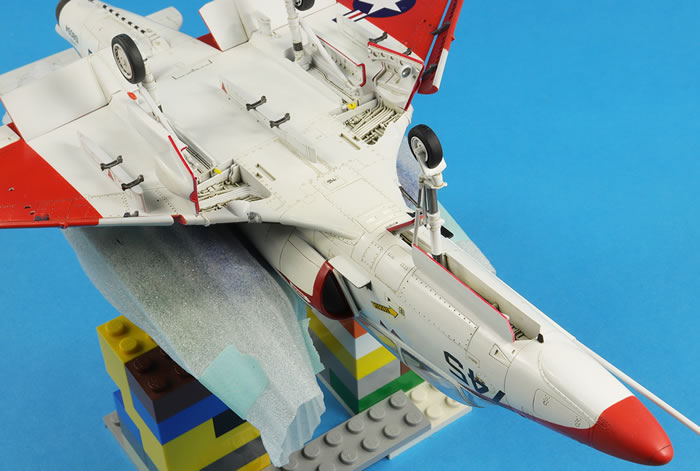
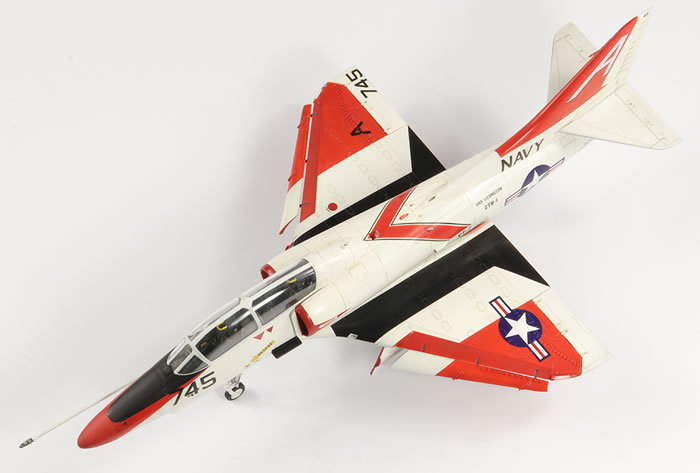
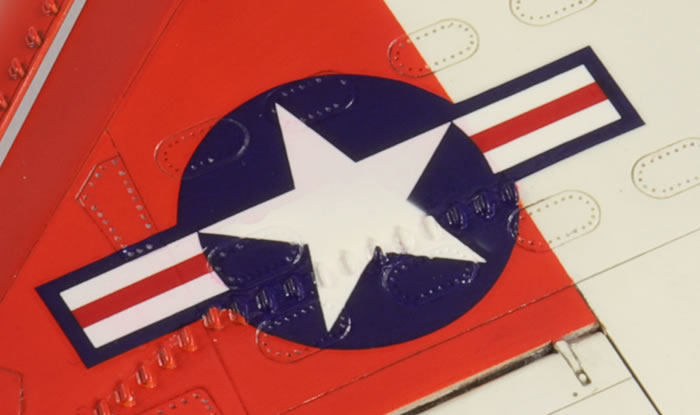
As with my A-4L, I asked a lot of the national insignia on the upper wing. The vortex generators are a significant problem for the decal to settle over. I used my method of letting the decal dry over a large pool of Mr Mark Setter for several hours. Once dry, I brushed multiple coats of Daco Red setting solution over the vortex generators, and also some Mr Mark Softer. After a day or so it looked like this:

Now, on one hand I was very happy. The decal did an amazing job of conforming to the surface detail. But on the other hand, it looked terrible, because the underlying red leached through giving a horrible pink colour to the white areas. What to do?
After some discussion on the Scale Modelers Critique Group, I decided to follow some advice and take the plunge to fix it by masking and spraying. After getting rid of a couple of air bubbles still visible in the photo above, I embarked on one of the highest risk modelling courses of action I’ve undertaken.
The star was masked off using Aizu 0.4mm and 0.7mm wide tape:

The gaps were filled with cut up Post-It notes and liquid frisket.
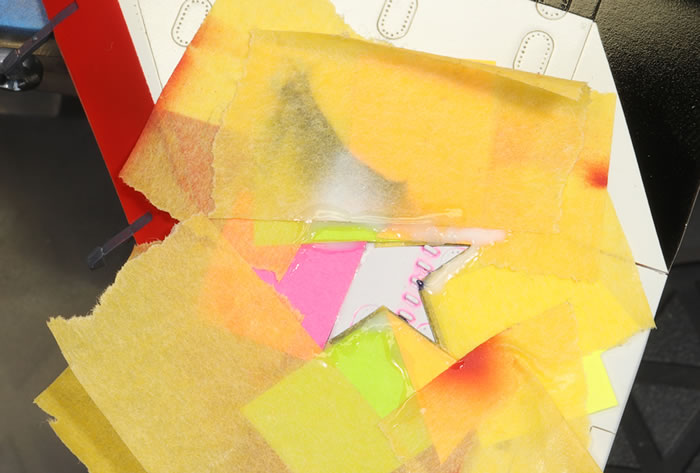
I then mixed some Mr Color 1 White with Mr Rapid Thinner and set about spraying over the pink using my Iwata Custom Micron-B.
This went better than I expected, but still not perfect. There was some overspray along one of the arms of the star, the shades of white don’t quite match, and the demarcation over the vortex generators was not perfect. However, it looks a lot better than it did, and to the naked eye at a normal viewing distance, it looks fine.
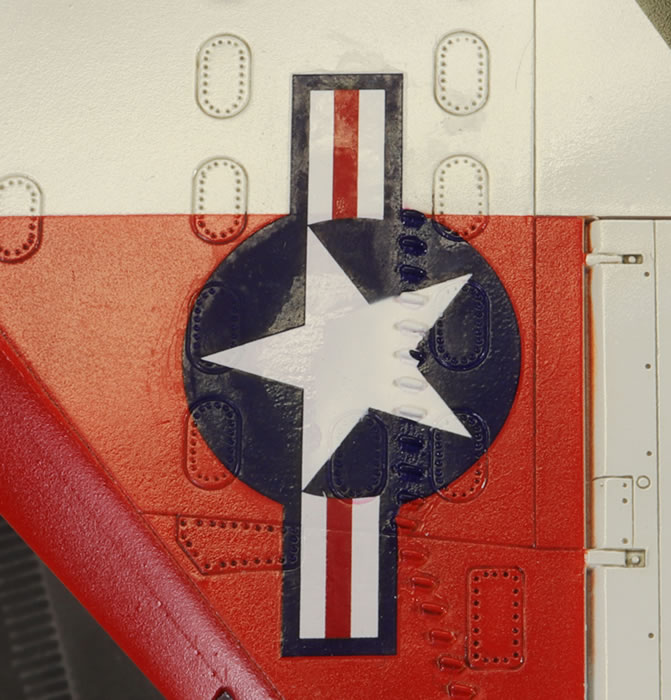
After the subsequent gloss coats, it looked like this:
Given that this is basically a decal, I was impressed.
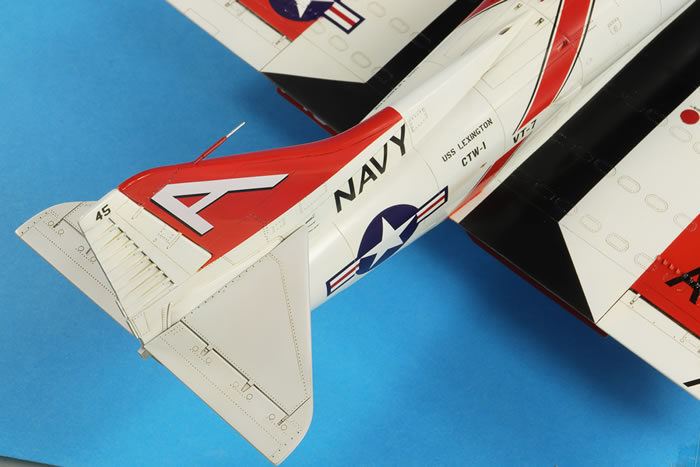
The kit decals were less impressive. Despite being thick, they are a bit translucent (so the ‘A’ on the tail is rather pink) and quite fragile. The ‘A’ on the upper wing did not cope at all well with the vortex generators, disintegrated and needed touching up with paint.
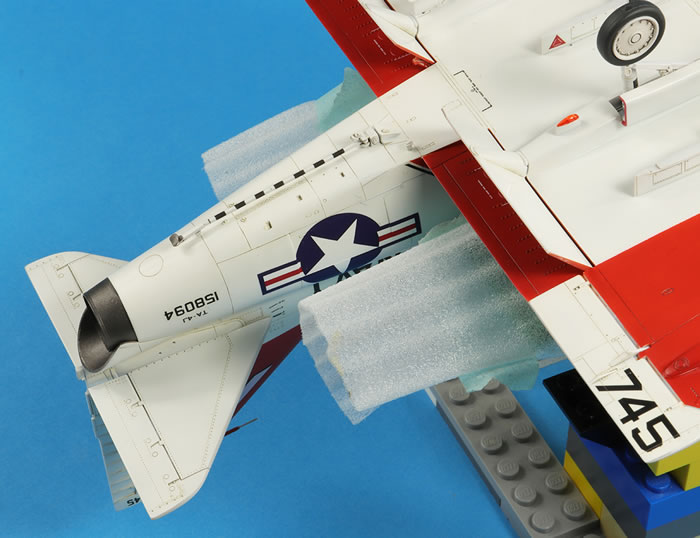
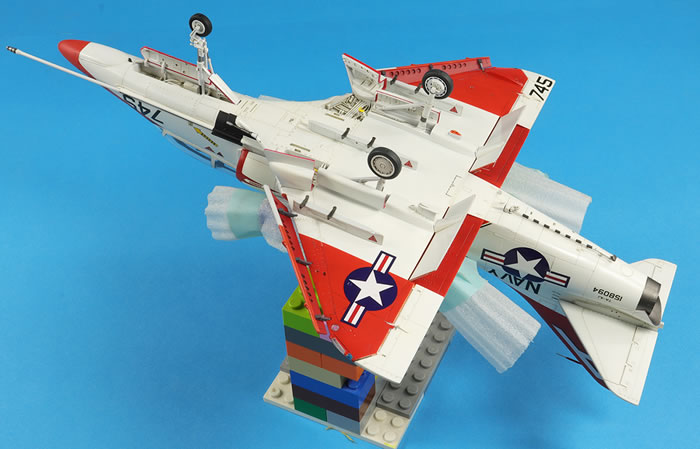
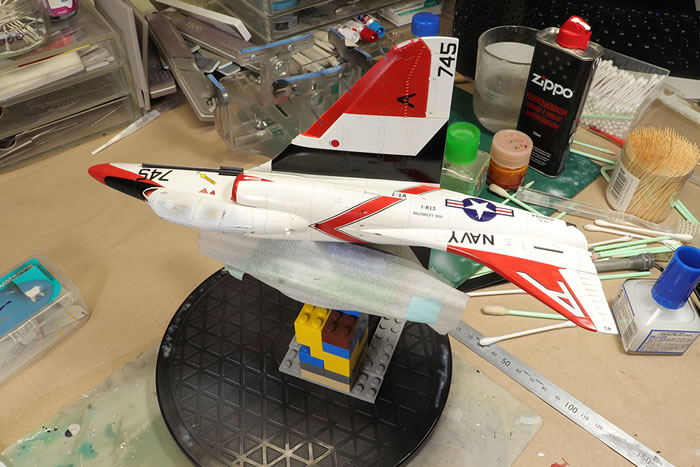
I do find that it is important to apply decals to a flat surface. Gravity matters! And it stops all the setting solutions from dribbling away. I use a Lego jig to keep the fuselage side horizontal as the decals are applied and dry.
I wanted a subdued gloss finish, not like a car model, but giving a smooth reflection. Some areas, such as the nose cone, would need to be flatter.
I applied a thick coat of Mr Color GX100 thinned about 40:60 with Mr Leveling Thinner over the decals and after leaving it for a day, set to with Infini 2500 sanding sponge dipped in water. This flattened down the surface nicely and the next step was to use an Infini 4000 grit buffer. This restores the reflection but leaves subtle imperfections in the surface which I feel give a good rendition of a mildly battered gloss paint. Of course, polishing around the raised detail, like the vortex generators, is impossible, so the effect is not as uniform as I would like. The flat areas were airbrushed with Mr Color GX113.
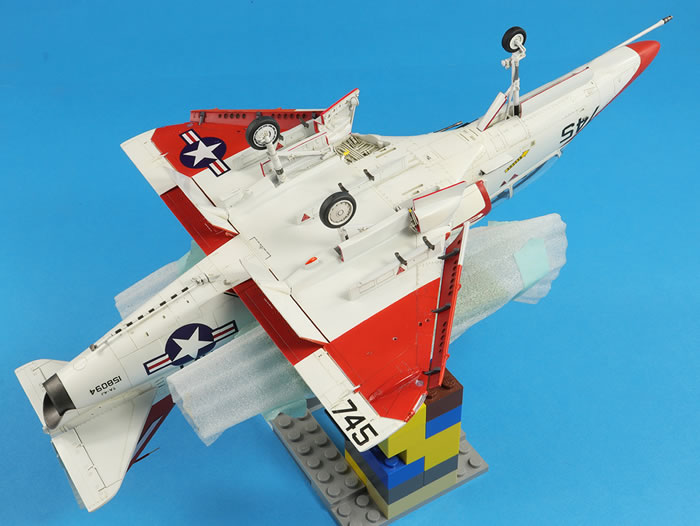
I’m pretty pleased with the finished article, especially some of the variation in the finish and the quality of the construction. I think white is difficult to weather well, and the recessed detail is more prominent than I would like, but I’m not sure how to improve on that in the future. And there will be a future, because I really like these USN trainers in red and white, and I’ve a few more of them in the stash I intend to finish in the same scheme.
Right, off to finish an A-4H…
For more articles like this, please visit my website at www.jonbryon.com
Text and Images Copyright ©
2020 by Jon Bryon
Page Created 26 May, 2020
Last Updated
26 May, 2020
Back to
HyperScale Main Page

|
 Home
| What's New |
Features |
Gallery |
Reviews |
Reference |
Forum |
Search
Home
| What's New |
Features |
Gallery |
Reviews |
Reference |
Forum |
Search