Hasegawa 1/48 scale
Douglas A-4L Skyhawk
|
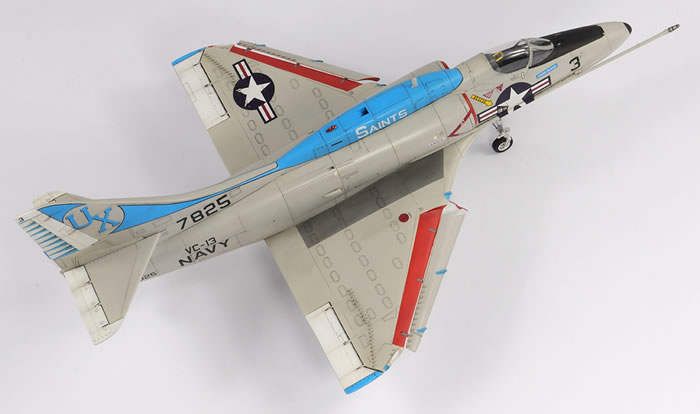
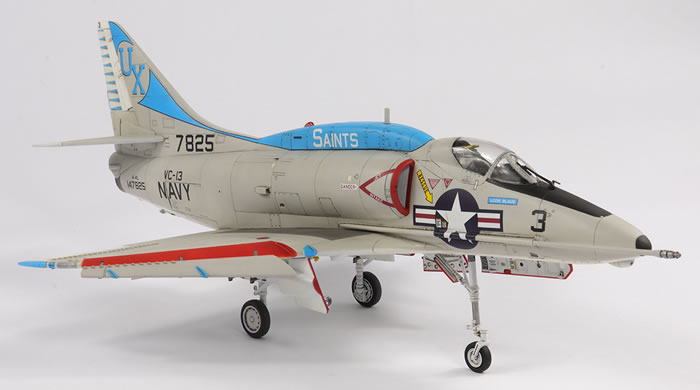
Douglas A-4L Skyhawk
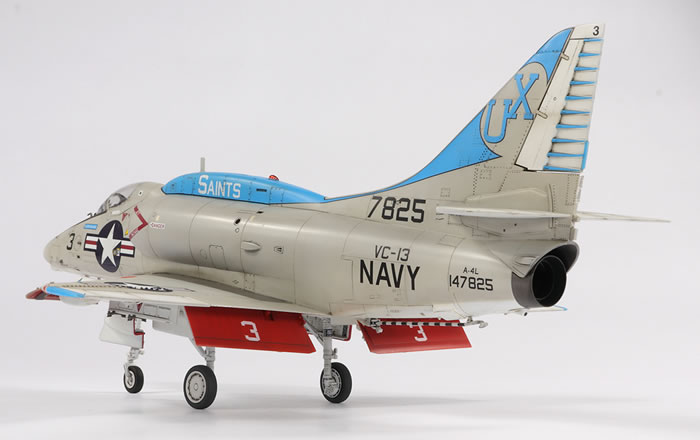
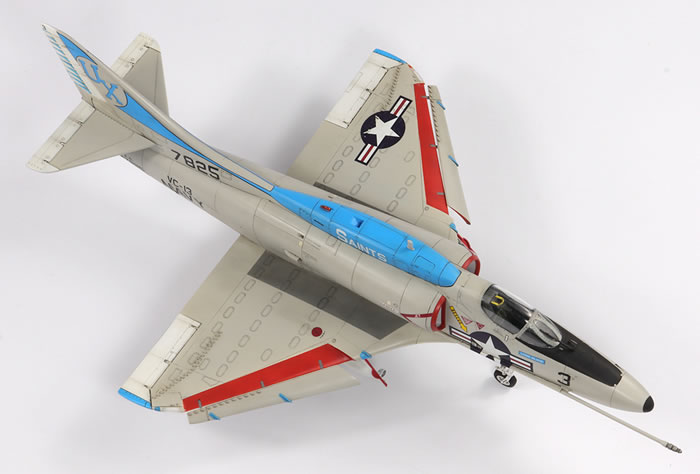
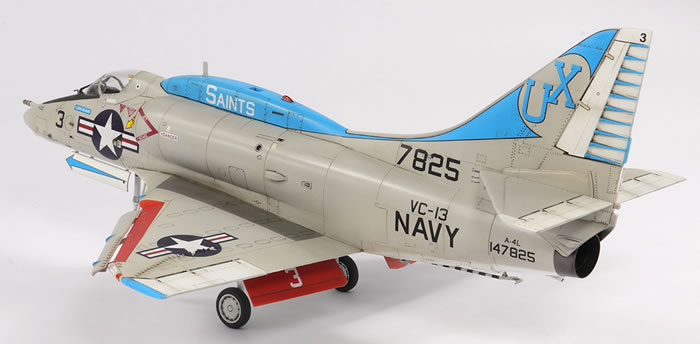
VC-13 ‘Saints’, US Navy, USA 1975
|
by Jon Bryon

Hobby Boss's 1/48 F4U-7 Corsair is available online from Squadron.com
This is the second A-4 from my third Skyhawk group build, and the seventh Hasegawa kit of this aircraft I’ve built. All my previous comments from my article on their A-4E pretty much hold here and I’ll just focus on some of the specific comments in relation to the Lima.
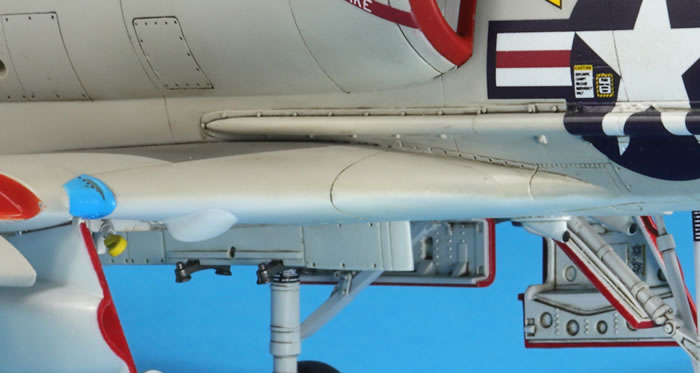
As with the Echo, I filled in the lip for the leading edge slats to smooth the transition from where they retract to the upper wing surface.
I also made a number of small changes to more accurately reflect this particular A-4L, not all of which are called out in the instructions:
-
Contrary to Hasegawa’s instructions, this specific airframe did not have the guns in the wing roots; the alternative kit parts were used.
-
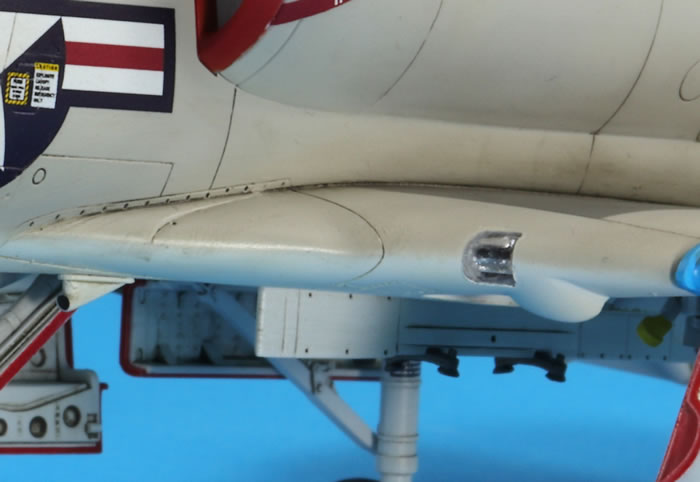
The intakes of the sides of the avionics hump need to be removed and the resulting gaps filled.
-
The ‘ice cream cone’ antennae (you’ll know what I mean if you have the kit) should all be fitted, but…the ‘cones’ need to be removed.
-
The vent on the right rear fuselage ahead of the speed brake needs to be filled and a smaller hole drilled in its place.
It may also be that the nose gear door should be replaced, although I am not 100% on this. Hypersonic make a replacement, but the difference is too marginal for me to worry about.
Hasegawa’s L model is based on their C, and has a different mould breakdown compared to the E/F around the nose and intakes. As with the later version, the fit is overall pretty good, but let down by poorly-fitting inserts.
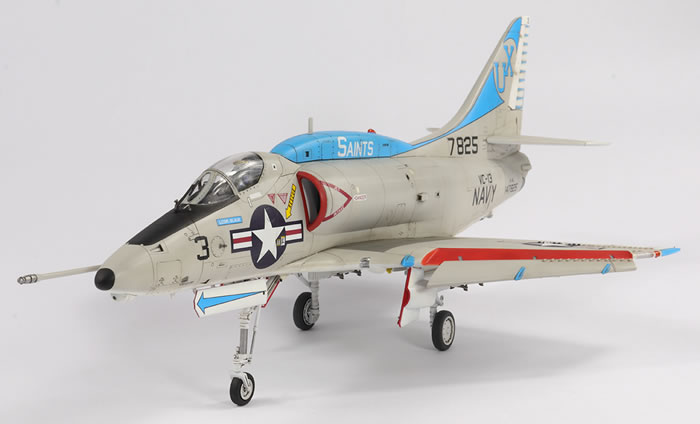
The boxing I had contained two very colourful schemes for US Navy A-4Ls, the first of which was to mark the Bicentennial anniversary of the USA. I have an aversion to Bicentennial markings (as I do to most special paint jobs) and was more attracted to the second scheme with its striking blue hump and trim. I found three good photos of this airframe on the internet (one is on the Detail & Scale website) and fortunately they were all from different angles. Interestingly, one shows the leading edge slats up.
I don’t like black-basing light gull grey and so did not prime this model. I regret that. The underside was painted with Mr Finishing Surfacer 1500 White, which is a decent primer, and I wish I’d covered the whole airframe in it and not just the white areas. Some white areas were then airbrushed in Mr Color 316 White, which I’ve never used before, but is actually a very good white paint that is subtly warmer in tone than the primer.
I then airbrushed the upper surfaces with Mr Color 315 Light Gull Gray. The demarcation between the white and grey is soft and not very linear, so the grey was airbrushed on freehand without any masking on the underside. The reason I wish I’d primed the whole model is that Mr Color 315 is one of their paints which is very fragile. The bond with the plastic is good – none lifted under some quite aggressive masking – but it scratches off very easily. The other problem is that it does not feather well when sanded; applying it over a primer fixes this.
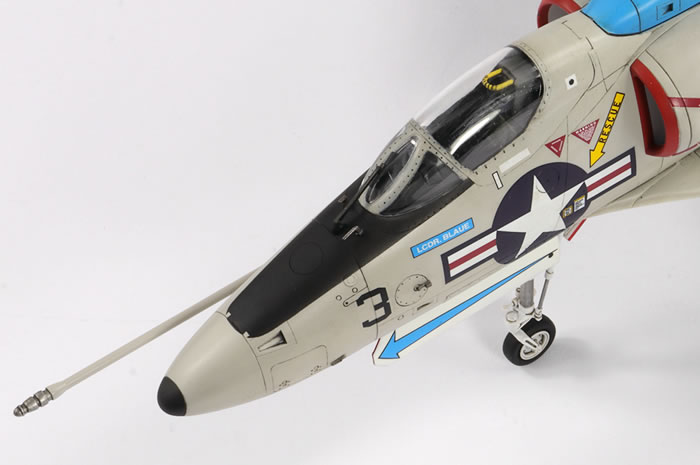
I painted this model whilst under quarantine during the coronavirus outbreak and pushed ahead completing the whole scheme in a few days. It’s more involved than it looks at first glance. The insignia red was applied to the intake lips before they were glued in place. The join is good enough for me that it required no further attention. The leading edge slat ‘bays’ were masked off and sprayed at the same time. This red needed to match the decal ‘DANGER’ triangles for the intakes and I had a choice between Mr Color 327 and Hataka lacquer. The latter is darker and a better match for the decals, although the decals are too dark compared to photos.
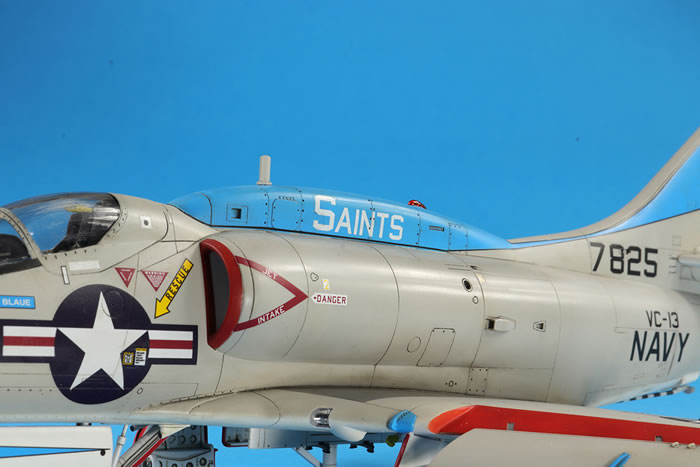
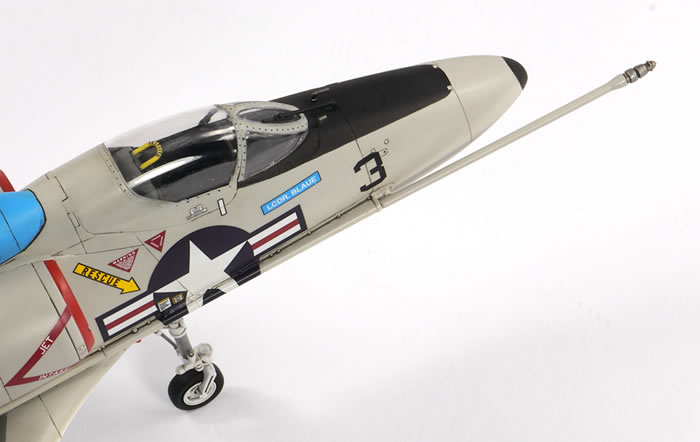
The wing walkway markings are Mr Color 317 in place of decals, and the anti-glare panel was airbrushed in black using a mask designed from a scan of the decal sheet and cut on a Silhouette cutter. I masked and sprayed the tip of the nose at the same time. I was particularly pleased with this as it’s a difficult shape to mask. I did it by using parts of a 12mm diameter circle cut with my DSPAIE circle cutter.
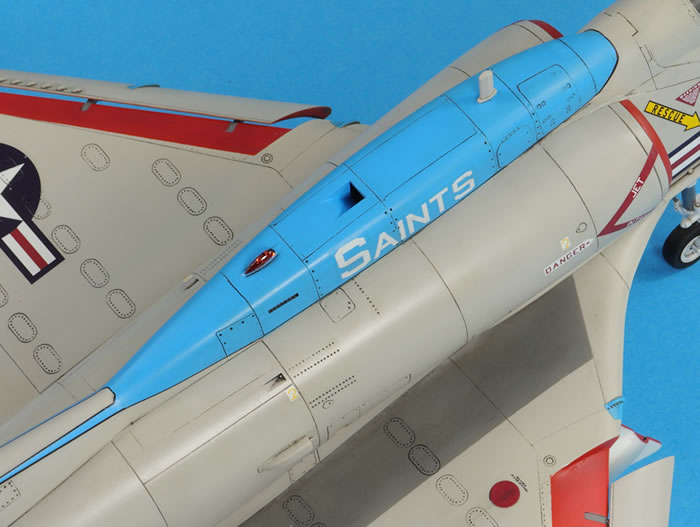
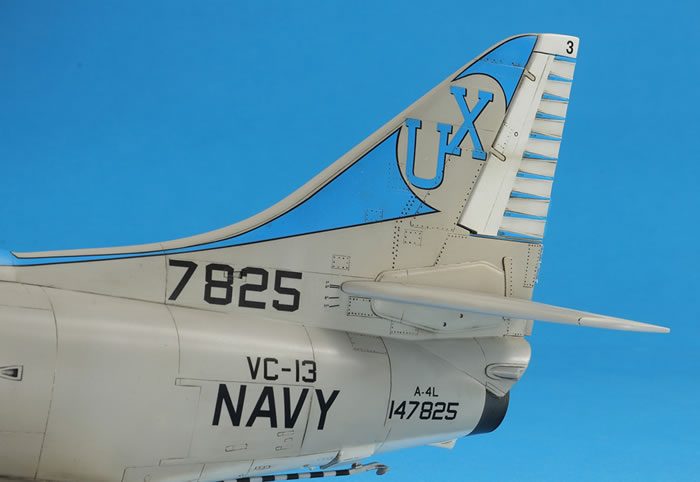
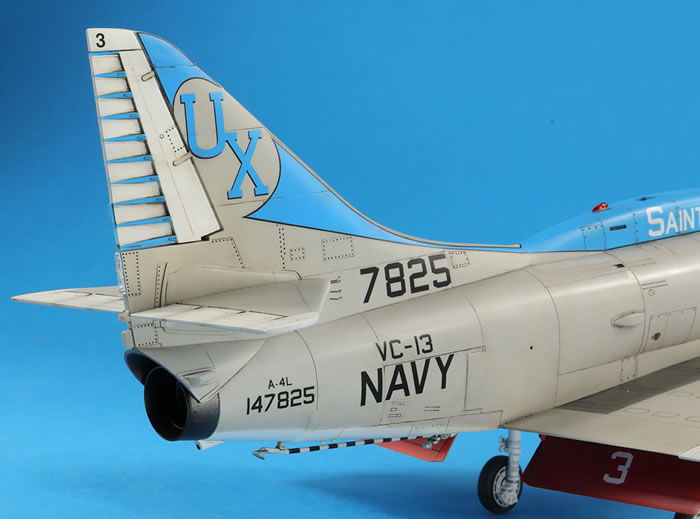
The really hard bit was the blue. First I had to find a blue to match the decals. Hasegawa recommend Mr Color 34 Sky Blue, and this is a very good match. Next I had to mask the hump so it merged accurately with the tail decals. This was actually okay – what was much more difficult was getting the shape of the blue area at the front of the hump correct so it could be outlined by the black decal. I did not get this right and it had to be touched up after the black lining decals had been applied. I also decided to mask and spray the rudder ribs rather than use the decals (this took quite a while) and the wing tips. Sadly, compared to the photos of the real thing, the blue is rather too electric (too bright) and I feel the finished article is poorer for this. I suspect Hasegawa chose a shade of blue that exactly matched a Gunze colour, rather than matching it to the actual deeper blue the real aircraft was painted in.
Without knowing which references Hasegawa had it’s hard to 100% sure, but there are a few detail errors in the details and markings compared to the photos I had:
-
The pilot name plates should be black (or a very dark blue, maybe green) rather than sky blue. I also have doubts over the name…
-
The front portion of the sensor under the tip of the nose should not be black
-
There should be a white patch on the hump, near the aerial
-
There are various white panels with black stencil markings missing from various places around the fuselage
-
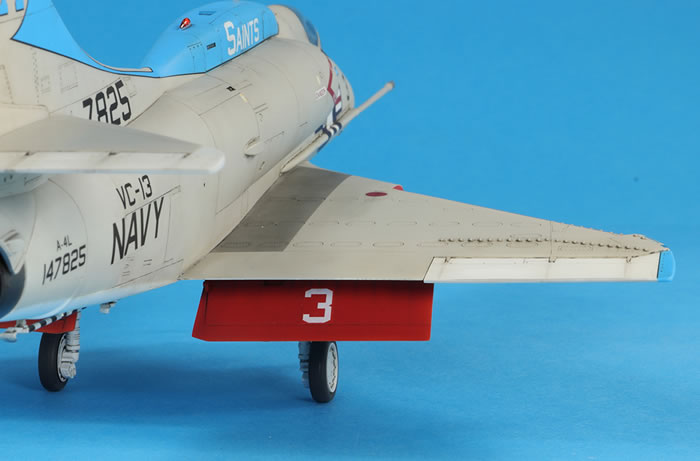
The white numeral on the inner flap faces should be a single ‘3’ in the centre of the flap, not a ’03’ to the side
-
The black ‘3’ on the tip of the tail is a bit too big
The decals in the kit are printed by Cartograf. This means the colour density and registration is excellent, but that the ink layers are quite thick. Consequently, the decals are stiff. The placards for the landing gear, for example, refused to even to begin to curve around the undercarriage legs. They were beaten into submission with Daco Red setting solution. The decals on the airframe were all applied directly to the paint without a gloss coat. Mr Mark Setter was applied generously to the surface and the decal floated in place. Once dry, a thin coat of Daco Red was brushed onto each decal. This resulted in decals that conformed excellently to the surface detail.
The national insignia on the starboard side is shaped to fit over the refuelling pipe. This was still a challenge to fit owing to the stiffness of the decals, but in the end the decal conformed very well.
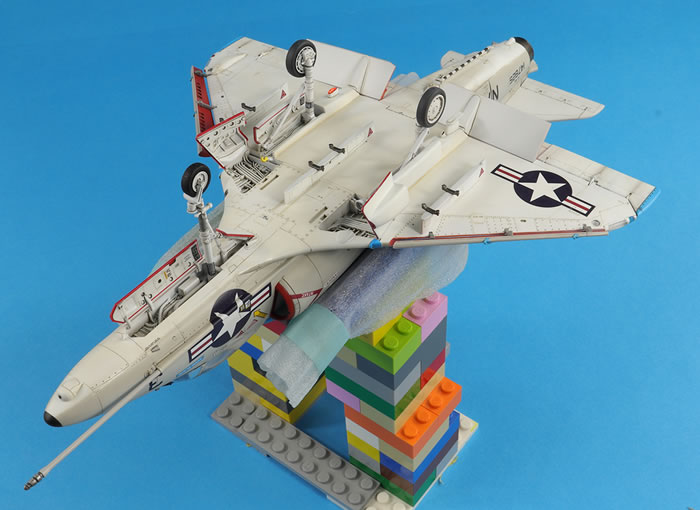
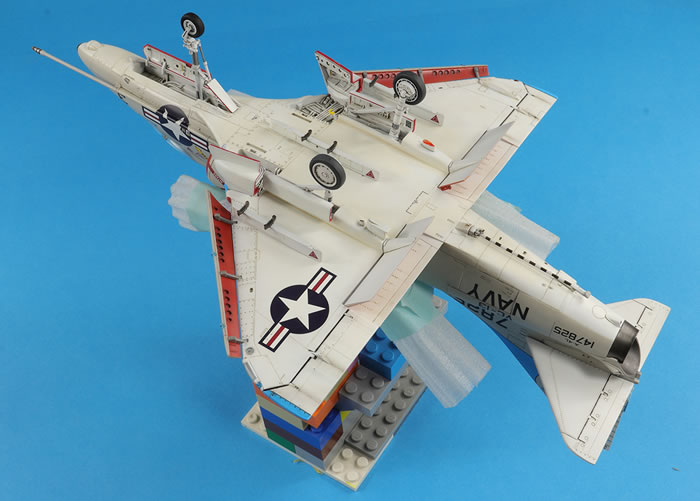
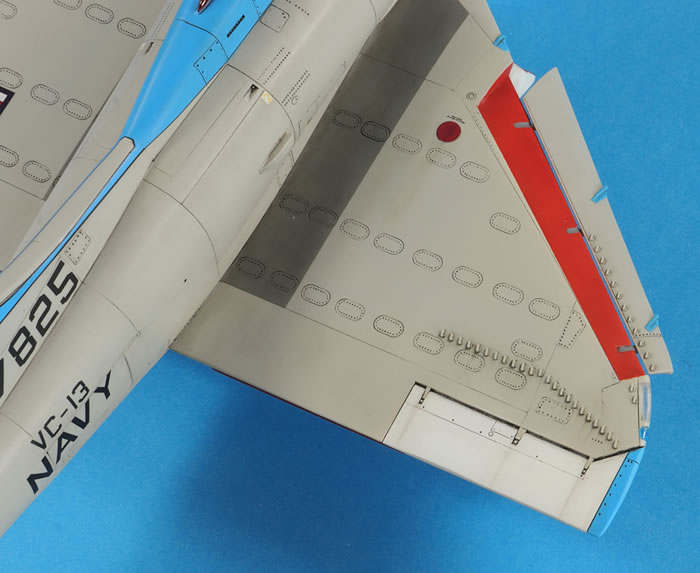
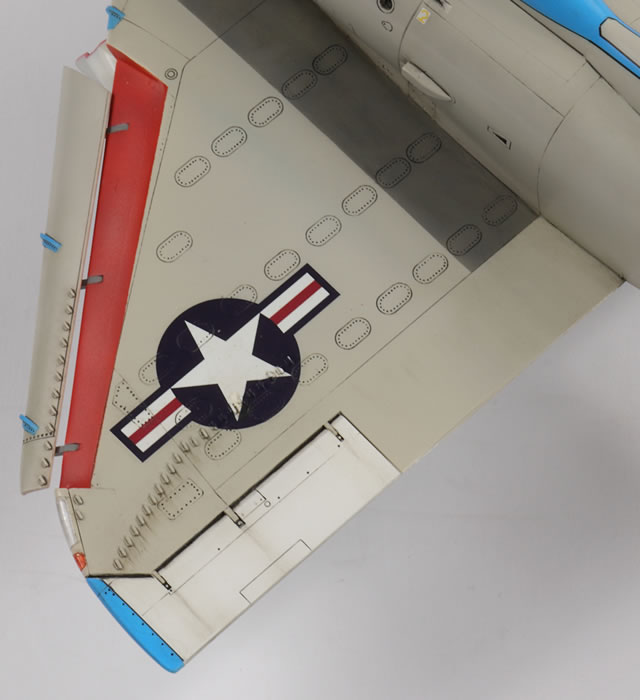
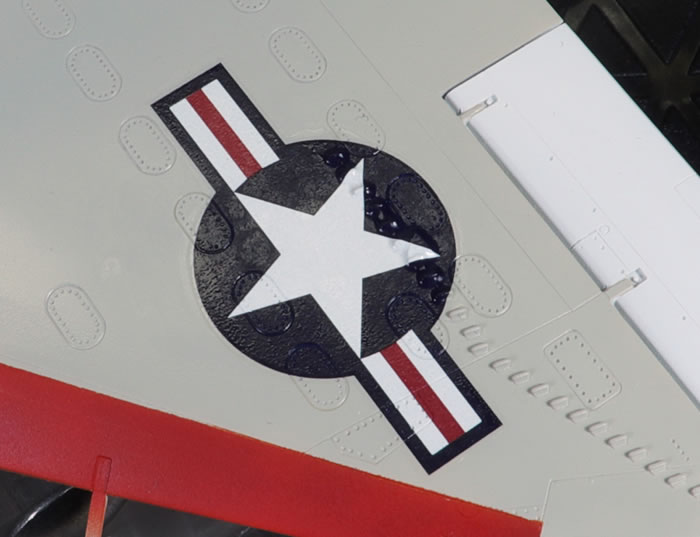
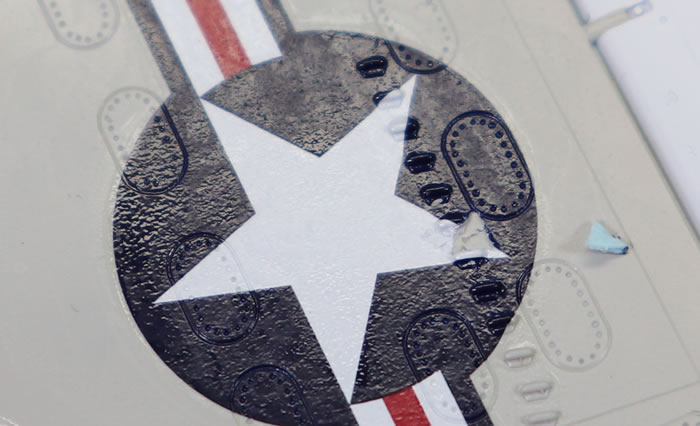
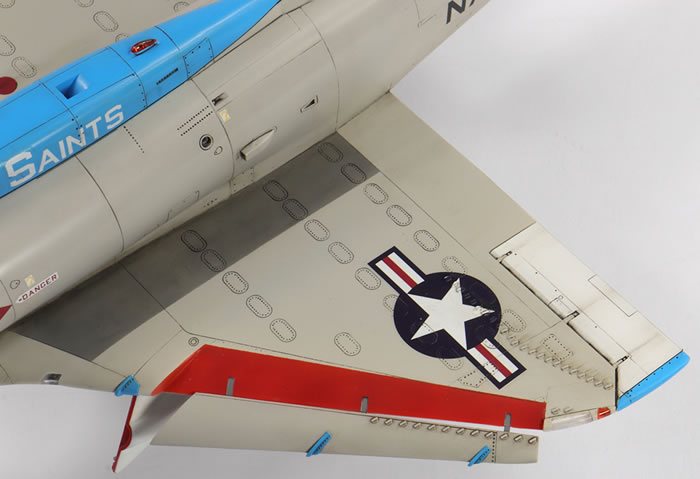
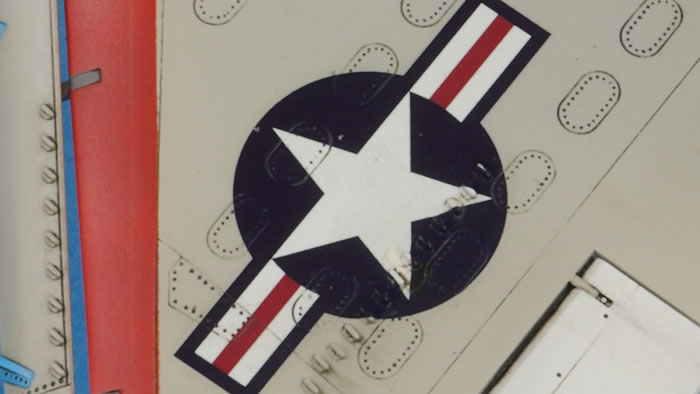
The big challenge with US Navy Skyhawks is getting the national insignia over the vortex generators on the wing. I applied it over a big puddle of Mr Mark Setter and then dumped a good quantity of Daco Red decal solvent on top of it. Beyond positioning *the decal was not touched* – no cotton bud to press it in place, no solution/water wicked away, etc. The decal was poked and prodded a bit with a brush laden with each solution. This was all done directly over the paint (no clear coat). After this, it looked like this:

Here’s what it looked like after more Daco Red had been applied:

I was pretty impressed with this, but as you can see, all was not well. When poking and prodding the decal, I noted there was a ‘spongy’ section around one of the vortex generators. I decided to pick at it and, to my surprise, found that a section of blue backing paper had got under the decal – you can see it next to the decal on the wing. I ended up slicing some other decals to try and fix it. It isn’t perfect (especially under such magnification), but with the naked eye it’s acceptable:
I decided to use some Kcolors XW100 Gloss as a clear over the decals and ready for the wash. For some reason I managed to apply this pretty well over the whole model, except the wings, where I got some small fisheyes and flooding. This unfortunately filled in some of the recessed detail which resulted in a less than consistent panel line wash than I would have liked.
The pin wash is mixed from Abteilung 502 oil paints and I then overcoated the model with an odd mix of Tamiya X-22, X-35 and XF-86 thinned 50% with Mr Leveling Thinner. On top of this I did a little oil paint rendering and streaking, but I appear to have forgotten a few areas, like the flaps and undersides of the tailplanes.
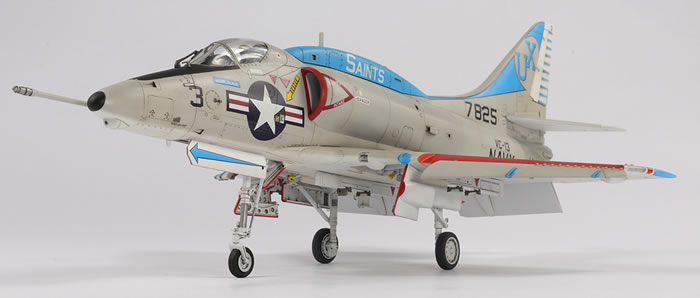
One of the big difficulties with USN subjects in this scheme is the red outlines to the undercarriage doors. I tried to deal with this by painting the interiors white first, followed by carefully hand painting the red under magnification. Once dry, I then sprayed the outer surfaces in white, angling the airbrush so that the red edges were preserved. I got the red outline on the nose door a little wrong.
My main disappointment with the finished article (aside from the usual bits of rubbish in the paintwork) is the canopy. After the masking had been removed some fogging became evident on the left side, and the paint demarcation is not the best. The source of the fogging is still a mystery to me – I only used 5 minute epoxy and some PVA to glue items in the cockpit.
There are a lot of parts to a Hasegawa Skyhawk, and as usual it took a few hours to attach all the fragile bits at the end. At least the undercarriage is nice and simple and Hasegawa have engineered the kit pretty well so everything fits nicely as it should. The refuelling probe got snapped and had to be reattached minus its locating lug, which turned out to be fortuitous because this allowed me to bend it out slightly as per the real thing.
Building batches of aircraft has its upsides (I’m cracking through the stash more quickly) as well as its downsides (my attention is spread across several models and so their finishes suffer). I wish the blue were a bit deeper and the finish a little tidier, but this is good enough that I’m pleased to have it on the shelf. Now to get the TA-4J done.
For more articles like this, please visit my website www.jonbryon.com
Text and Images Copyright ©
2020 by Jon Bryon
Page Created 22 May, 2020
Last Updated
22 May, 2020
Back to
HyperScale Main Page

|
 Home
| What's New |
Features |
Gallery |
Reviews |
Reference |
Forum |
Search
Home
| What's New |
Features |
Gallery |
Reviews |
Reference |
Forum |
Search