Great Wall Hobby's 1/48 scale
Lockheed T-33A
Shooting Star

|
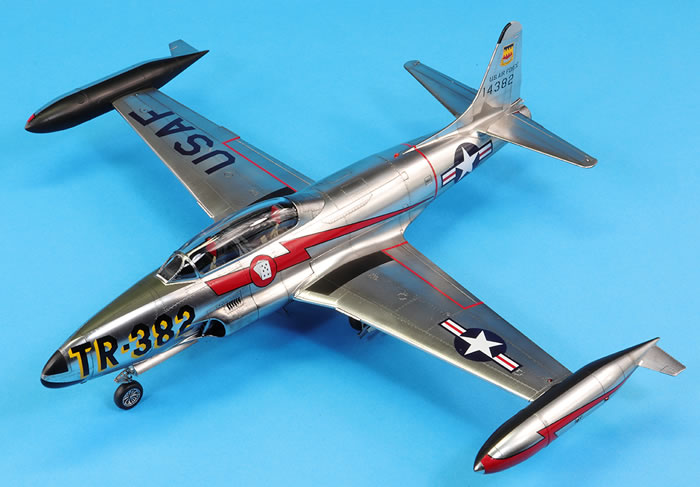
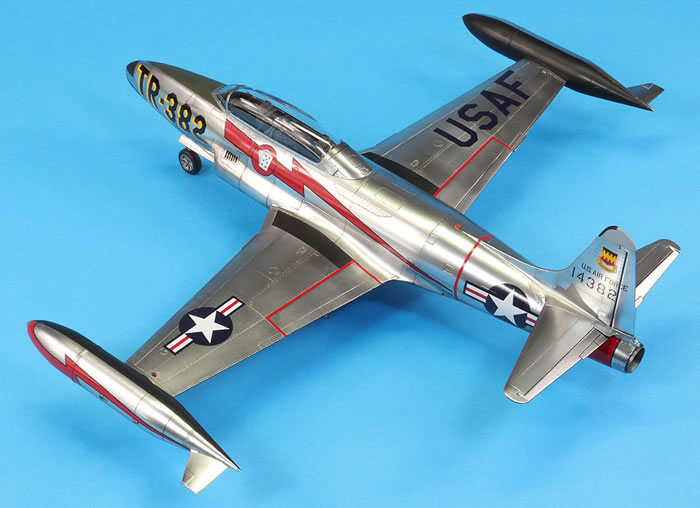
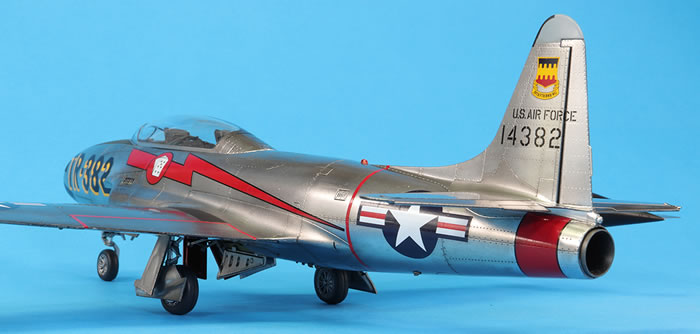
Lockheed T-33A Shooting Star US Air Force, 77th FBS, UK 1954
|
with Caracal Decals
by Jon Bryon

Hobby Boss's 1/48 F4U-7 Corsair is available online from Squadron.com
This model brings to an end my mini-series on P-80-based airframes that started with the F-80C. This kit was released in 2016 and when reviewed in the modelling press it was frequently referred to as ‘simple’, which is a description I find somewhat baffling.
The only ‘simple’ feature is that the landing gear doors are moulded together to make constructing a wheels-up model easier and need separating if the undercarriage is to be down. But aside from this, there’s nothing simple about this kit: control surfaces are separate, cockpit and undercarriage detail is above average and the surface detail is extensive and beautifully moulded. I’m not sure how it could be less simple, although the lack of full-length intakes is a (practically invisible) concession.
This is a very well moulded kit. After working with Kitty Hawk’s and Monogram’s plastic, GWH’s moulding was a dream. The overall standard of fit is high and by my standards I built this model ready for painting very, very quickly – less than two weeks.
There are some flaws. The seats are not quite right and seem to be missing their prominent ejection handles. I used some Eduard steel seat belts, which was the first time I used this product and was pleasantly surprised by how easy they were to manipulate and how resilient the pre-painted finish was. On the downside they were rather too long and the paint finish is unnecessarily fussy. The T-33 has a huge cockpit and the interior is very visible even with the canopy closed; photo-etched instrument panels would be an improvement, but not one I made.
There were a fair few criticisms of the overall shape of GWH’s T-33 made by subject matter experts over on ARC. The rear fuselage was considered to be too conical and not curve like the real thing. There were other issues noted too, but the only ones that really jumped out at me were:
-
The tail fin tip is just not the right shape in my opinion, having a kind of ‘peak’ towards the leading edge whereas it should be rounder. I did sand the top of the vertical stabiliser to what I believe to be a better shape.
-
The rudder (and probably the elevators) is too narrow in chord. This is quite evident from good quality profile photographs.
The fit of most parts is generally good. I had three areas that caused me problems:
-
The nose cone did not fit as well as it could. It needed to be carefully faired in with some CA and the surface detail restored. I did add lead ballast inside the nose cone.
-
The intakes were the worst fitting parts and needed a lot of CA and patient sanding, rescribing and polishing to keep the finish neat.
-
The rear underside of the wing, where it joins the rear fuselage, had a few gaps and a bit of a step.
Other areas, such as the fuselage halves and the wing roots, fitted extremely well, as did the flaps in the raised position. The canopy was also an excellent fit, but if you want it closed, like me, you will need to trim the rear of it for the tabs to fit in their recesses. It’s moulded to only be modelled open, and the instructions do not mention this.
Construction was so quick there’s really not much else to say. I kept the wingtip tanks and horizontal stabilisers off until the end to aid painting, and certainly do not follow the instructions on adding the undercarriage; this can be done at the end.

A few days into the build. This kit goes together very quickly.
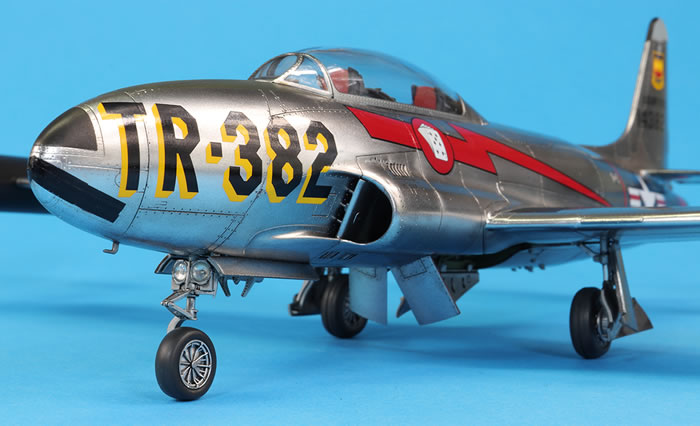
I obtained Caracal Decals set for early T-33s. Note that these are not for *really* early T-33s with the fuel tanks under the wingtips. I settled on a brightly finished T-33 based in the UK in 1954. I found two very good black and white photos of this aircraft, although both were taken from almost exactly the same angle, giving an excellent view of the starboard side.
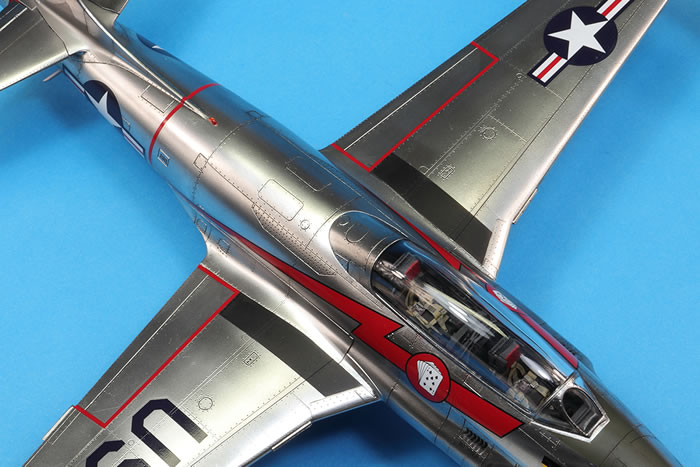
What was obvious to me was that the aircraft was rather clean and not highly polished, although quite shiny. Having had enough of foil, and deciding that was far too bright and shiny, I wanted to try another product to get a high-shine finish: Kcolors. Following a good Youtube video by Matt McDougall testing various Kcolors shades, I settled on 60 Steel. This would needed to be protected by Kcolors gloss coat, and so I bought a bottle of each, which at nearly £19 was ridiculously expensive.
The first step was to get a decent black gloss base coat as recommended by the manufacturer. I used Gunze GX2 Gloss Black sprayed directly on the plastic, which did give a lovely deep gloss without any need for a polish. Unfortunately the dreaded ‘flerm’ (all the little fibres and bits of dust that infect my modelling room) raised its ugly head and needed sanding out in a few areas. These were polished and the GX2 reapplied, but I could never get the retouched areas to look as good as the original coat. This would result in a slightly patchy final finish.
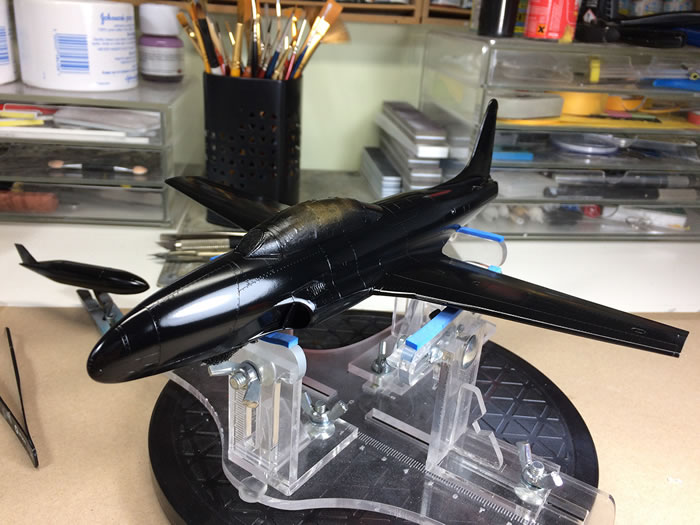
GX2 Gloss Black airbrushed on with an Iwata RG-3.
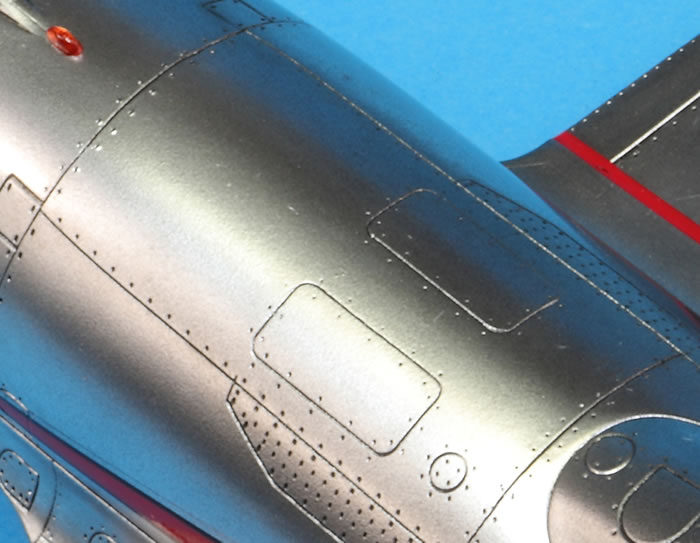
I spent a little while experimenting with the Kcolors Steel on a spare Seafire wing and then proceeded to airbrush it on the T-33. It was a learning experience. Initially, I was very frustrated. The paint is the thinnest, most dilute paint I’ve ever used, and the alcohol base flashes off extremely quickly. It took forever to build up any kind of opacity and retained a speckled finish where the underlying black kept showing through. I tried spraying it heavy, with an Iwata RG-3, and fine, with an Iwata Custom Micron, and at high pressure (30PSI) and low (<15 PSI). Kcolors imply the high pressure should work better, but in the end I got my best results with the Custom Micron at around 15PSI and many, many light coats. The opacity did improve, but never completely to my satisfaction, and there is 25ml of paint sprayed on this small airframe…which is a *lot* (the bottle is 30ml). However, the paint is the shiniest I’ve ever managed to lay down, and I learned to like it more and more.
Testing the Kcolors Steel. You can see the speckled finish where the gloss black shows through.
Building the finish up on a horizontal stabliser.
There’s 25ml of paint on this!
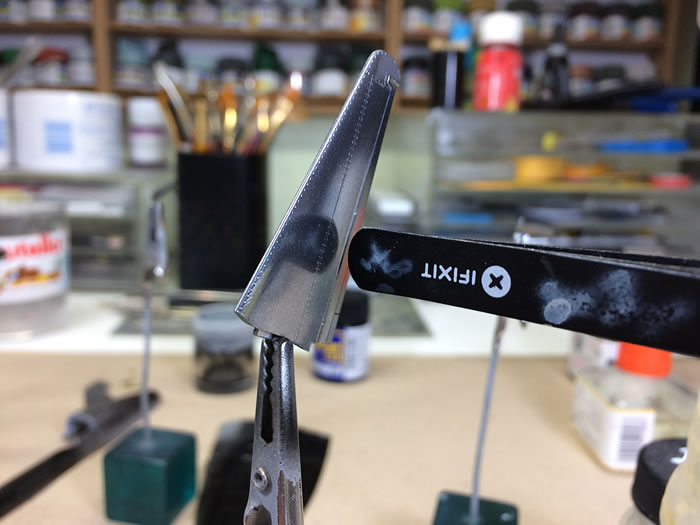
The finish was a little fragile. Testing showed it could be masked with very low tack tape without a protective coat, but it had a propensity to wear away if rubbed or touched. Kcolors recommend their clear acrylic gloss, XW100, as a protective coat. This is a thick gloss that should be airbrushed at 30PSI without being thinned and through a thick nozzle (0.4-0.6mm). The Iwata RG-3 was ideal for this and a thick coat was sprayed on.
I really, really liked this clear coat. Kcolors said there would be an inevitable reduction in the shininess of the metallic finish, which suited me fine as the naked Steel was too reflective. Under the clear coat the finish was, for me, just right. Sadly, it wasn’t as protective as I would have liked and under an oil wash (made with MiG Productions white spirit) some of the metallic paint did rub away revealing the gloss black underneath. This required some touch up which was a shame as it did further compromise the finish.
My verdict on the Kcolors is that it looks good but isn’t opaque enough and too fragile under weathering, even with the recommended clear coat. It stood up to masking with Tamiya tape far better than I expected, and I think the weaknesses could be turned into a strength if the underlying paint is a decent gloss aluminium/silver shade rather than black. I intend to make a few natural metal F-84s in a couple of years and will revisit Kcolors, maybe using the Aluminium shade over a glossed Mr Color Silver.
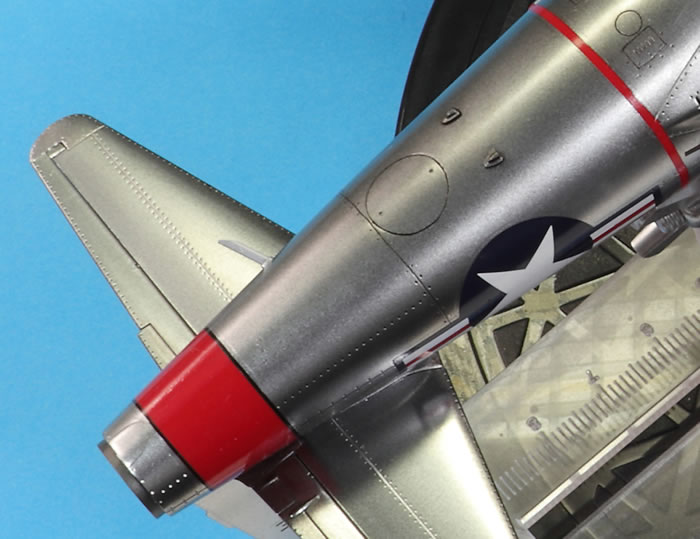
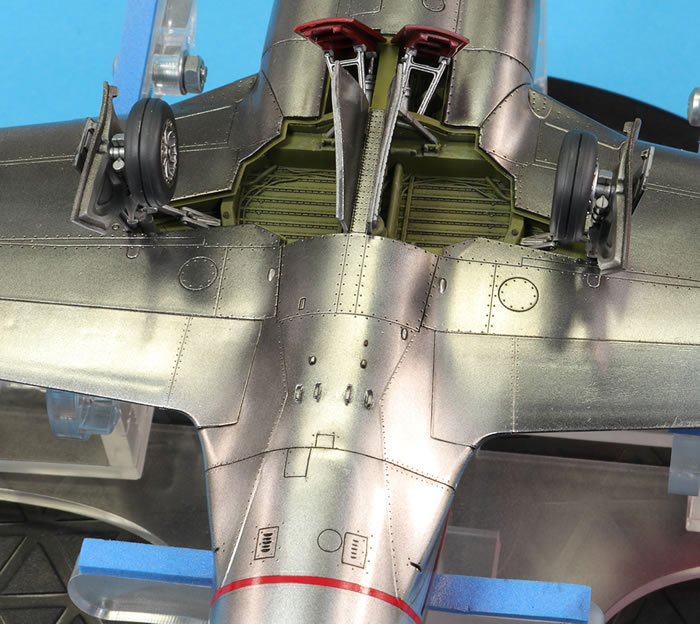
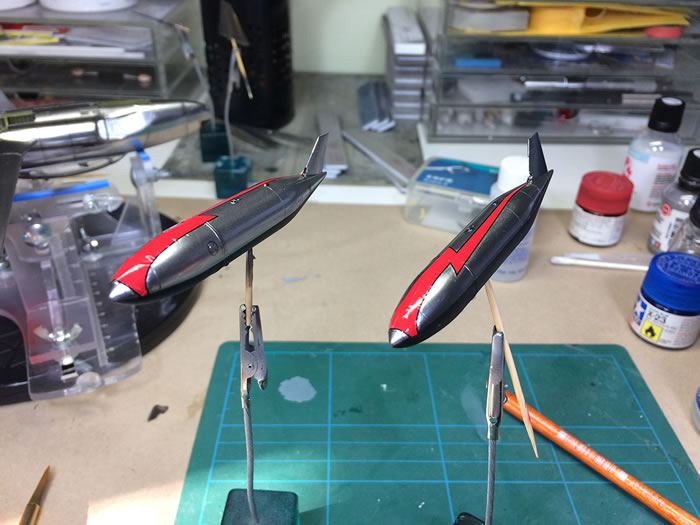
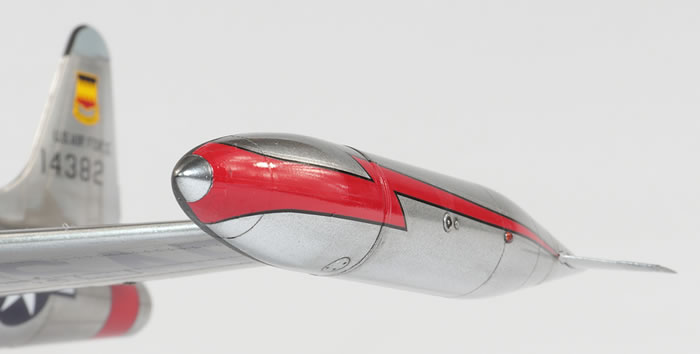
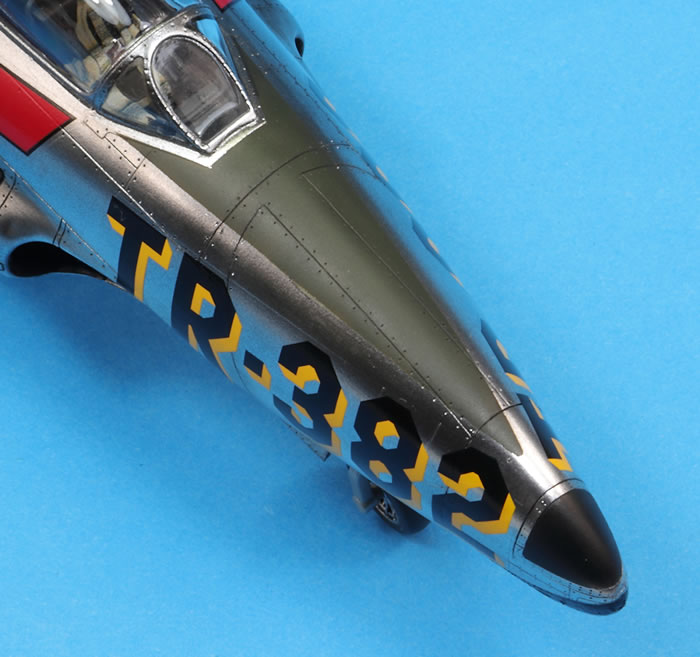
There were a few marking questions that needed to be resolved. First: what were the inner sides of the wingtip tanks finished in? Olive Drab? Matt Black? Aluminium. I found photographs for both black and aluminium examples on USAF T-33s in the early 1950s and went with the black for more interest. Another was some striping evident on the nose and not mentioned by Caracal. What colour was this? The tone looked similar to the red trim, but discussion on Hyperscale favoured black, which I went with as it was easier. Some suggested this was tape applied over the gun ports – and certainly they look quite roughly applied – and so I used black decal cut into strips to replicate this. A third area of interest was a darker panel on the vertical stabiliser above the horizontal tail plane. I was uncertain what colour this would have been (it looked similar to the grey fin tip to me) but was persuaded that it was a darker metal panel. I used an Alclad shade to represent this, which was duller than the steel, matching the contrast visible in the photo of the real thing.
It is, apparently, a law that when reviewing any decals printed by Cartograf you have to write ‘so quality is assured’ after mentioning this manufacturer. Well, it isn’t. I’ve always found Cartograf decals somewhat inconsistent and there are definitely better printers out there. I will agree that the printing is beautiful: the colours are vibrant, the register is perfect and the decals are strong. But for all the Cartograf sheets I have, the film is too thick and the decals do not settle that well into recessed detail. I could not use my beloved Mr Mark Setter as it requires overcoating to hide the stains, so drenched the decals in Micro Sol, Mr Mark Softer and Daco Red setting solution (which I’ve never seen make any difference to any decal, so I assume I have a dud bottle). The decals reacted a little under these, but it’s not brilliant. The markings made of only one dark colour (like the ‘USAF’ lettering) did settle very well, but those with multiple or light colours (like the national insignia and the red trim) barely budged.
I like Caracal decals, but there are a few compromises in this sheet. The main issue is that for my selected scheme the decal geometry for the wingtip tank markings is completely wrong. Caracal have designed it for a cylinder, whereas the tank, of course, tapers. I persevered with the decals by making many cuts with a scalpel and then using the red decals for the unused options to patch the shape so it resembled the real thing. The overall effect is fine, but the thickness of the decals means the patchwork is very evident close up.
This did not start well.
Patched-up finish using some of the unused decals from the sheet.
There are some detail differences and stencils missing on the outsides of the tanks compared to the reference photos I was using.
The wide red stripe under the tail is a challenge. This fits okay but requires a little patching where the two parts join underneath. Fortunately Caracal supply some spare decal for this purpose and I think I got away with this one!
[insert image T33A_73.JPG with caption: Patched-up finish using some of the unused decals from the sheet.]
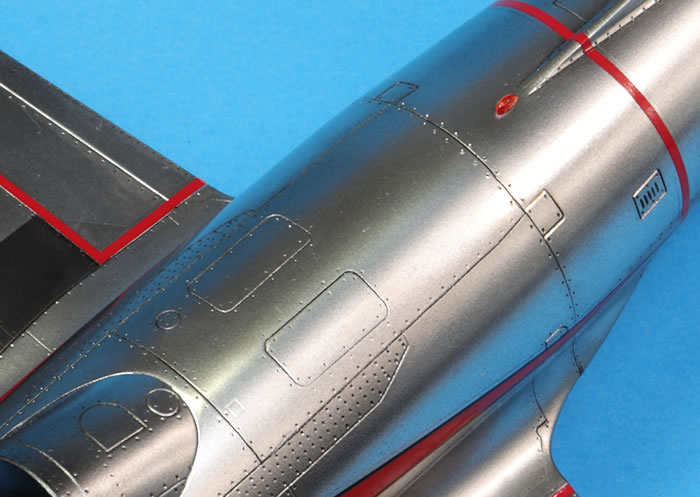
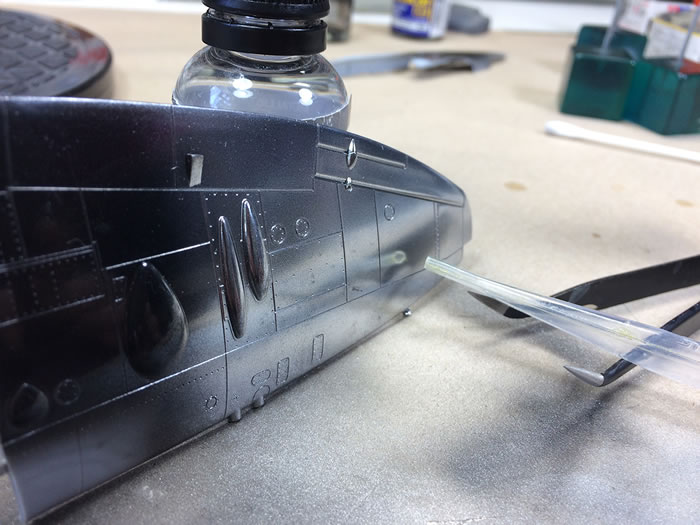
There is a red warning stripe around the rear fuselage provided as a straight strip of red decal. Again, the fuselage is tapered where this needs to go and ideally the stripe should be provided as a curve. Because I was nervous about the ability of the paint to withstand masking I used the decal, but in hindsight I should have masked and sprayed it as my effort is wonky.
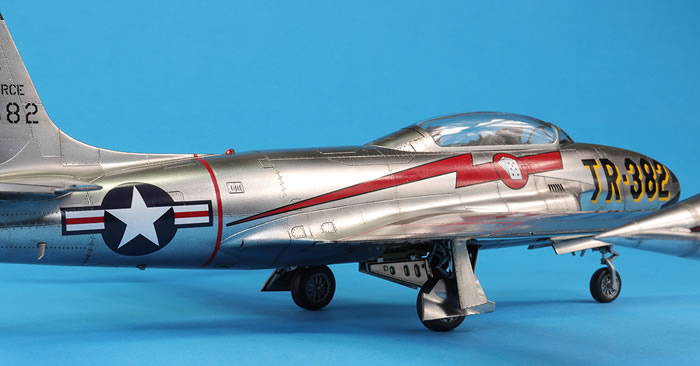
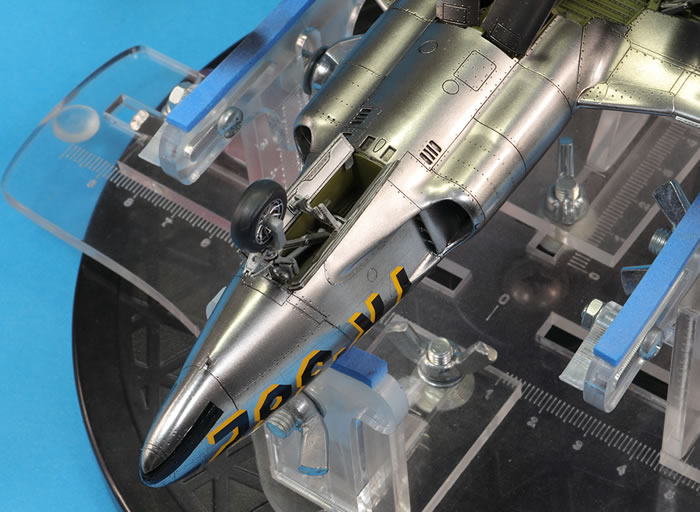
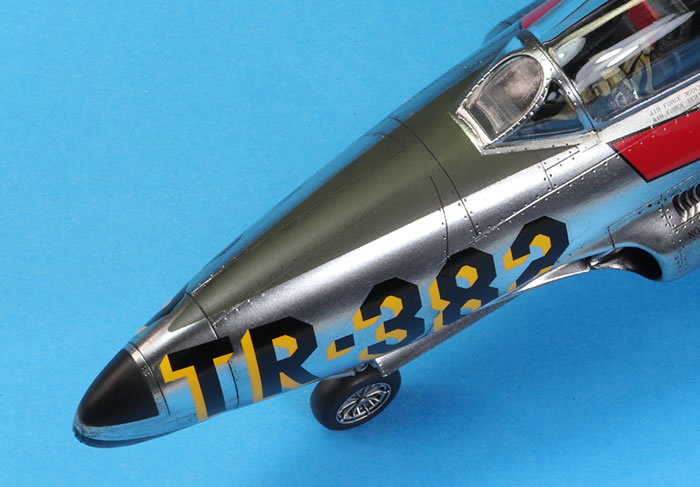
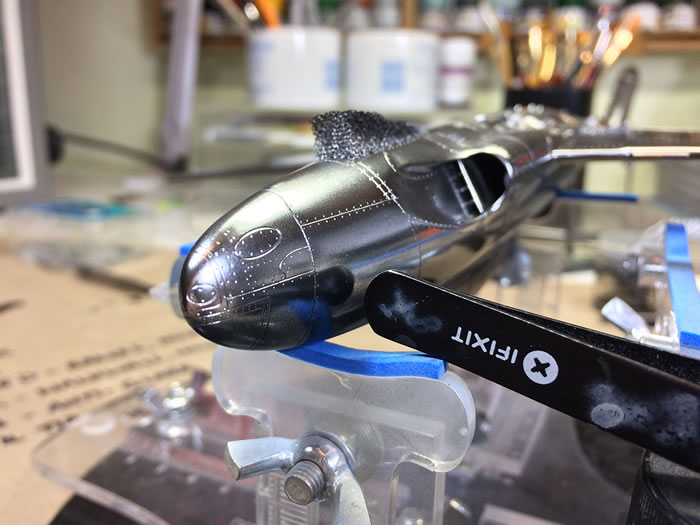
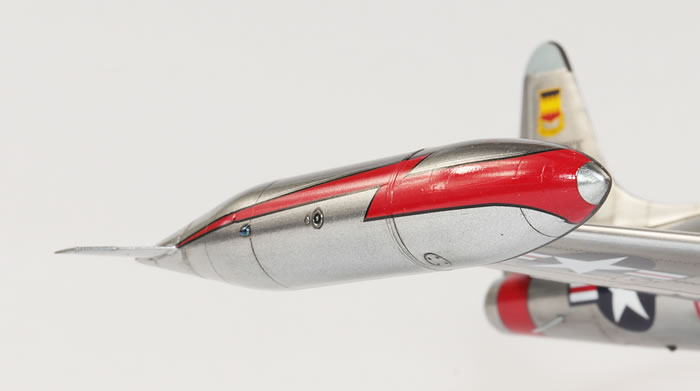
The fuselage codes on the nose have some compound curves and protrusions to deal with. I applied the starboard code straight from the decal sheet and ended up with some wrinkles. For the port side I removed as much of the decal film as I thought I could get away with, and the result was far better. I make these mistakes so you don’t have to .

Patched-up finish using some of the unused decals from the sheet.
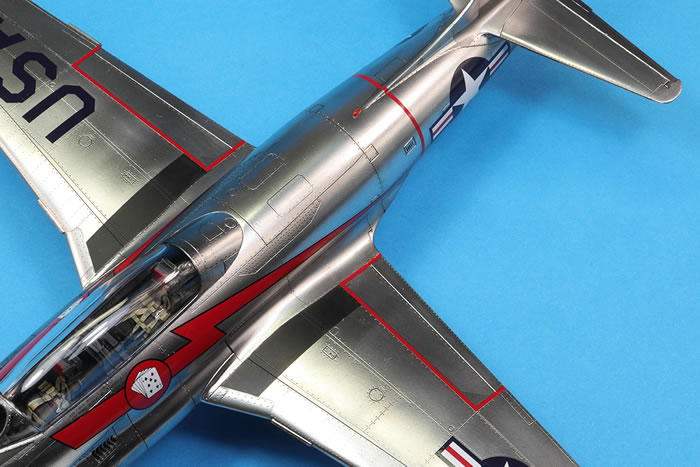
Quite happy with seam removal, although sadly missed the bit at the base of the tail fin. The red light is an addition from the spares box.
The anti-glare panel is Mr Color 304 Olive Drab darkened with black.
Within a month of starting this kit I found myself putting the final bits together. It’s well engineered, so this was not too taxing, aside from probably the most important parts: the main undercarriage. The legs had a very sloppy fit into the wheel wells and I used some 5 minute epoxy to set them. I thought I had set them in square, but when it came to fitting the doors to the port side they definitely did not look right and I ended up having to remove some locating tabs. I do not know what went wrong here but I suspect the port leg moved aft slightly. By the time I realised this everything was set in stone. It’s not massively visible, but it will always annoy me!
The wheels are very strange. They are bulged, but with a very odd geometry, and the main wheels had a massive groove. I assumed this was meant to be there but having stuck them on, I’m not so sure! The wheels were also keyed, ostensibly to ensure the not-so-flat area sat in the right place. The problem is that when you have such a sloppy fit of the leg into the bay, any such design effort is a hindrance and not a help. Manufacturers: leave the hole in the wheel round so we can ensure the flat sits where it’s meant to!
The airbrakes require patience but go together beautifully once you realise they are not hinged at the leading edge of the brake. The leading edge slid aft as the brake opened.
I had removed the nose pitot before construction in order to clean the fuselage seam up. It was reattached at the end.
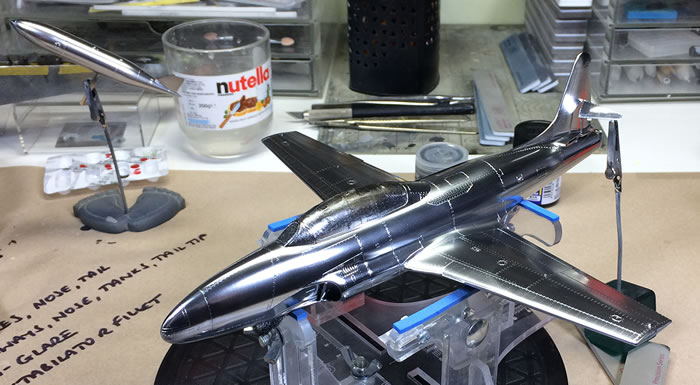
I love looking at this model; 1950s shiny jets in bright markings really do it for me. This model was a pleasure to make and completed very quickly. It has a few faults, but when the basic engineering is sound, the plastic nice to work and the level of detail quite high, they fade very quickly.
Now to make a couple of helicopters…
For more articles like this, please visit my website .
Text and Images Copyright ©
2019 by Jon Bryon
Page Created 20 August, 2019
Last Updated
20 August, 2019
Back to
HyperScale Main Page

|
 Home
| What's New |
Features |
Gallery |
Reviews |
Reference |
Forum |
Search
Home
| What's New |
Features |
Gallery |
Reviews |
Reference |
Forum |
Search