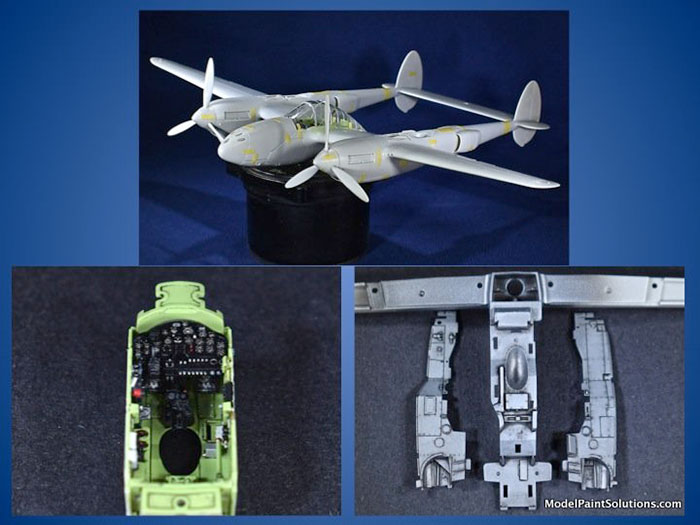
Tamiya 1/48 scale
P-38F/G Lightning
Part One

by John Miller

Hobby Boss' 1/72 P-61A Black Widow is available online from Squadron.com
I was fortunate to attend the IPMS National Meeting/Contest in Chattanooga Tennessee--The 'Nooga Nat's--- last month where an awesome time was had by all. A sincere thanks is owed to the folks behind the scenes for putting on such a well-organized and enjoyable show: Well Done!
Through the good graces of Dan C. a friend from Seattle IPMS, I got my hands on the new Tamiya P-38: what a kit! I've been building models for a long time and I've never seen a kit as well engineered. I owe ya one, Dan.
Despite being crammed into my luggage for the flight home, the plain white box, adorned with a small picture of the production kit box art, arrived undamaged and was on my work bench toot sweet so let's get to it.
For the Hyperscale review of the kit go here.
As I do with all my builds, the sprues were soaked a solution of Windex (original formula) and Denatured Alcohol (DA). After the soak, the sprues were allowed to dry and the build began.
All parts were removed from the sprues with Gods Hand cutters and cleaned up with 600 and 1,000 grit Alpha Abrasives and a fresh #11 blade.
As usual, assembly begins with the cockpit and here the details are beautifully rendered. The parts were affixed to a painting board with wads of putty and were primed and painted using an H-S Evolution fitted with a 0.20mm tip.

Parts such as the instrument panel and control yoke that are supposed to be black were left in Mission Black Primer.

Bondic is a liquid glue available at many hardware stores that hardens instantly when exposed to ultra-violet light. The Bondic applicator pen comes with an integral UV light source and a needle-like applicator.

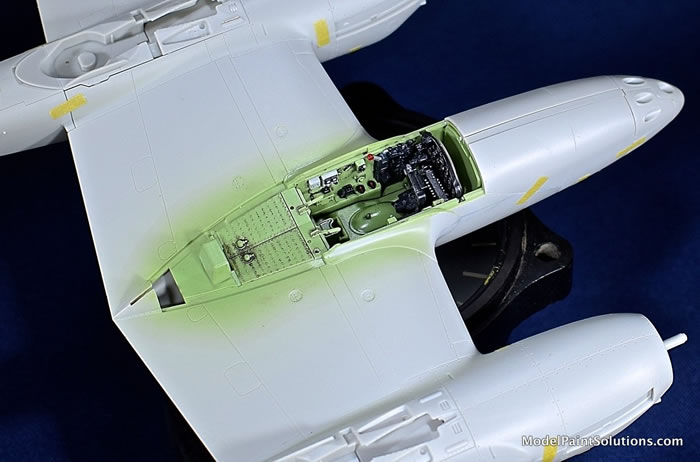
The cockpit floor and side-panels were painted with a custom mix of Mission Chromate Green, Interior green, and White. Unfortunately, I got the color a bit light so I'll have to darken that up a bit with a wash later in the build.
The left and right cockpit side panels literally clip onto the sides of the cockpit floor thereby completing the sub-assembly.
The nose wheel well components were tackled next and here again the fit is excellent and the detail abundant. Since I opted to finish the wheel well in natural metal, the sequencing was pretty straight forward: Black Primer, Aluminum, and Tamiya Panel Liner cleaned up with cotton bulbs moist with Mona Lisa Odorless Thinner (available at most Hardware stores).

All primer and paints were were applied with an H-S Evolution fitted with a 0.20mm tip.

The upper portion of the nose wheel well is an integral component of the full-span wing spar. Just like the cockpit components, the wheel well side panels simply clip onto the center section with no fuss.

The completed nose well/spar assembly drops into the bottom section of the fuselage/cockpit pod. Note the heavy ball bearing (supplied with the kit) and the well-engineered receptacle that holds the bearing in place: awesome.
The upper portion of the fuselage is integral with the full-span upper wing part. The cockpit tub fits into the upper section which is then mated with the lower section containing the nose wheel well. The fit of the upper and lower fuselage halves is perfect.

The ample cockpit detail will be easily seen through the large and crystal-clear canopy parts. To make things even, Tamiya provided both closed and open canopies, complete with the sliding, side panels, so if you've super-detailed the pilots office, it'll be easy to show off your work.
This kit is a dream to build. Time spent carefully cleaning and prepping the parts will be rewarded with a nearly flawless fit of practically every component. In Part II of this progressive build we'll assemble the main wheel wells and booms. Stay tuned!
For more on the build review visit ModelPaintSolutions.com.
Text and Images Copyright © 2019 by Model Paint Solutions
Page Created 20 June, 2019
Last updated
6 September, 2019
Back to HyperScale Main Page
Back to Reviews Page

|
Home
| What's New |
Features |
Gallery |
Reviews |
Reference |
Forum |
Search