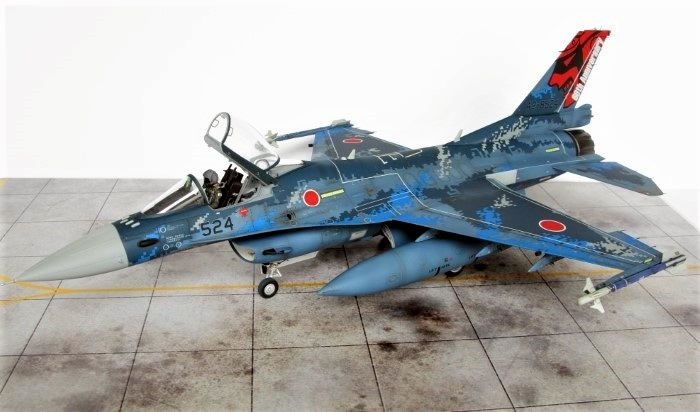
Hasegawa's 1/48 scale
Mitsubishi F-2A
by Steve Pritchard
|
Mitsubishi F-2A
|

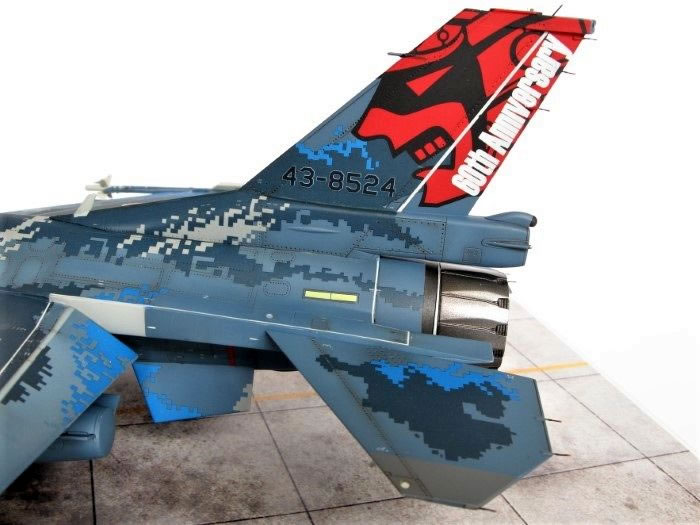
Hasegawa 1/48 Mitsubishi F-2A ‘3SQ 60th Anniversary Detail Up Version' kit SP357
Aftermarket Accessories:
Paints Used:
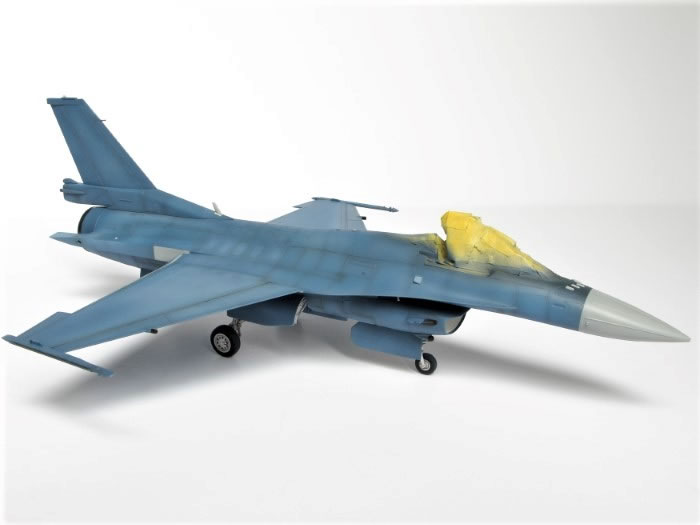
Mr Color C14 Navy Blue for the preshading of the panel lines, C325 Gray for the nose with C72 Intermediate Blue for the overall colour. Tamiya White Primer decanted from the spraycan and airbrushed on for the wheel bays and undercarriage. Various Humbrol enamels for cockpit and pilot detail painting. Alclad shades Exhaust Manifold, Magnesium and Jet Exhaust for the exhaust nozzle and surrounding area.
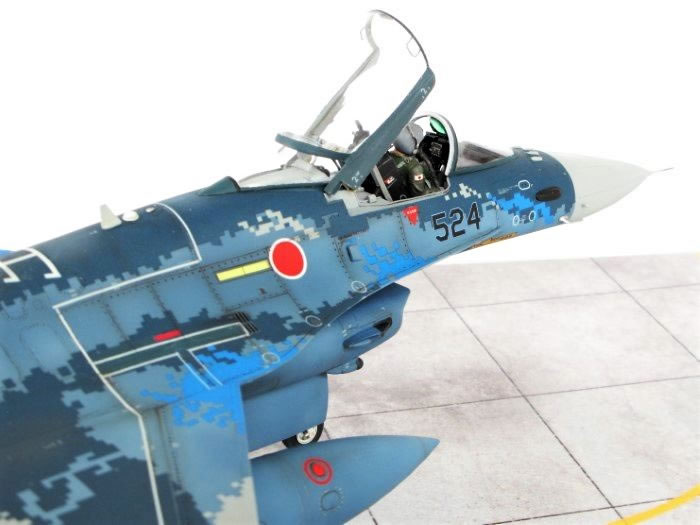
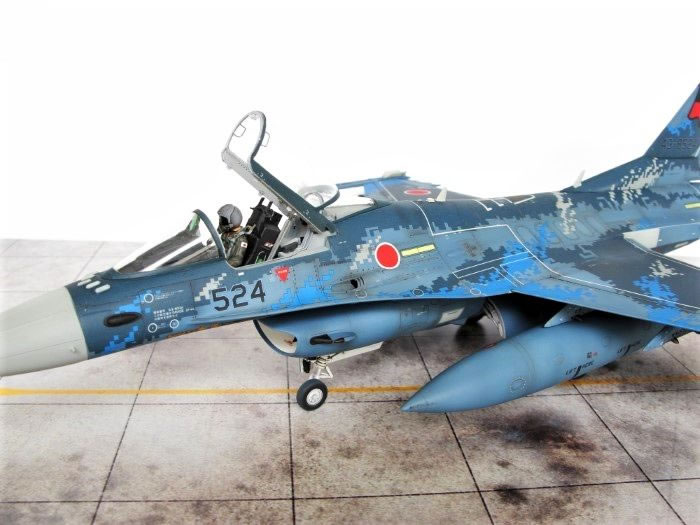
I had never really considered modelling this aircraft until I saw it featured in the March 2019 issue of the magazine ‘Combat Aircraft’. It has a good feature on Japan’s “Hyper Viper”, and includes photographs of aircraft 43-8524 in its anniversary digital paint scheme. Hobby Link Japan promptly supplied the Hasegawa kit and Modelair in Auckland had the Mr Color paints available, along with Mr Color Levelling Thinner.
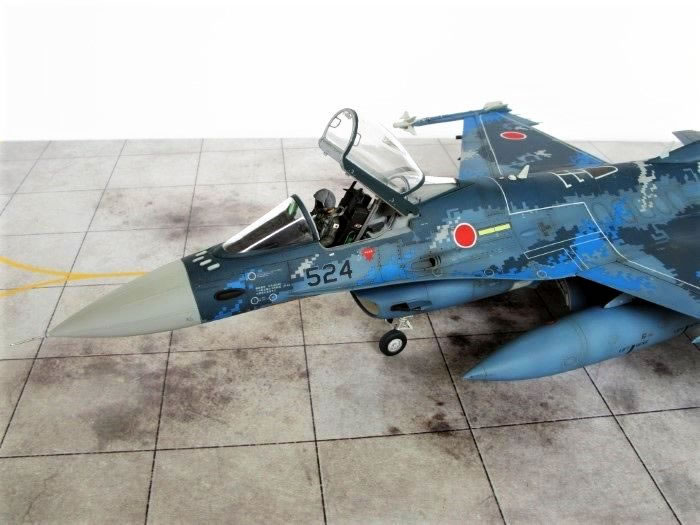
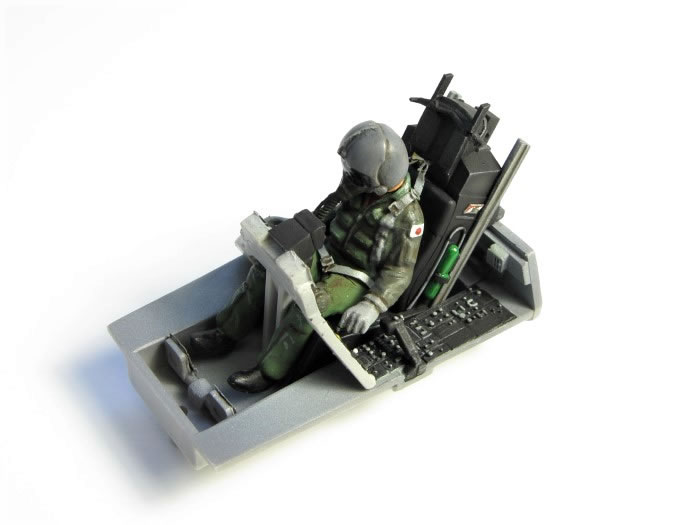
Construction was straightforward. I added some of the Eduard set to the cockpit but quickly realised that with the pilot in place very little extra work would be seen - consequently I didn’t spend much time detailing and painting the instrument and side panels. I did fashion an oxygen hose from lead wire to replace that provided, and the Eduard set came in useful for the added canopy details.
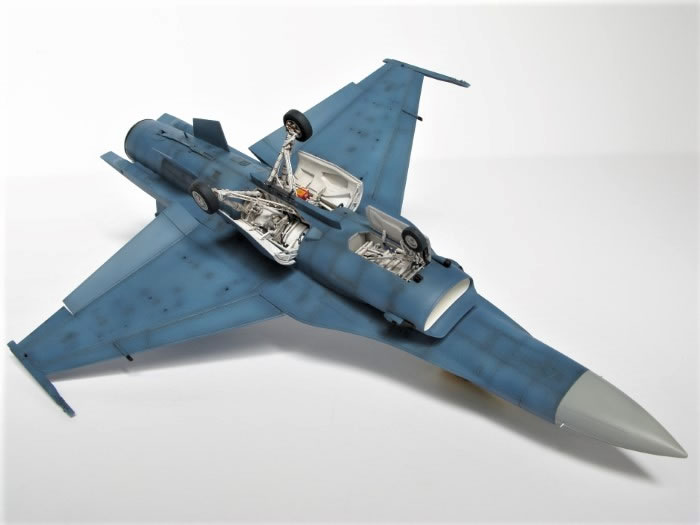
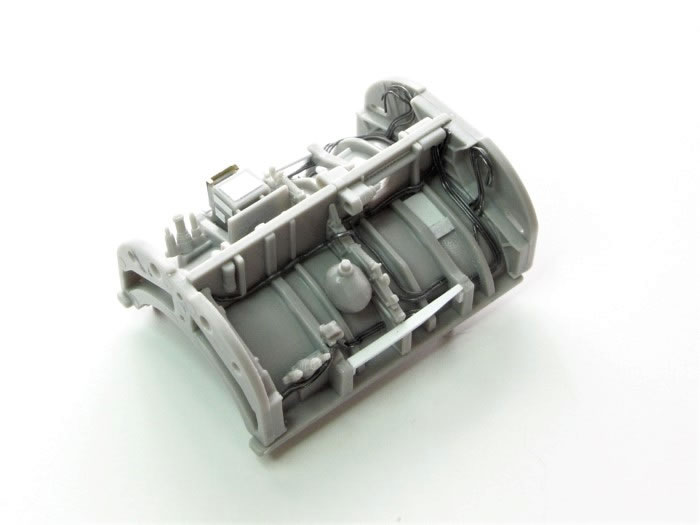
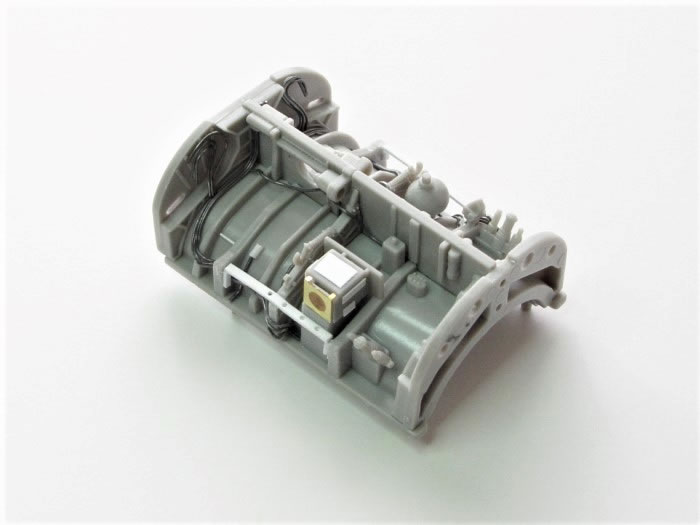
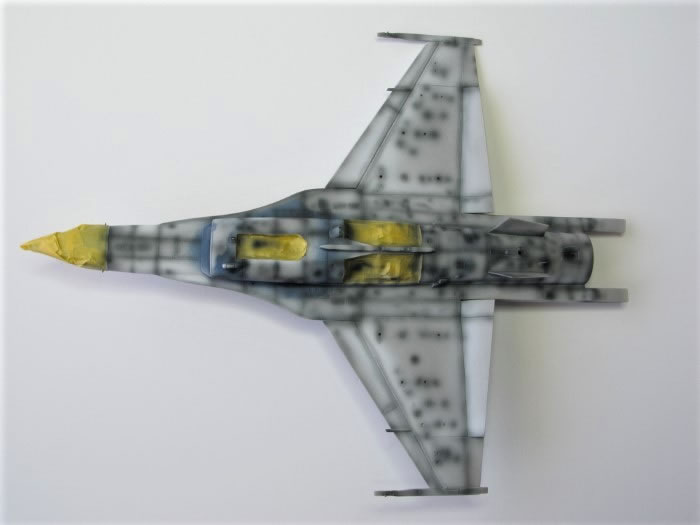
As with F-16 kits, the air intake can be tricky to build with its multiple parts and complex curves, but with care and plenty of test fitting the Hasegawa F-2A kit can be assembled in this area with a minimum of filler. I prepainted the top and surrounds of the intake before attaching, as this area can be hard to reach with the airbrush once assembled. I didn’t achieve a completely seamless intake, but running some Tamiya white putty on each part of the trunking, and wiping the excess clear with a cotton bud, produced an acceptable result.
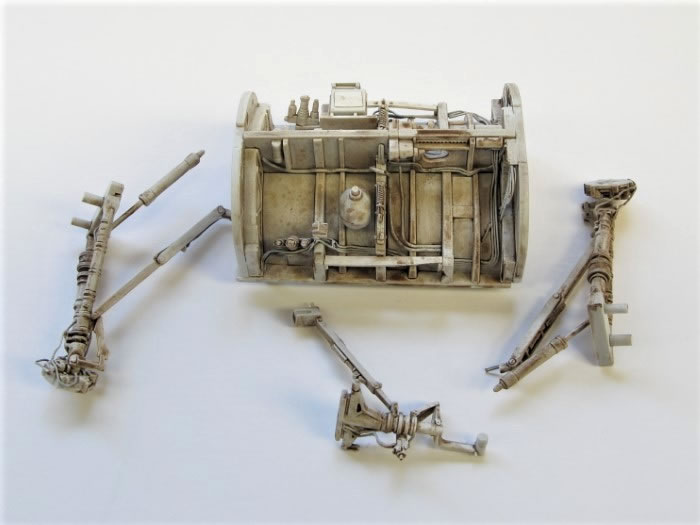
The engine nozzle in the kit lacked detail on the interior plates so I replaced it with the Wolfpack one – this was fairly straightforward, but note, it is not a drop-in replacement, needing some trimming to get a satisfactory fit. It actually has interior detail that may be a little too heavy, but still a worthwhile addition, I think.
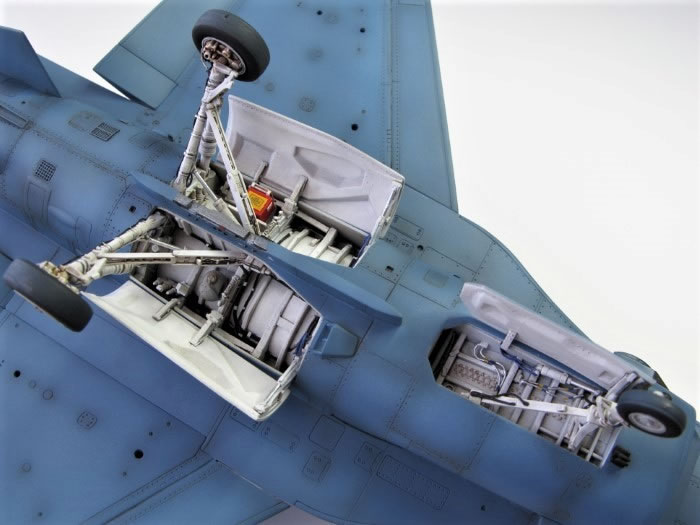
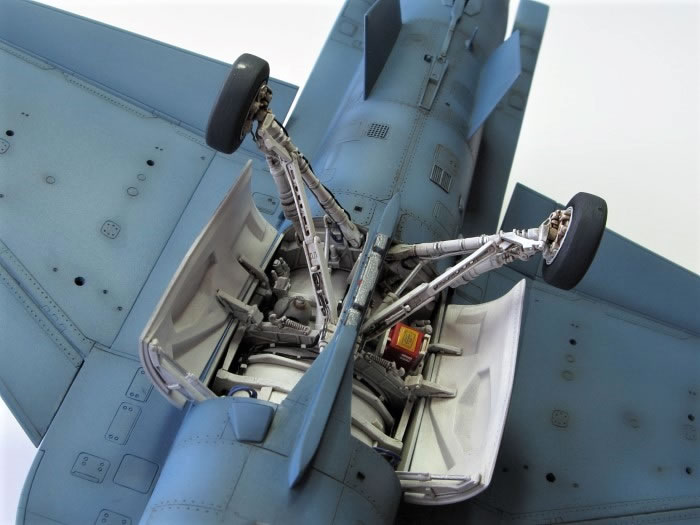
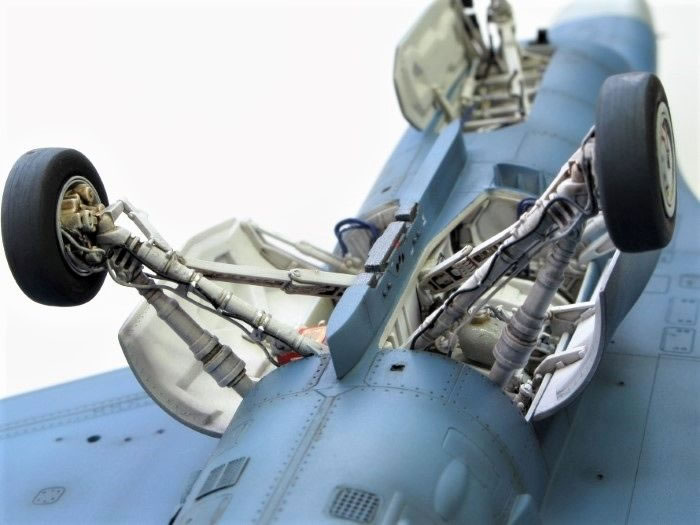
Extra detail was added to the undercarriage – lead wire was used to represent hydraulic lines.
The photo etched fret in the kit and the equivalent parts in the Eduard set were not used, but they were useful in providing a pattern to follow.
The undercarriage doors had good solid locations and attached easily.
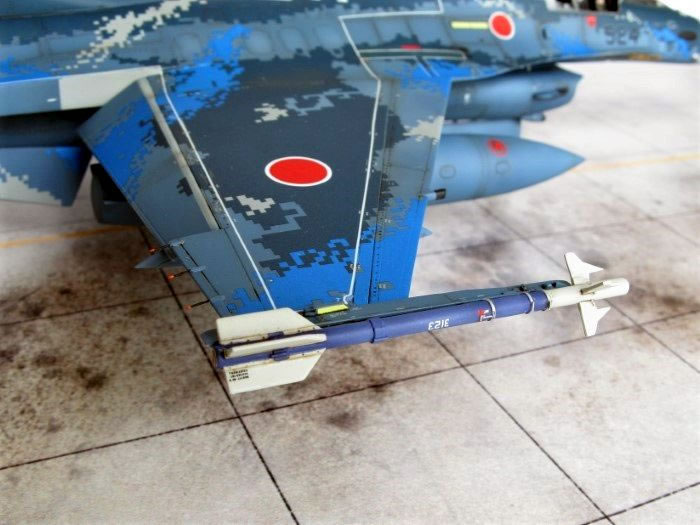
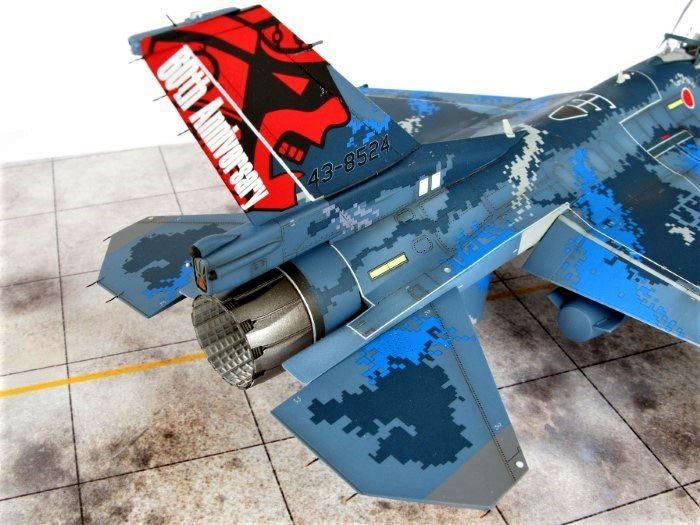
All other construction was straightforward – I had intended leaving the tail off until last to make applying the decals easier, but in the end decided it was less risky to attach before painting and deal with any gaps then. I removed the moulded in static discharge wicks and replaced these with the photo etch parts after all construction and painting was complete. These metal parts have the benefit of being more to scale and also able to recover their shape if accidently knocked, as I have discovered many times already.
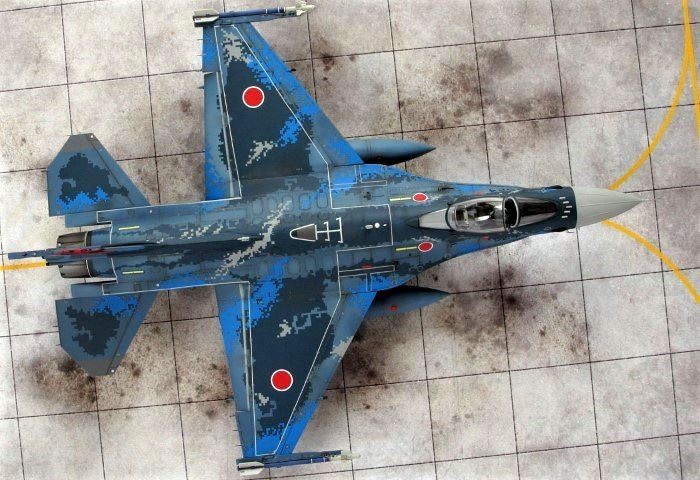
Painting was straightforward, basically one shade of blue – I preshaded as usual and also lightened the paint with white to provide some suggestion of faded panels in places. I followed the blue with a Humbrol gloss polyurethane coat.
The undercarriage and wheel bays had a rough oil wash applied to the Tamiya white primer base colour, followed by another overspray with white to give them a slightly worn look. Panel lines were also given an oil wash – Windsor and Newton Raw Umber and Burnt Sienna.
The most difficult part of the build was applying the decals – there are a huge number of large and small ones to apply and quite a lot of carrier film on the smaller stencils. I was impressed with the larger ‘digital’ pieces, the carrier film is generally quite small on these due to the thoughtful design.
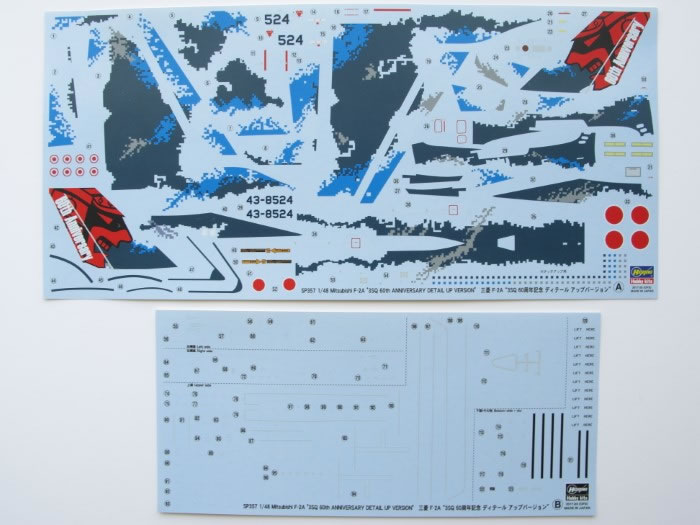
It took several sessions to get them applied – there are several decals to apply over ones already placed, so I sprayed an additional gloss coat in these areas.
Overall the decals went on well with a minimum of silvering – they did need some encouragement with Microset and Microsol to settle them into the extensive surface detail. I did have to overpaint one walkway decal – I had applied it slightly crooked and didn’t have any spare decals in the correct colour and width.
Final coat was my ‘go to’ matt finish, Wattyl Estapol Matt Polyurethane.
Overall a very enjoyable build – the result is a striking and unusually colourful addition to my collection. The kit is very well detailed, assembles relatively easily and the decals proved less problematic than I had expected.
Text and Images Copyright ©
2019 by Steve Pritchard
Page Created 16 December, 2019
Last Updated
16 December, 2019
Back to
HyperScale Main Page

|
 Home
| What's New |
Features |
Gallery |
Reviews |
Reference |
Forum |
Search
Home
| What's New |
Features |
Gallery |
Reviews |
Reference |
Forum |
Search