Kinetic 1/48 scale
F/A-18B Hornet
by Steve Pritchard
|
F/A-18B Hornet
|

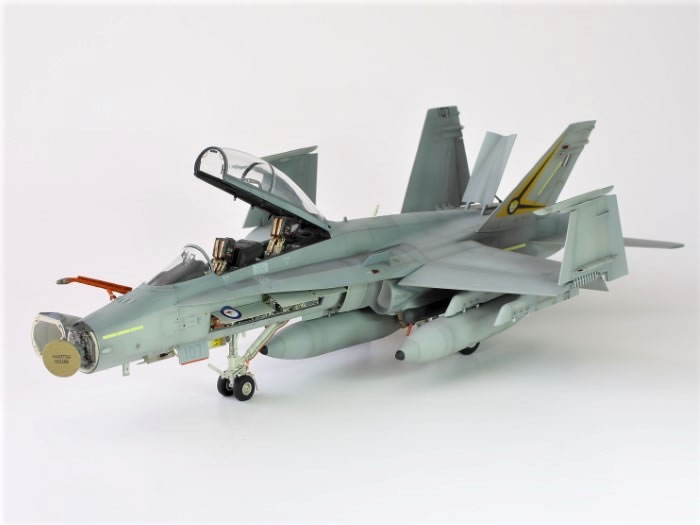
Kinetic 1/48 F/A-18A+/B/CF-188 (Kit number K48030) painted as aircraft A21-107 of 2 OCU RAAF
Aftermarket Accessories:
-
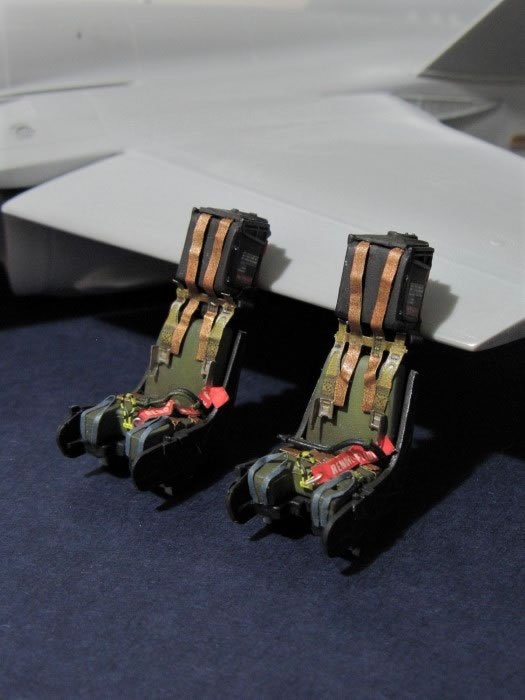
Eduard Big ED BIG49201, comprising Exterior set 48960, interior set49915, seatbelts set FE 917 and canopy mask set EX 604
-
Aires Exhaust Nozzles Closed. Item No.4702
-
Aires Hornet Radar Antenn.a Item No.4706
-
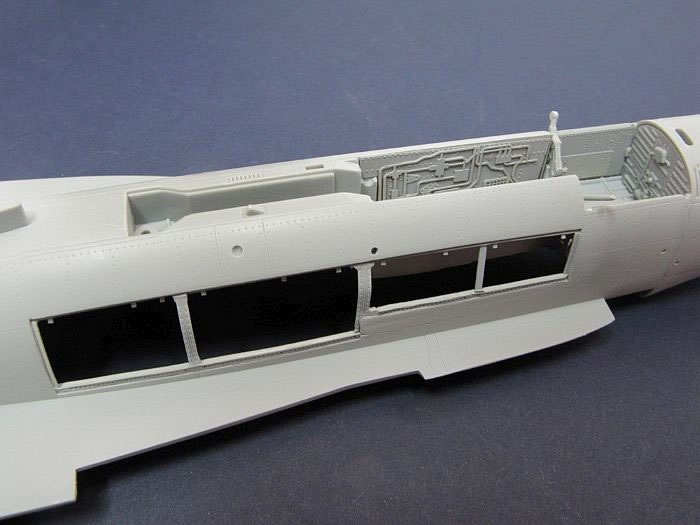
Aires Hornet Electronic Bay. Item No.4707
-
Novascale F/A-18B Hornets. RAAF Item No. N-48035
Paints Used:
Humbrol enamels 145 for the upper surface blue grey and 127 for the lower surfaces. Various other Humbrol enamels for details. Alclad shades steel, magnesium and jet exhaust for the exhaust nozzles and surrounding bare metal area.
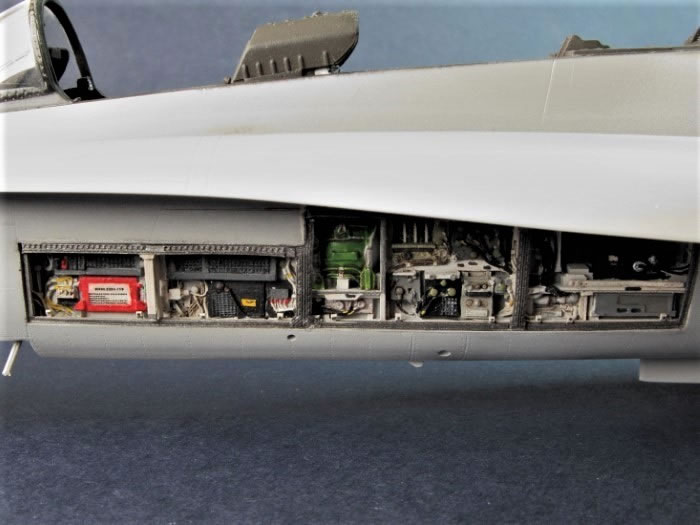
Assembly was complicated by the addition of the Aires electronic bay – because of the effort required to install the port side bay and the fragility of the photo etched parts I decided not to use the starboard bay. I thinned both the fuselage half and the resin bay part to enable what was a snug fit around the cockpit tub and undercarriage bay - in the end I think the effort was worth it. Hopefully the RAAF electronic bay looks something like this – my main reference was Danny Coremans and Nico Deboeck’s excellent book “Uncovering the Boeing F/A-A/B/C/D Hornet”, but the photos of the bays are of Canadian Hornets.
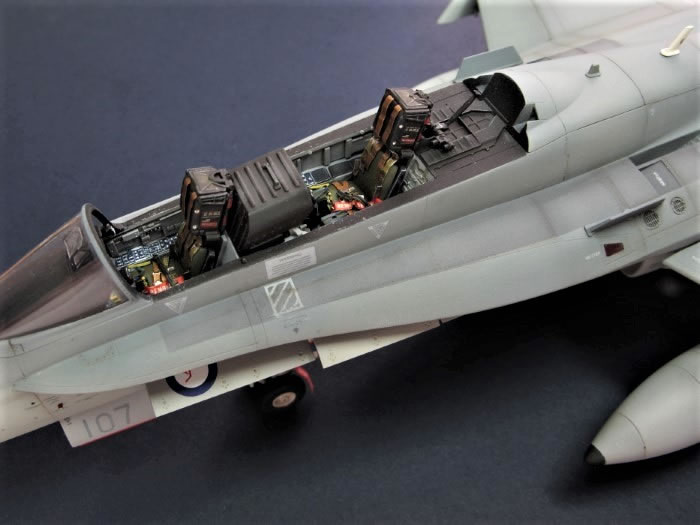
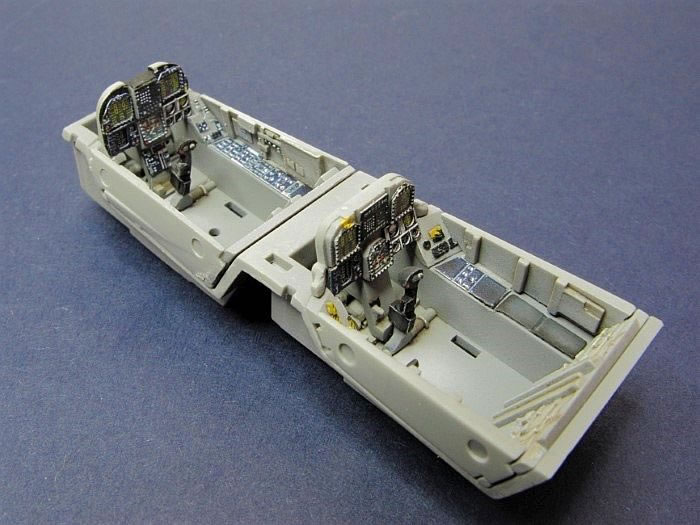
I added the Eduard cockpit display screen parts to add a bit of interest – I suppose they could be ‘on’ in the real aircraft without a crew present, perhaps when undergoing maintenance? I also added the cockpit photo etch for the side panels, but don’t think they really look better than the kit parts in this scale. After I had carefully sanded away the detail on the intake splitter plates, parts H35 and H36, and replaced these with the Eduard parts, I noticed that these lacked one column of holes. Oh well, too late to fix now and not too noticeable!
Overall, construction was straightforward – the only issues I had were in the complex nose joints, canopy windscreen attachment, and fixing the undercarriage doors which lack very positive location points. Careful sanding and dry fitting worked for the nose section and canopy, but the undercarriage doors remain a little fragile. I also altered the position of the outboard underwing pylons so that they sit more in line with the fuel tank pylons – just a millimetre or two.
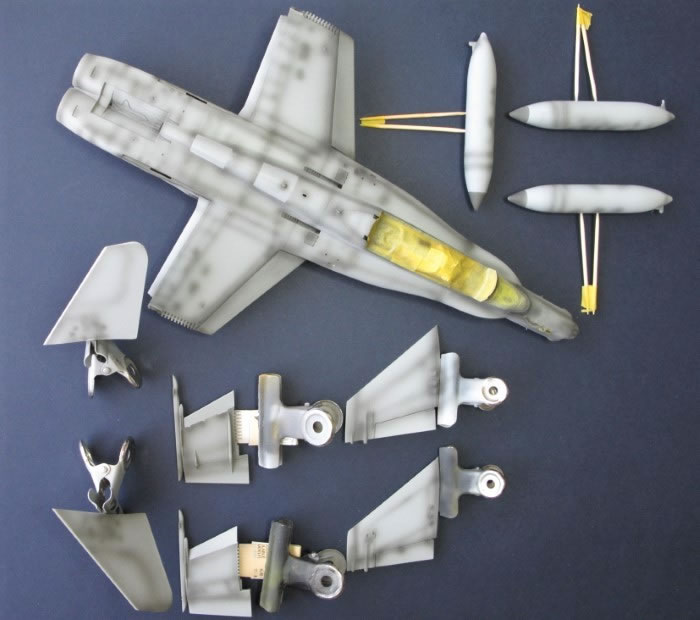
Initial painting was a preshading with Humbrol matt black enamel on panel lines followed by the light grey and blue grey. A little white was added to the base colours and sprayed on selected panels to give a slightly weathered appearance.
I wanted to model aircraft A21-107 as I had seen this aircraft when it was in Christchurch in 2010 for the Warbirds over Wanaka airshow. I used a combination of kit decals and those from the Novascale set to source the aircraft numbers. I used the Tiger’s head decal from the Novascale sheet but not the yellow and black chevron as these appeared to be a little smaller than on A21-107. I also had to carefully paint the yellow part of the tiger head to match the Humbrol yellow 24 used on the chevron.
Overall an enjoyable build of one of my favourite aircraft. The kit is quite complex with the various options - wing fold, flap position, weapon load etc, but generally straightforward in assembly. I would certainly build another – perhaps a very weathered Canadian one – after all, I have still have a starboard side electronic bay to use up.
Text and Images Copyright ©
2019 by Steve Pritchard
Page Created 10 September, 2019
Last Updated
10 September, 2019
Back to
HyperScale Main Page

|
Home
| What's New |
Features |
Gallery |
Reviews |
Reference |
Forum |
Search