Kawasaki Ki-45 Kai Tei Type 2 Two-Seat Fighter "Toryu"
Zoukei-Mura, 1/32 scale
S
u m m a r y |
| Catalogue Number: |
Zoukei-Mura Kit No. SWS13 - Kawasaki Ki-45 Kai Tei Type 2 Two-Seat Fighter "Toryu" |
| Scale: |
1/32 |
| Contents and Media: |
25 sprues in this package, with six of these being in clear plastic. Markings for two aircraft. |
| Price: |
Available Soon |
| Review Type: |
FirstLook |
| Advantages: |
Beautifully detailed cockpit gun areas and engine nacelles. |
| Disadvantages: |
|
| Recommendation: |
Everything about this release is quality, right down the instruction manual. You will need to have your wits about you with the manual due to the sheer amount of info given, but it really is quite something to study, and study it you really must. |
Reviewed by James Hatch

Eduard's 1/48 scale Fw 190 A-3 is available online from Squadron.com
The Kawasaki Ki-45 Toryu was a two-seat, twin-engine fighter used by the Imperial Japanese Army in World War II. The army gave it the designation "Type 2 Two-Seat Fighter"; the Allied reporting name was "Nick". In response to the rapid emergence in Europe of twin-engine heavy fighters such as the Messerschmitt Bf 110, the army ordered development of a twin-engine, two-seat fighter in 1937, and assigned the proposal by Kawasaki Shipbuilding the designation of Ki-38. This only went as far as a mock up, but by December of that year, the army ordered a working prototype as the Ki-45, which first flew in January 1939. Results from the test flights, however, did not meet the army's expectations. The Ki-45 did not enter service, but the army, insistent on having a working twin-engine fighter, ordered Kawasaki to continue development. Kawasaki responded by replacing the engines with the proven Nakajima Ha-25.
The Ki-45 was initially used as a long-range bomber escort. It was subsequently deployed in several theatres in the roles of interception, attack (anti-ground as well as anti-shipping) and fleet defence. Its greatest strength turned out to be as an anti-bomber interceptor, as was the case with the Bf 110 in Europe. In New Guinea, the IJAAF used the aircraft in an anti-ship role, where the Ki-45 was heavily armed with one 37 mm (1.46 in) and two 20 mm cannons and could carry two 250 kg (550 lb) bombs on hard points under the wings. Soon after entering service, the Ki-45 was assigned to home defence, and several were dispatched against the Doolittle raid, though they did not see action. The craft's heavy armament proved to be effective against the B-29 Superfortress raids which started in June 1944. Eventually the end aircraft were used effectively in aerial ramming attacks. They were also used in kamikaze attacks, such as the attack on USS Dickerson on 2 April 1945 off Okinawa. In 1945, forward and upward-firing guns showed some results with the commencement of night time bombing raids, but the lack of radar was a considerable handicap. By the spring of 1945, the advent of American carrier-based fighters and Iwo Jima-based P-51s and P-47s escorting B-29s over the skies of Japan brought the Ki-45's career to an end. 1,675 Ki-45s of all versions were produced during the war.
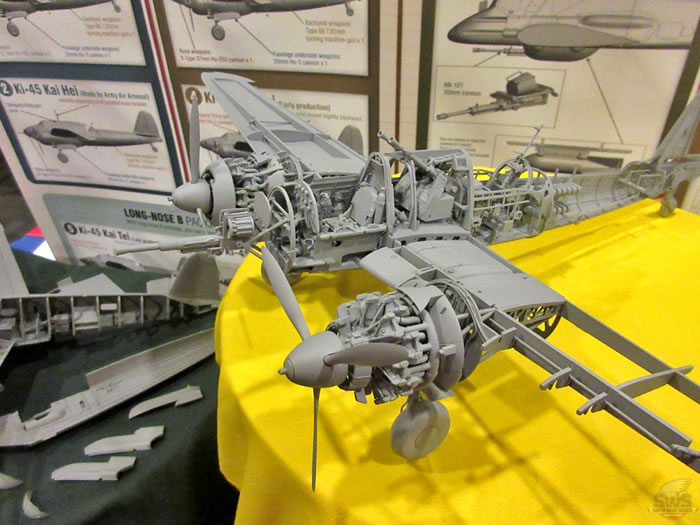
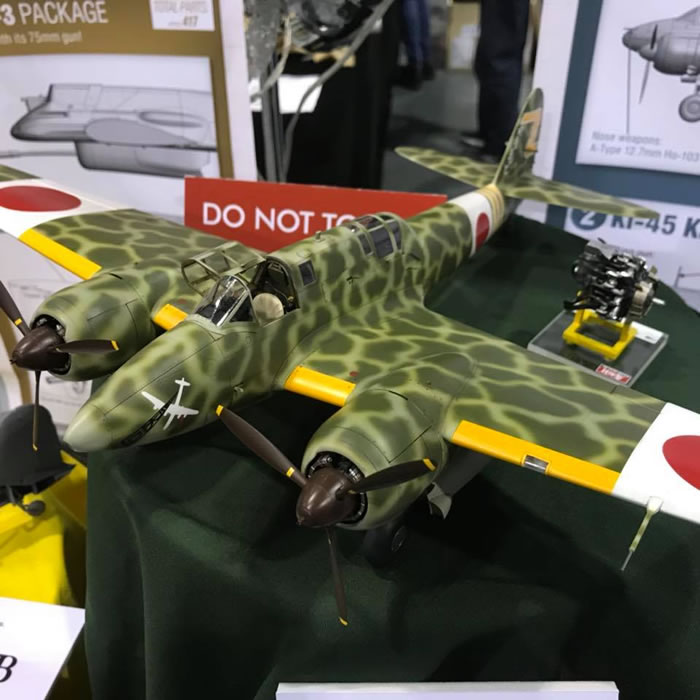
As I write, straight after Scale Model World 2018, this kit isn’t slated for general release until late December. The kit I have with me is a full production version, with the exception of the instruction manual which has been printed in-house at Zoukei-mura in order to fulfil their SMW pre-order commitment. I, of course, picked this kit up from their booth, at this show and began my article as soon as I got home. This project has taken around 4 ½ years from start to release, so let’s tuck in and see what we have.
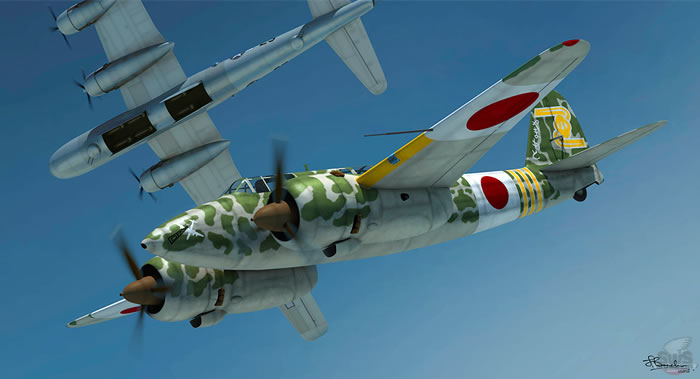
The Ki-45 Toryu is packed into a rather large and heavy box that has a hell of a lot of rigidity to it. This is because ZM supply a complete corrugates box with integral lid, and the product lid sits over the top of this. Zoukei-mura’s artworks are always very attractive and this one is no exception, depicting a Tai-Atari machine (Special Attack) flying underneath a B-29. These machines were stripped of defensive weaponry and used to ram bomber formations in a form of Kamikaze attack. So yes….’special’ attack! Images on the side of the super-glossy product lid depict the internal details of the Ki-45, and they sure look impressive. Lifting the tabbed lid reveals a box that’s crammed full of styrene.
There are 25 sprues in this package, with six of these being in clear plastic. Of the latter, four of those are frosted clear duplicates of main airframe sprues, with just one being crystal clear for the canopy parts, and another containing windows and airframe lights etc . The rest are moulded in light grey styrene. You could almost build an entire external airframe from the left-over parts. It’d certainly be useful to acquire the remaining sprues and build another, if it was cost efficient enough to do so. All sprues are individually packaged too…even where multiples exist. This is the standard that we should expect from all manufacturers.
As this kit is just on the cusp of full release, there was no instruction manual in the package, and this was given to me at the show, along with the decals and vinyl mask set. The instructions themselves aren’t final standard, and are printed in-house, but are still every bit as good as the finals. There are no photo-etch parts in this kit, as ZM like to produce the detail using just standard kit parts. I don’t doubt that their own range of PE will eventually be released for those who like to adorn and detail their models further.
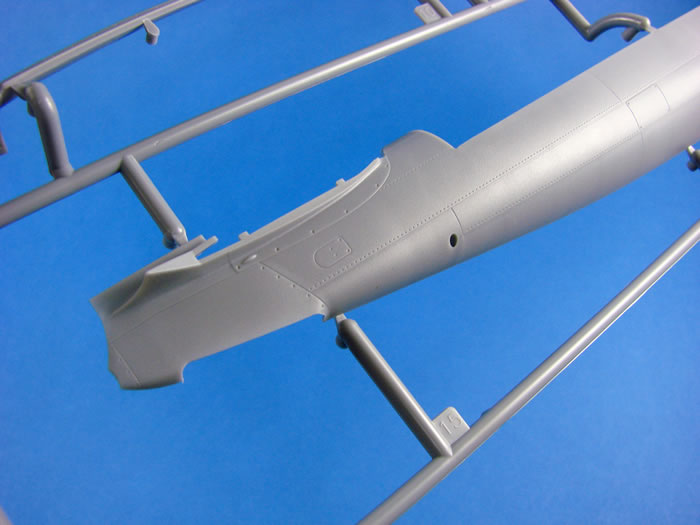
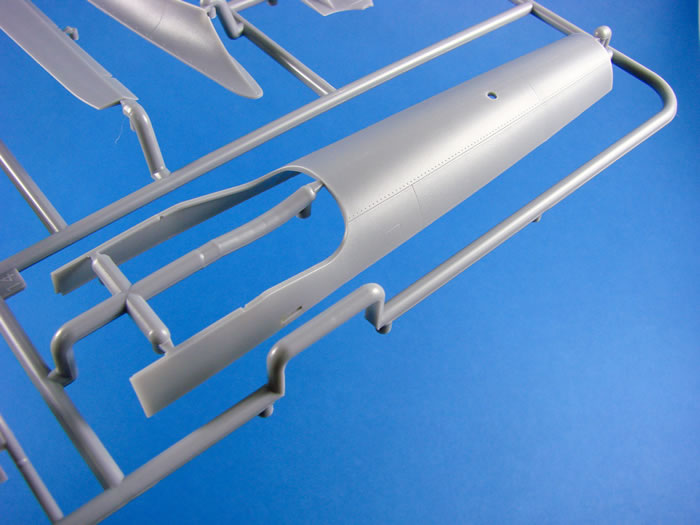
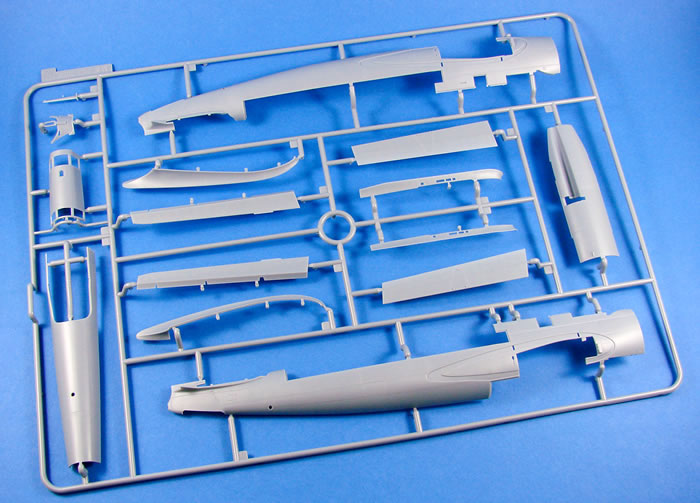
Sprue A (1 x grey, 1 x clear)
Here we have the fuselage sprue, with this particular unit broken down into port and starboard sides, with a separate forward belly and upper spine. The nose is also separate, but on a different sprue. Zoukei-mura has also engineered this with separate wing fairings that recess into the fuselage sides. The fairings themselves are provided as upper and lower parts. Externally, the fuselage isn’t resplendent in rivets, but it does have key lines of them following the nicely recessed panel lines, with rivets and fasteners around areas such as the tailplane fairing and access ports. There are even rivet lines in the area which will be encapsulated by the wing root fairings and wing. Internally, all of the formers and stringers are represented, as well as some avionics and wiring looms. There are a small number of ejector pin marks inside, but they do look like they will be obscured by the various assemblies and equipment. The internal structures are equally as good in all of the various fuselage sections, producing a fully detailed interior.
The area between the pilot and gunner is also a separate part, with holes into which the various panes of clear plastic will install. Note also a separate instrument coaming, removing the need to erase tricky seam lines in this area.
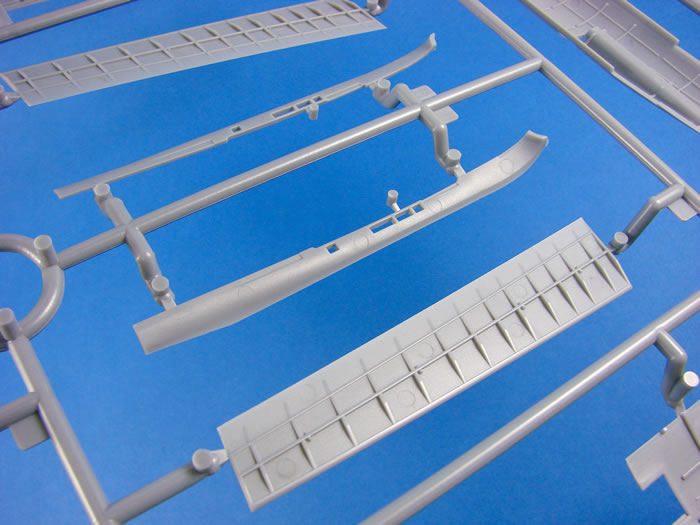
Also on this sprue are the aerial mast, landing flaps with internal structural details, and single-piece ailerons, with superbly thin trailing edges.
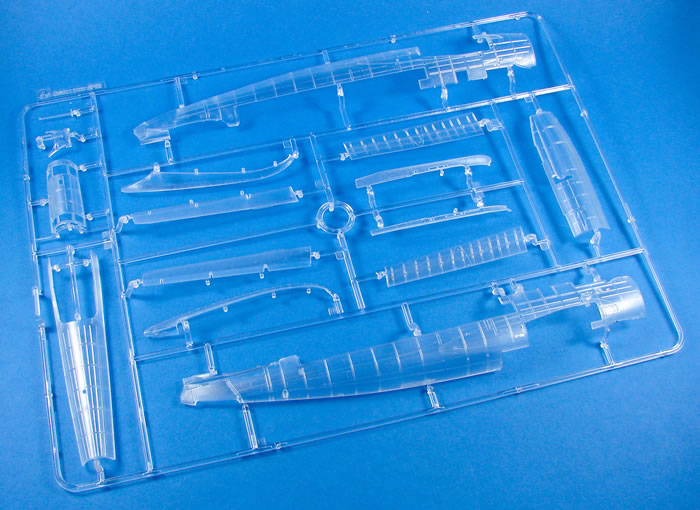
This sprue has also been supplied in clear styrene, should you wish to use such parts to partially display the interior.
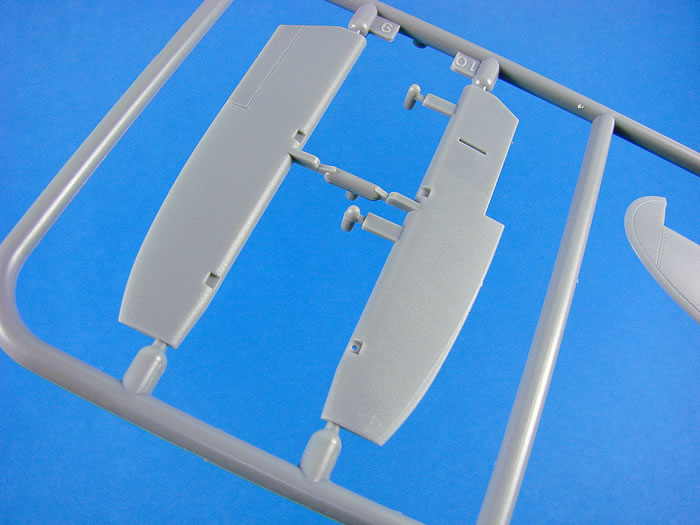
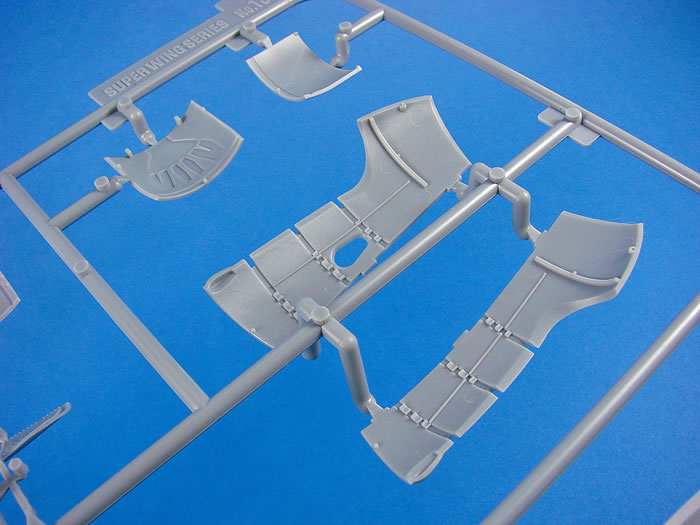
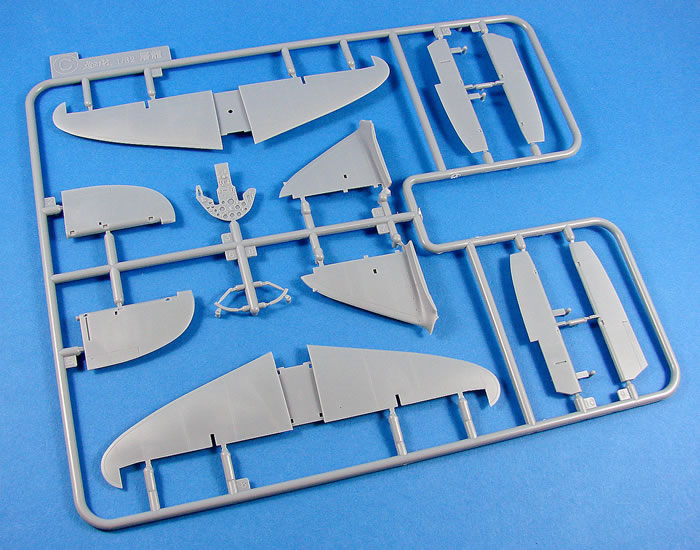
Sprue B (1 x grey, 1 x clear)
As with the previous sprue, one of these is supplied in clear as well as grey. This is where we get to see the wings. These are moulded as conventional upper and lower panels, minus the forward engine cowl fairing and undercarriage nacelles.
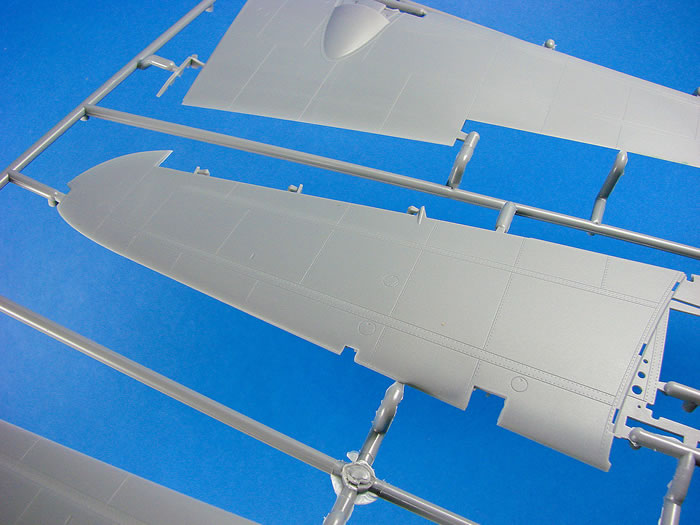
Landing flaps and ailerons are also separate and were seen on the previous sprue. Note again how the selected rivet lines chase the finely engraved panel lines only. If you want to make a weathered and beaten up example, you may consider adding extra rivet lines that you can use as points of paint chipping etc. Very nicely represented are the raised rear engine cowl fairings. As with the landing flaps themselves, the upper wing panels have the interior constructional detail moulded within them.
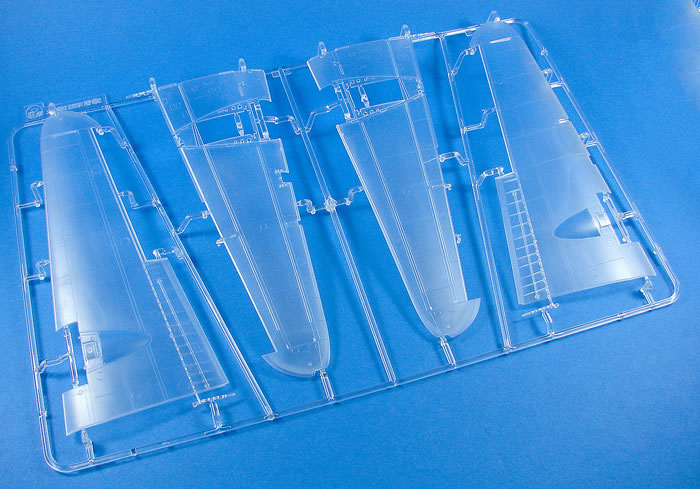
Leading edge lights etc. are to be fitted separately, hence the cutaways in this area.
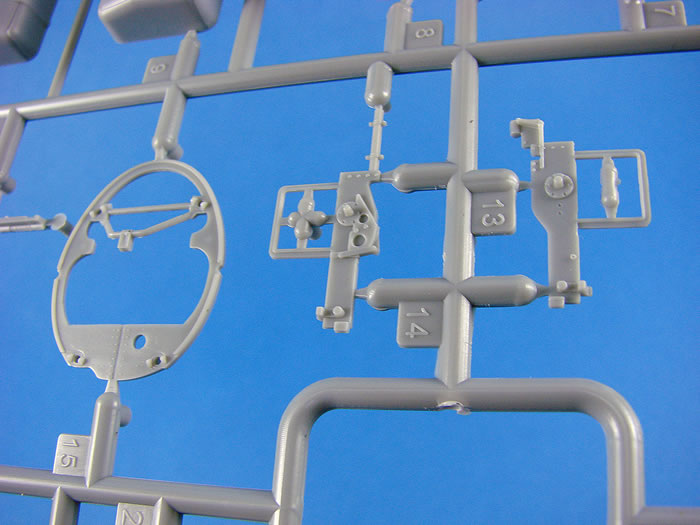
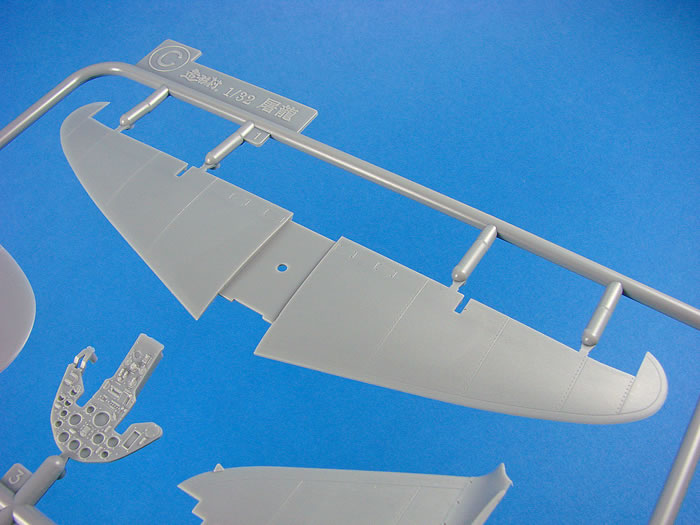
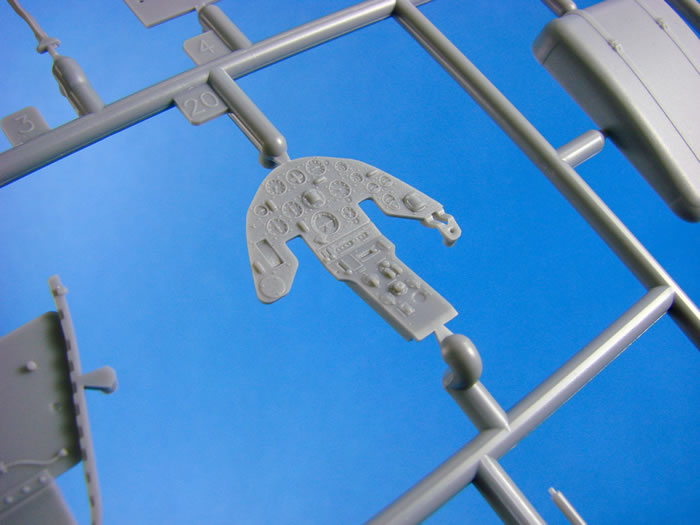
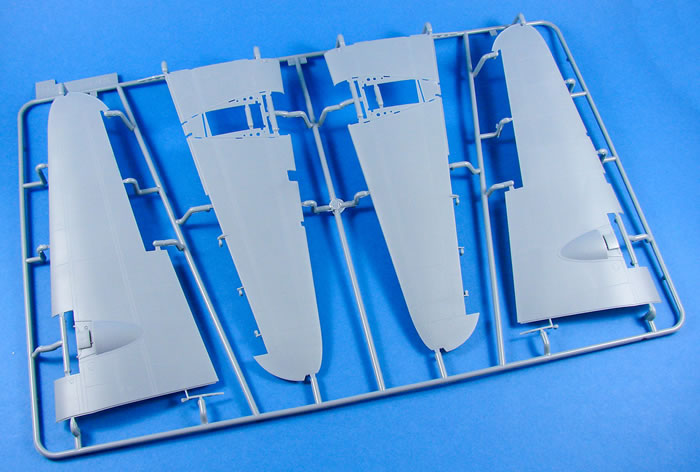
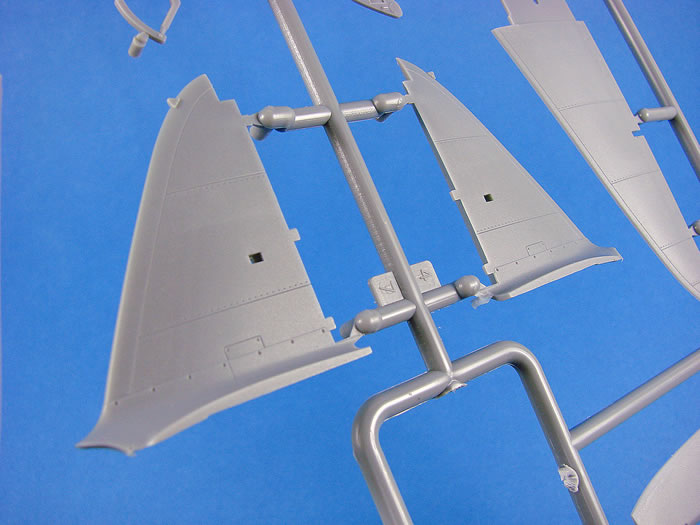
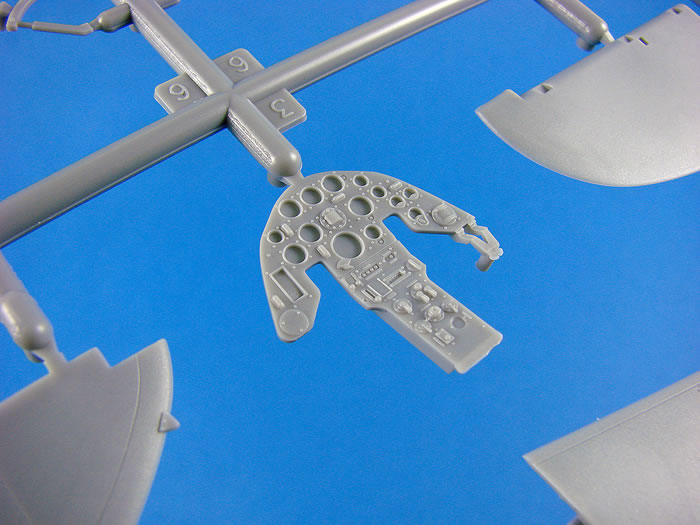
Sprue C (1 x grey, 1 x clear)
Proving that the whole exterior airframe can more or less be built twice, this next key sprue is also provided in both grey and clear styrene. Note that the tailplane is moulded full-span and the lower panel is recessed so it fits neatly into the tailplane fairing on the fuselage. You will also notice that the upper panel is recessed. This is because the fin is moulded separately and contains part of the upper fairing, which again sits into the tailplane recess. Lovely engineering. The elevators are also to be found here, and are moulded as upper and lower halves, which is unusual seeing as the ailerons were single-piece units. You will also find the rudder and its actuators on this sprue.

There are a number of options when it comes to the instrument panel. The one on this sprue is for a panel moulded with blank, recessed instrument faces. A decal is supplied for this, and it does look very good, and indeed much better than those that ZM used to provide with their kits. For this to work effectively though, I would look at punching out the dials and sitting them individually in the recesses.
If you flip the sprue over, you’ll note that the tailplane parts actually have real aircraft constructional elements within them, which are designed to be seen when you use the clear sprue options.
Ideally, you should try to paint those to make the appearance more realistic.
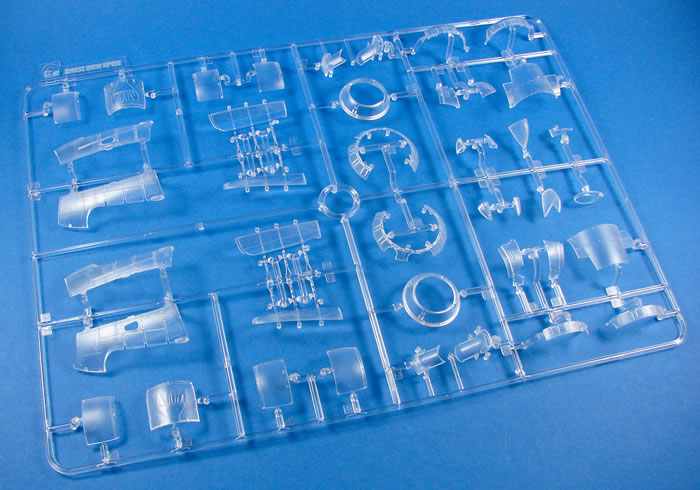
Sprue D
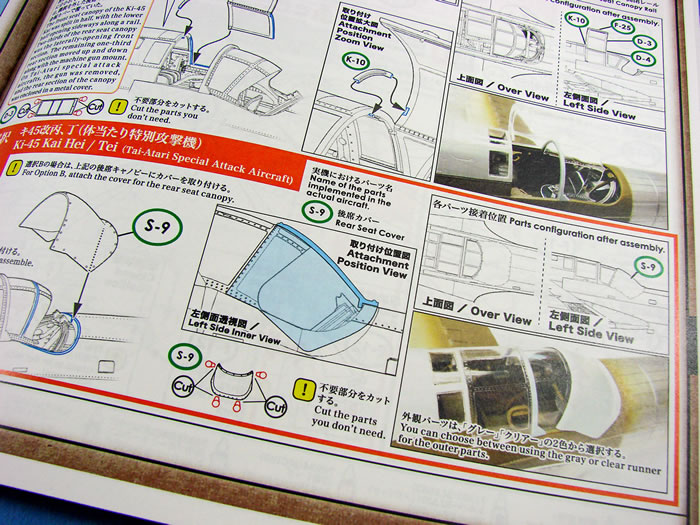
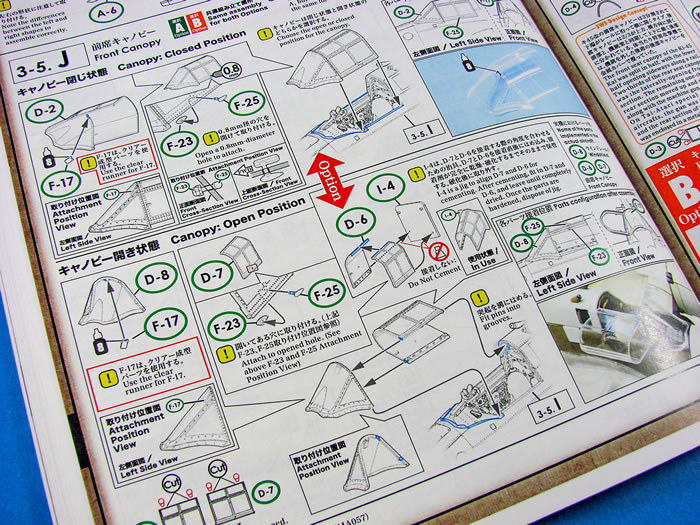
This is one of two totally transparent sprues in the kit, containing parts for the canopy. ZM has provided an option for both open and closed canopies for both crew positions. This means the forward windscreen and hood is moulded as a single piece for the closed option, and likewise the rear canopy is provided as a single, closed part. If you wish to pose them open, that rear canopy is moulded as a single piece again, but with the canopy folded sideways.
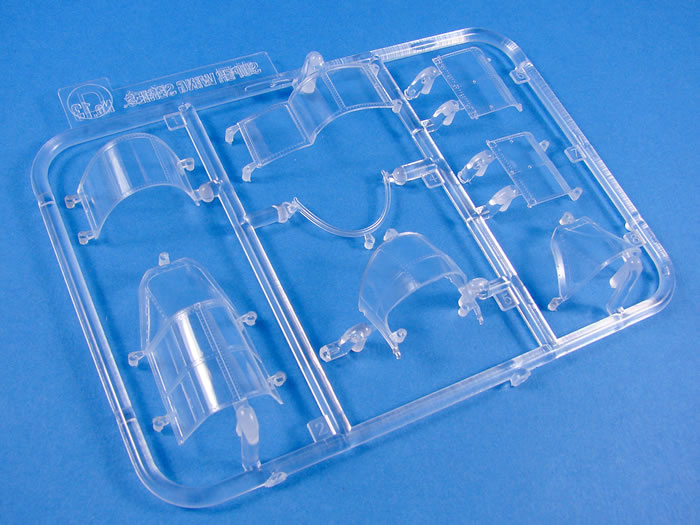
The pilot’s hood is provided as two parts which are assembled on a jig to get the correct folded angle before you attach to the fuselage. Another very nice little touch. Canopy frame lines are well-defined and should be very easy to mask up to with the vinyl mask set (although I’m a bigger fan of tape masks).
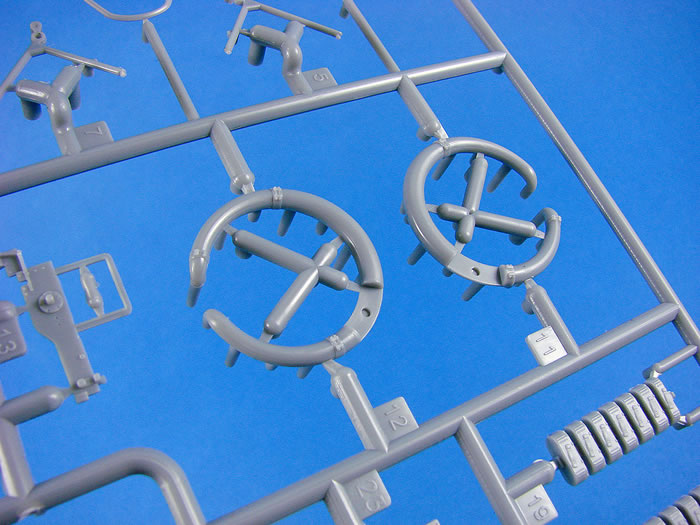
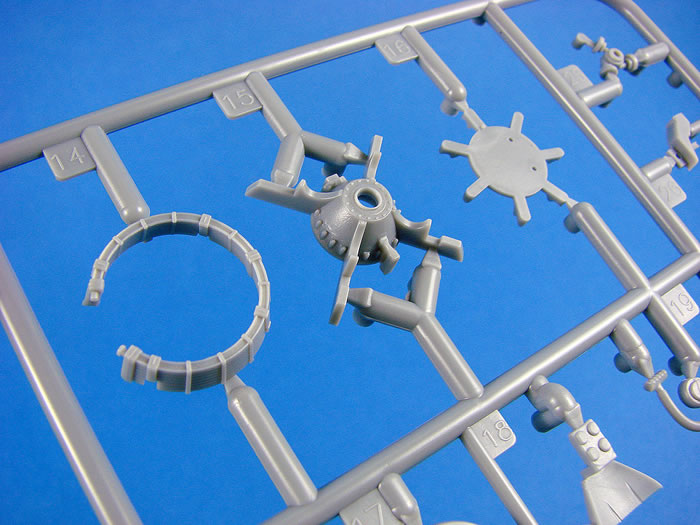
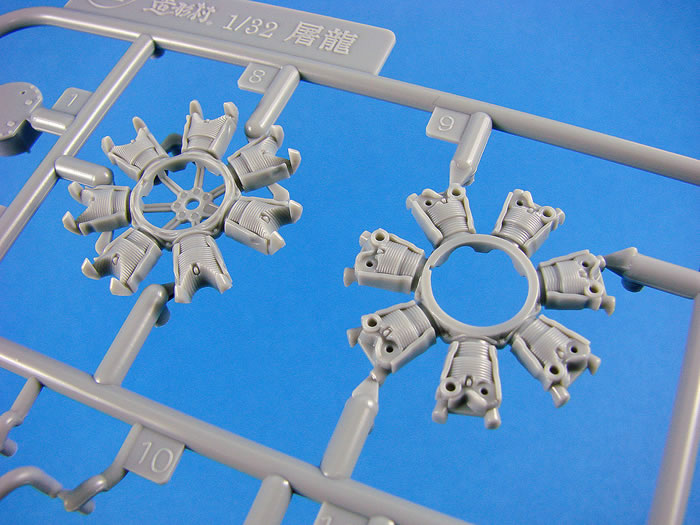
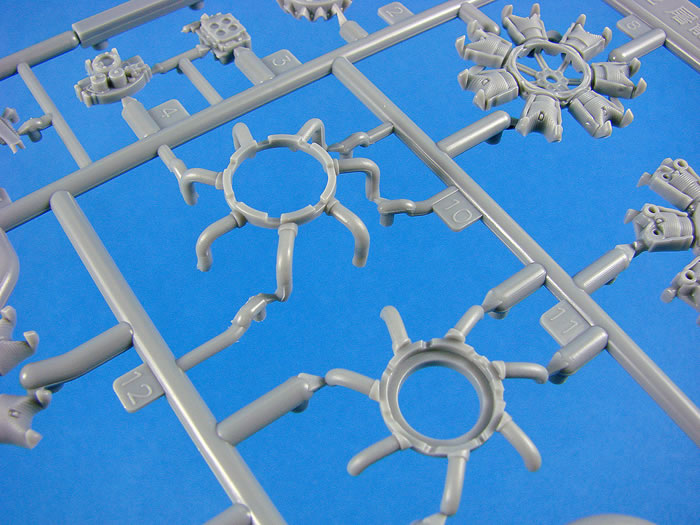
Sprue E (x2)
E is for ‘engine’, and here we have everything you need to build two complete Mitsubishi Ha-102 14-cylinder radial engines, minus their exhaust systems. I’ll explain that rationale later. These really are amazingly detailed, right down to the crankcases and cylinders containing the pistons in various states of compression. You can’t see any of this when assembled, of course, and it is a bit of a gimmick, but impressive nonetheless. Details are filigree in execution with superbly fine cooling fins on the cylinders, bolt head details on the reduction housing and the textures applied to the annular radiator parts. Even the prop shaft is keyed, so you can pose the model with the prop removed.
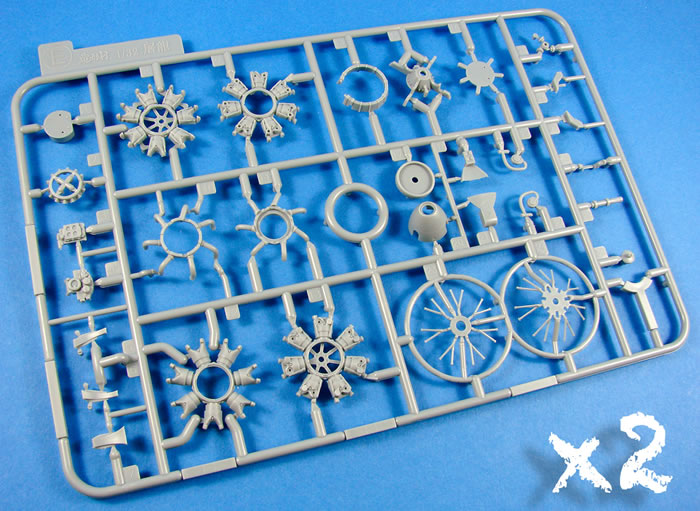
Auxiliary details are also perfectly represented, such as the magneto, turbine housing, carburettor, and attenuator etc. The only thing you will really need to do is to add the ignition wires, and you should have a very authentic replica of this engine.
As is now de rigueur with ZM kits, the engine sprue has a neat little trick up its sleeve. Parts are moulded within the sprue parts themselves, that when cleaned up and assembled, will create a rather nice display stand for the engines. These will be very useful if you wanted to display an engine next to the aircraft instead of installed. In the back of the instruction manual, there is a price list given (in Yen) for specific sprues, so you could always purchase another, should you wish to build a third engine and display that instead of sacrificing an airframe unit.
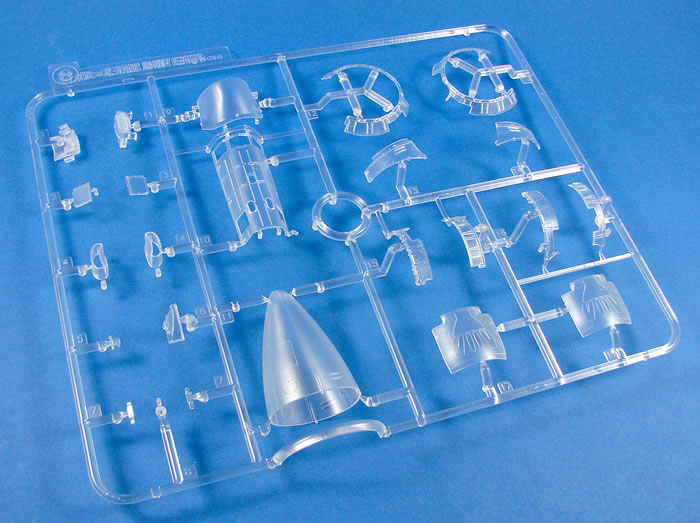
Sprue F (1 x grey, 1 x clear)
I’m not sure why there is a grey sprue included here, as well as this clear one, as this contains such things as windows for the upper fuselage between the pilot and gunner, as well as wingtip lights, airframe lights, wing leading edge lenses etc. Unusually the pitot is on here too!
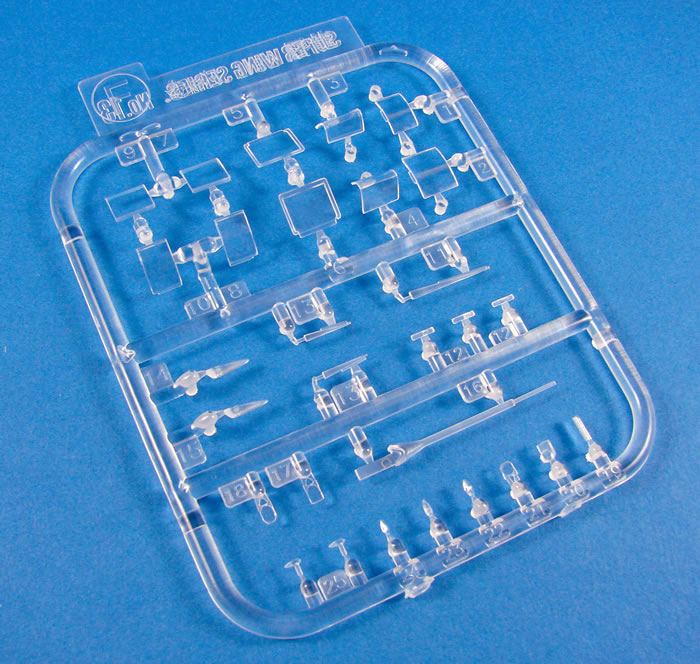
Whatever the logic, the parts are crystal clear, as with the main canopy set, and superbly moulded
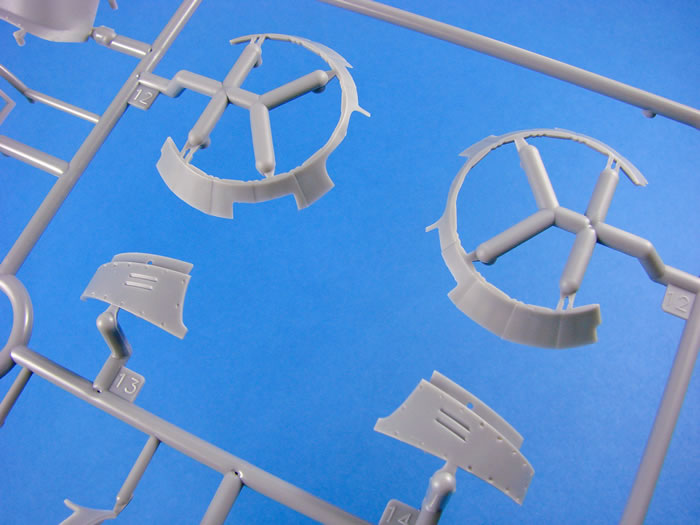
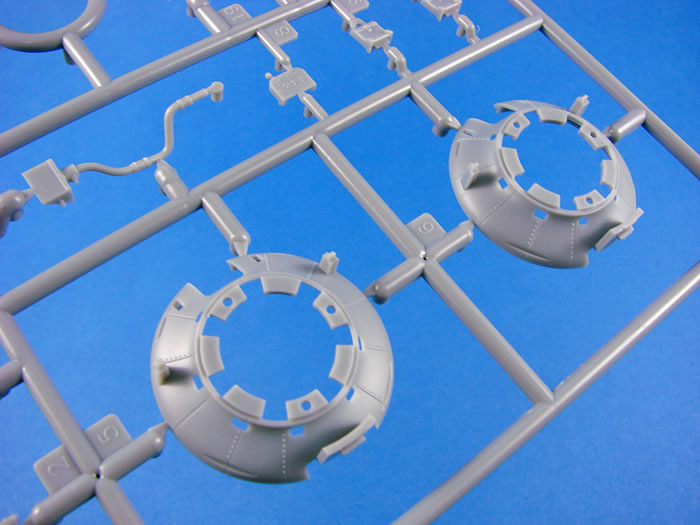
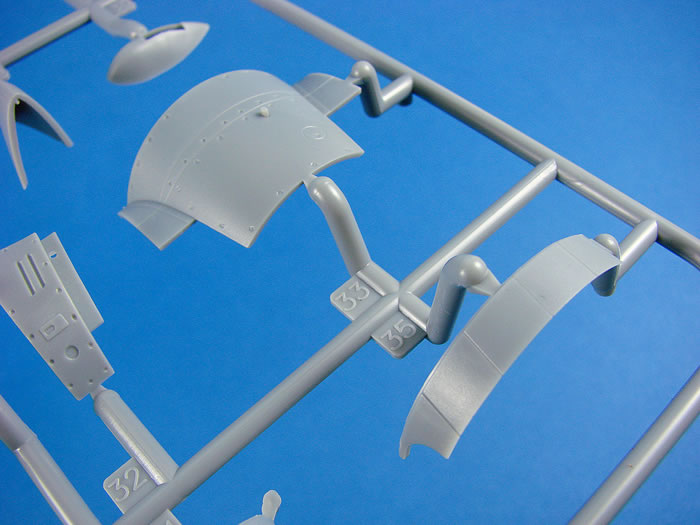
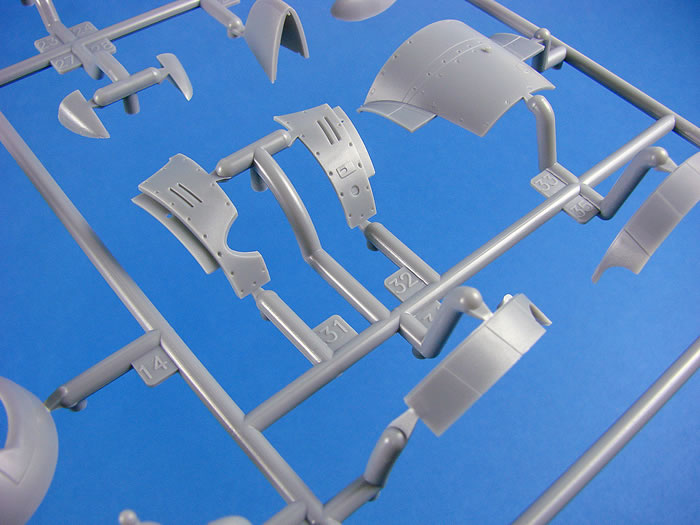
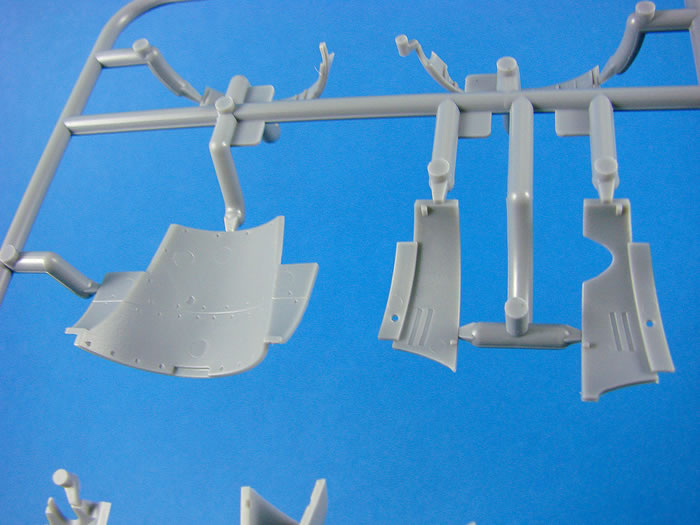
Sprue G (1 x grey, 1 x clear)
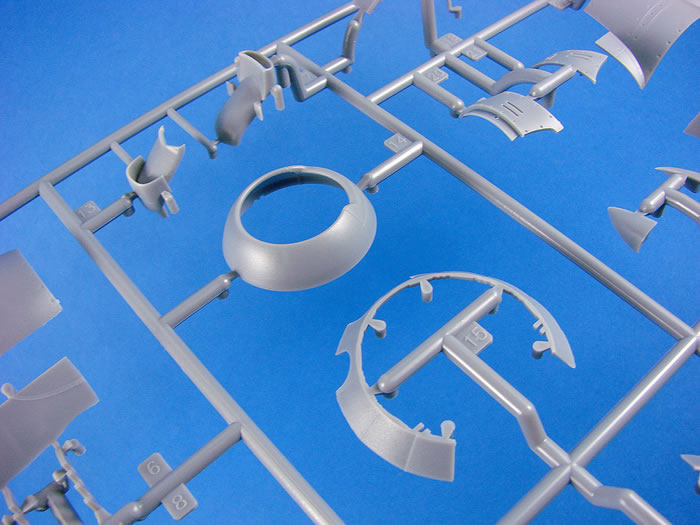
Another large sprue for which an identical clear alternative is supplied. The main players here are the engine nacelle halves and the forward engine cowl ring, cowl panels, and engine – wing fairings. You’ll also note the main gear doors which are moulded with inner nacelle structural elements attached. This will create a rock-solid gear door to nacelle joint. Detail on the various cowl and fairing panels is excellent, with nice louvre details (although not open), panel line, fastener and rivet details.
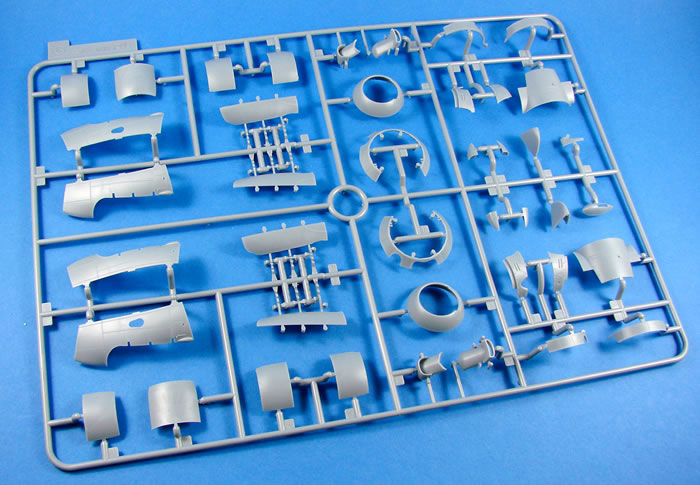
There are some differences in nacelle assembly, depending on which machine you build, and these tend to centre around the intake areas and engine mounting housings which are moulded on other sprues. However, what you will find here are the options for the Tai-Atari open and closed cowl flaps and the oil cooler for the same version.
Internally, the structural items have details that correspond to their construction, as per the fuselage interior.
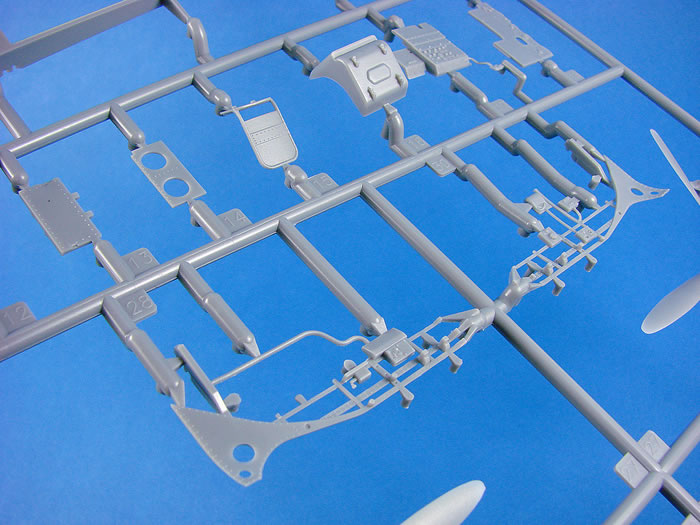
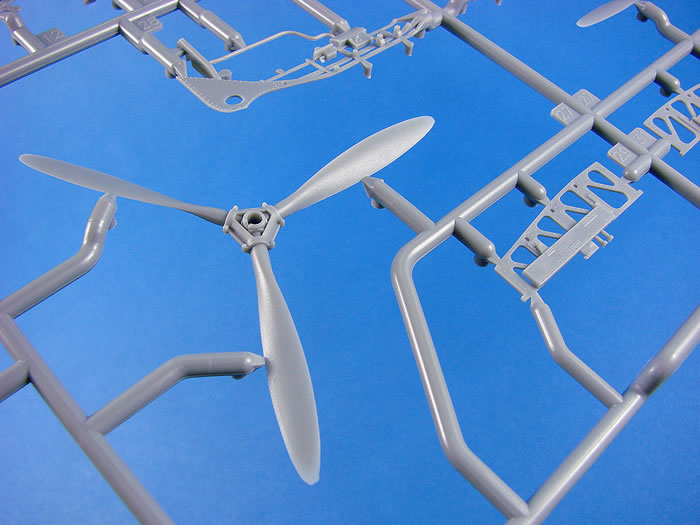
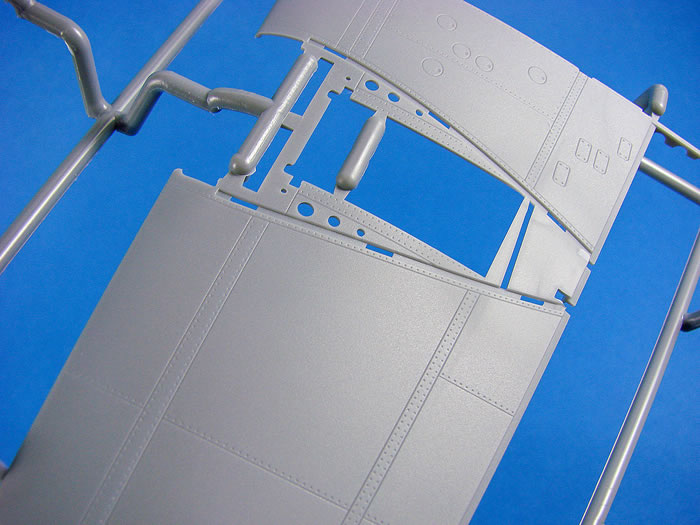
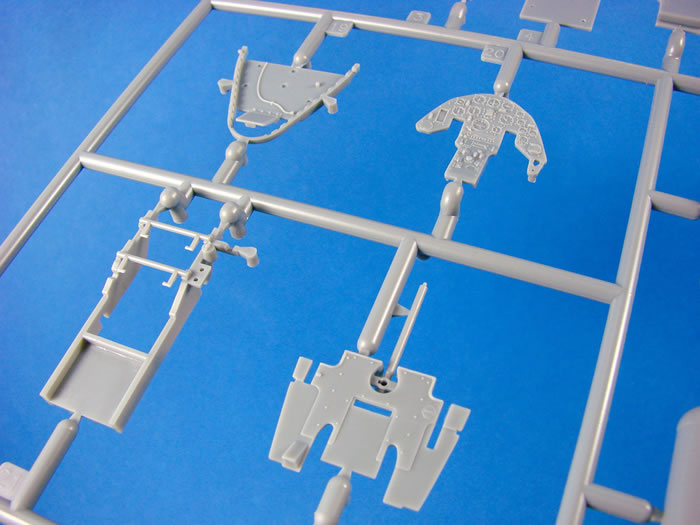
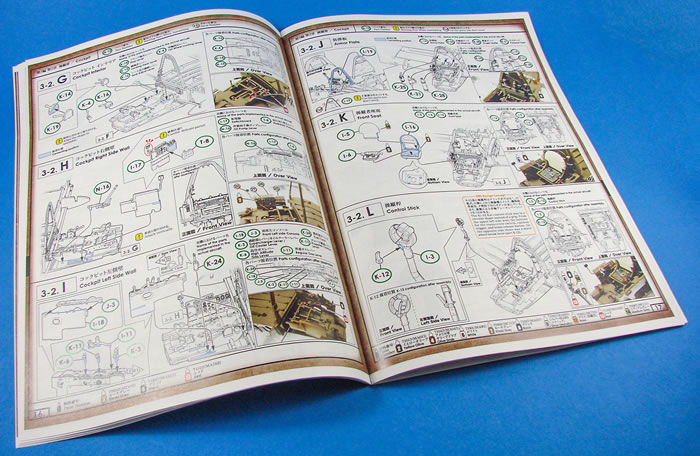
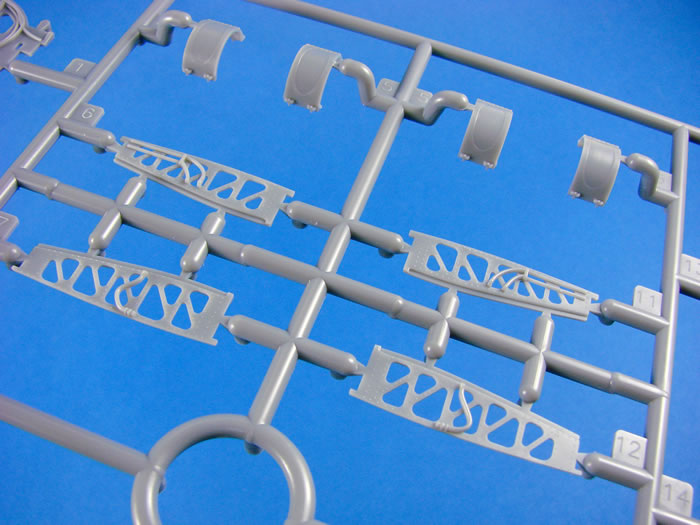
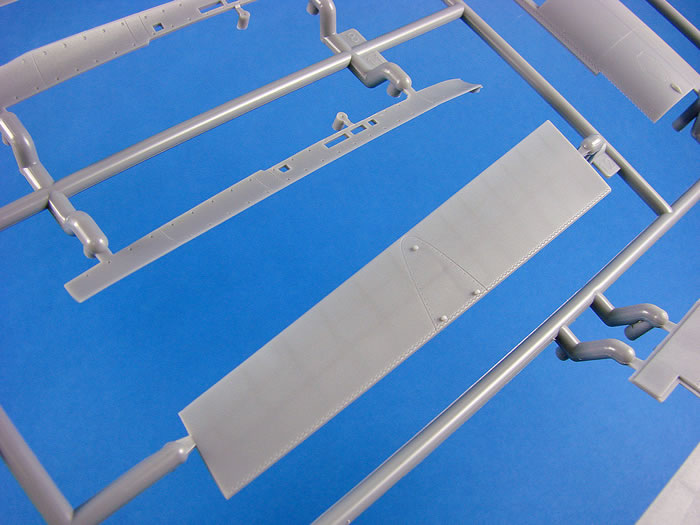
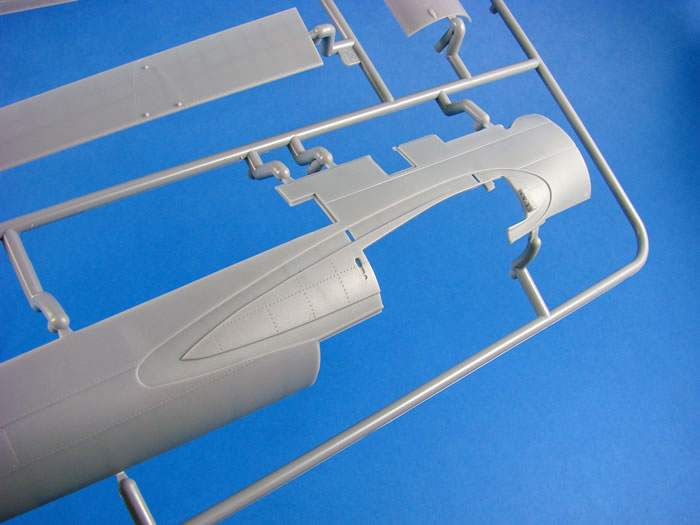
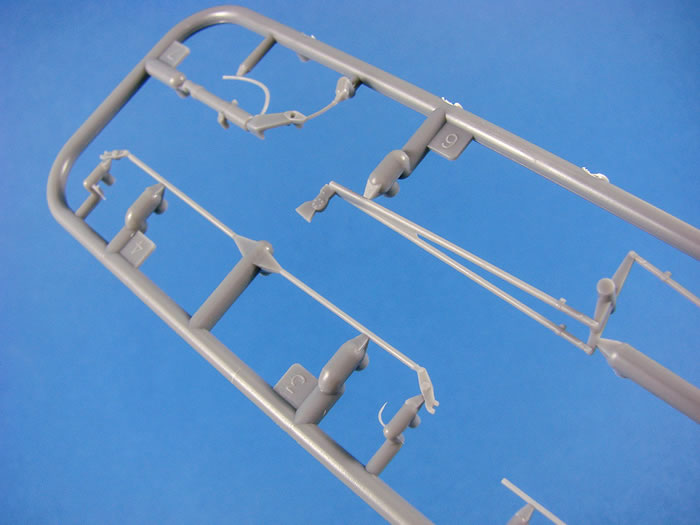
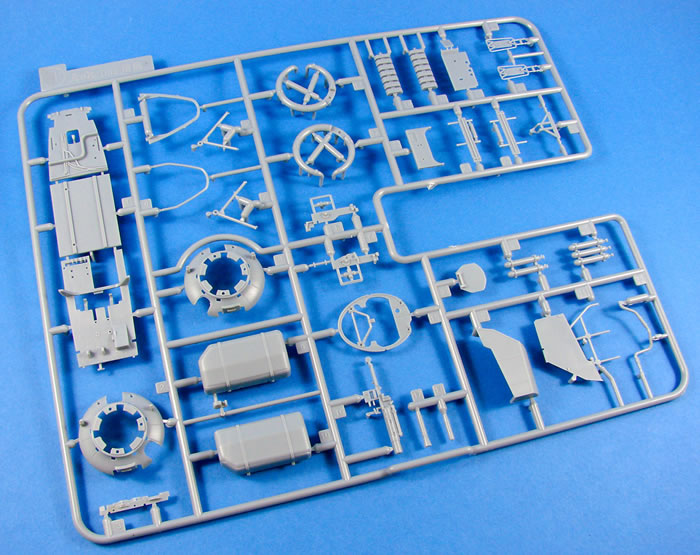
Sprue I
You get a sense of the size of this model when you see the main wing spar which is almost full span. This isn’t really typical of the real wing interior as it doesn’t have much in the way of ribs etc. and is only representative. However, it does provide a solid base for the wing assembly, and also to fit the inboard wing fuel tanks. The centre section though, represents the area between crew stations, and is raised above the regular floor so a fuel tank can be installed within. With the cockpit floor in place, you’ll only be able to see that tank through the wing rib structures which will sit either side of the tank. These will be glimpsed through the nacelles.
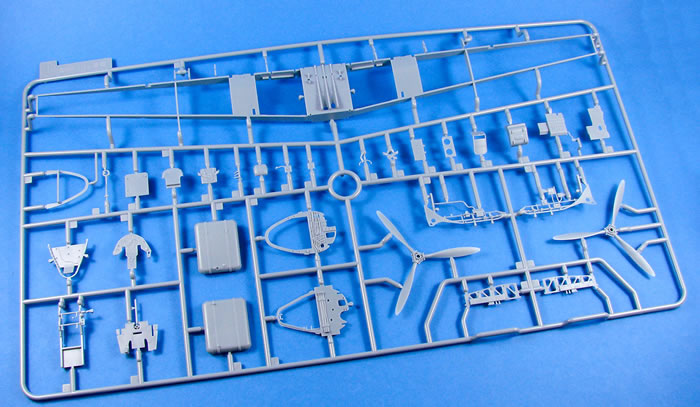
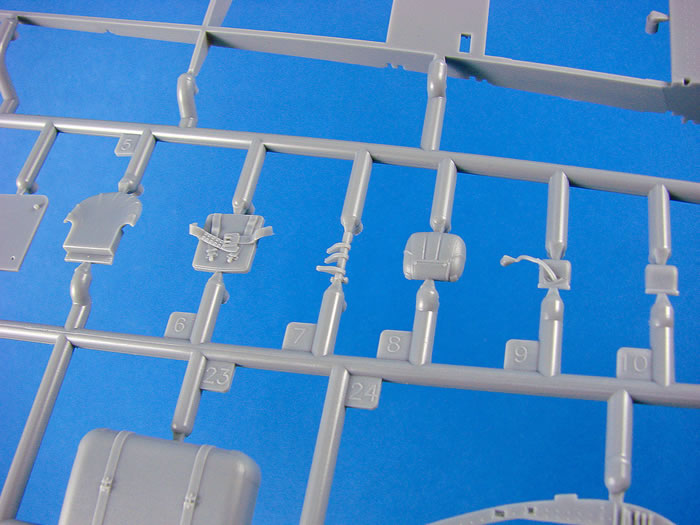
We now also start to get an idea about how the cockpit will be fitted out, and the detail involved. As well as bulkheads with plumbing/wiring details, we have avionics units, console units, gas levers, multipart pilot seat with a superbly detailed and moulded lap strap, armour plate, gunner seat with separately moulded lap strap, control stick and spade grip, forward cockpit floor, floor mounting frame, side wall frames with wiring and avionics units, and both propellers with integral hubs. Hey, we’ve nowhere near finished with cockpit detail either, as there’s more on another sprue! You’ll also note that another instrument panel option is provided here too, and this time as a unit with moulded instrument detail. This, for me, is my least favourite option as I’d rather go for the version with blank instruments as it looks far more 3D in appearance.
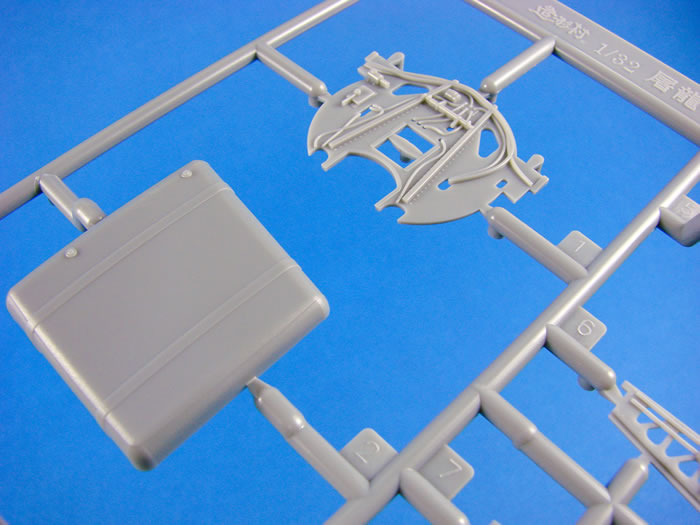
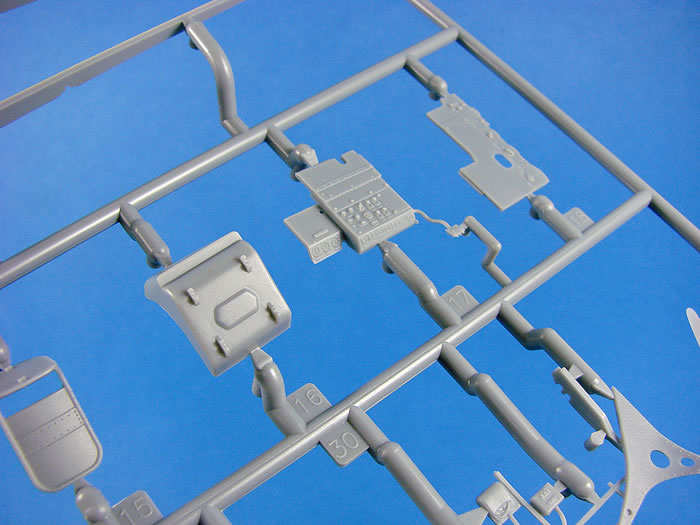
Sprue J
The main cockpit floor is moulded here, and it’s upon here that the centre wing fuel tank is mounted, and both cockpits are constructed. Here you can see some nice raised riveting and more plumbing too. This should look great when weathered and washed. Engine – nacelle mounting housings are also found here, although these are specifically for the Tai-Atari machine and not suitable for Late Production due to the cut-out shapes for the oil cooler etc. Also note cockpit side console part in this photo. The exhaust manifolds for the Tai-Atari are also moulded here.
Unfortunately, the instructions don’t denote parts that aren’t scheduled for use with this release, and no matter how hard I look, I can’t find this two-part fuel tank installed anywhere. There will be future versions of this kit available eventually, so I suppose these will be for those. Not all optional parts on this sprue are for the suicide machine. Along with parts from Sprue K, parts here are included to build the Ho-203 37mm nose cannon pack. Nice use of slide-moulding has been incorporated so produce hollow muzzle and muzzle socket.
Other parts on this sprue include the empty cartridge collection box, oxygen tanks, ammunition magazines, radio mounting frames, magazine racks, bulkheads, cannon base, etc.
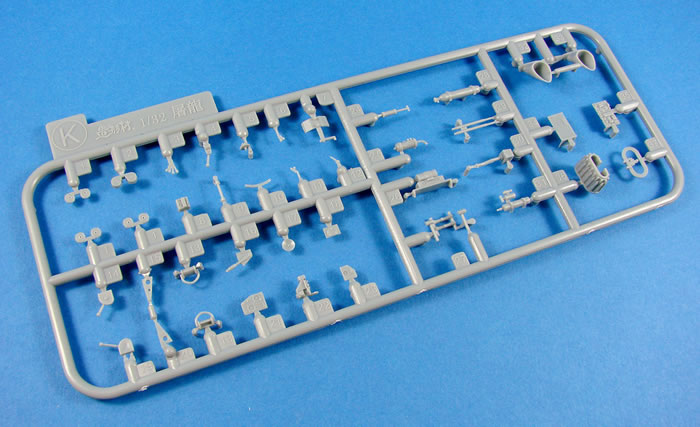
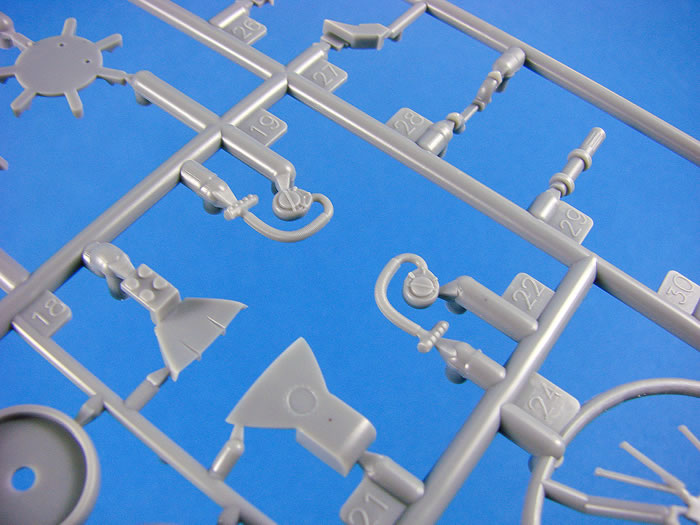
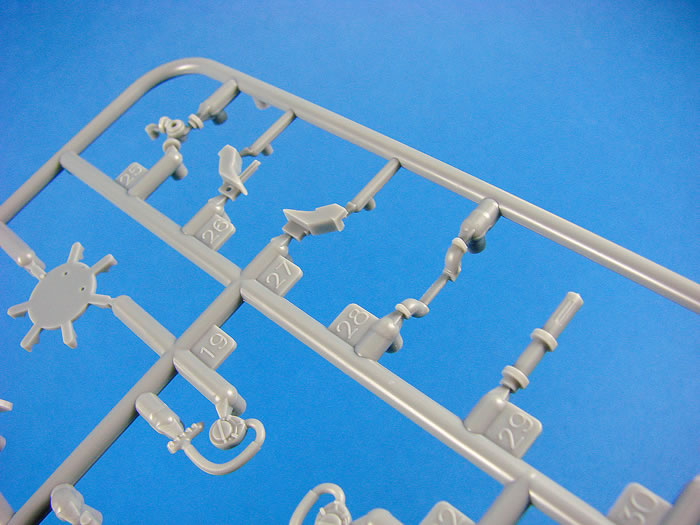
Sprue K
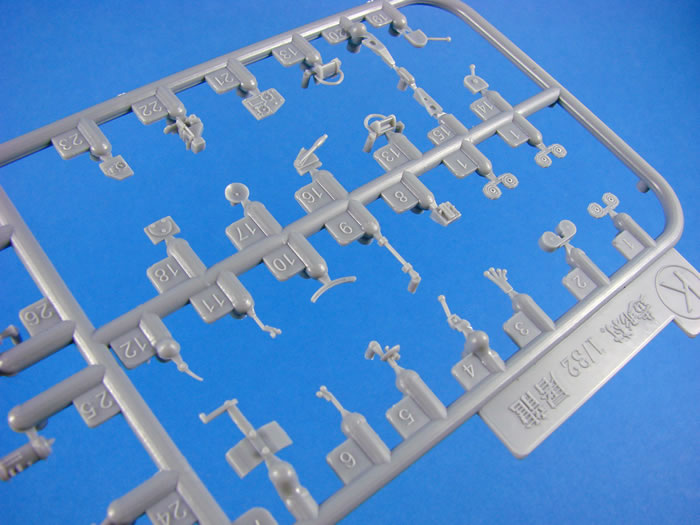
This small sprue contains detail parts such as rudder pedals and rudder pedal bar, flap lever, landing gear lever, seat adjustment lever, tailwheel locking lever, console levers, oil reservoir, oxygen bottle, gas pressure tank, Type 99-Hi-2 radio, fuel gauge toggle switch, auxiliary instrument panel, plus more parts for the nose cannon pack.
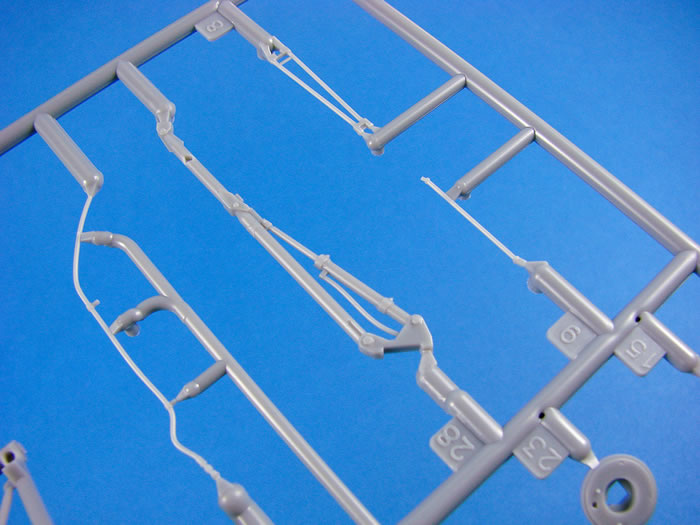
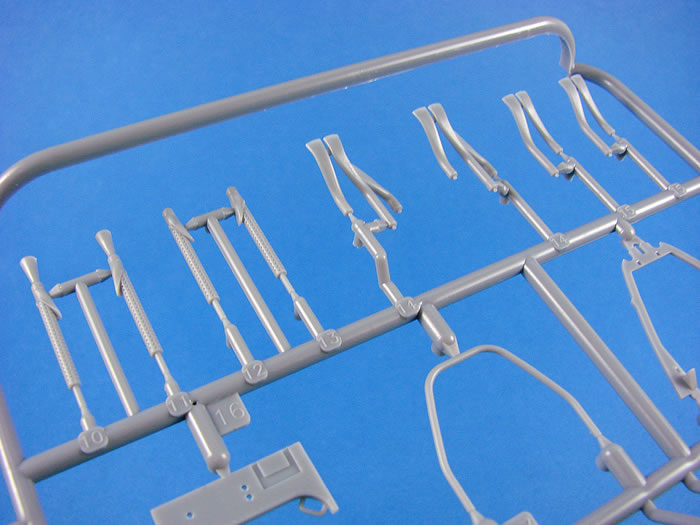
Sprue L
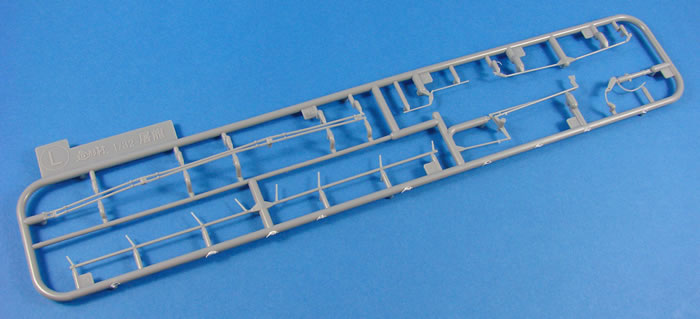
You’ll need to be real careful with this sprue as the components on it are pretty fragile. Here we have linkage rods for things such as the rudder and elevator. These are very finely moulded and the biggest job here is to remove the connection points as the seams are negligible.
Sprue M
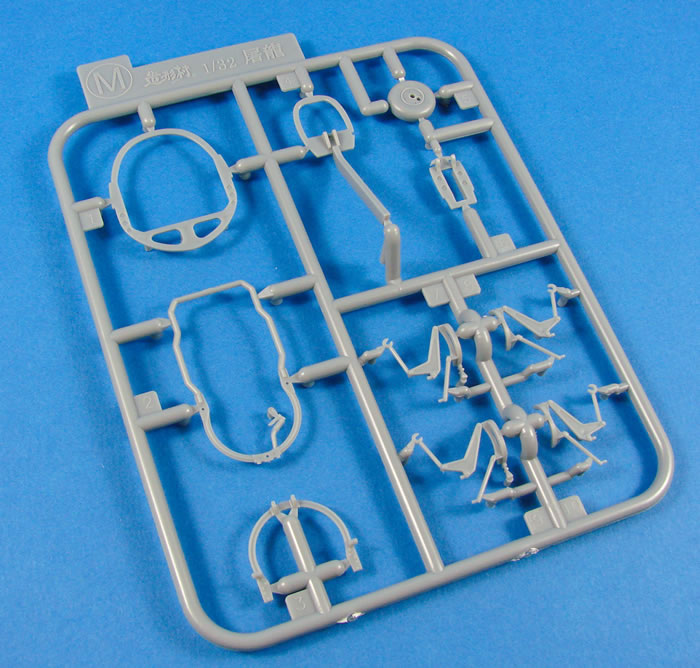
Another small sprue. This one holds the options for the rear seat base, although it does look like only one of these sets of parts is needed for this specific release. Parts exist here for the gun ring truck, rear cockpit bulkhead, tail wheel bulkhead and fin attachment point and also the tailwheel.
Sprue N
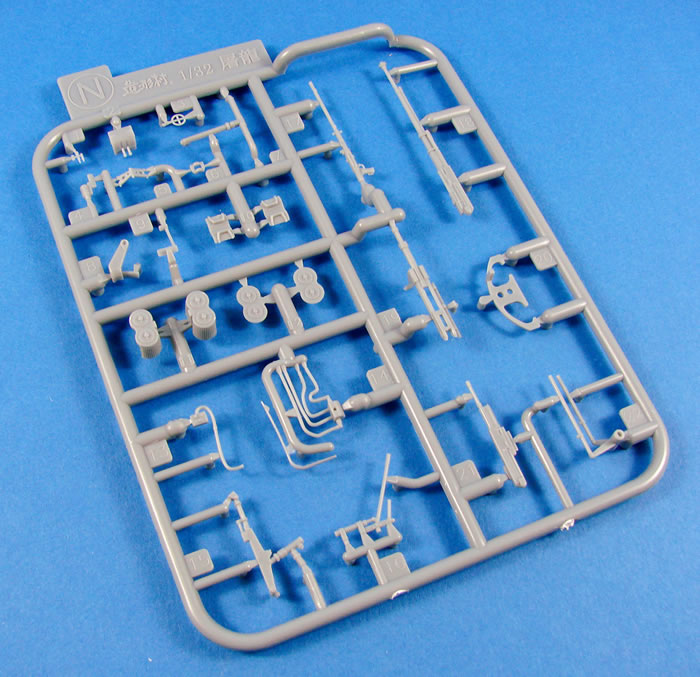
ZM certainly like to pack as many details into their subjects as possible, and this small sprue contains many more of those details, such as oil pump lever, cannon hydraulic control cock, fuselage underside bulkhead, tail gear support lever, tail strut oleo scissor, electromagnetic control box, etc. A number of parts on this sprue also seem to be for a future version of the kit, such as the machine gun for the rear cockpit (not fitted on this release).
Sprue O
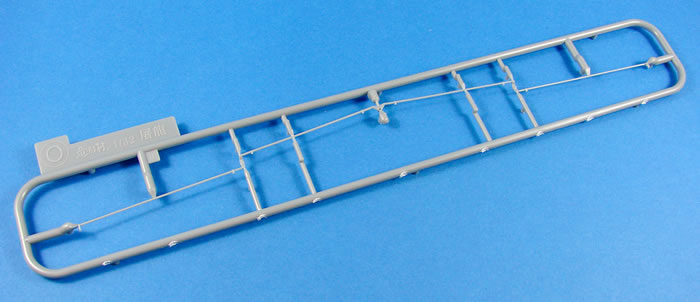
Only one part here, and that is for a linkage rod which extends from the cockpit to both wings, presumably for aileron control.
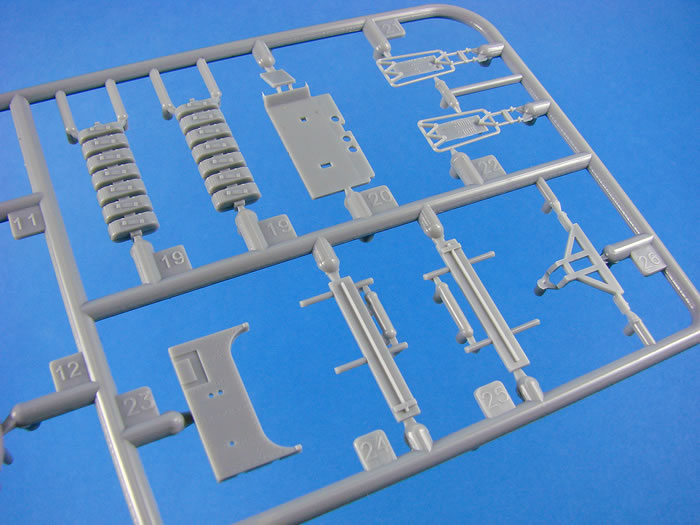
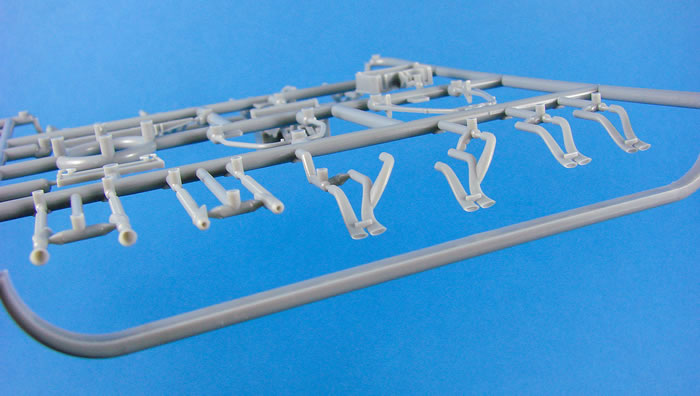
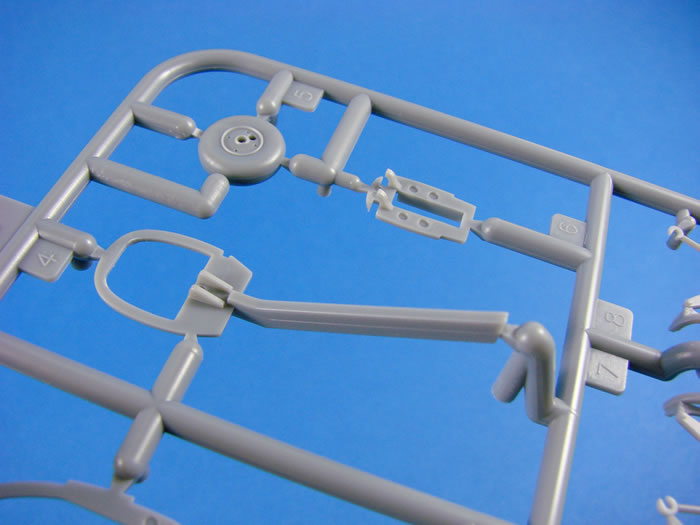
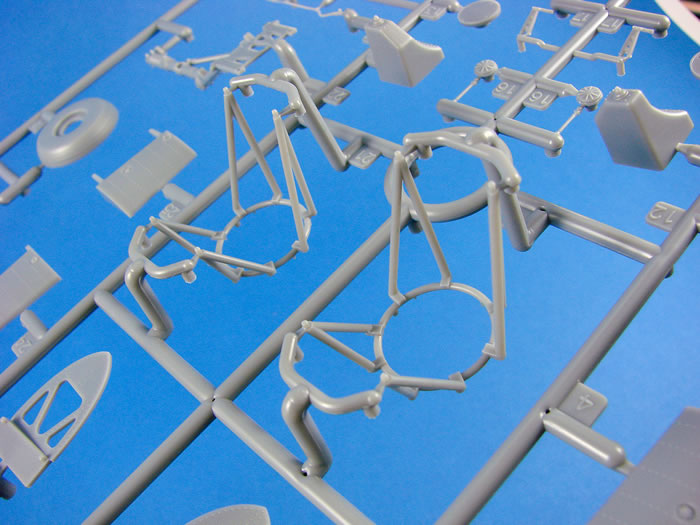
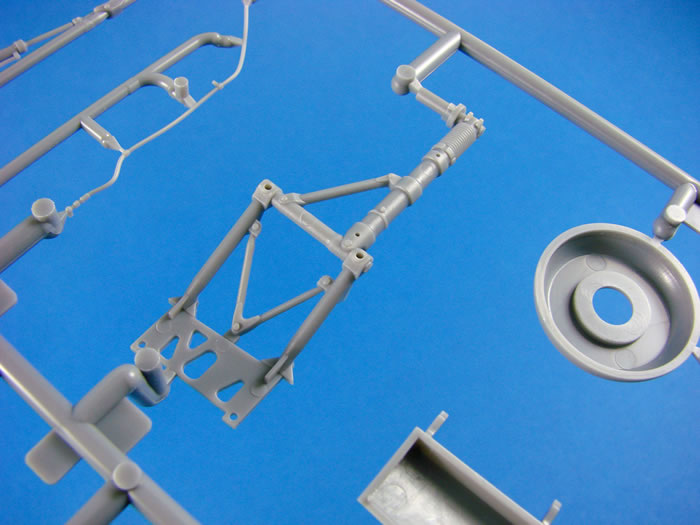
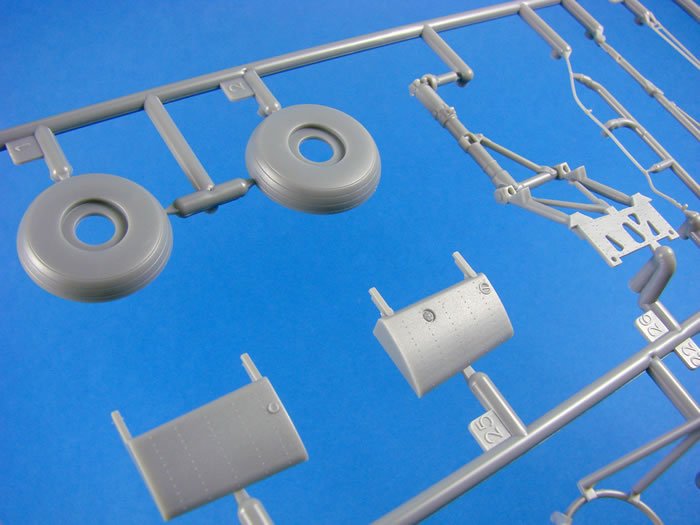
Sprue P
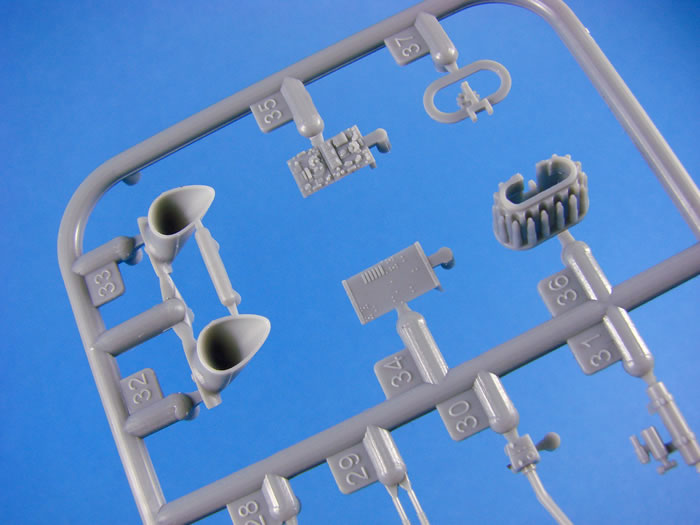
If you’ve ever fiddled with tricky tubular frame mounts for engines, and wondered whether all the angles were correct, then you’ll have no such worries with this kit. Both engine mounts are moulded as single, complete pieces, complete with mounting ring. The moulding is particularly impressive. Equally as impressive are the main gear struts with their integral mounting points and retract mechanisms. Also included are the brake lines.
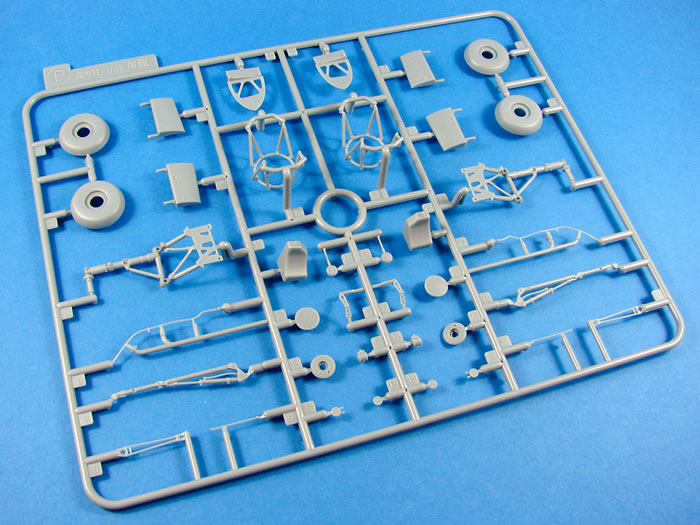
I’m surprised that ZM haven’t chosen to add weighted tyres in this kit, as seems to be becoming more of an industry standard. Here, we find those wheels, moulded as traditional halves, minus the hubs. Note also the small leading-edge fuel tanks in this photo.
Other parts on this sprue are the oil tanks, nacelle bulkheads, wheel hubs, torque arms, landing gear door links, and fuel cooler etc.
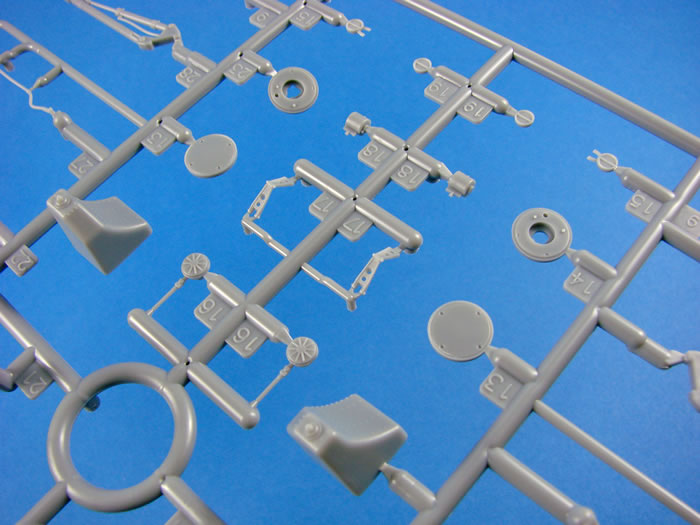
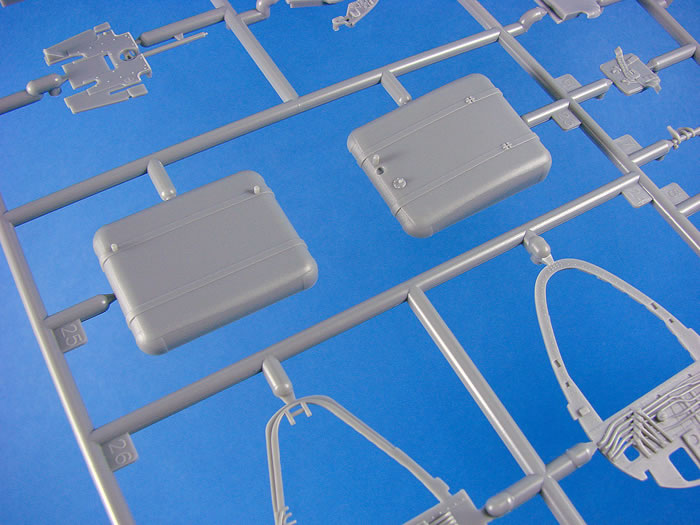
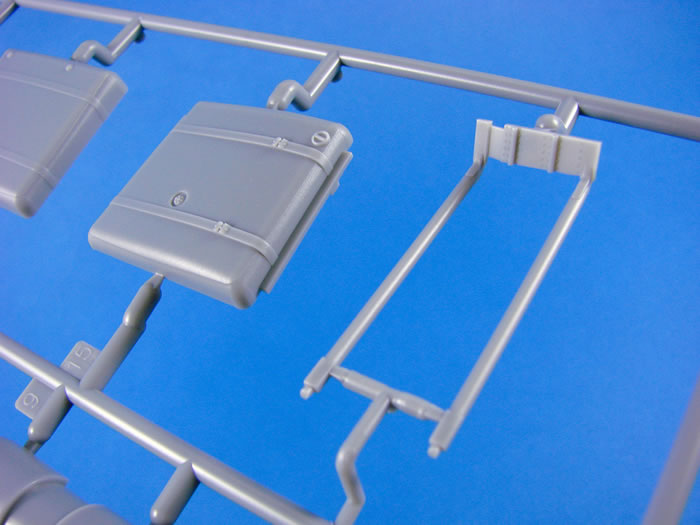
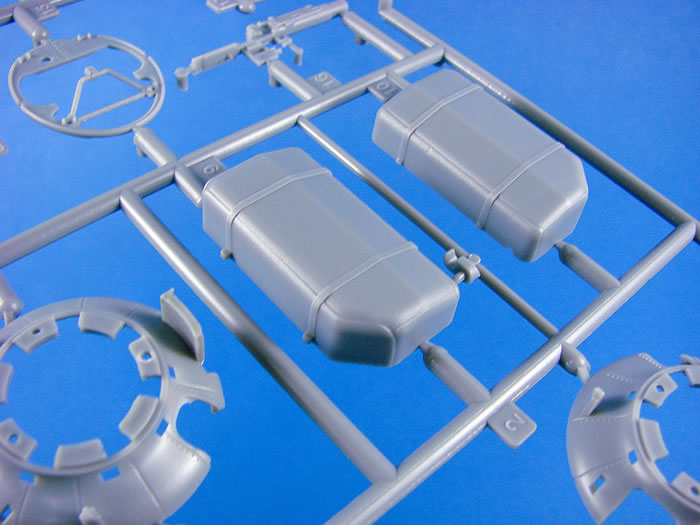
Sprue Q
As well as a couple more pieces pertaining to the main undercarriage, this sprue contains the inboard wing fuel tanks (moulded as halves), auxiliary fuel tanks, engine firewalls and the wing ribs that will be seen inside the landing gear nacelle, moulded with what I presume are either hydraulic or fuel line detail. Engine bulkhead detail is equally as impressive, with various wires and plumbing lines running from point to point and through to the rear of the bulkhead.
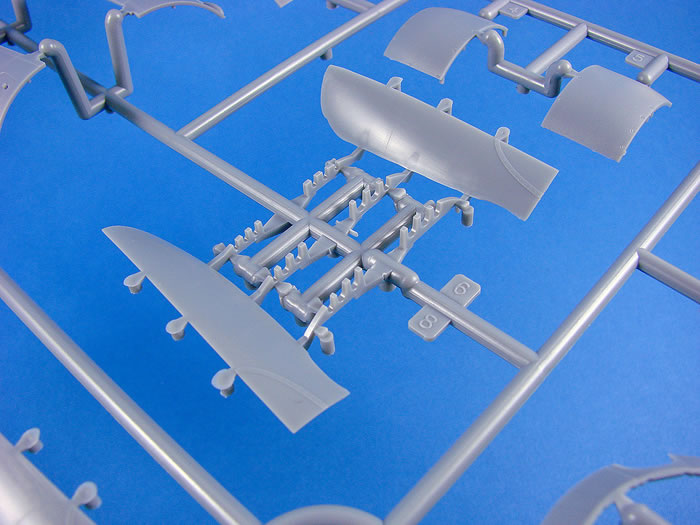
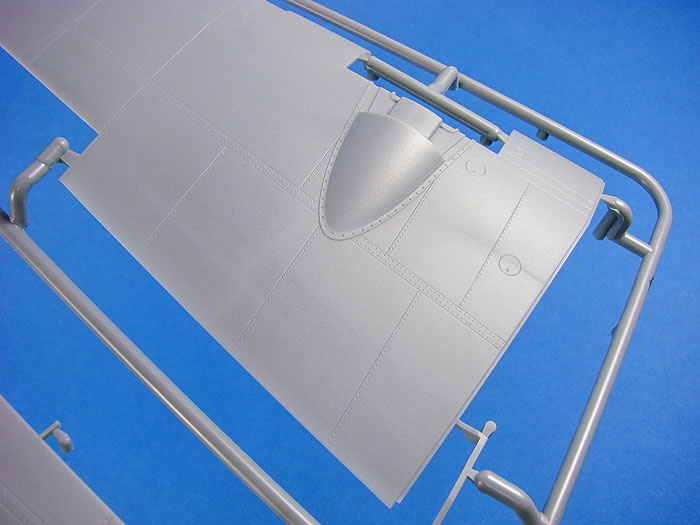
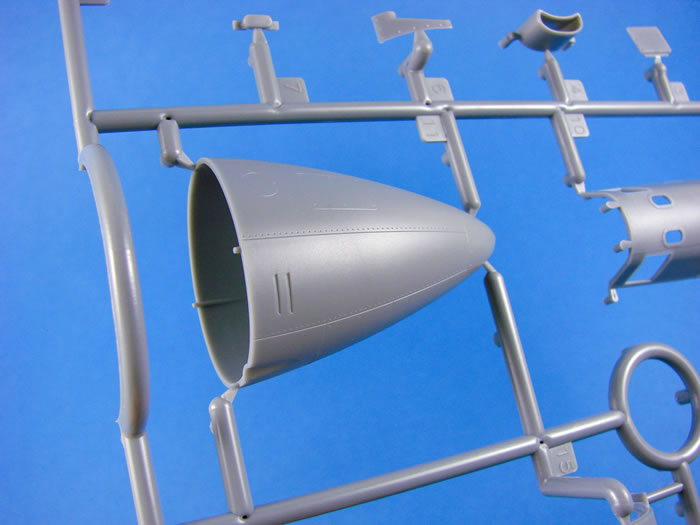
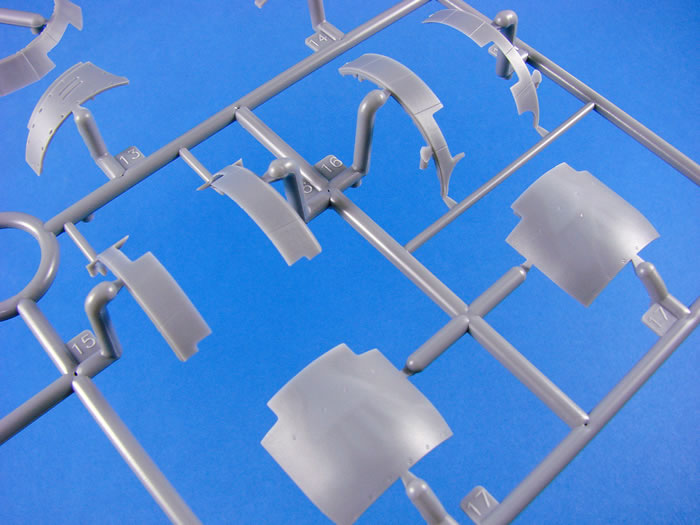
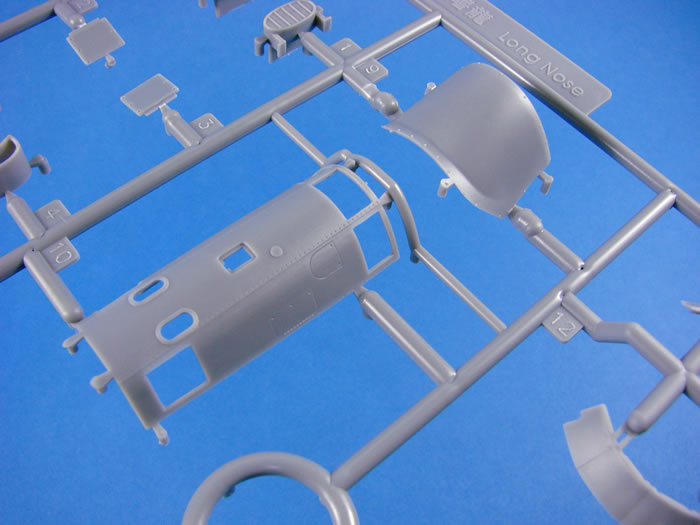
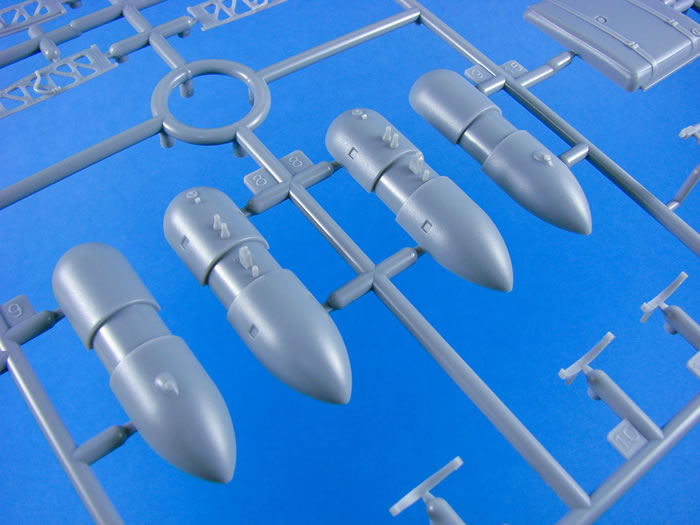
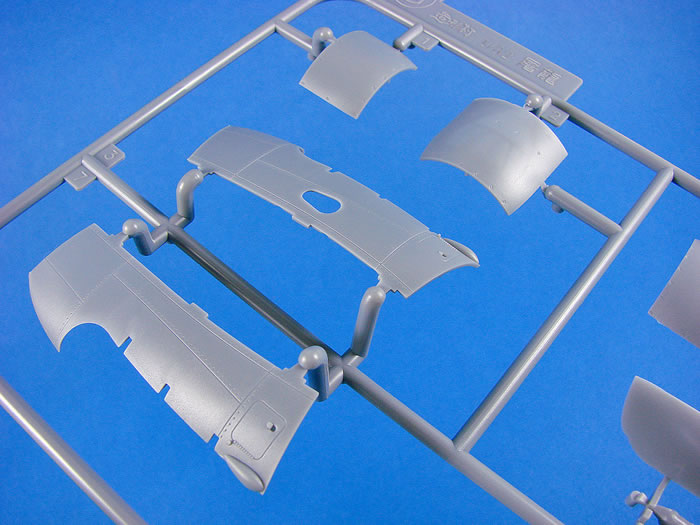
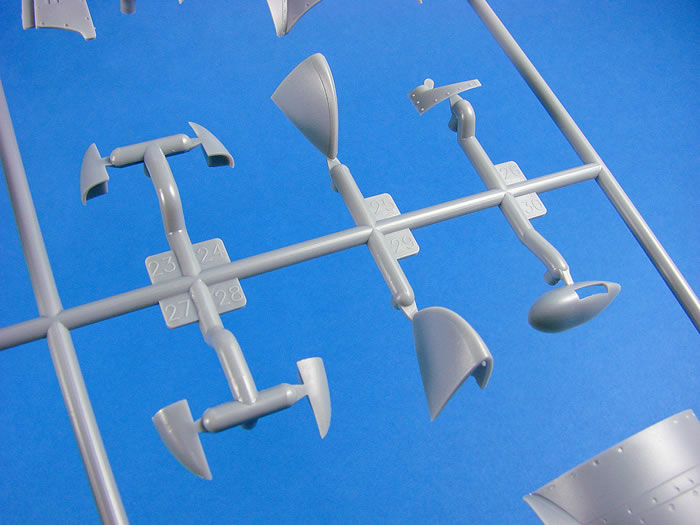
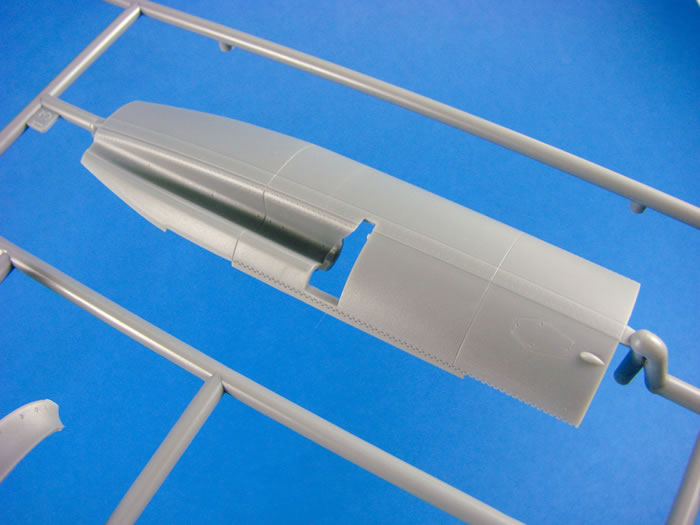
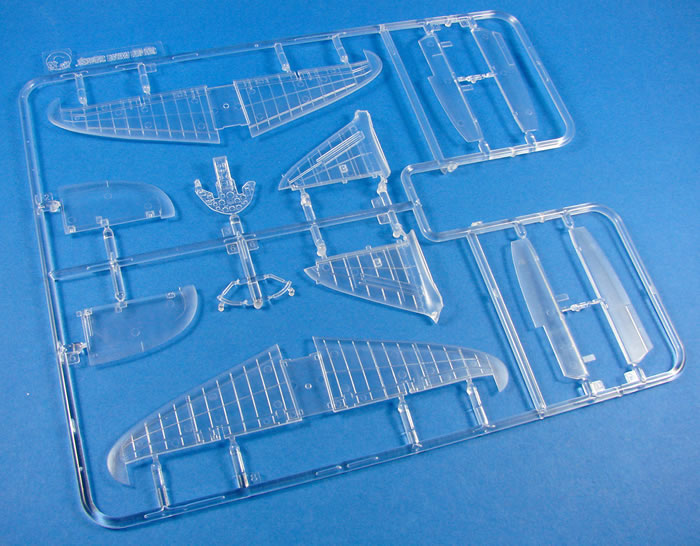
Sprue S (1 x grey, 1 x clear)
Cowl parts and radiator flaps in both open and closed positions, are moulded here. These are for the Late Production machine, and are resplendent with detail internally too.
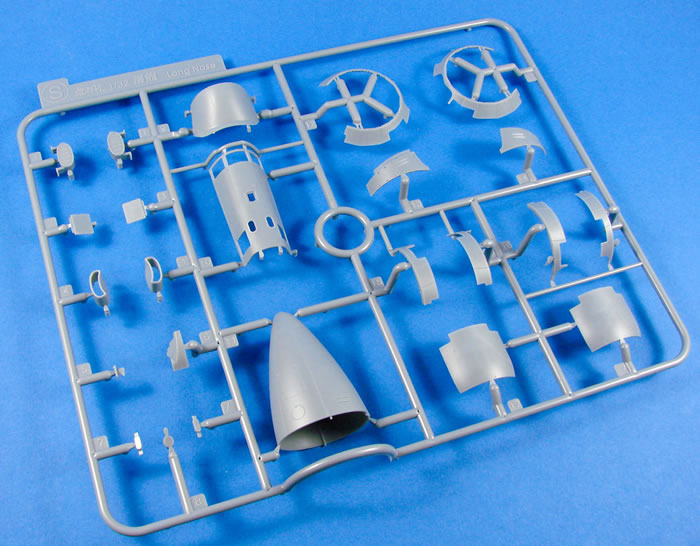
The nose cone is pretty obvious in this photo, moulded as a single-piece unit, with the cannon aperture in the tip. More cowl parts are moulded here, as well as the Late Production oil cooler.
The last part of the fuselage can be found here in the shape of the spine that sits between the pilot and gunner. Into this will fit the various glazed panels and you’ll also note the slots through which the upward firing guns will protrude. Adjacent to this is the solid metal fairing that encloses the rear cockpit position opening that would be fitted with a rear facing gun in earlier versions of the Toryu.
As with a number of other sprues in this release, this one is also provided in clear.
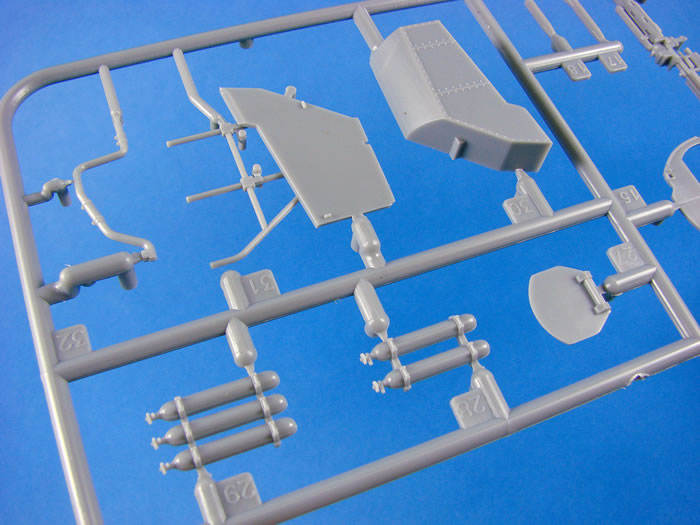
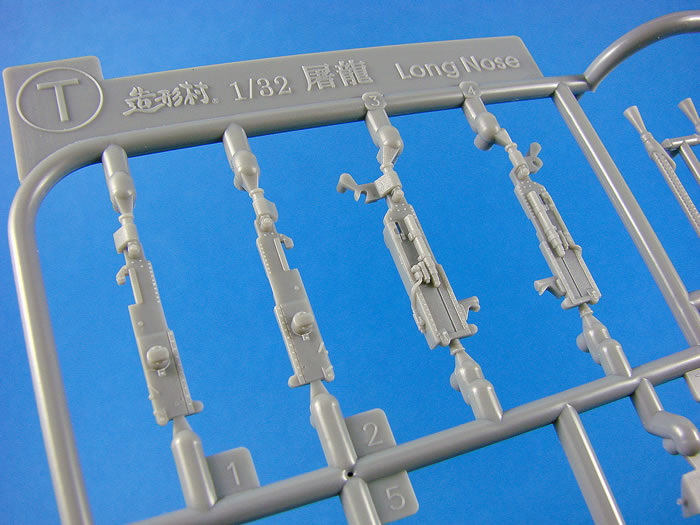
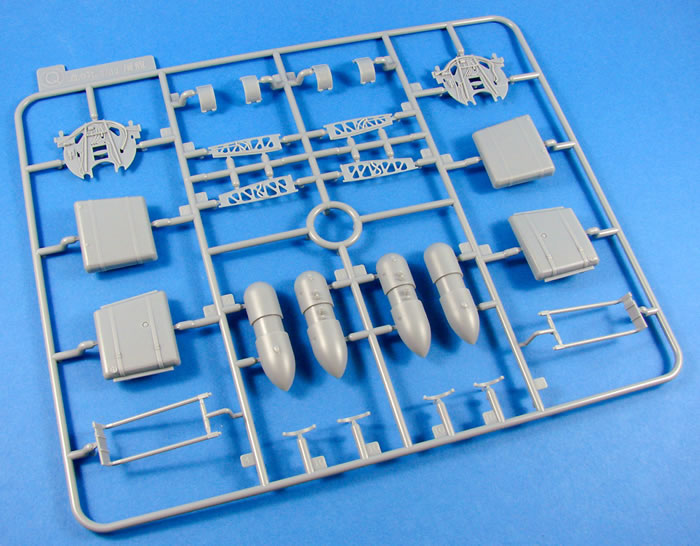
Sprue T
Our last sprue concerns the Late Production version, with parts to build the Shräge Musik upward-firing gun pack. Note the Ho-5 20mm cannon which are amazingly detailed and moulded as halves, ammunition box, spent cartridge box and feed chutes. Cannon muzzles are hollow due to being slide-moulded. Adjacent to these are the exhaust parts for this version, again moulded with hollow ends.

The different exhaust and oil cooler system for the Late Production calls for a different engine mounting fairing, as can be seen on this sprue. Other parts include hydraulic pressure control unit, cannon support bulkheads, magazine rack, spare magazine rack etc.
Masks

A small sheet of green vinyl is supplied, including masks for all the canopy and glazed areas. I’ve found this material from ZM a little hit and miss with it starting to peel after being applied for a short while. I still prefer kabuki-style masking material, as supplied by the likes of Eduard.
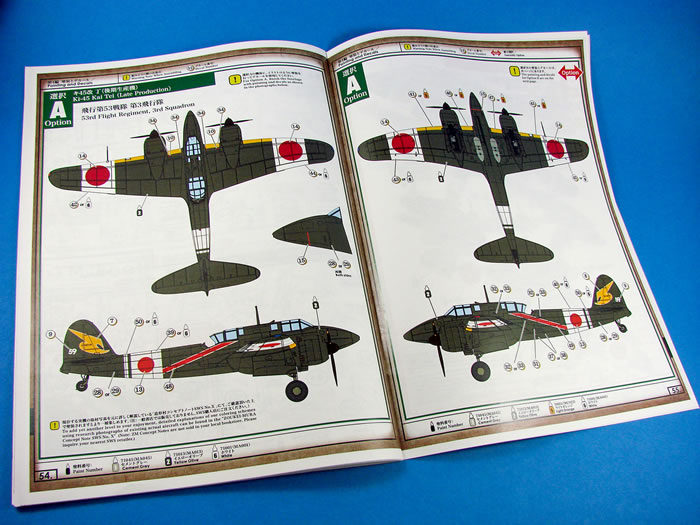
Marking Options
I find that some Japanese decals are a little thicker than what I’m used to, and ZM’s fall within that category, although my experience in applying them has yielded little trouble. These are too a little thicker I am used to, but are indeed printed by Cartograf, and are superbly printed, and the instrument decals are also worthy of use, unlike some of their previous kits where they had little definition. They are also super-glossy. ZM has provided decals for the various white and yellow areas/bands of the model, and I would airbrush these instead of resorting to decal use. I would also airbrush the Hinomaru too, and maybe only use the instrument, emblems and stencils. Everything is in register, and carrier film is minimal.
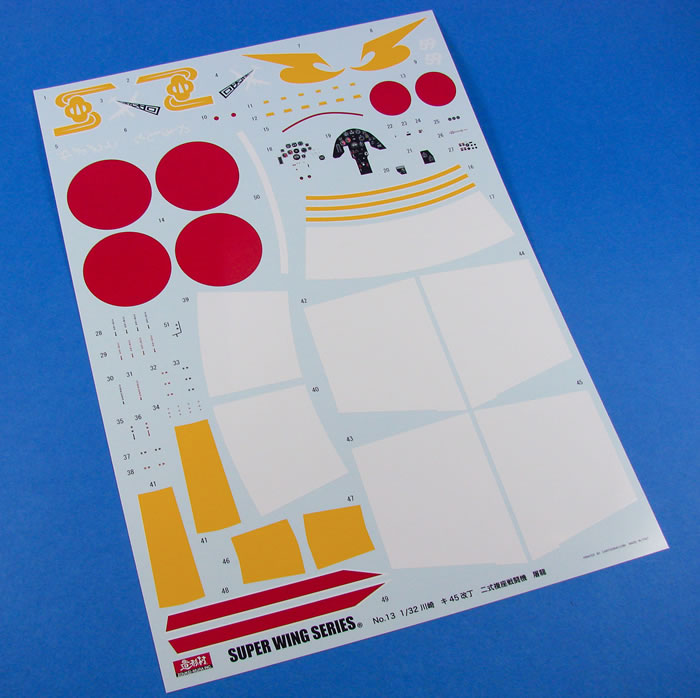
The two schemes supplied are:
-
Ki-45 Kai Tei (Late Production) 53rd Flight Regiment, 3rd Squadron
-
Ki-45 Kai Hei/Tei (Tai-Atari Special Attack Aircraft), Second Lieutenant Miosaburo Yamamoto, Captain, 1st Kaiten Special Attack Unit, 4th Sentai Flight Regiment
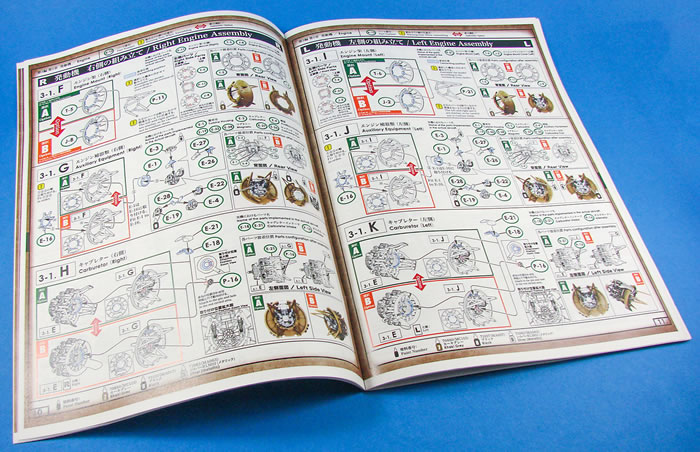
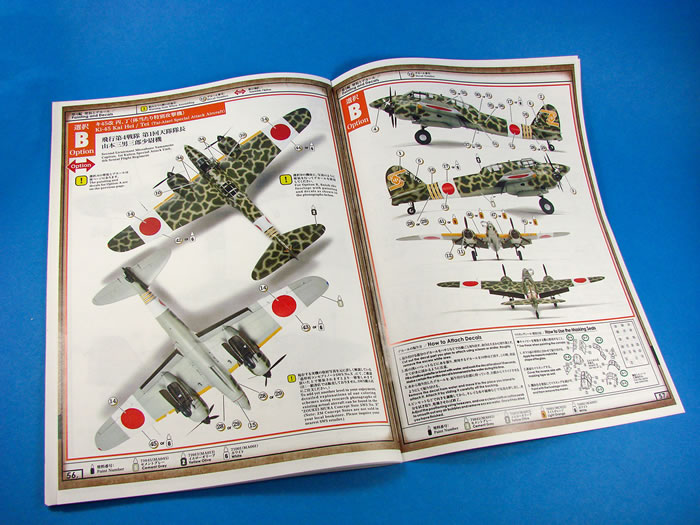
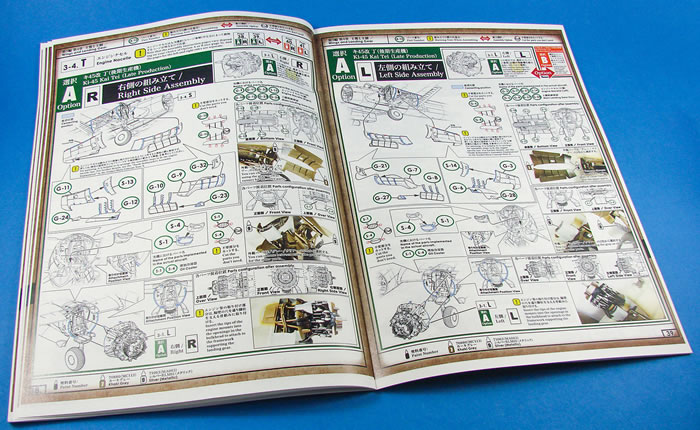
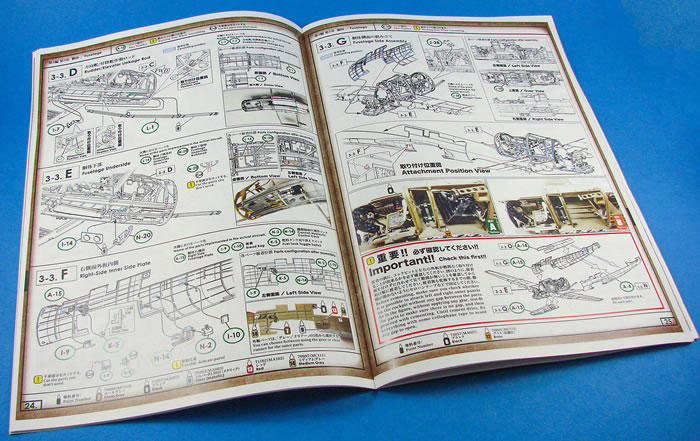
Instructions
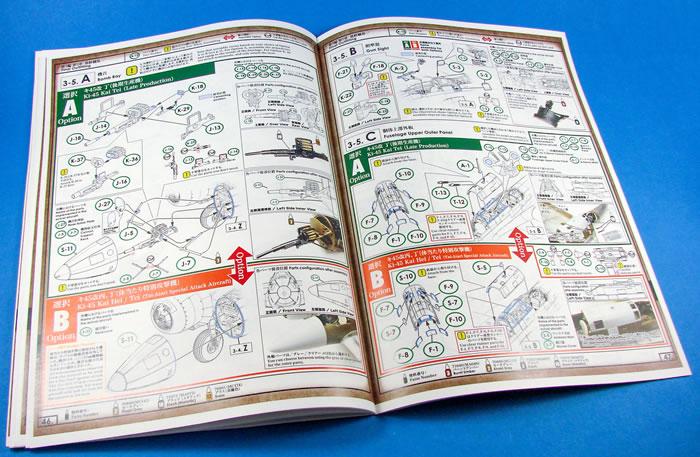
As I initially stated, this is not the professionally printed version which will be included with the full release, but you really couldn’t tell! Mine is glossy and stapled, and still worthy of being called final. This A4-size manual has 60 pages, with construction broken down into 5 chapters with dozens of sub illustrations etc. You do get a feeling of sensory overload when you first look at a ZM instruction manual, but they are not only very informative with regards to the many drawn illustrations, but they also contain great annotation, part names, and also notes on the real aircraft, as well as a few photos of the model for clarity.

You will need to keep your wits about you with regard to the various parts options, to ensure your model is an accurate representation of the machine you choose to build. There is also a very good history of the type and notes on its design. Later in the manual, a drawing illustrates one of the schemes, whilst a finished model exhibits the second scheme. Paint references are provided throughout for Vallejo and Mr Colour paints. A parts map is also included in the rear of the manual.
After looking at initial CAD and at the 3D-printed models that have been on display, I sort of had an idea about what to expect from this release. Or at least I thought I had.
In reality, the kit is far nicer than I envisaged, and certainly far more detailed than I expected, even from ZM.
The cockpit and gun areas are simply astounding, and the engines and nacelle details match that assessment.
There are of course two versions of the Toryu that can be built from this kit, and they vary significantly in equipment. The Late Production, whilst having the plainer scheme, has the underwing tanks, Schräge Musik-style gun pack, and the nose cannon, plus the more complicated exhaust arrangement. This for me is the one that really appeals to me, whilst some will doubtless prefer the slightly stripped version with the green camouflage patches. It could well be a tough call!
Everything about this release is quality, right down the instruction manual. You will need to have your wits about you with the manual due to the sheer amount of info given, but it really is quite something to study, and study it you really must. I really can’t wait to pile into this and build my first Japanese fighter since I was a kid!
Review sample courtesy of my wallet and my Telford pre-order. Thanks to the guys at ZM for the chat, and I look forward to that Hs 129! ;)
Watch out on the Volks Japan/USA sites for this kit becoming available. Also watch out for this in a future issue of Military Illustrated Modeller, where I’ll be building the Late Production version.
Review Text Copyright © 2018 by James Hatch
Page Created 15 November, 2018
Last updated
15 November, 2018
Back to HyperScale Main Page
Back to Reviews Page |
 Home
| What's New |
Features |
Gallery |
Reviews |
Reference |
Forum |
Home
| What's New |
Features |
Gallery |
Reviews |
Reference |
Forum |