|
Focke-Wulf Fw 190 C (V18) Känguru
Conversion for Hasegawa A-5/A-8 kits
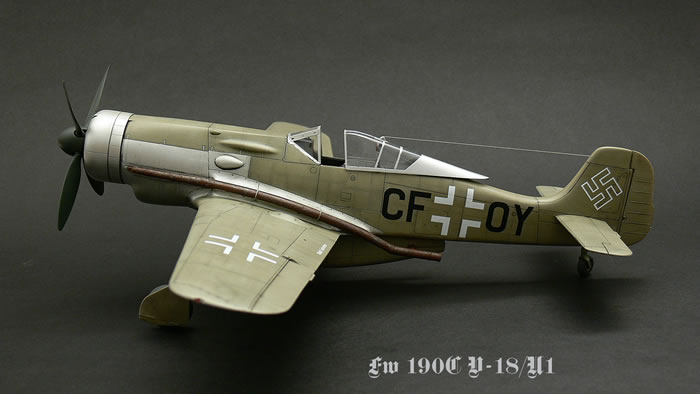
Planet Models, 1/32 scale
S u m m a r y : |
Catalogue Number: |
Planet Models Kit No. PLT233 - Focke-Wulf Fw 190 C (V18) Känguru Conversion for Hasegawa A-5/A-8 kits |
Scale: |
1/32 |
Contents & Media |
25 parts in grey resin; one part in clear (two supplied); markings for a single aircraft. |
Price: |
Available online from these stockists:
And specialty hobby retailers worldwide.
Click here for currency conversion |
Review Type: |
First Look. |
Advantages: |
High quality resin parts; high level of detail; crisp and fine surface textures; detailed instructions. |
Disadvantages: |
|
Conclusion: |
Planet Models has created a rather nice set which should easily convert the Hasegawa Fw 190A-5/A-8, and as this is quite a simple conversion, it should be ok for those who have limited but some resin experience. All in all, an excellent and relatively inexpensive conversion set.. |
Reviewed by James Hatch

ICM's 1/48 scale Ju 88 A-4/Torpis available online from Squadron.com
Whilst there is no doubt that whilst Kurt Tank’s Fw 190A series was highly successful, it’s real Achilles heel was its lack of performance at high altitude, whereas its biggest contemporary and competitor, the Bf 109, was a far more capable performer. This lead Tank to look at ways of addressing the altitude performance problem early in the program. In 1941, he proposed a number of versions featuring new power plants, and he suggested using turbochargers in place of superchargers. Three such installations were outlined; the Fw 190B with a turbocharged BMW 801, the Fw 190 C with a turbocharged Daimler-Benz DB 603, and the Fw 190 D with a supercharged Junkers Jumo 213. The aircraft would also include a pressurized cockpit and other features making them more suitable for high-altitude work. Prototypes for all three models were ordered.
The C model's use of the longer DB 603 engine required more extensive changes to the airframe. As the weight was distributed further forward, the tail of the aircraft had to be lengthened in order to maintain the desired centre of gravity. To test these changes, several examples of otherwise standard 190As were re-engined with a supercharged DB 603 to experiment with this engine fit. These were the V13 (W.Nr. 0036) with the 1,750 PS 603A, the similar V15 and V16, with an 1,800 DB603E being fitted to the latter after a time. With this engine, the V16 was able to reach 450 mph at 22,310ft, which was a considerable improvement over the 400 mph at 17,060ft of the basic A models. V18 followed, the first to feature the full high-altitude suite of features, including the pressurized cockpit, longer wings, a 603G engine driving a new four-blade propeller, and a Hirth 9-2281 turbocharger. Unlike the experimental B models, V18 had a cleaner turbocharger installation, running the required piping along the wing root, partially buried in the fillet, and installing both the turbocharger air intake and intercooler in a substantially sized teardrop shaped fairing under the cockpit. This "pouch" led to the "Känguruh" (Kangaroo) nickname for these models. V18 was later modified to the V18/U1, with a "downgraded" 603A engine, but a new DVL turbocharger that improved the power to 1,600 PS at an altitude of 35,105ft. Four additional prototypes based on the V18/U1 followed: V29, V30, V32 and V33.
It is the V18 which is perhaps the most interesting, and the subject of this conversion set review.
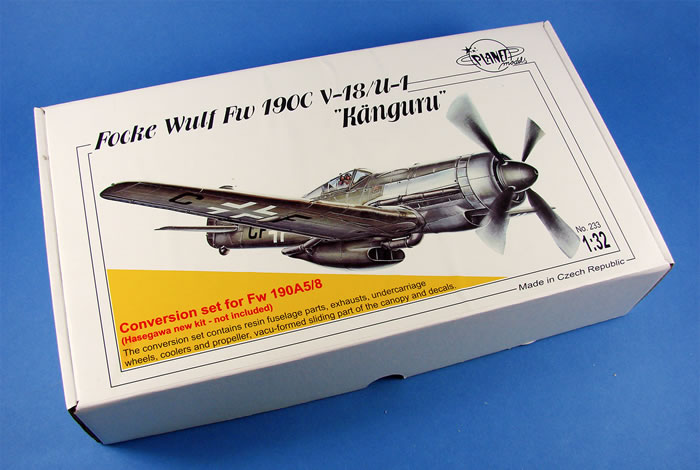
Planet Models’ Fw 190C/V18 ‘Känguruh’ conversion set is packed into a reasonably large box, as befits the full fuselage replacement that it contains. The box lid has a large sticker with a product label attached, showing a rather sleek-looking 190C. This is quite a nice angle to see this at, as other angles would show the aircraft to be a little clunky in places, but still a very interesting aircraft in the evolution of the 190 series. Whilst it is generally said that the Fw 190D-9 was the aircraft that went on to be the genesis of the Ta 152 development, the Fw 190C, with its wide-chord fin, is also said to be an important step towards what was to become perhaps Germany’s most impressive piston-engine fighter. As stated on the label, this conversion contains fuselage halves, exhausts, main gear wheels, coolers, propeller, vac-form sliding hood, and decals. You will of course need a Hasegawa Fw 190A-5/A-8 kit which will donate its wings, cockpit, gear struts, stabiliser etc.
All components within this conversion are packed into heat-sealed sleeves, with the fuselage halves being separate items in themselves. It’s these parts that I’ll be looking at first. The overhaul of the fuselage on the 190C/V18 was so extensive that it required an entirely new fuselage. As with the original kit, these are supplied as halves, and they pretty much exhibit the same standard of detail that is seen on the original kit parts. By this, I mean fine panel lines and port access details. There is no riveting. When I come to build this, I will river the whole airframe, including the wings and this new fuselage replacement.
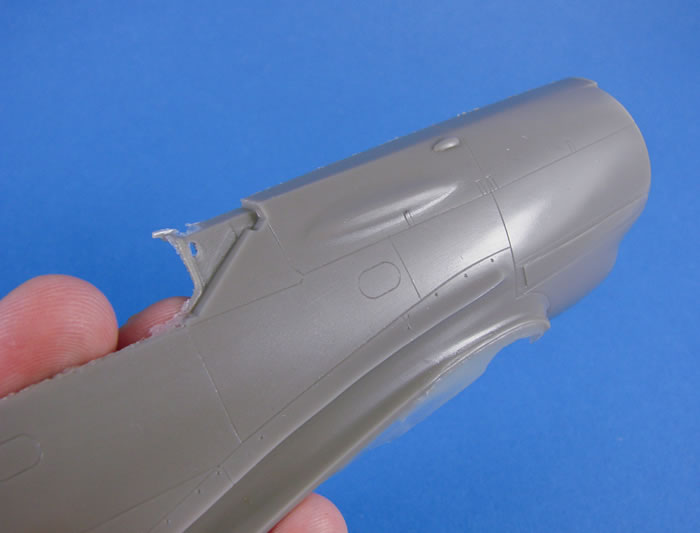
The instrument coaming and forward upper fuselage areas are cast integrally with the remainder of the fuselage. You can clearly see the wing root fairing into which the turbocharger pipework will recess, as well as the intake that sits below the annular radiator. The tail fin is also wide-chord, as with the Ta 152, yet the fuselage isn’t extended as was seen on the 190D series, despite the length of the nose. Presumably the intake under the bellow helped to offset the change in the centre of gravity. Also note that the rudder is cast separately. Internally, there is no detail as this would come from the Hasegawa cockpit parts. There is a very small stub on the underside of the fuselage, which is a remnant of the casting block, so this will be a breeze to remove.
Other parts in this release include the long turbocharger pipes that tuck under the wing root fairings and exhaust further down It doesn’t appear that the wing root gun bay wing-moulded detail needs to be modified, so all looks good there!
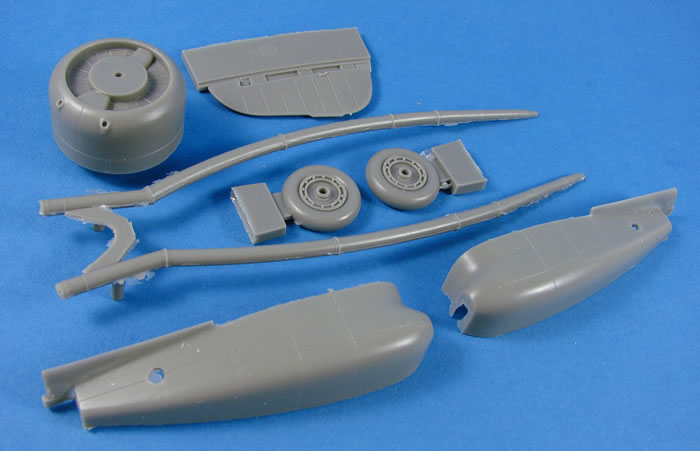
Of course, there is the large intake which sits below the belly of the 190, in P-51 style, and there is a small section of plumbing which needs to be fitted here, stretching to the fillet that separates the main gear bay. There is a new part which fits between the bays, and to fit the large intake itself, some plastic will need to be trimmed from the belly plastic that is moulded to the rear of the main, lower wing panel. It all looks quite simple to execute. A small intake grille fits within the belly intake, as does a separate part that fits into the nose intake area. That belly intake is provided in halves, so there will be a seam to remove, as with the fuselage.
This machine was designed to be armed, and although there appears to be no wing guns, the fuselage ones were still installed. Evidence of this is shown on the forward nose cowling, where the gun ports are actually found, unlike other 190 series where there were channels on the upper cowls for this purpose. With the 190C, the cowl changes meant that these were now embedded within the cowls due to the change in depth of the nose. Note also how angular the nose cowl is, unlike the large curved radius of the A-series machines. This gives the 190C quite an unusual appearance. Radiator details are cast within the main nose ring cowl.
Of course, a new 4-blade Hirth propeller is included, along with a new spinner, again giving a highly unusual feature for the 190. A set of main gear wheels are also supplied to replace the Hasegawa plastic.
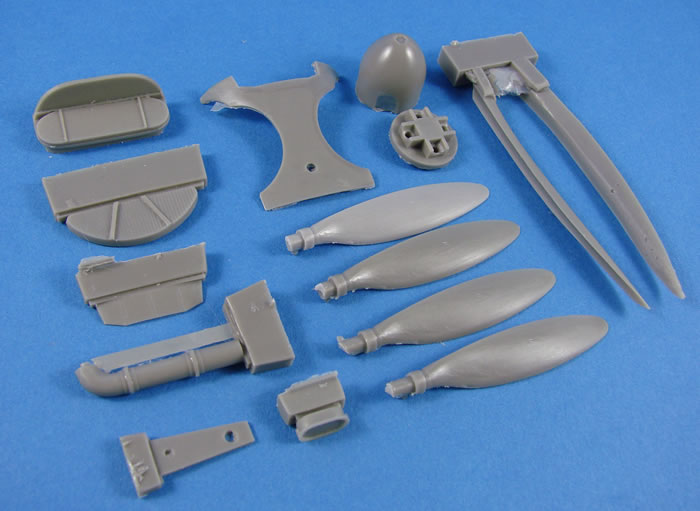
Resin quality is very good, with everything being cast in an unusual shade of grey. Where casting blocks remain, then they will be easy to remove. Where they are already removed, then final clean-up will just consist of removing a resin tag or thin resin web. There is a little flash to remove in places, and a slight scratch will need to be buffed out on one fuselage half.
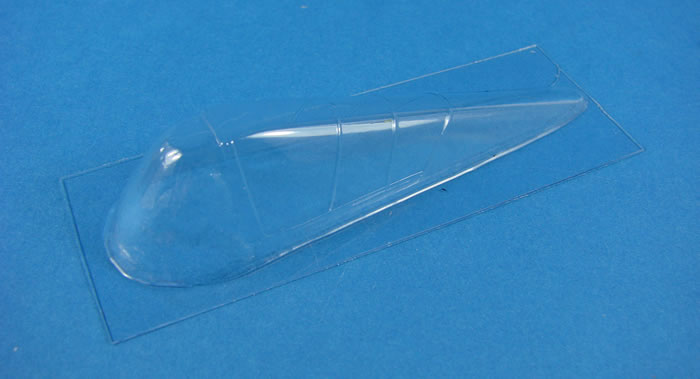
Many people dislike vacform parts, but that’s what you have here for the pressurised cockpit rear hood with its canopy framing. Planet Models supply TWO canopies, just in case you make a mistake, but they really aren’t as difficult as you’d imagine. To cut these, I fill the interior with Blue-Tack which makes the part more rigid. A brand-new scalpel blade is used to cut the plastic, with Dymo tape being used as a guide. It would only take a few minutes to complete this task. Vacform clarity. No masks are supplied with this release, so you’ll need to mask it using your own methods.
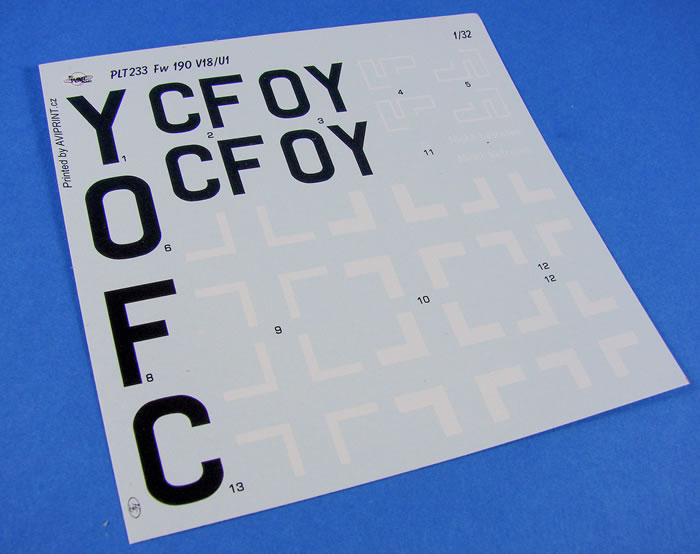
Lastly, a single, small decal sheet is supplied for the V18 prototype. This consists of the national markings, split swastika, and prototype codes. A couple of small stencils are included for the wings. You may need to supplement this with kit stencils, but I don’t know if this would be historically accurate. Printing is excellent, with the decals being nice and thin and having minimal carrier film. Registration is void because the decals are either black or white, with no multicolour elements.
Two A4 instruction sheets are supplied and folded into A5. A history of the 190C is supplied, and a photo of the parts, with identifier numbers. Twelve black and white images are included which shows construction of the model, along with notes as to which resin part is which. Annotation clearly indicates the Hasegawa plastic.
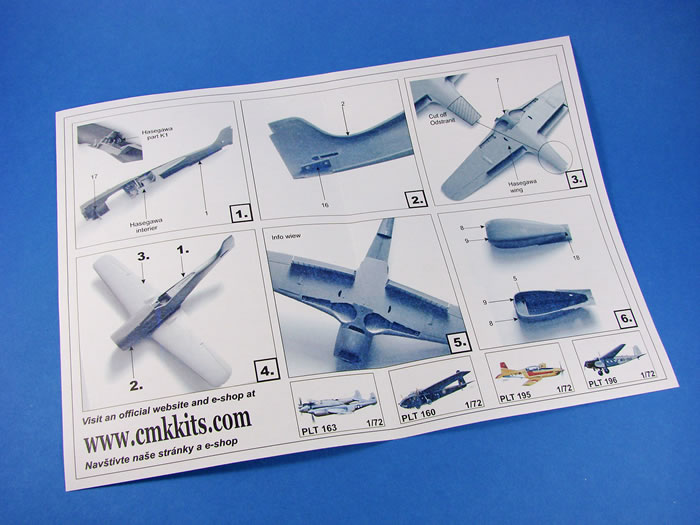
When it comes to sawing and modifying the plastic, you will need to measure things yourself as no dimensions are supplied.
For me, this is a very exciting conversion set in that it really recreates a transitionary and evolutionary change between the A and D versions, and Tank’s attempt to push the metaphoric envelope with his design so it could be operated at high altitude. There’s no doubting the historical significance of the C-series birds, despite them not really being at the forefront of our attention, or indeed print articles etc.
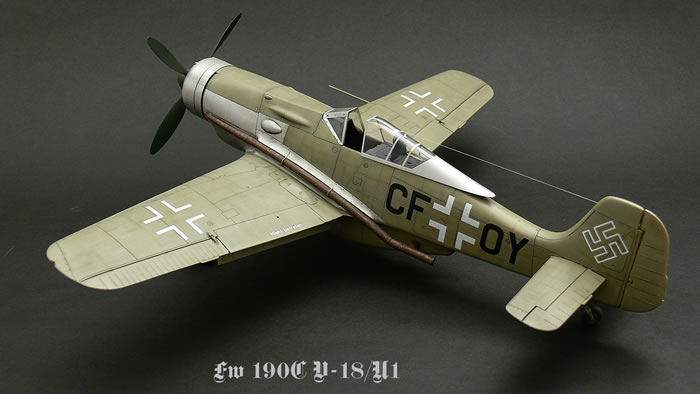
Planet Models has created a rather nice set which should easily convert the Hasegawa Fw 190A-5/A-8, and as this is quite a simple conversion, it should be ok for those who have limited but some resin experience. All in all, an excellent and relatively inexpensive conversion set.
Thanks to Special Hobby for the review sample.
Review Text and Images Copyright © 2018 by James Hatch
Except photos of completed model courtesy of Special Hobby
Page Created 28 February, 2018
Last updated
28 February, 2018
Back to HyperScale Main Page
Back to Reviews Page |
